
Paddling Bears Crib Quilt

Guess what?! My good friends are about to have a baby! And you know what that means...my crafting brain is screaming at me to present said baby with a homemade gift. I could make baby clothes, but they are outgrown too quickly, and I don't think it would be much fun to make something for a super new baby (so small, so fragile, so...unwilling to wear the outrageous clothing I would want to put them in). AND SO! Naturally, I decided to make a crib-size quilt. Functional, not something you can just buy, plus fun to work on (for me)! Is a part of me afraid that the baby will take a huge dukie-dump on it? A little, yes. But I will try to quiet that self-serving part of my brain because that's not the point, is it? It's not a piece of art that they will hang on the wall and remain unsullied--it's supposed to be used and loved (and shat on, if need be)!!!
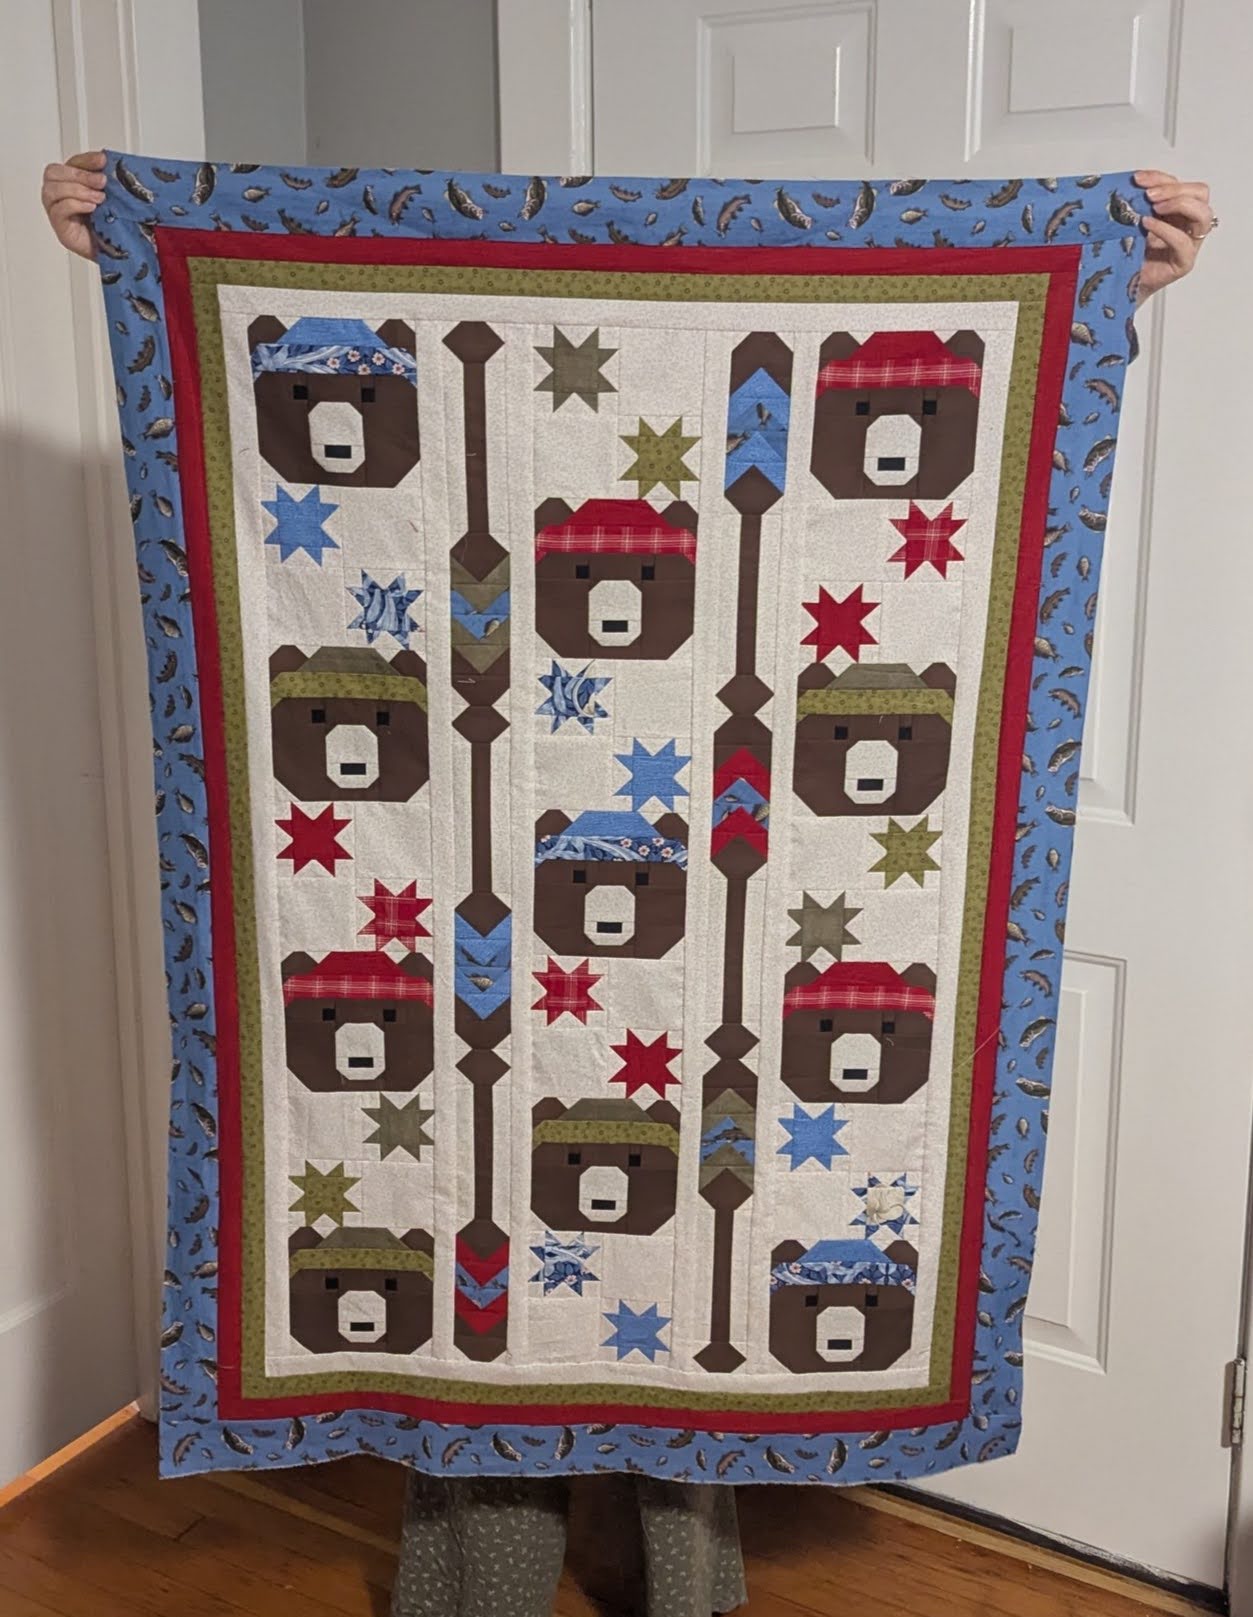
And so, I asked my friends what the theme of their nursery will be and they told me: forest. Perfect! Calming, sufficiently gender neutral...etc. I took to pinterest and found some appealing options, but landed on Paddling Bears. So cute! Outdoorsy (Plus I was thinking how cute it would be if I got a little matching teddy to go with.) The original quilt looks to be made for a king or queen size bed, and thus very square:
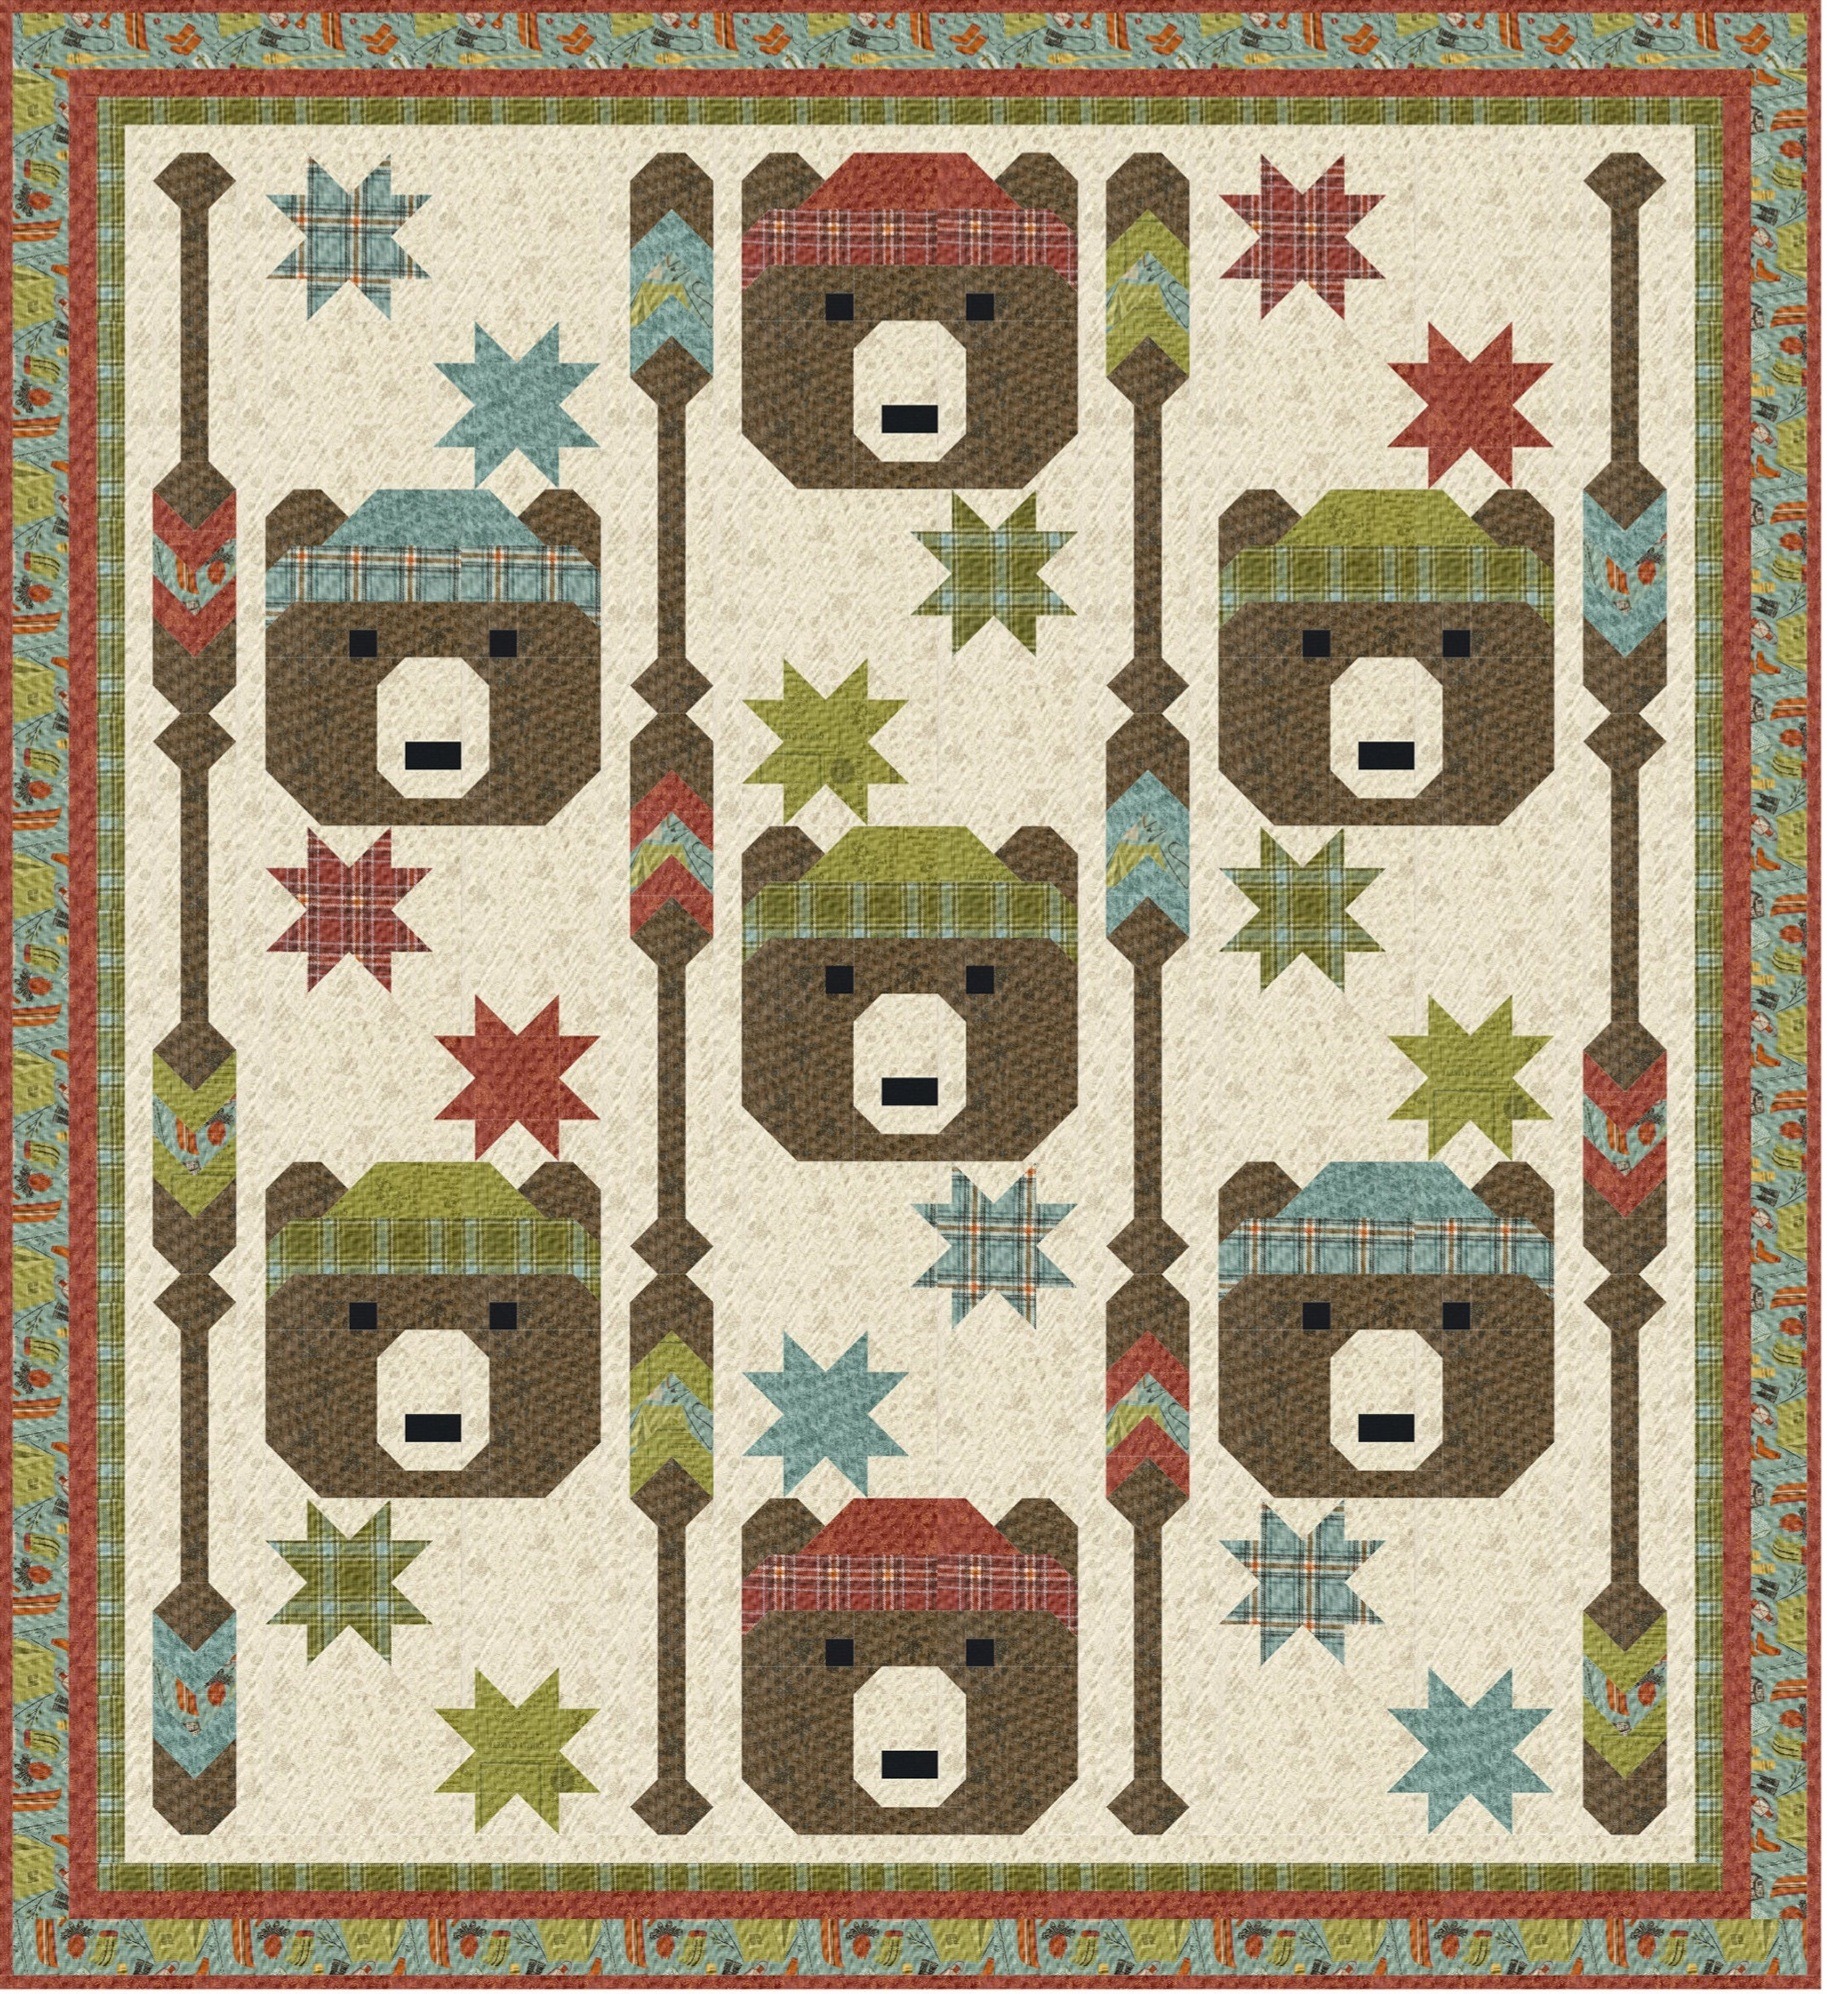
The standard crib quilt (after googling) seems to be 36" X 52", so...decidedly not square. I got out my grid paper and did some rough sketching to get this new layout:

Somehow it ended up that I added four more bears to the original design? Oops. You know how I love creating more work for myself.
Each bear-square would be 6" X 6". I don't trust myself to sew accurately without guides, and my only experience with quilting is my Queen Mattress costume, which is entirely foundation paper-pieced. So I made my own paper-piece pattern in inkscape! Had some frustrations there because I used the grids/guides in inkscape, but despite that, it wasn't matching up to irl measurements when printed. Wasted a lot of paper tinkering with settings, but to no avail. Ended up just calculating the size difference and scaling up the image in inkscape by 4.35%. That did the trick, but wasn't "elegant" enough for my tastes. Too hacky lol.
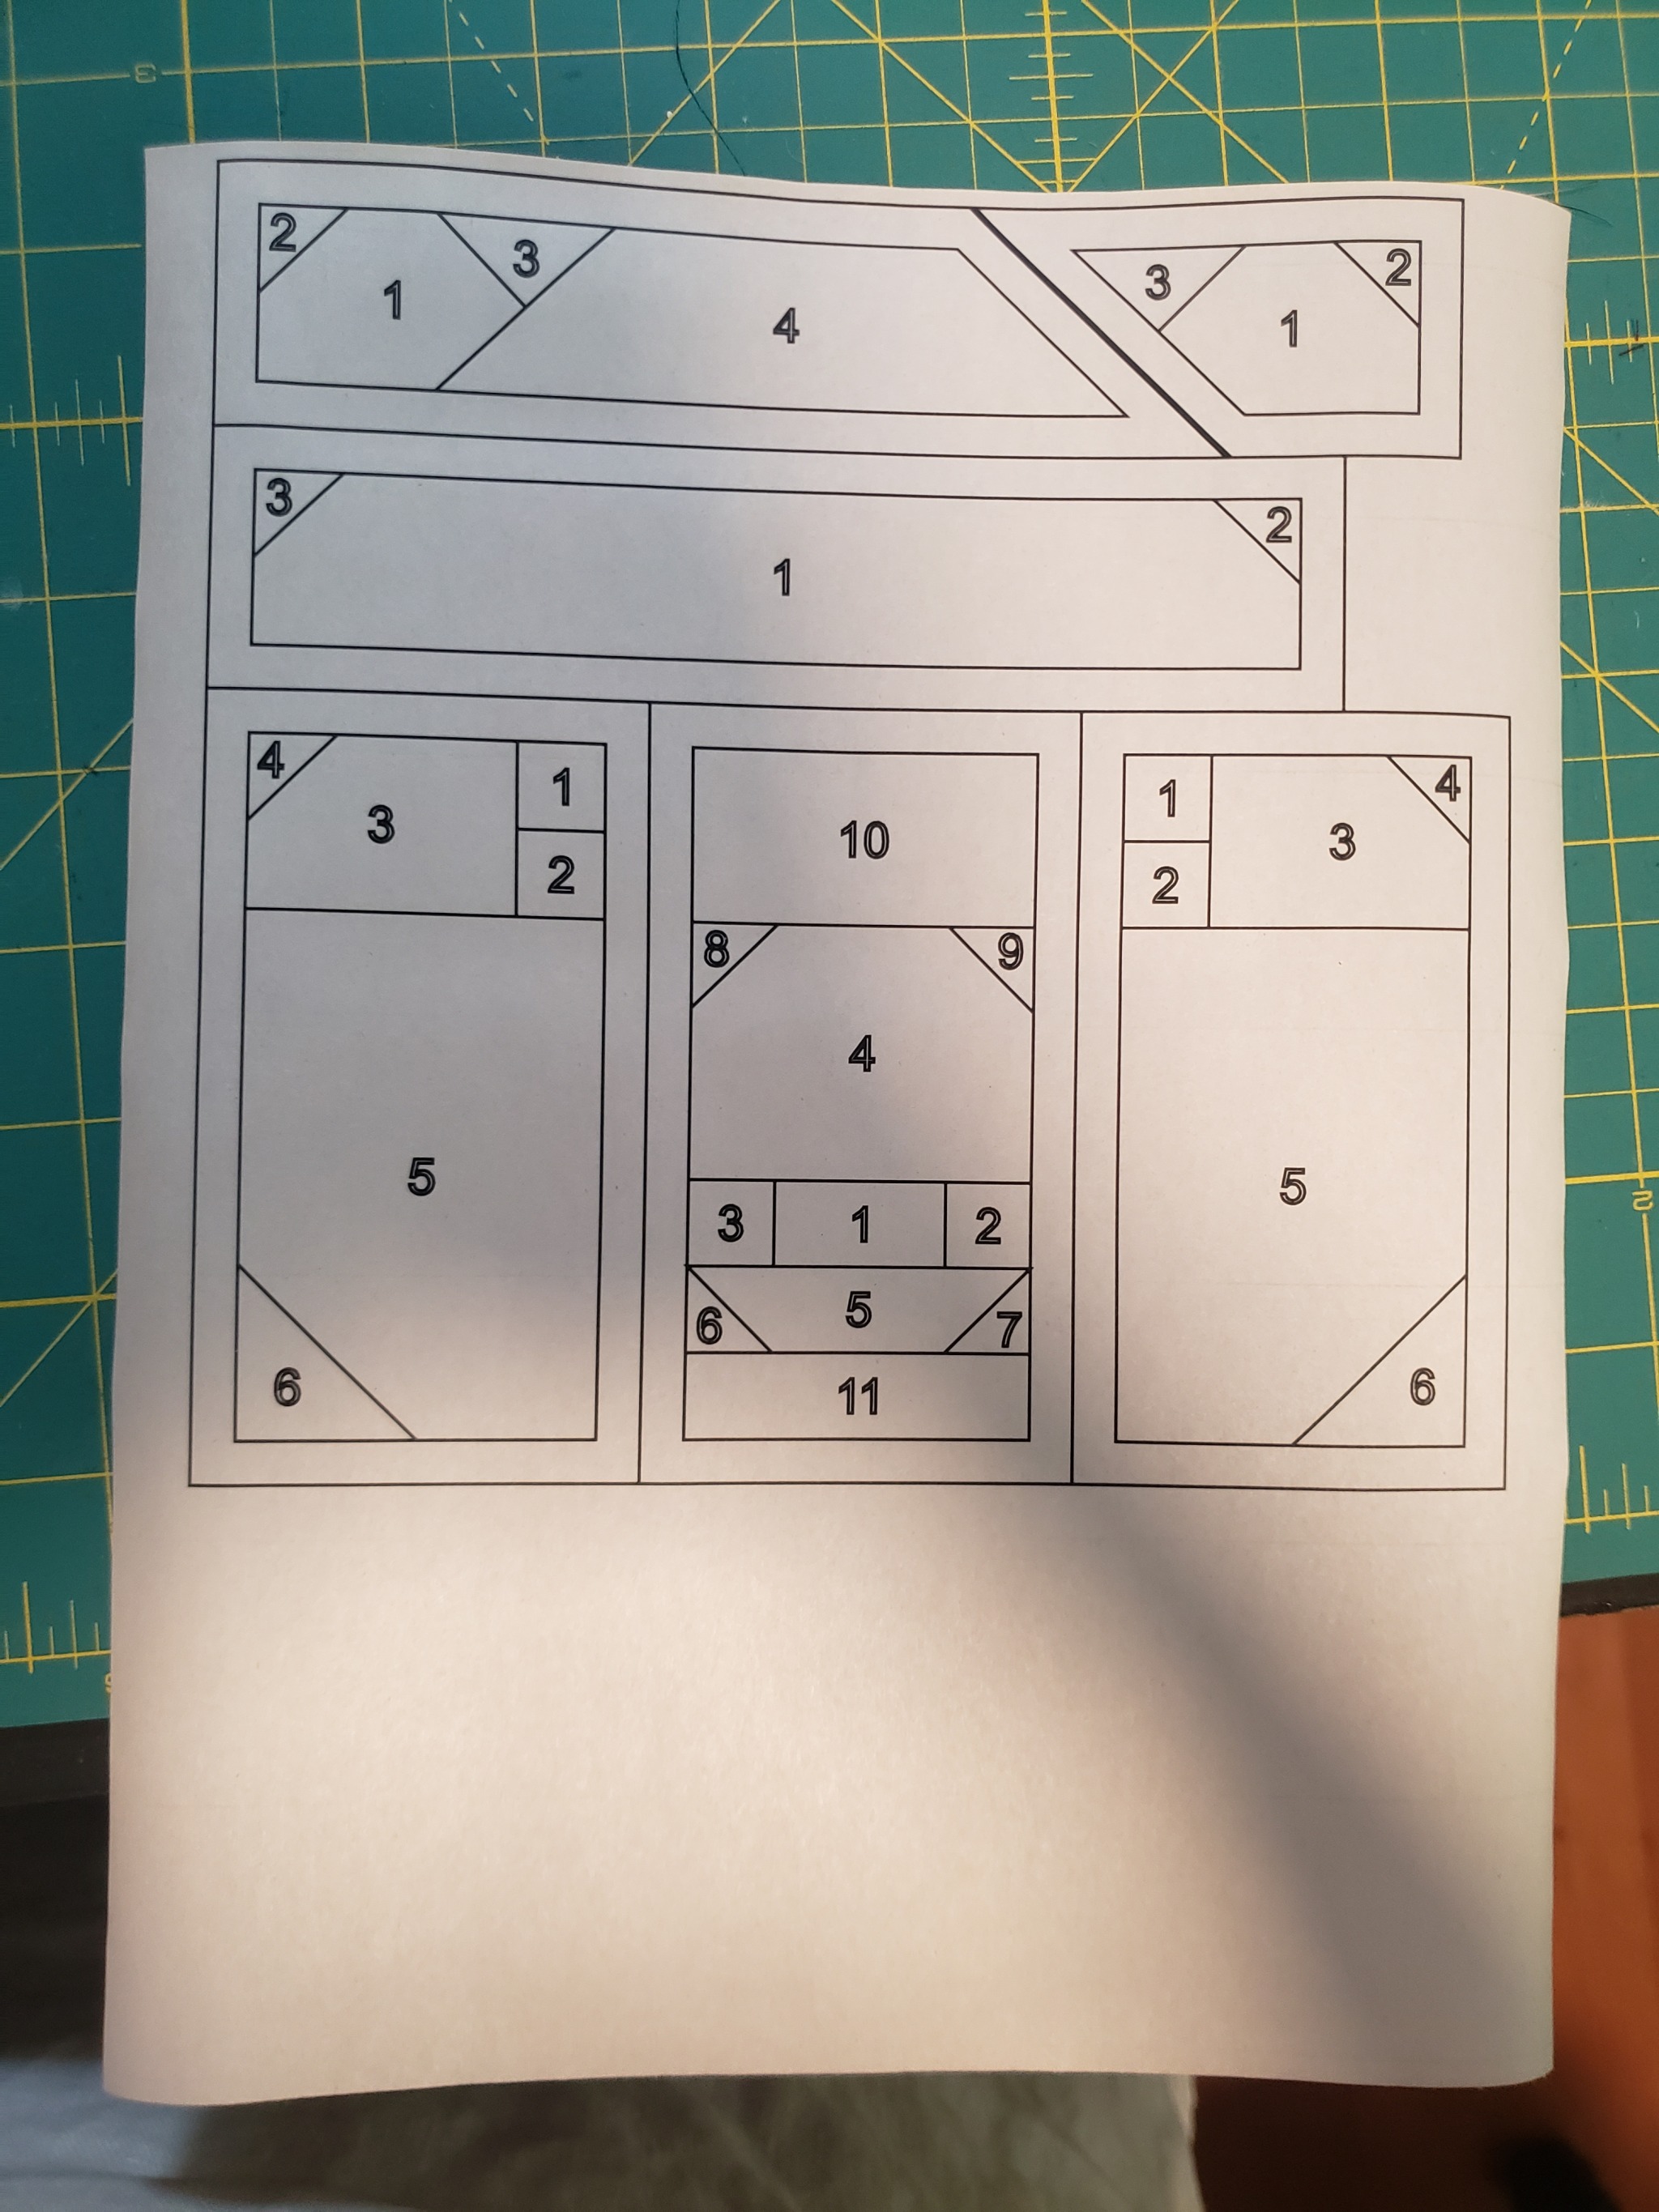
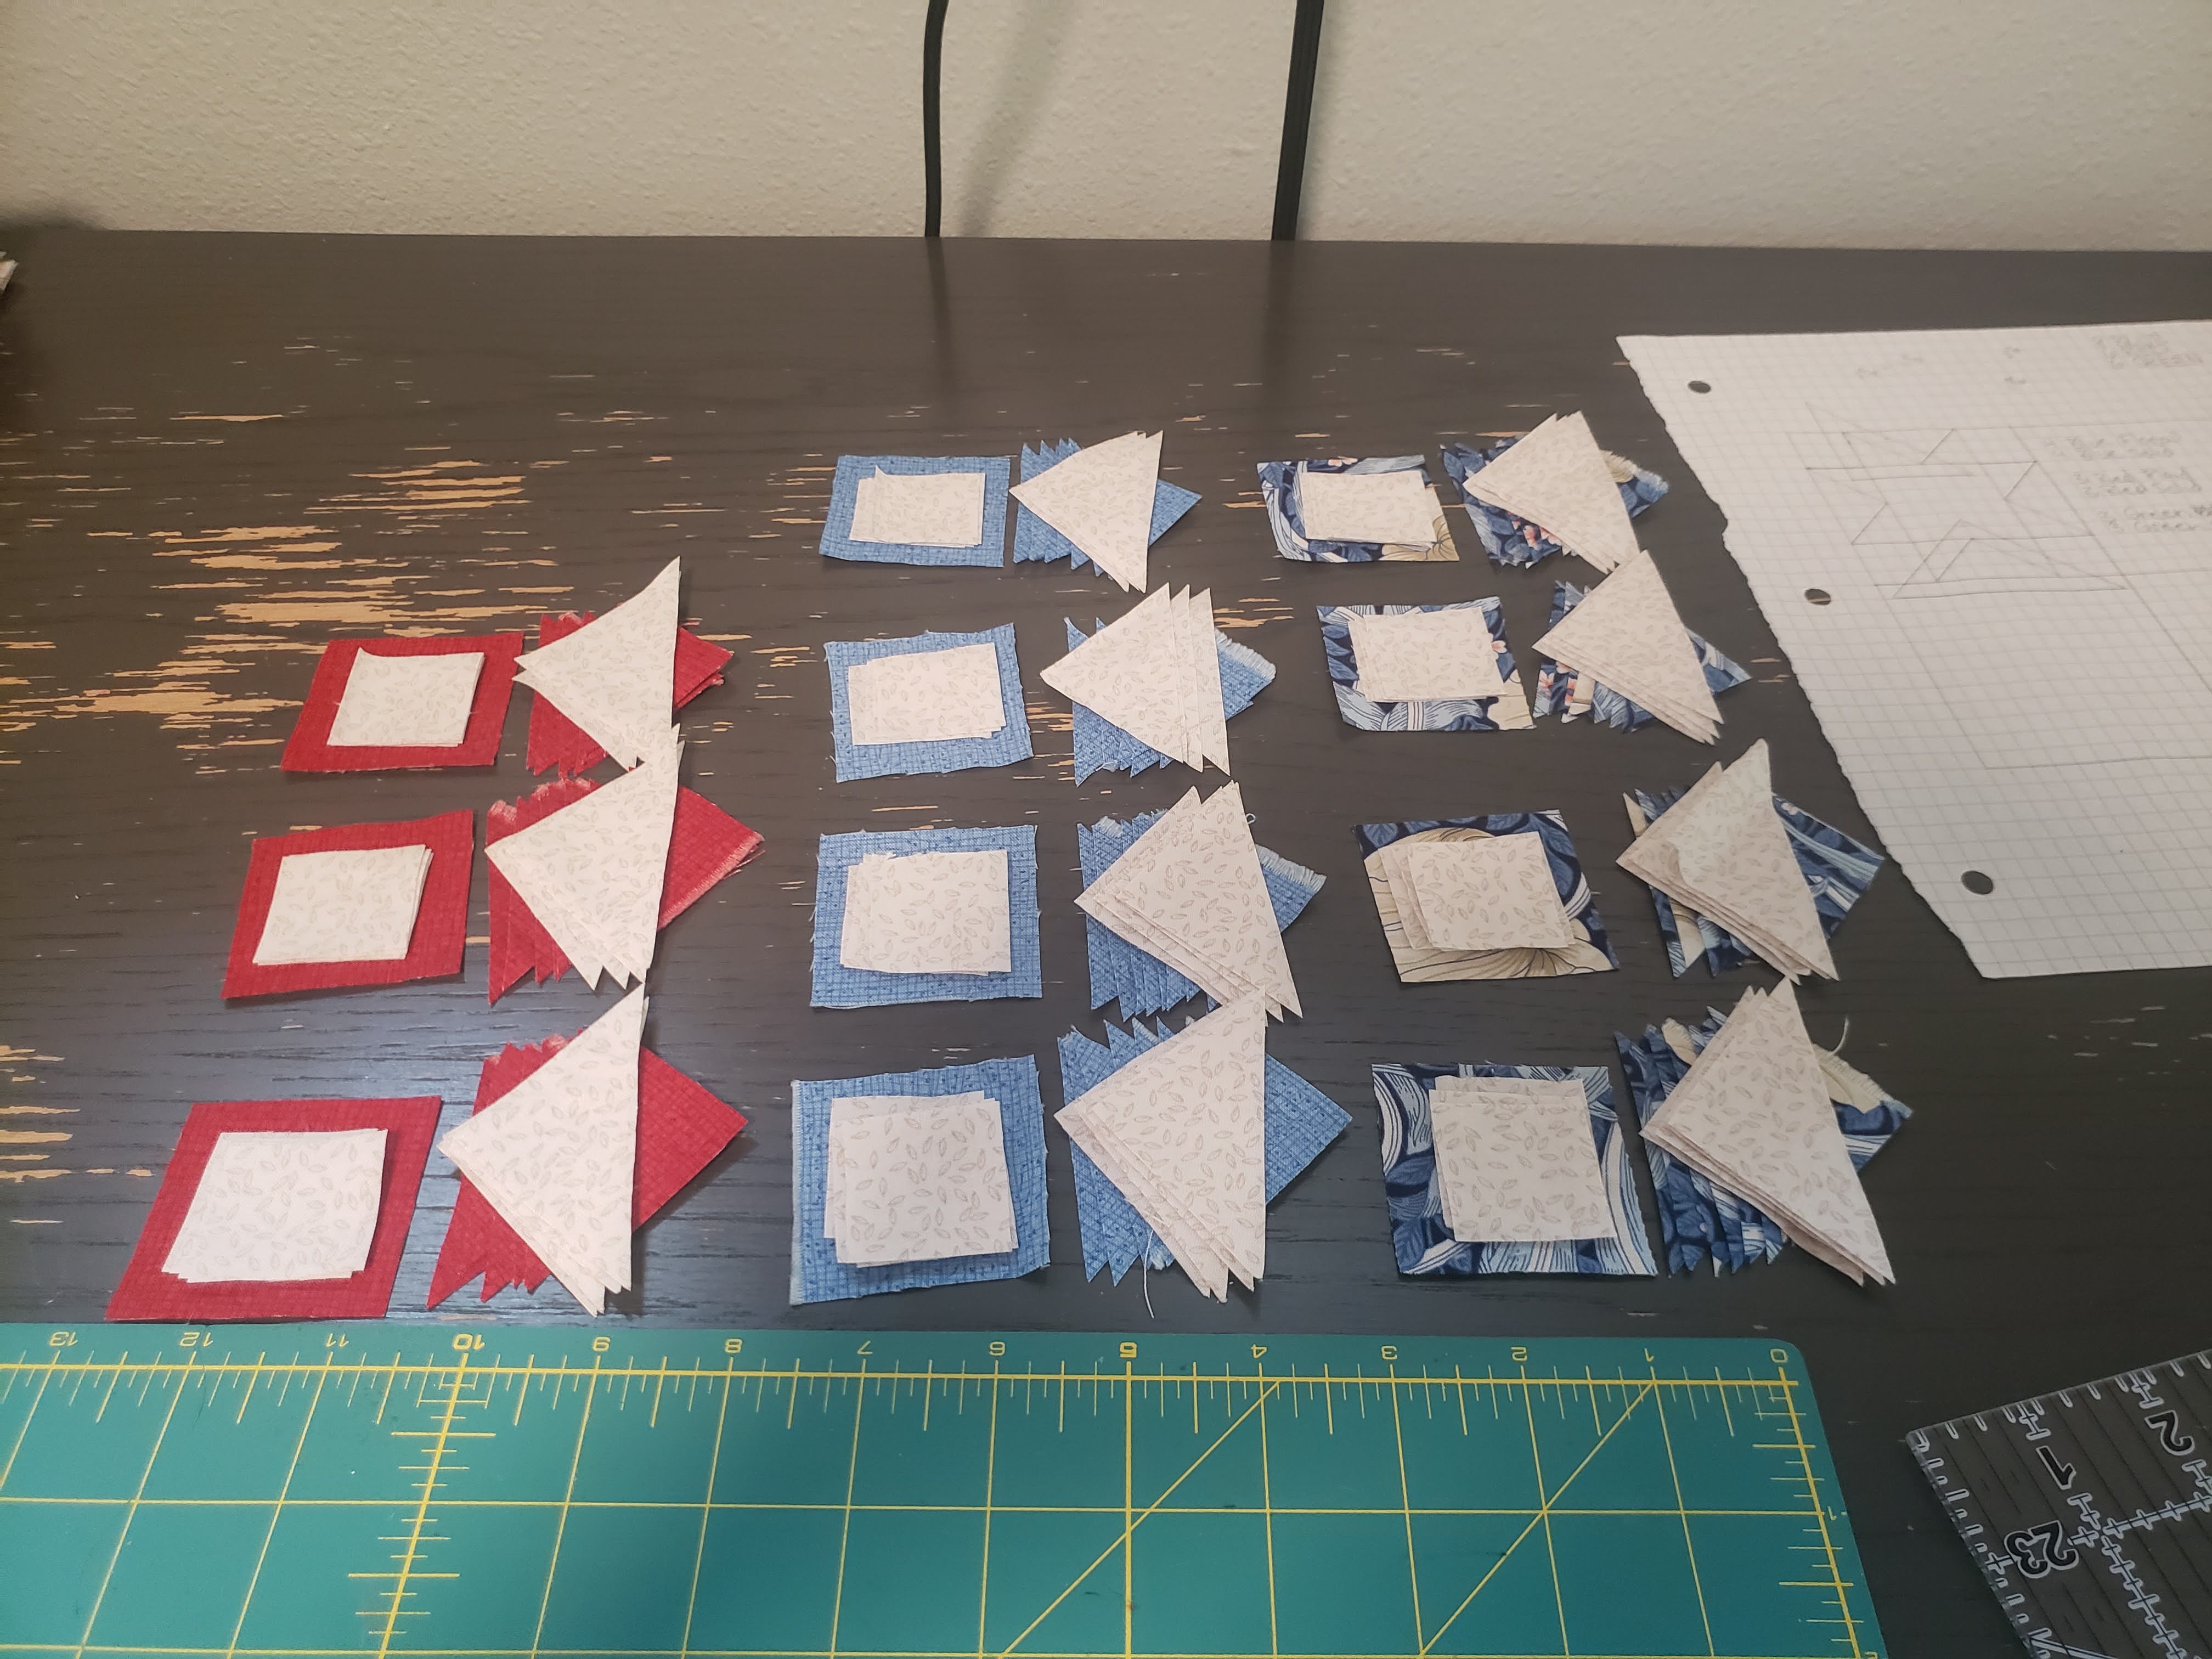
I also made a separate file to create cutting templates for each unique piece which I printed on cardstock. In addition to standard 1/4 in seam allowance, I added a bit more buffer to account for...me not judging placement accurately.
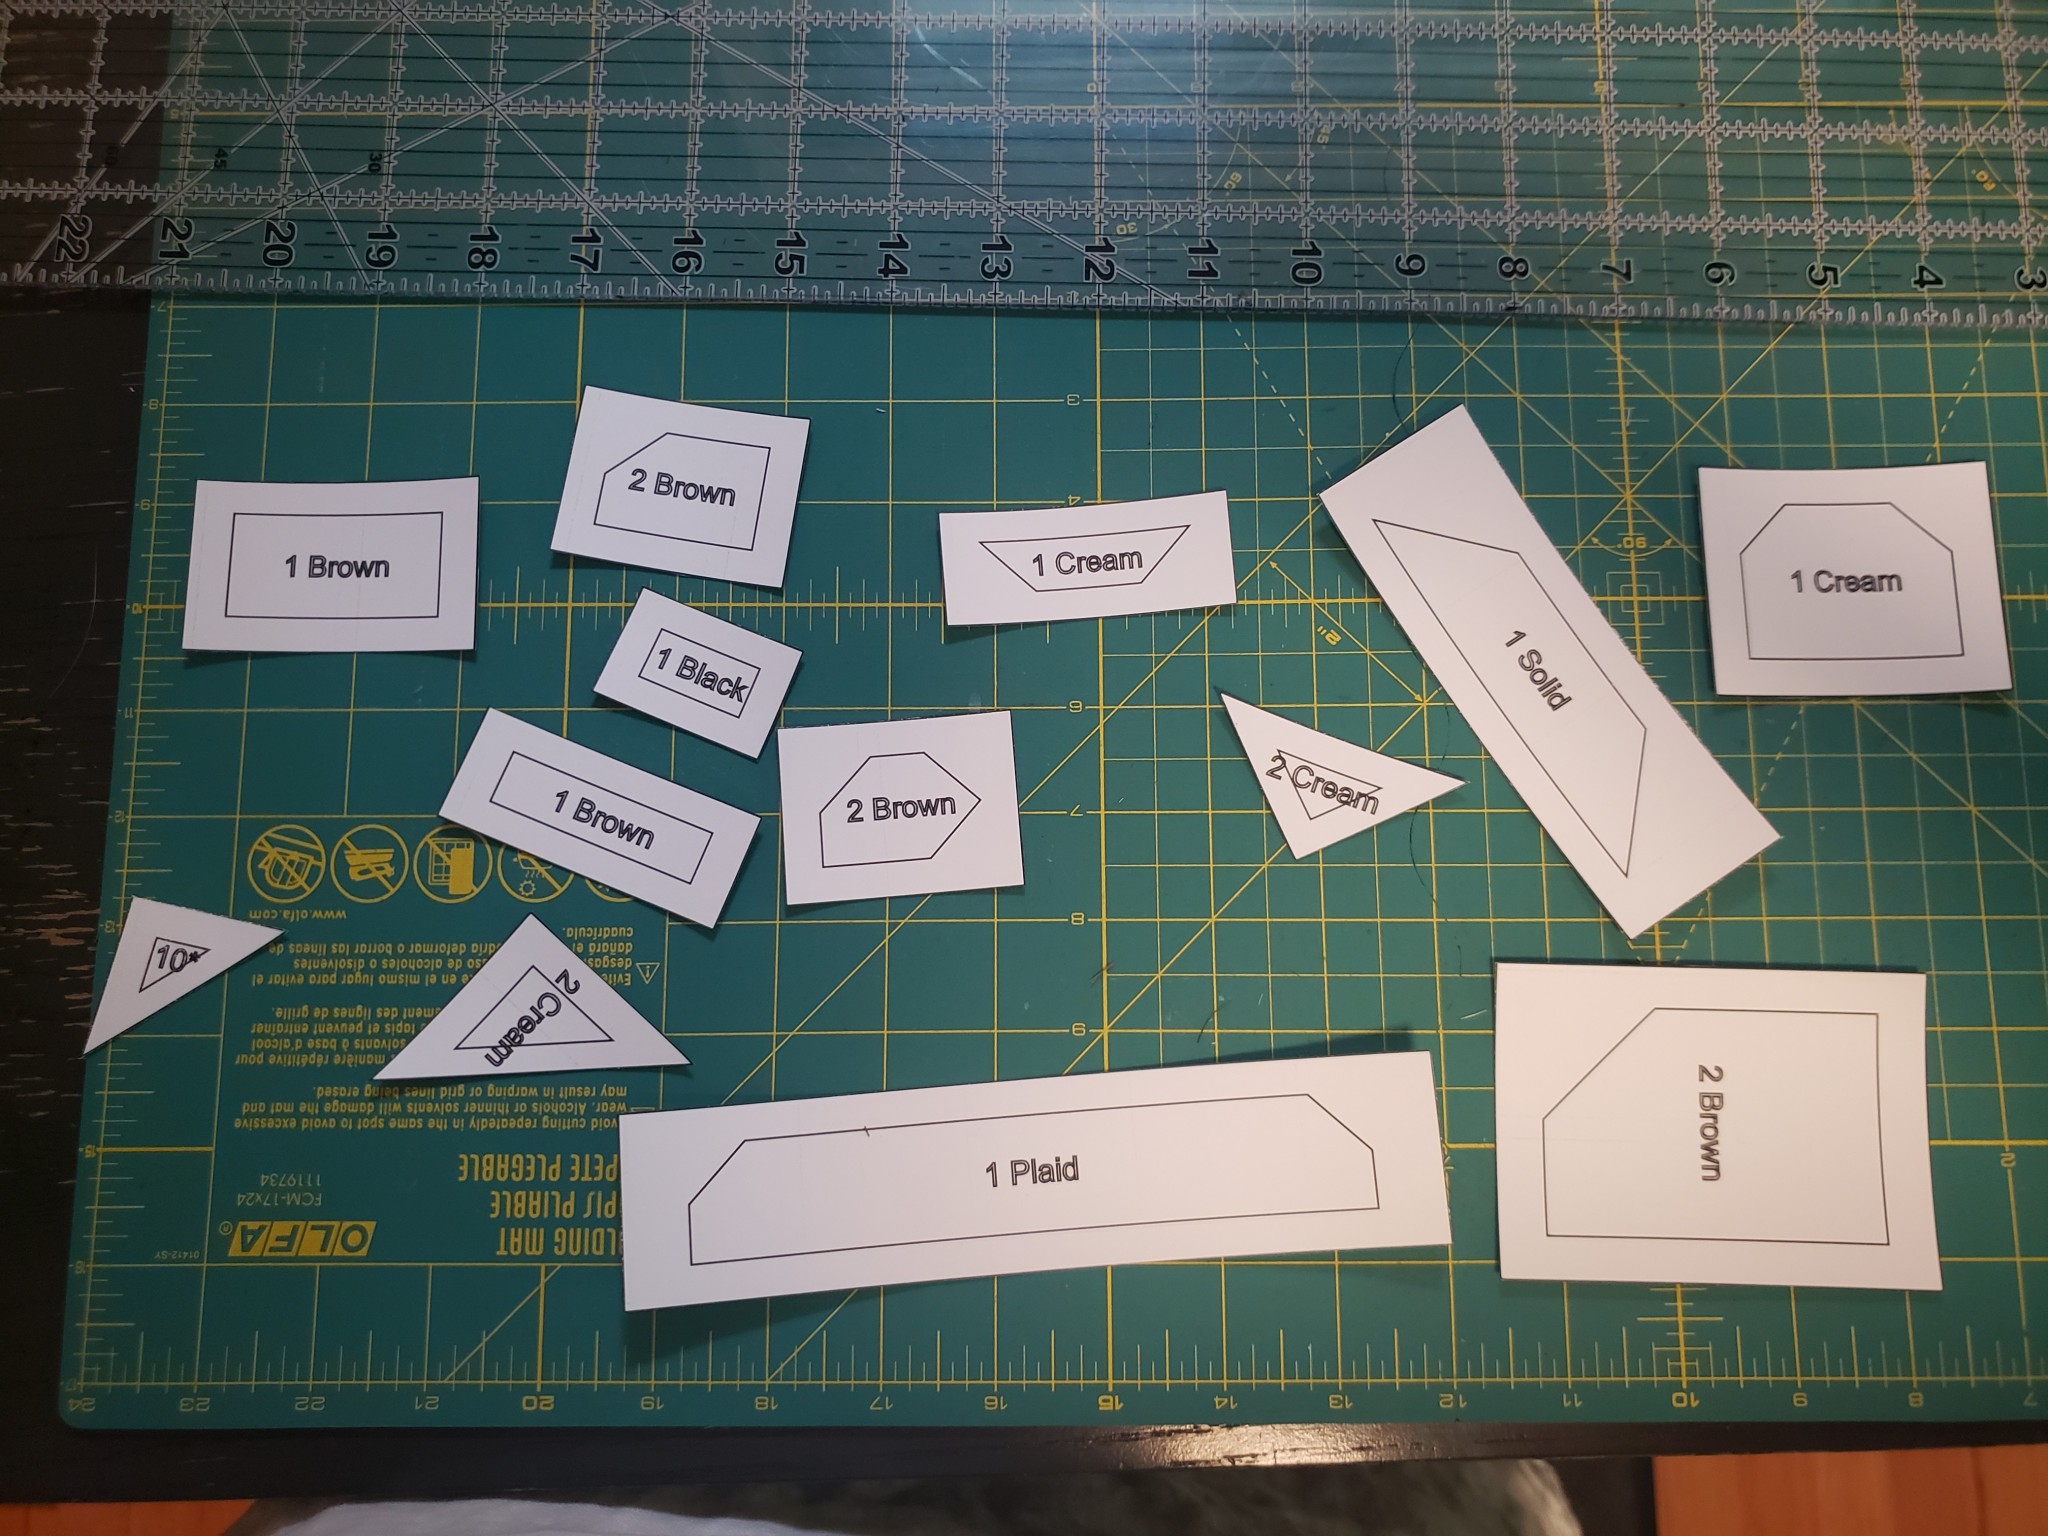
These helped me to only cut as much fabric as I reasonably needed.
Speaking of fabrics! Decided to just go with the original color scheme because I couldn't be assed to come up with a different one. I know that this was an easy way to introduce something Uniquely Me or whatever. But I'm already indecisive enough as it is. I spent 3 hours looking at fabric with a pre-decided color scheme. Imagine how long I would have been in there if I wasn't somehow restricted in my choices. Fabric stores to me are like the island of the lotus-eaters to Odysseus. I'd still be there.
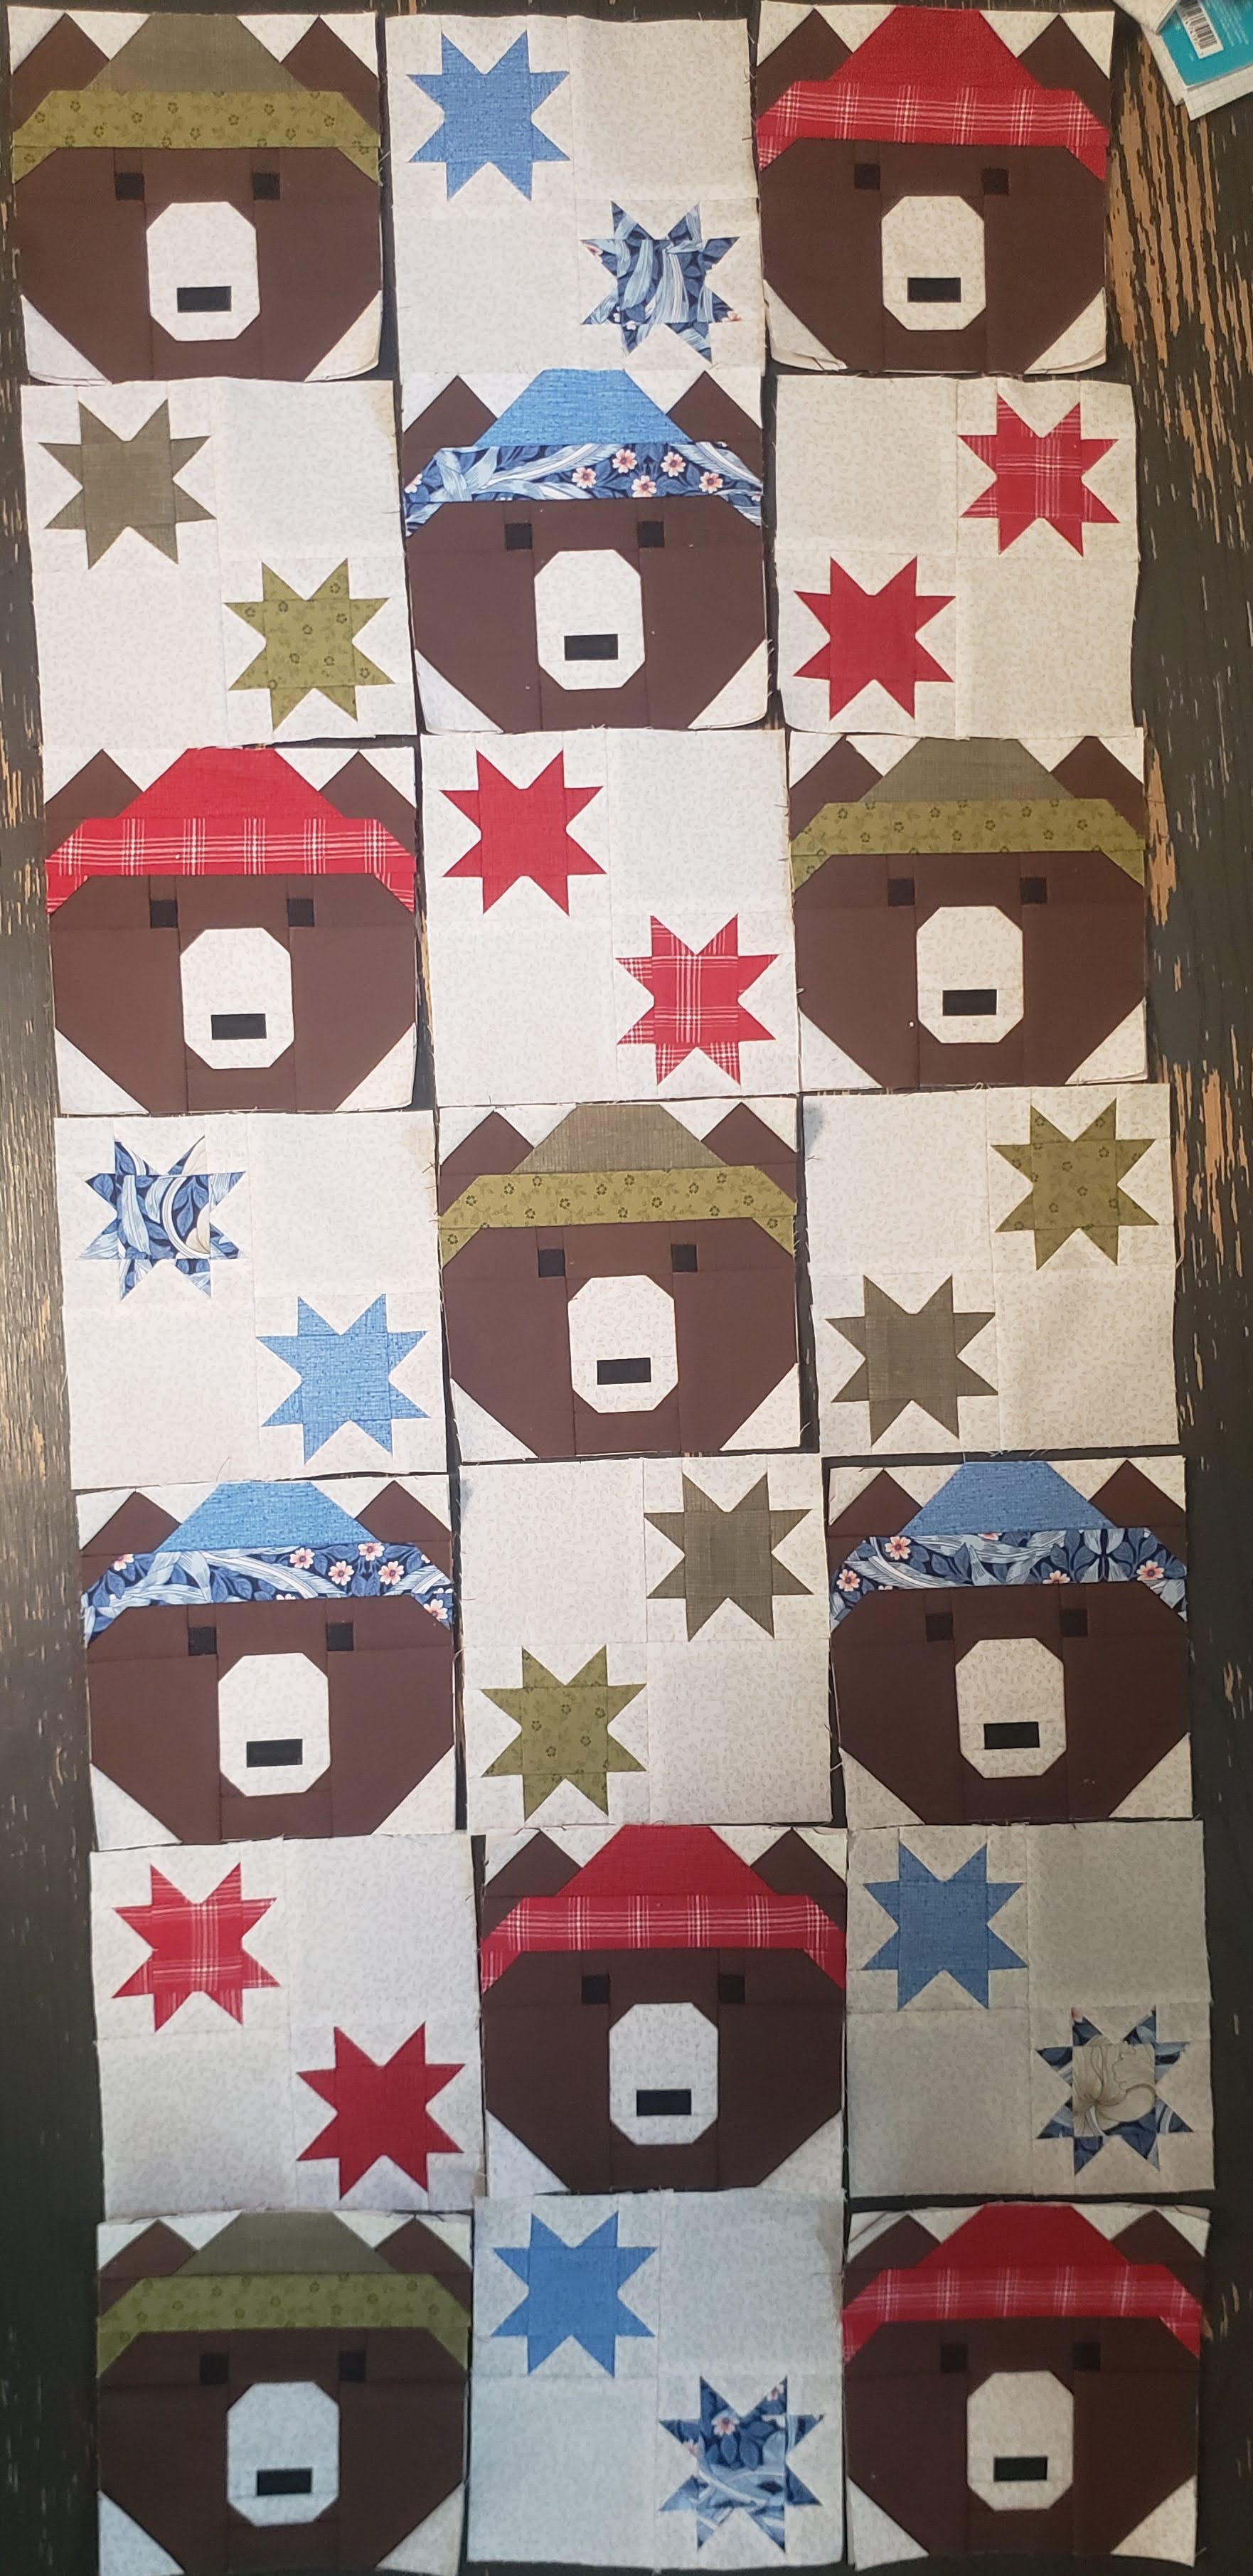
After washing, drying, and ironing all my new fabric, I got to work! I gave each unique bear a special name based on their colors. Introducing Bluebeary, Raspbeary, and Kiwibeary (yes, it's a real fruit. Google it!)
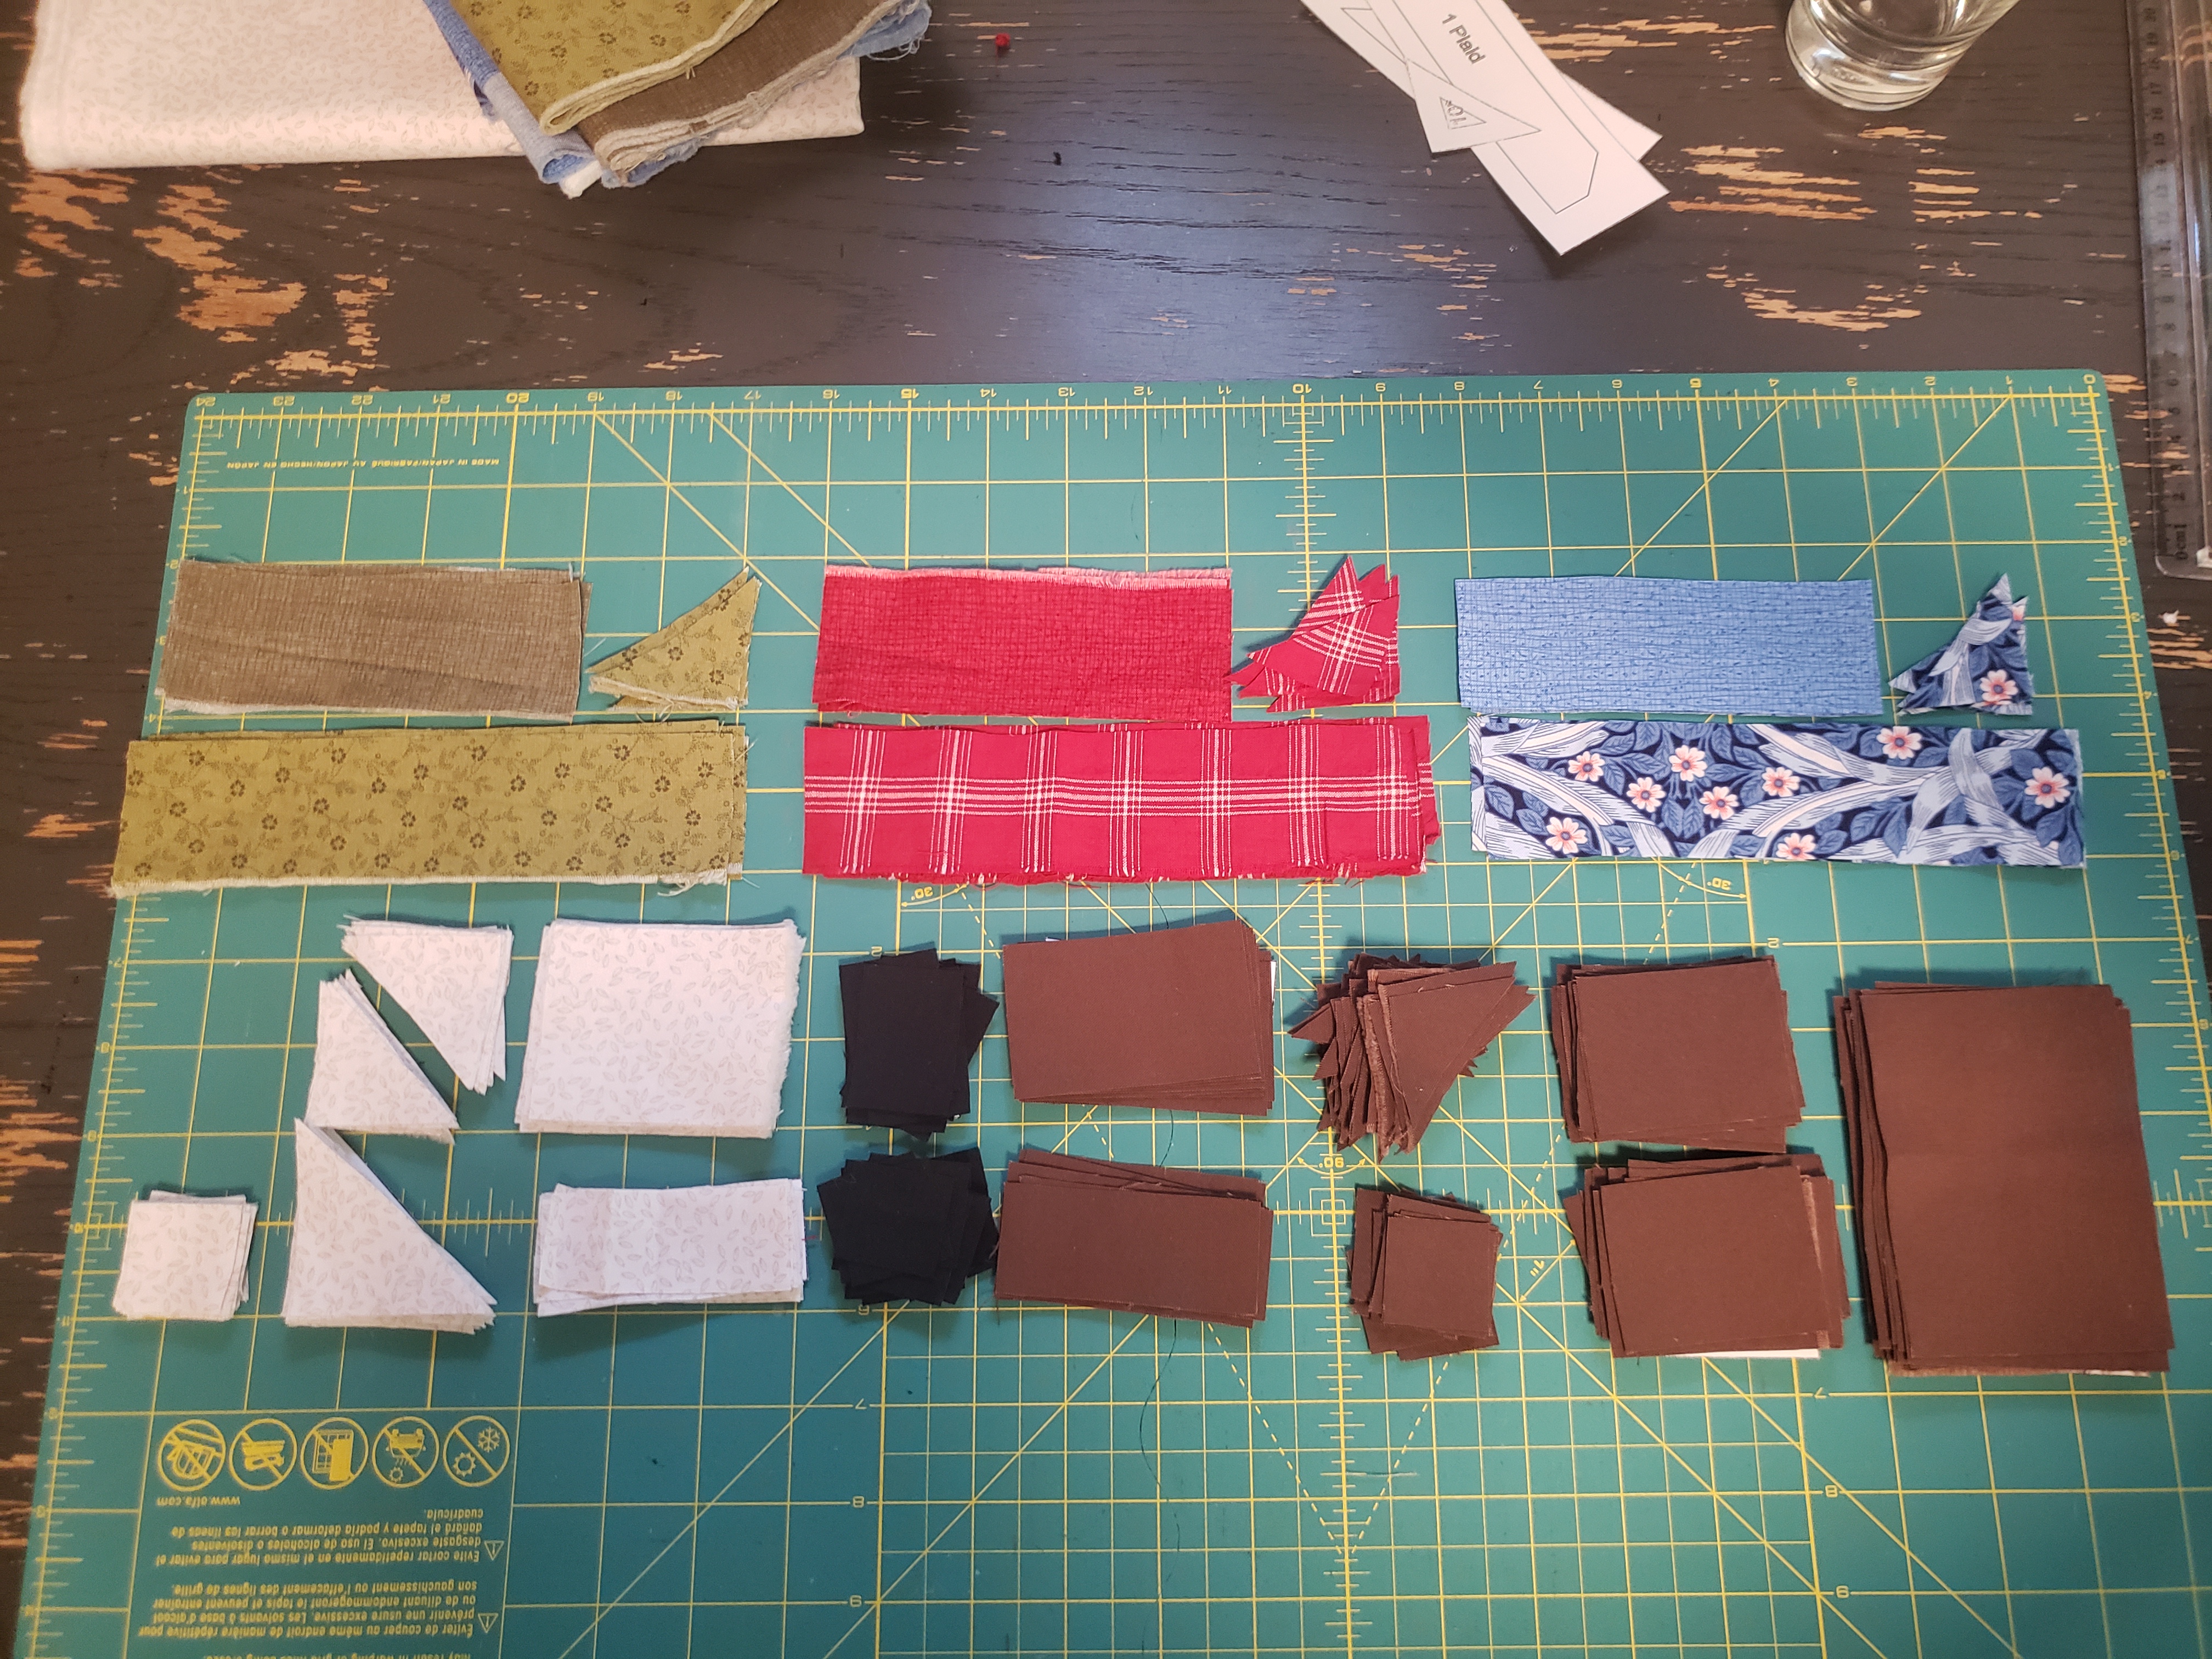

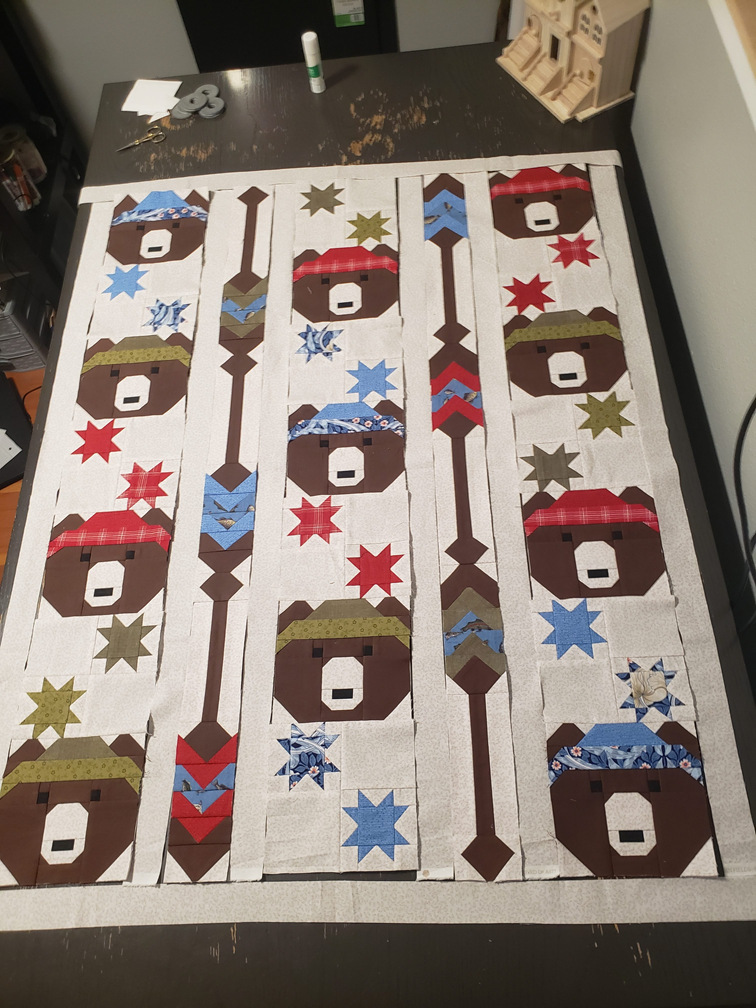
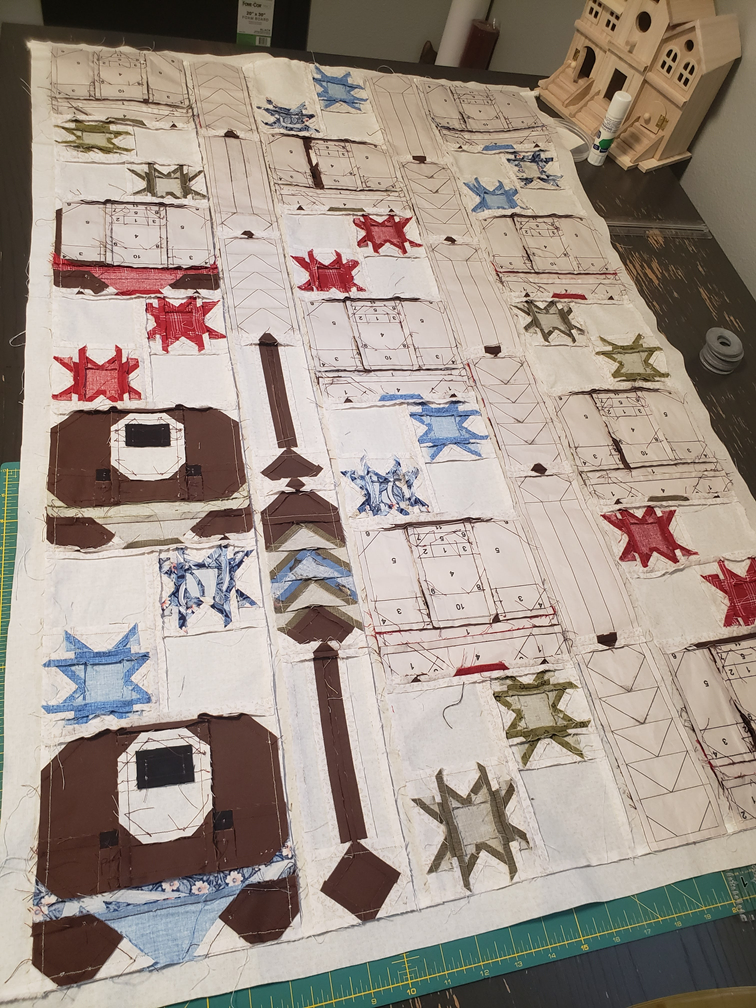
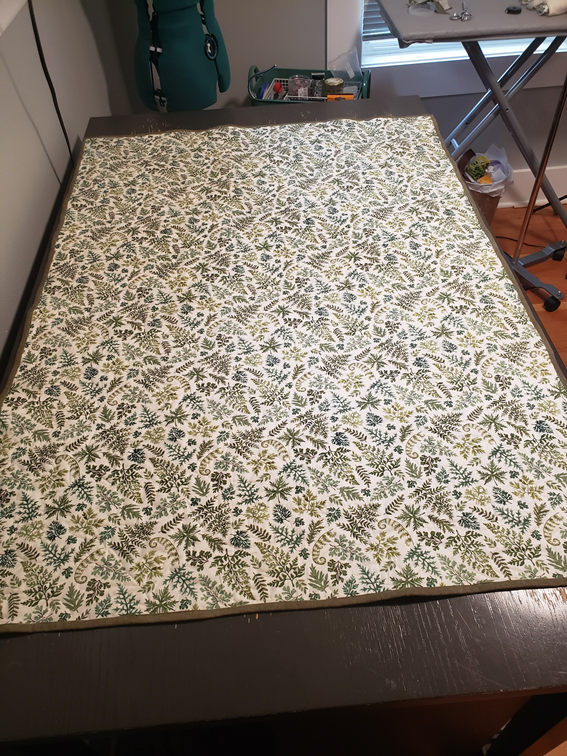
I ran out of brown fabric when cutting out the pieces for the oars. I swear, I only needed 5 sq inches, meaning I had to pause progress until I had time to run to the same fabric store where I originally bought it. While I was at it, I also bought the perfect backing fabric :D After that, I was off to the races! I figured out placement, sewed them into columns, added spacing strips out of my bg fabric, and then began the painstaking process of removing the foundation paper backing with my trusty tweezers. I think that alone took 5 hours...
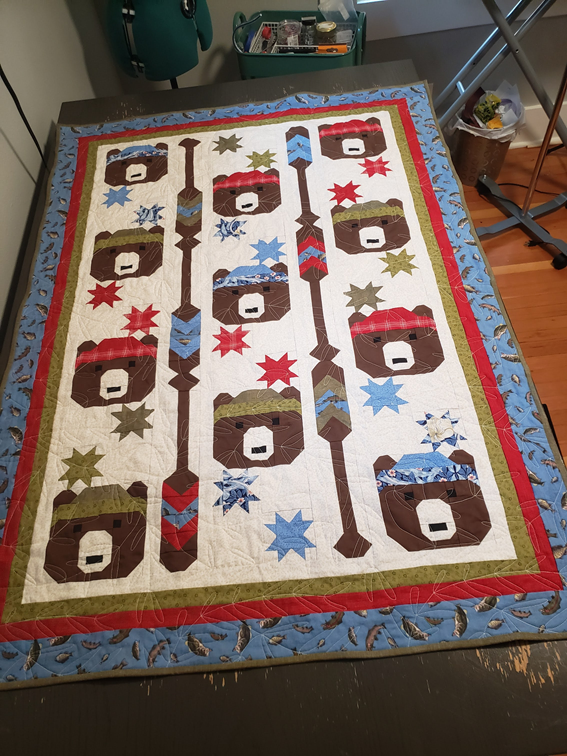
My last step was cutting and sewing the borders, and I was done! Took it to the longarm quilter and requested the 'Rosemary' pantograph. My friends love it! Hopefully their baby does too.


Comments