
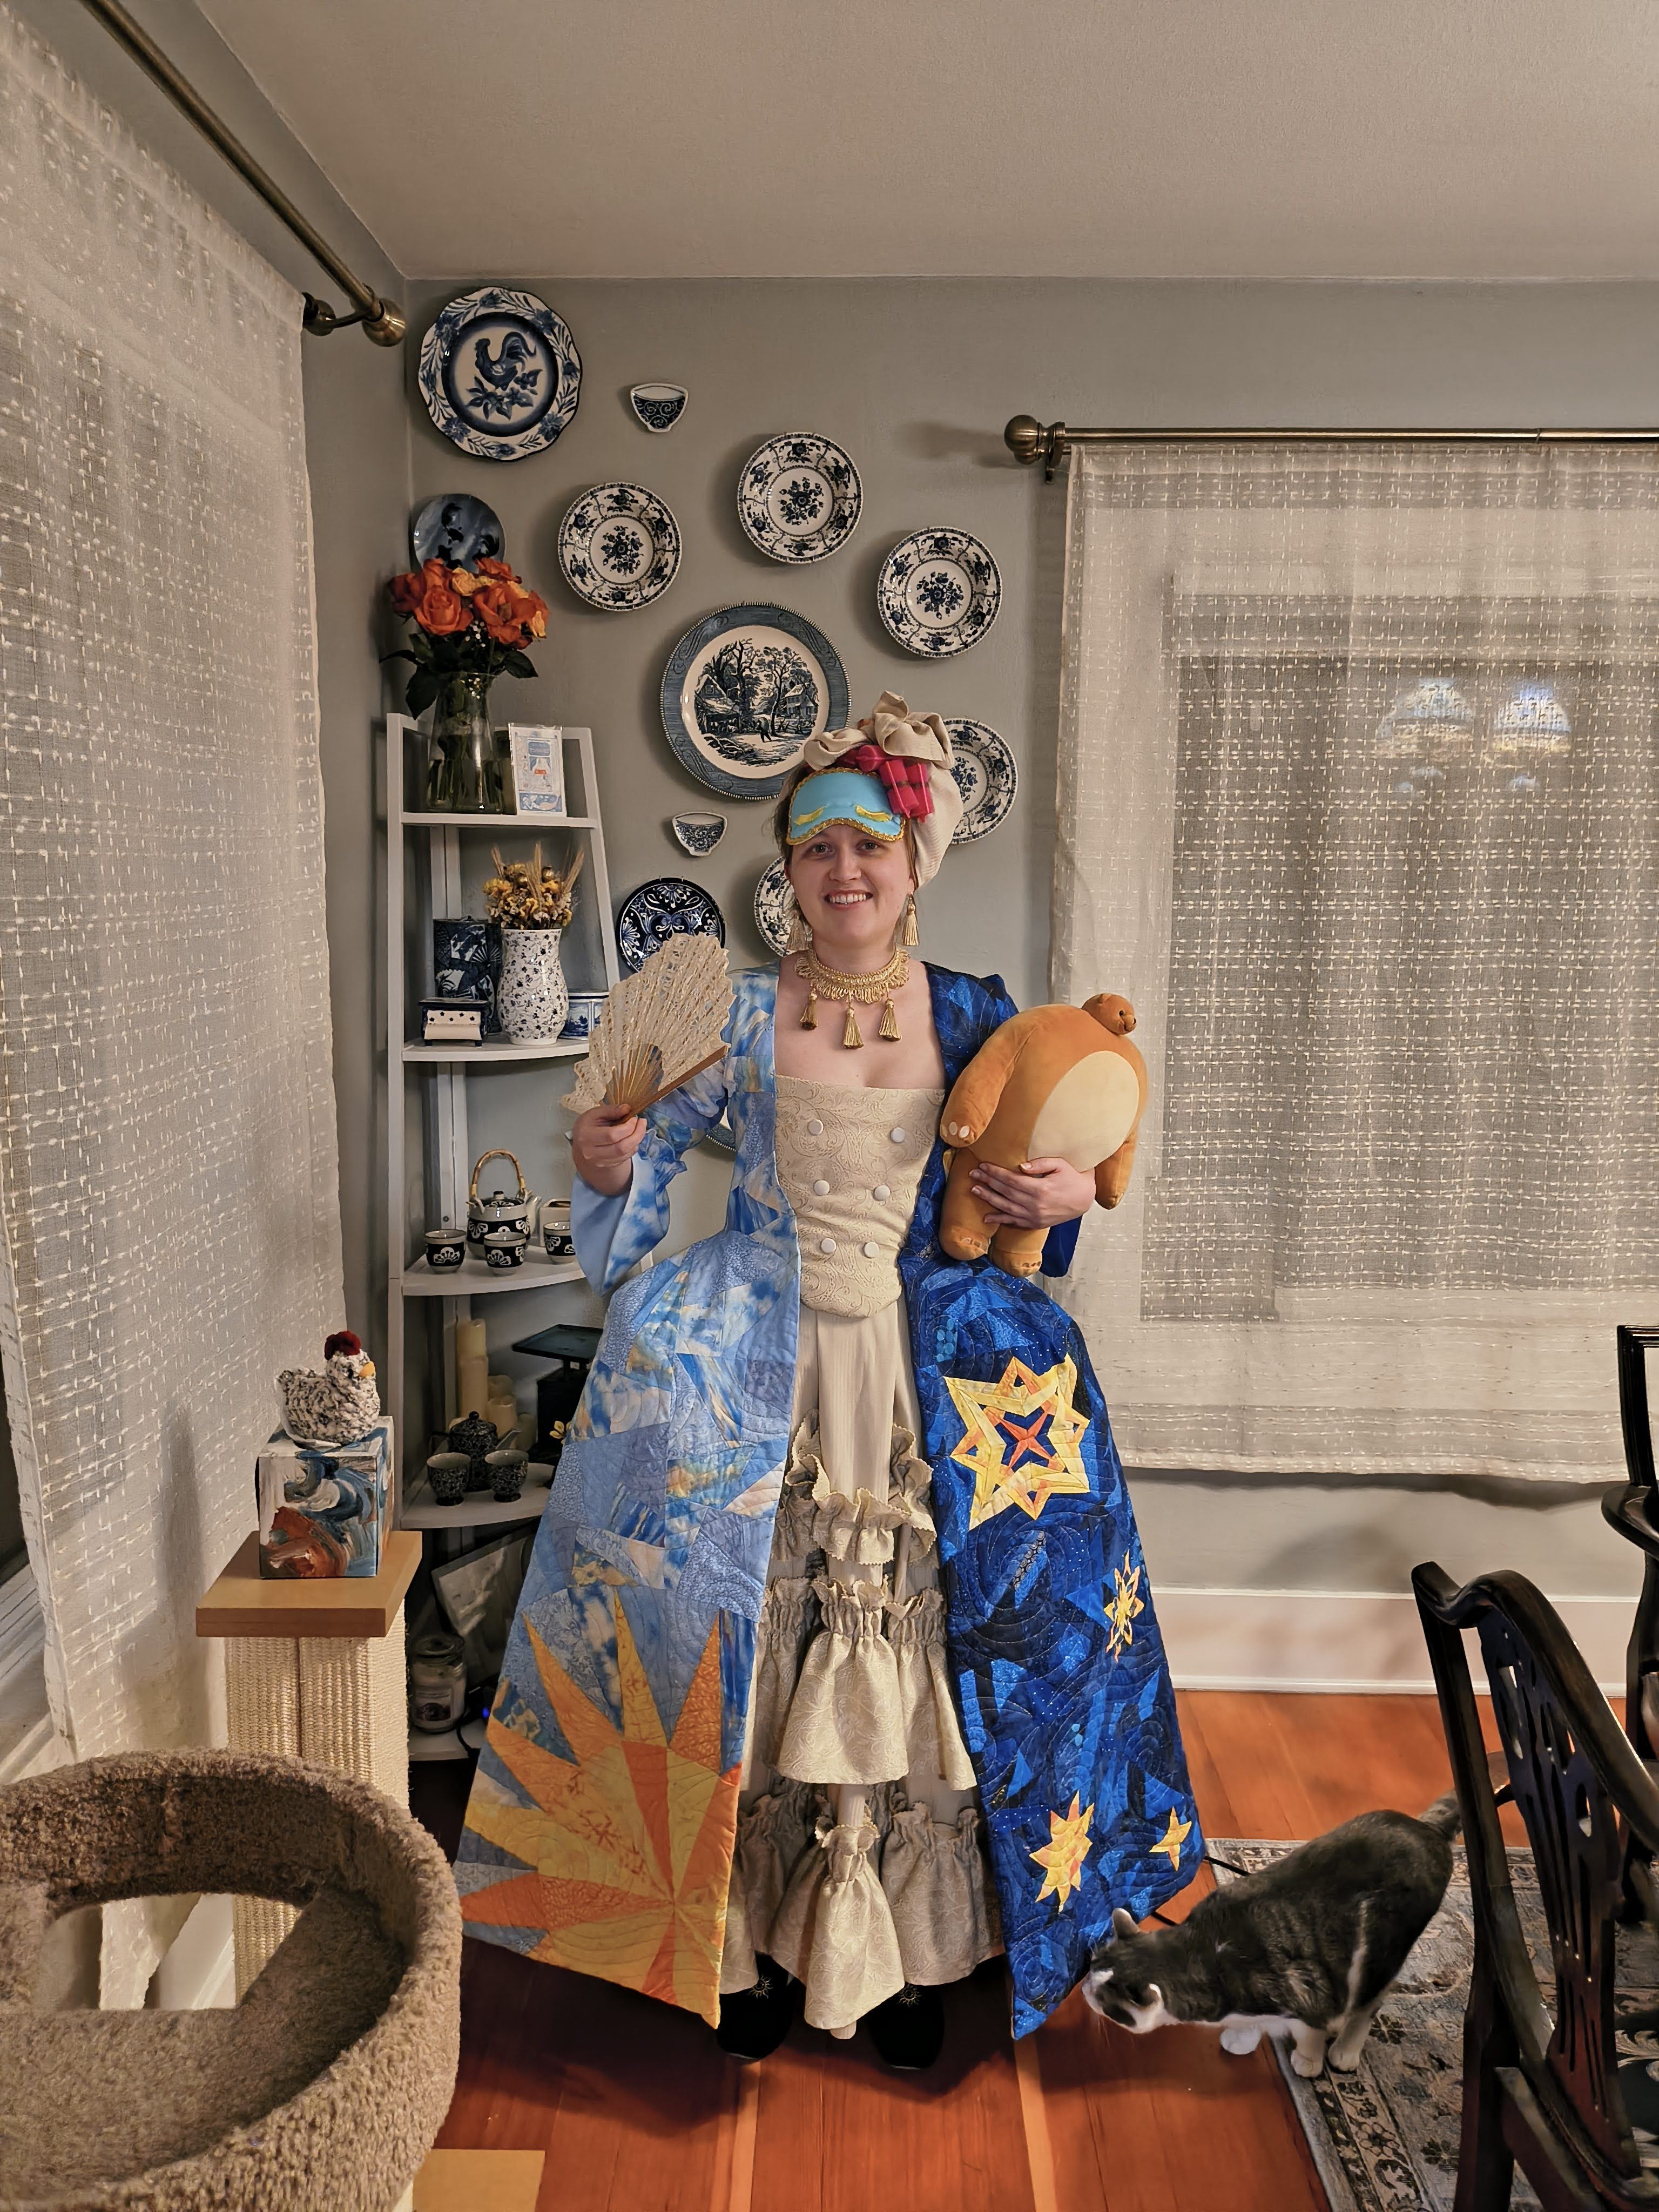
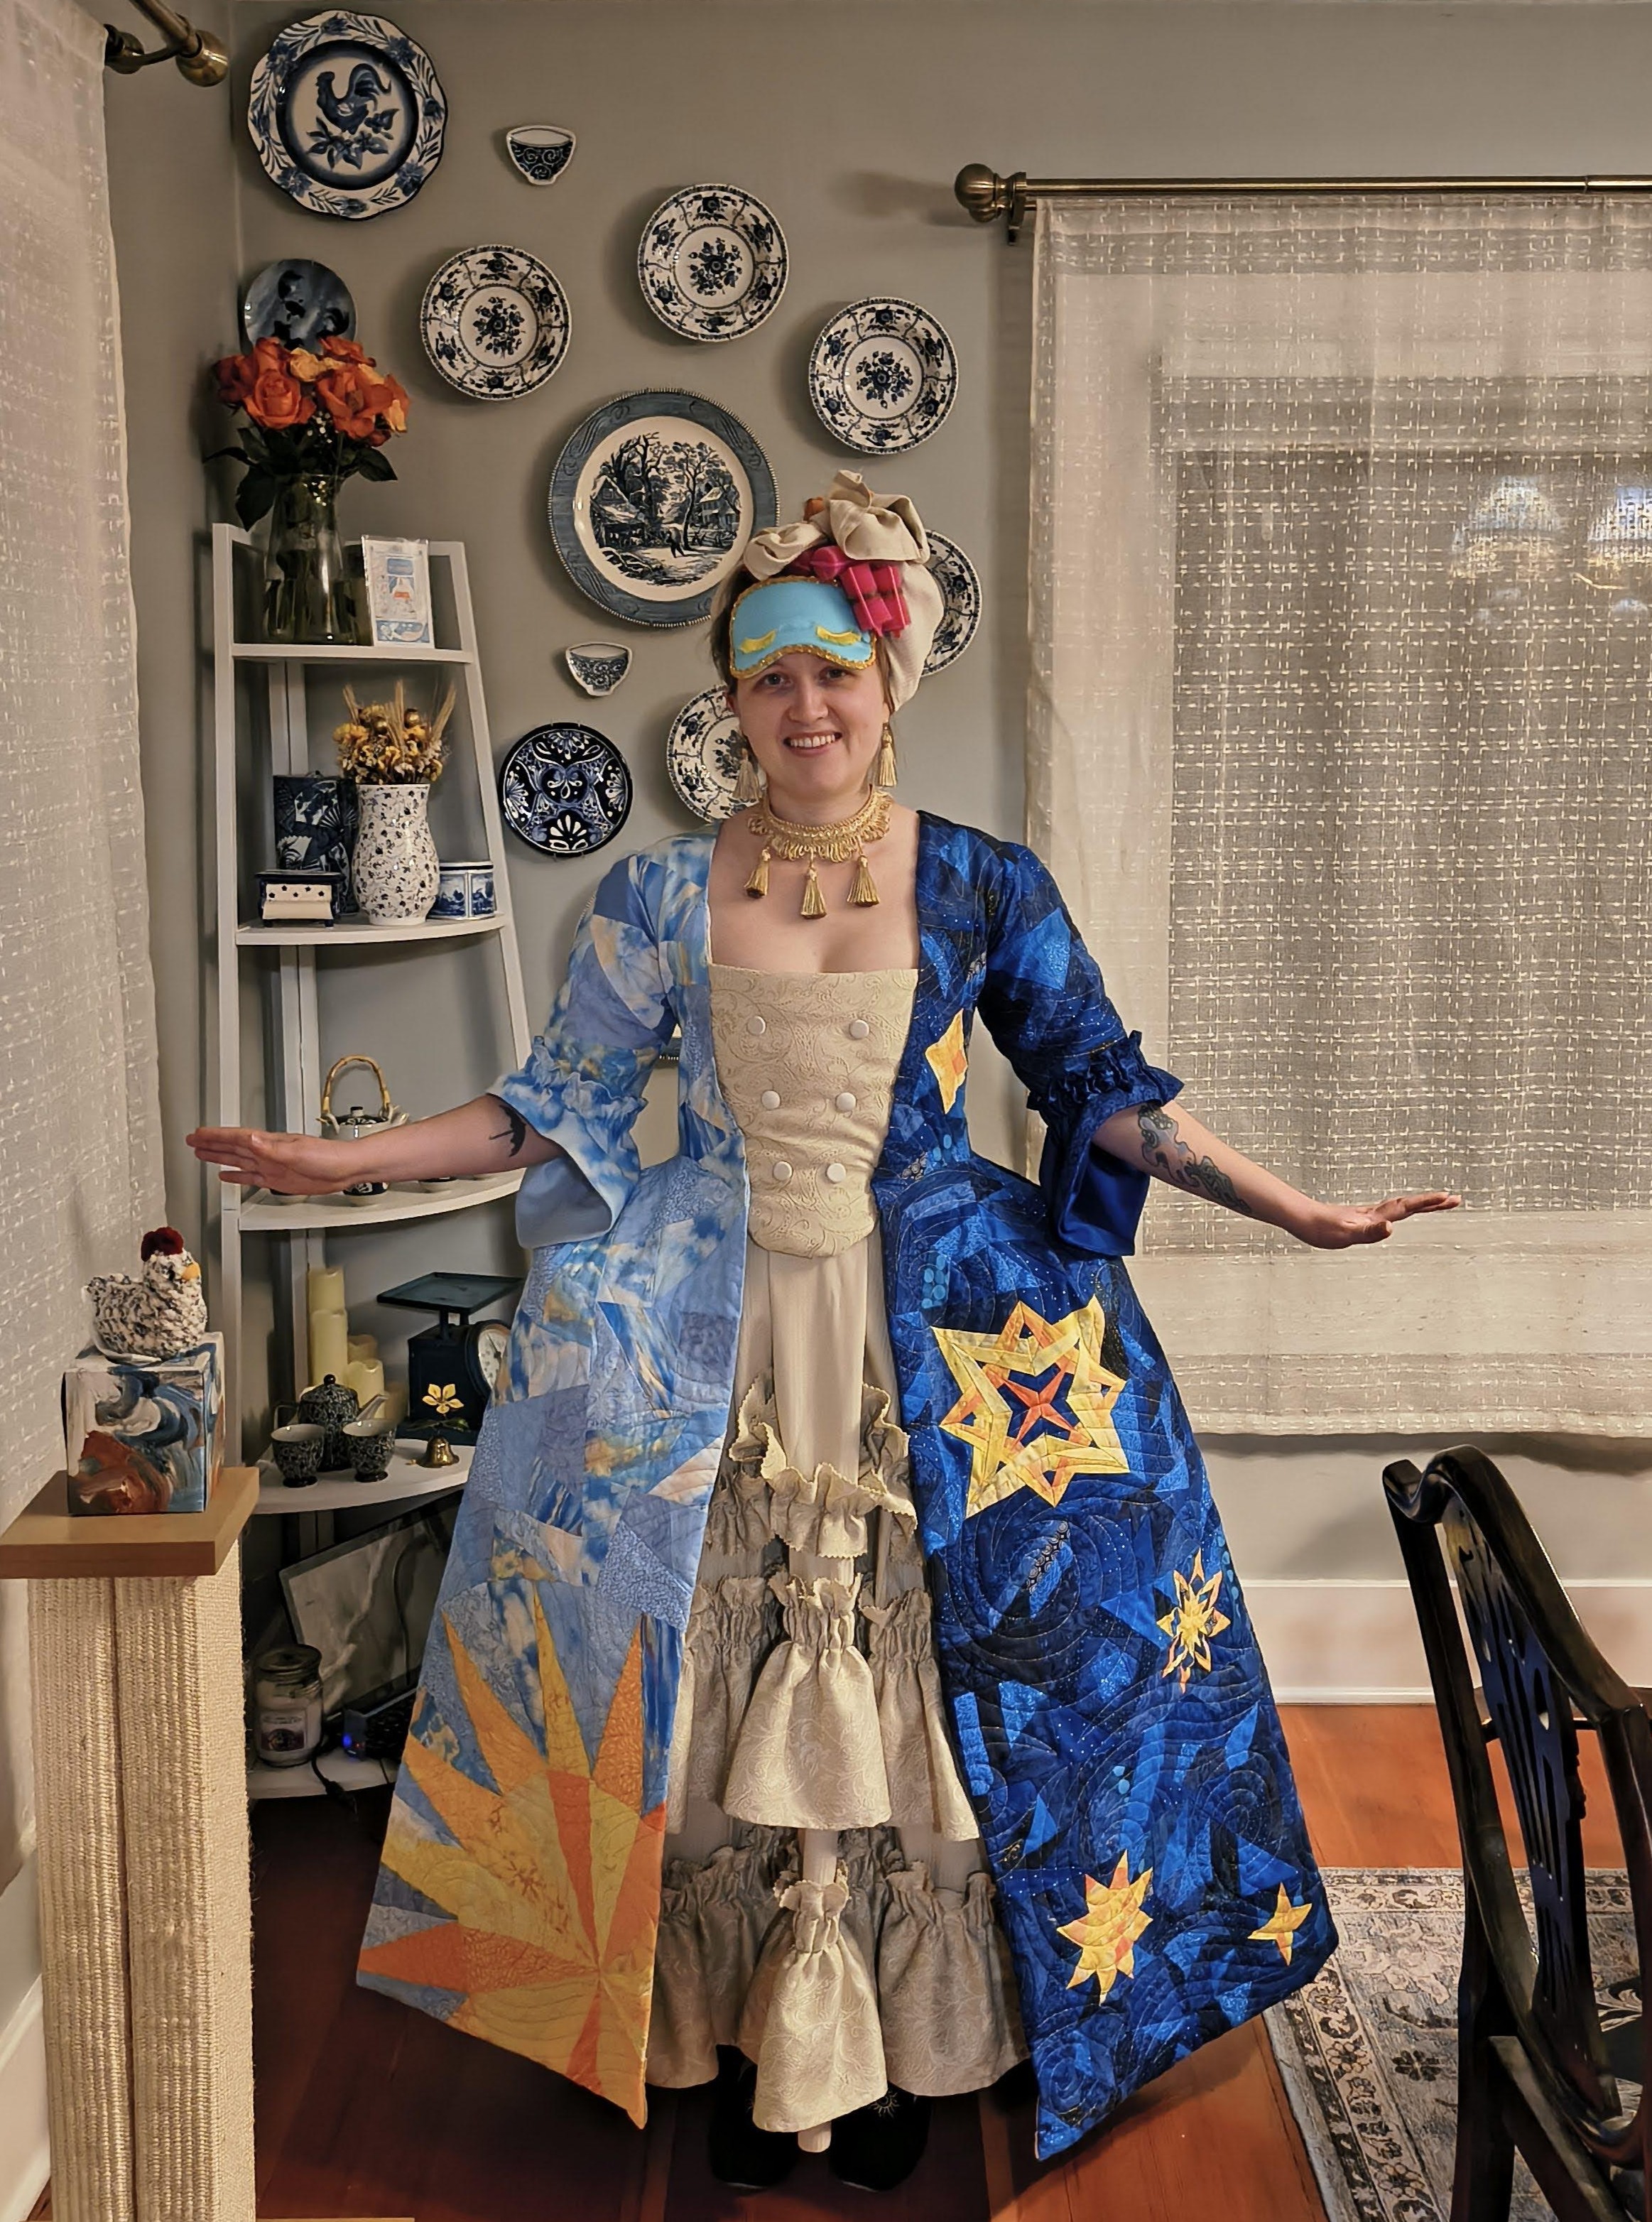
Presenting, the Mattriarch of Beauty Sleep: ✨QUEEN MATTRESS!✨
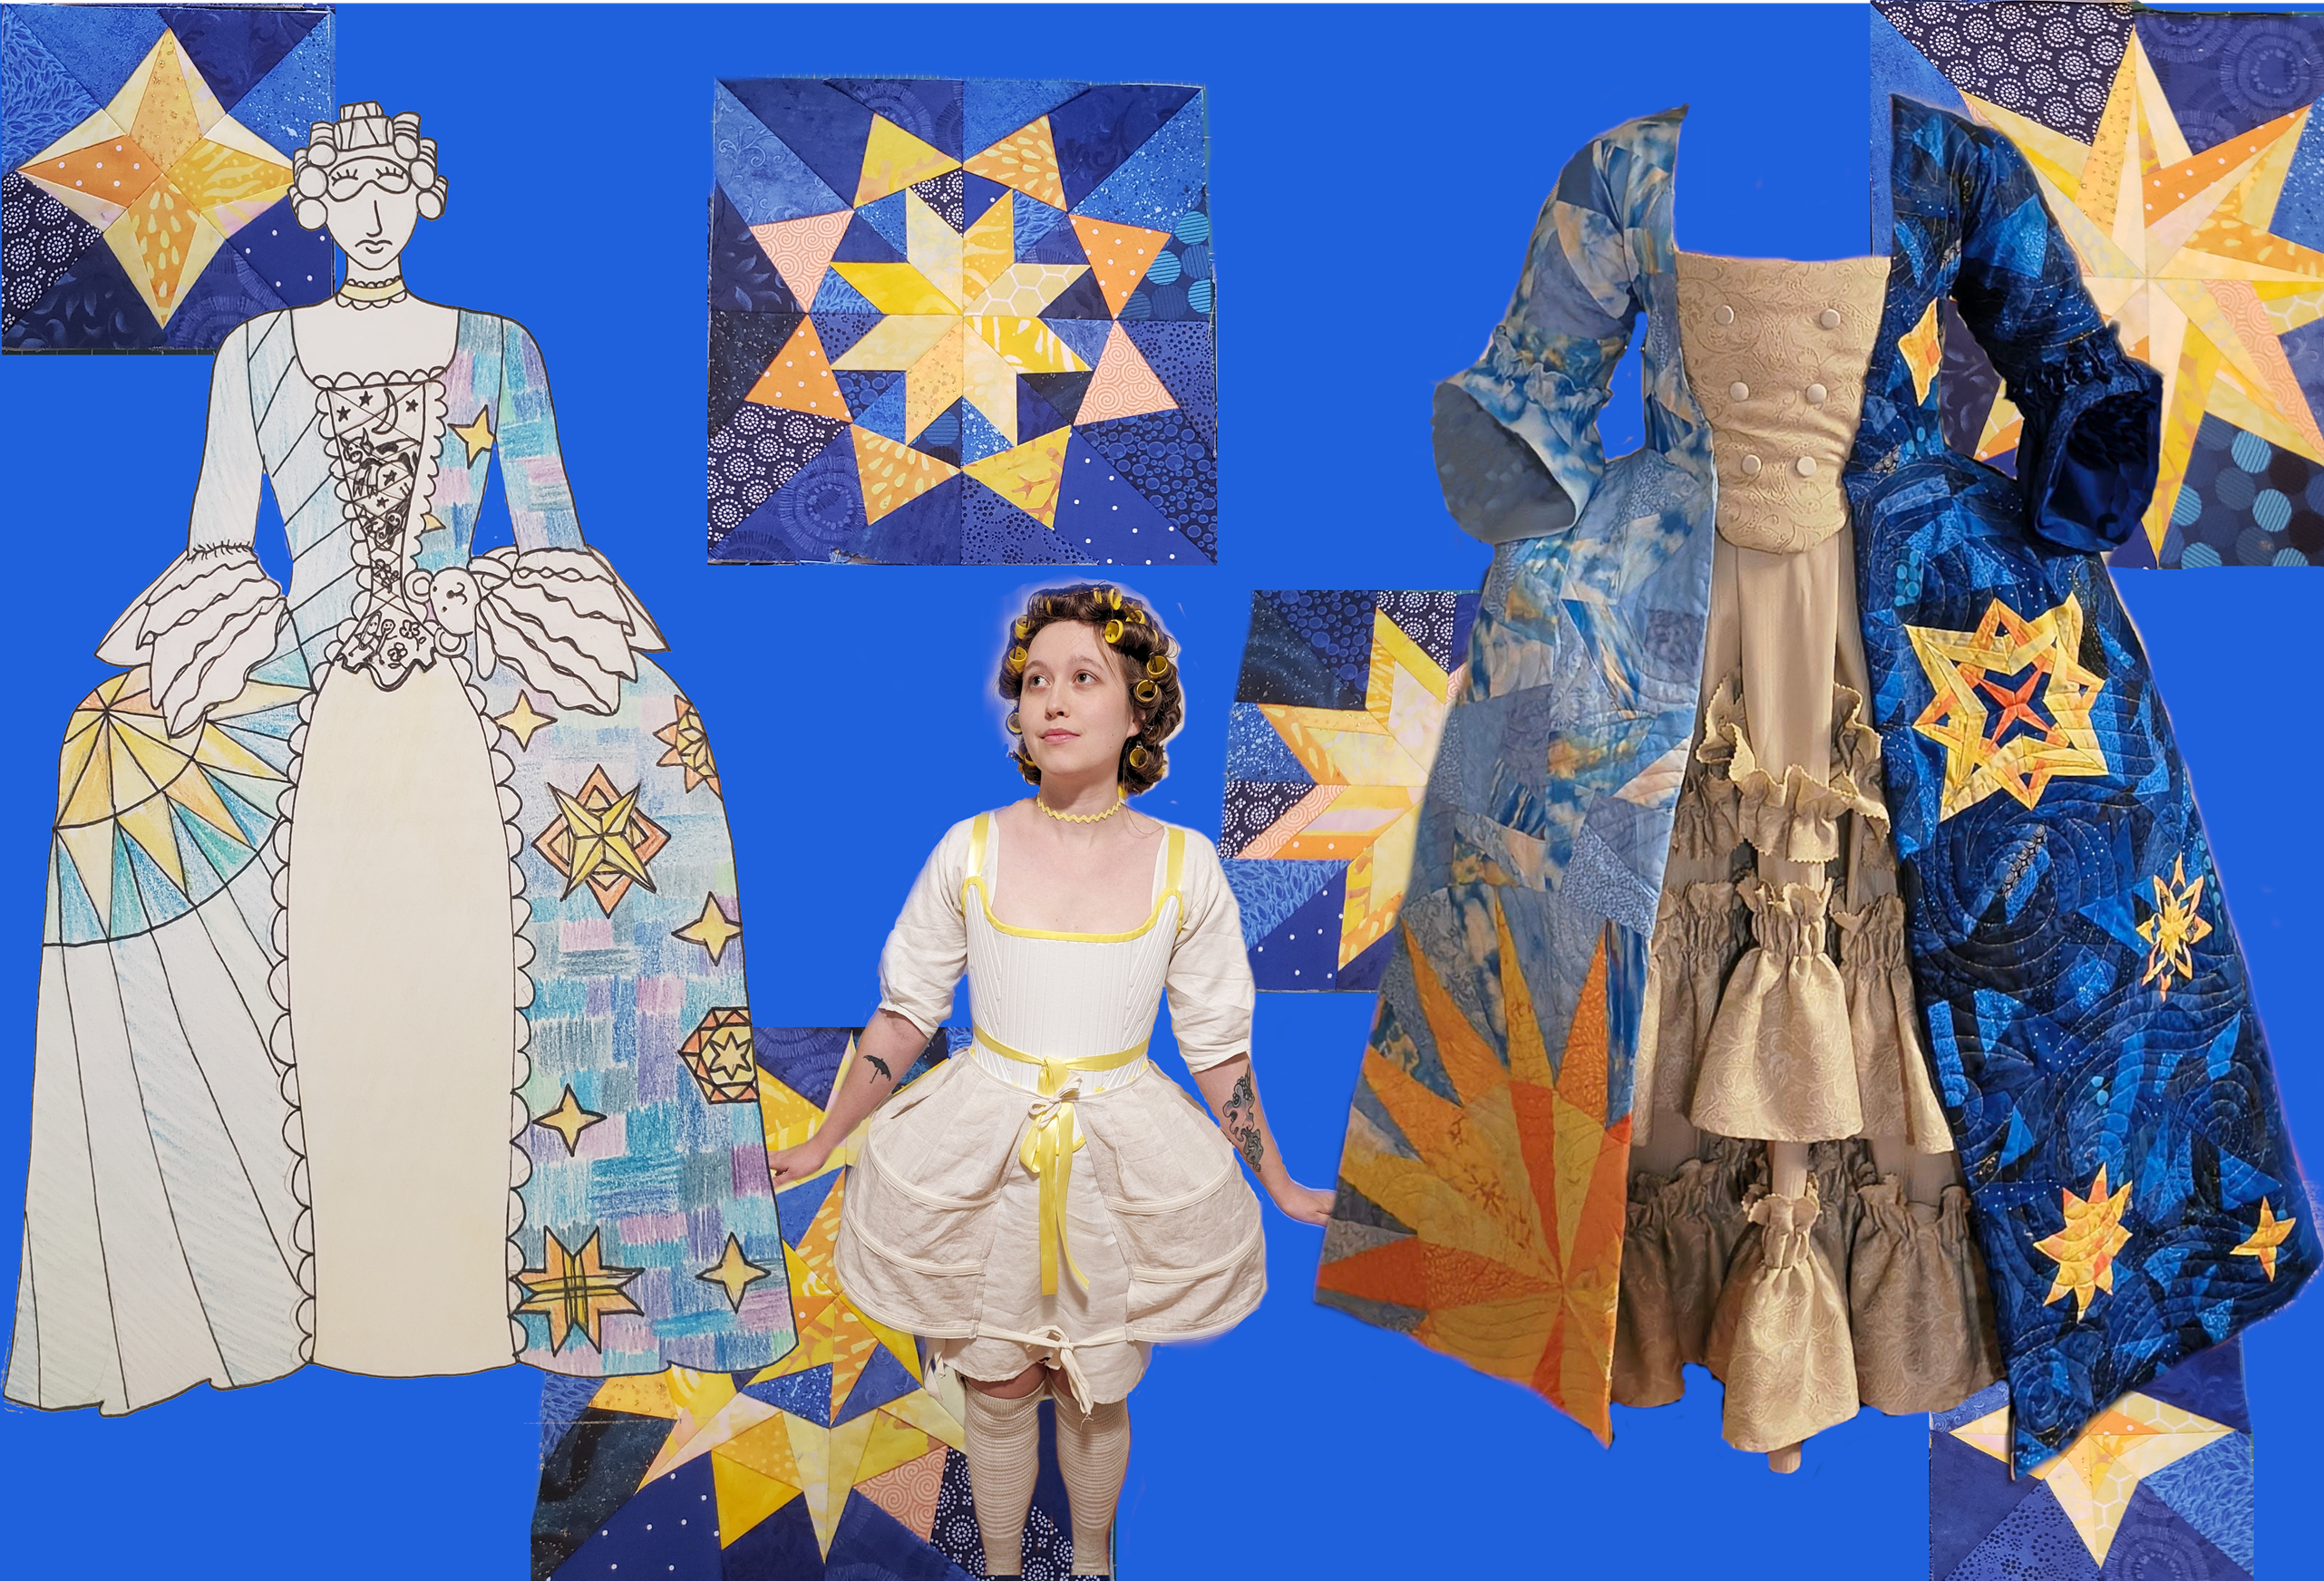
Two years, and several finished projects later, I am back and ready to finally finish Queen Mattress!
Where I left off: I was putting together my 100 night sky squares only to discover that after all that work...I still hadn't made enough. I started to paper piece more with the goal of making an additional 50 for the front right panel, shoulder strap, and sleeve. However, I quickly lost steam. I decided I would rather work on smaller projects that I could actually finish and wear in a short period of time, rather than this monster, plus do some costume work for my local theatre.
I am super glad I made that choice! It was a much needed break and it gave me plenty of time to figure out how I wanted to proceed with Queen Mattress.
I was having fun working on my me-made wardrobe, when a friend of mine mentioned he was planning an extravagant event: a MET Gala Art walk. The historic district of the city I'm in will have monthly art walks where galleries open their doors, serve snacks, and have artists available to talk about and sell their art. The one in May happens to be right around the MET Gala, whose theme this year is "Costume Art," with the official dress code announced as "Fashion Is Art." His idea was to have us all dress up in runway ready looks, take pictures, and look at art.
I thought to myself, "if I'm ever gonna finish this, it's now or never!!!" So, my deadline was set.
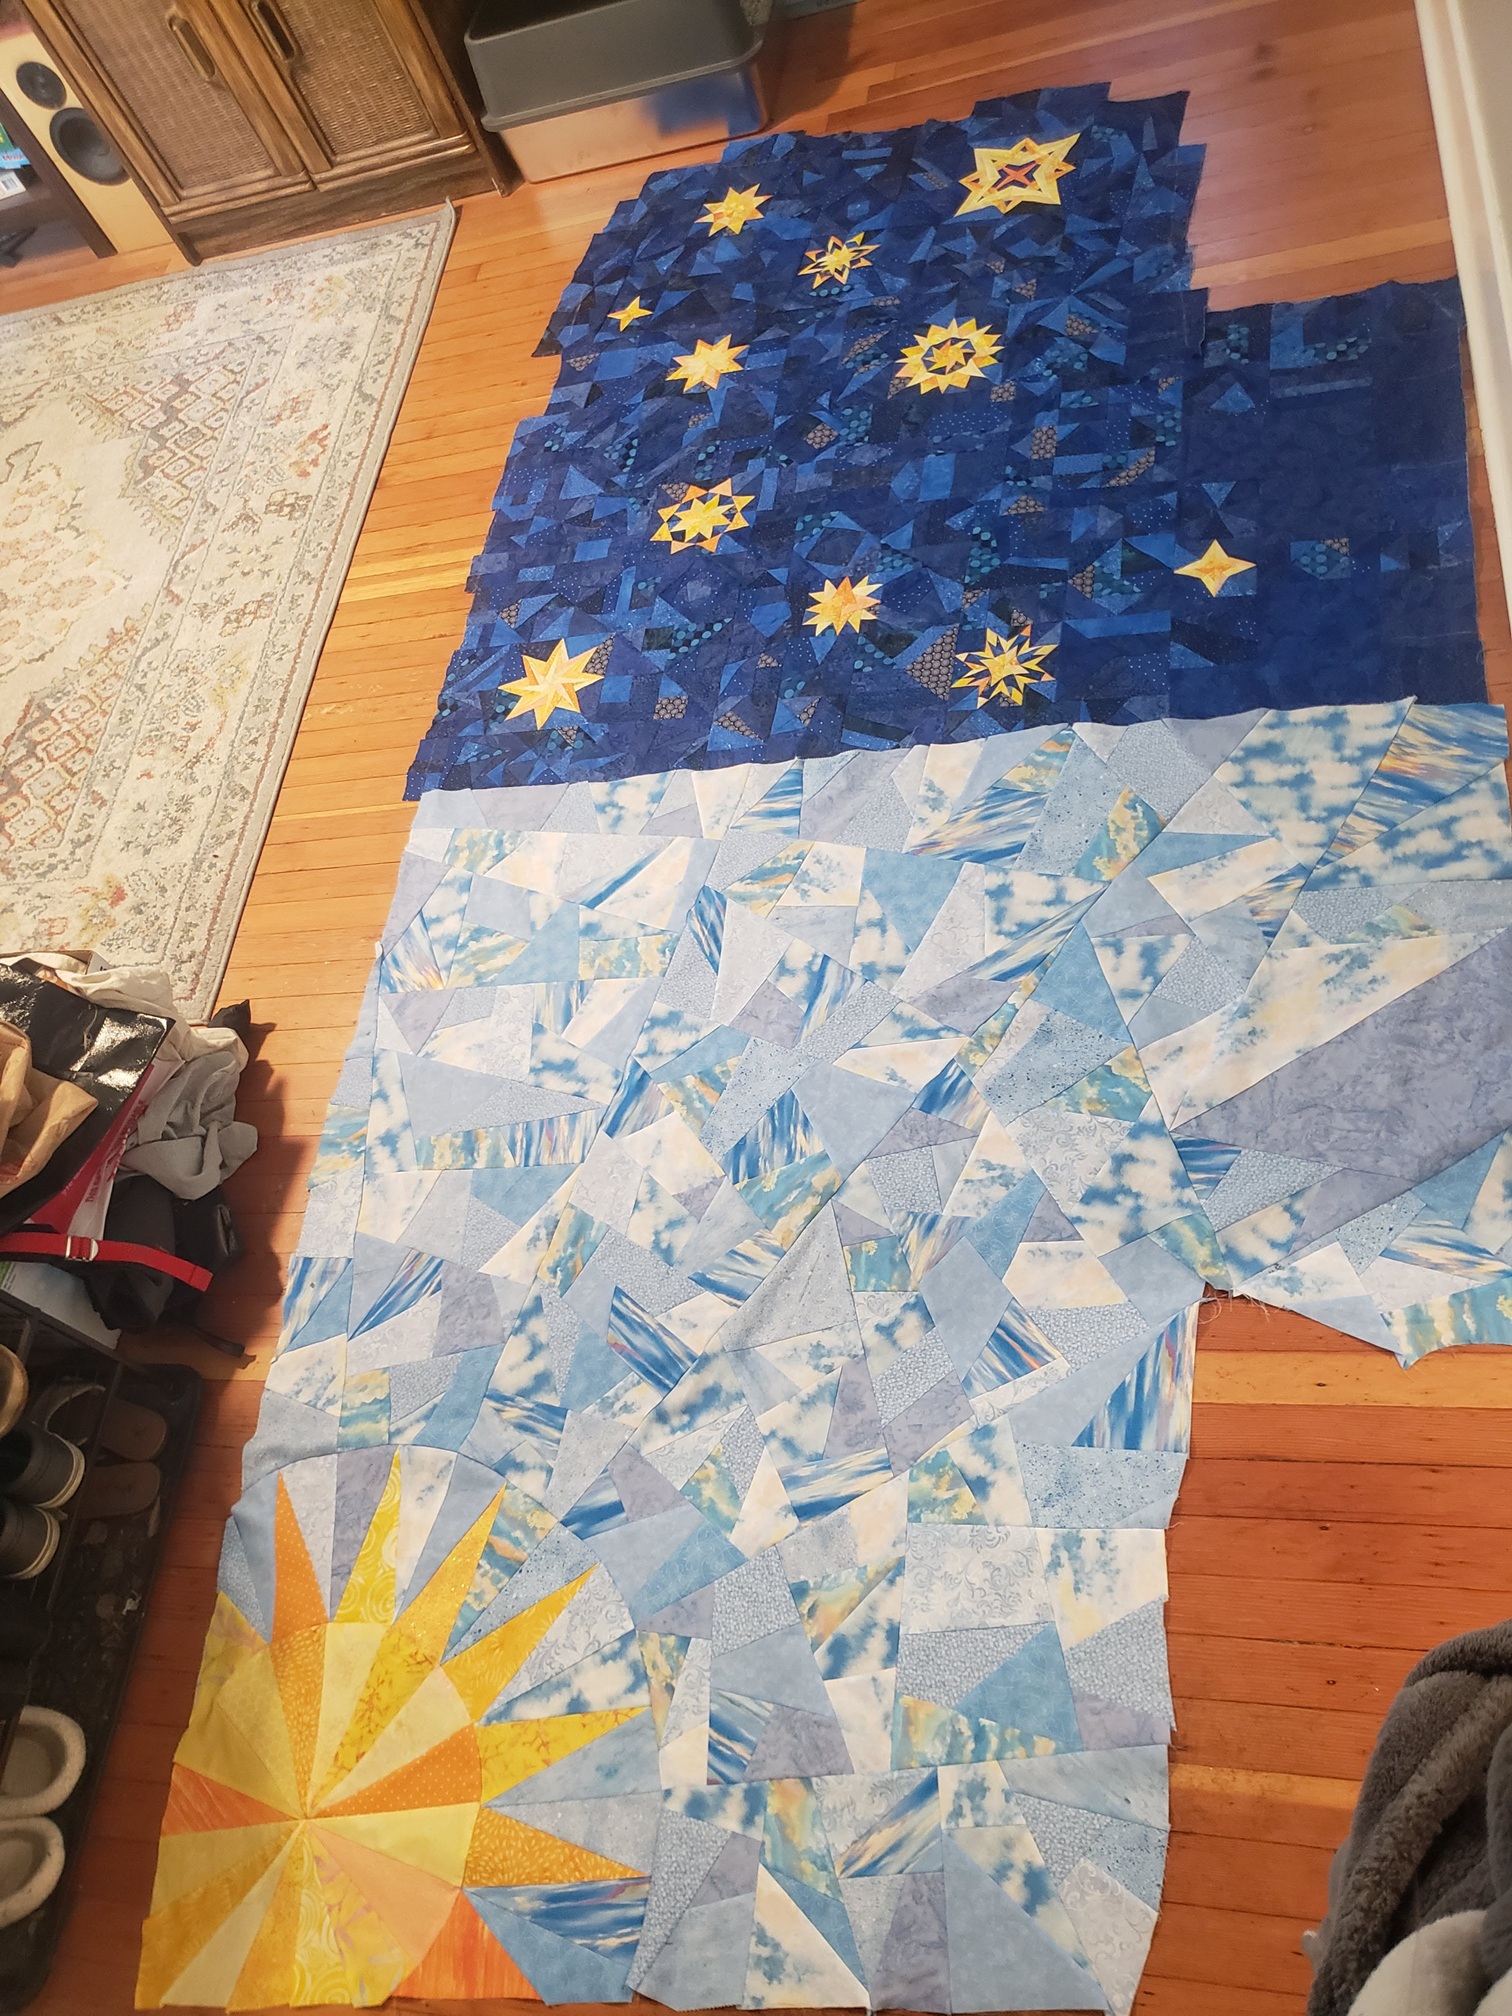
I was a busy little bee, and within a week had made a fair bit of progress. First: I finished making and assembling the night sky squares into the aforementioned pattern pieces I was missing.
I even had enough left over to eventually make a matching waistcoat for my partner to wear!
Next, I reached out to my local longarm quilter who did an amazing job on the crib quilt I made in December. She was fully on board to help me quilt this dress. For those of you who have been following along, I was previously filled with indecision about whether or not I would quilt this myself, and if I would even add batting since it would introduce a lot of bulk. In the end, I decided I would rather outsource to someone who knew what they were doing, than struggle to quilt on my tiny domestic sewing machine. I also figured out where I wanted the batting and backing to go for the best effect. Here is a little sketch to illustrate:

The very bottom up to the pocket slit would have three layers: the backing, batting, and quilt top; the pocket slit to the waist would have two layers: the backing and the quilt top; and the bodice would be one layer: the quilt top. Once everything was in pinned in place, the whole dress was to be quilted. Only then would I be able to drape, pleat, and sew the dress onto the bodice lining. The longarm quilter was so kind, and helpful in making these decisions I was stuck on for so long, and I am super grateful for her advice! If you are in the Seattle area (or anywhere really, since she accepts orders via mail) I 100% recommend Goldfinch Quilting.
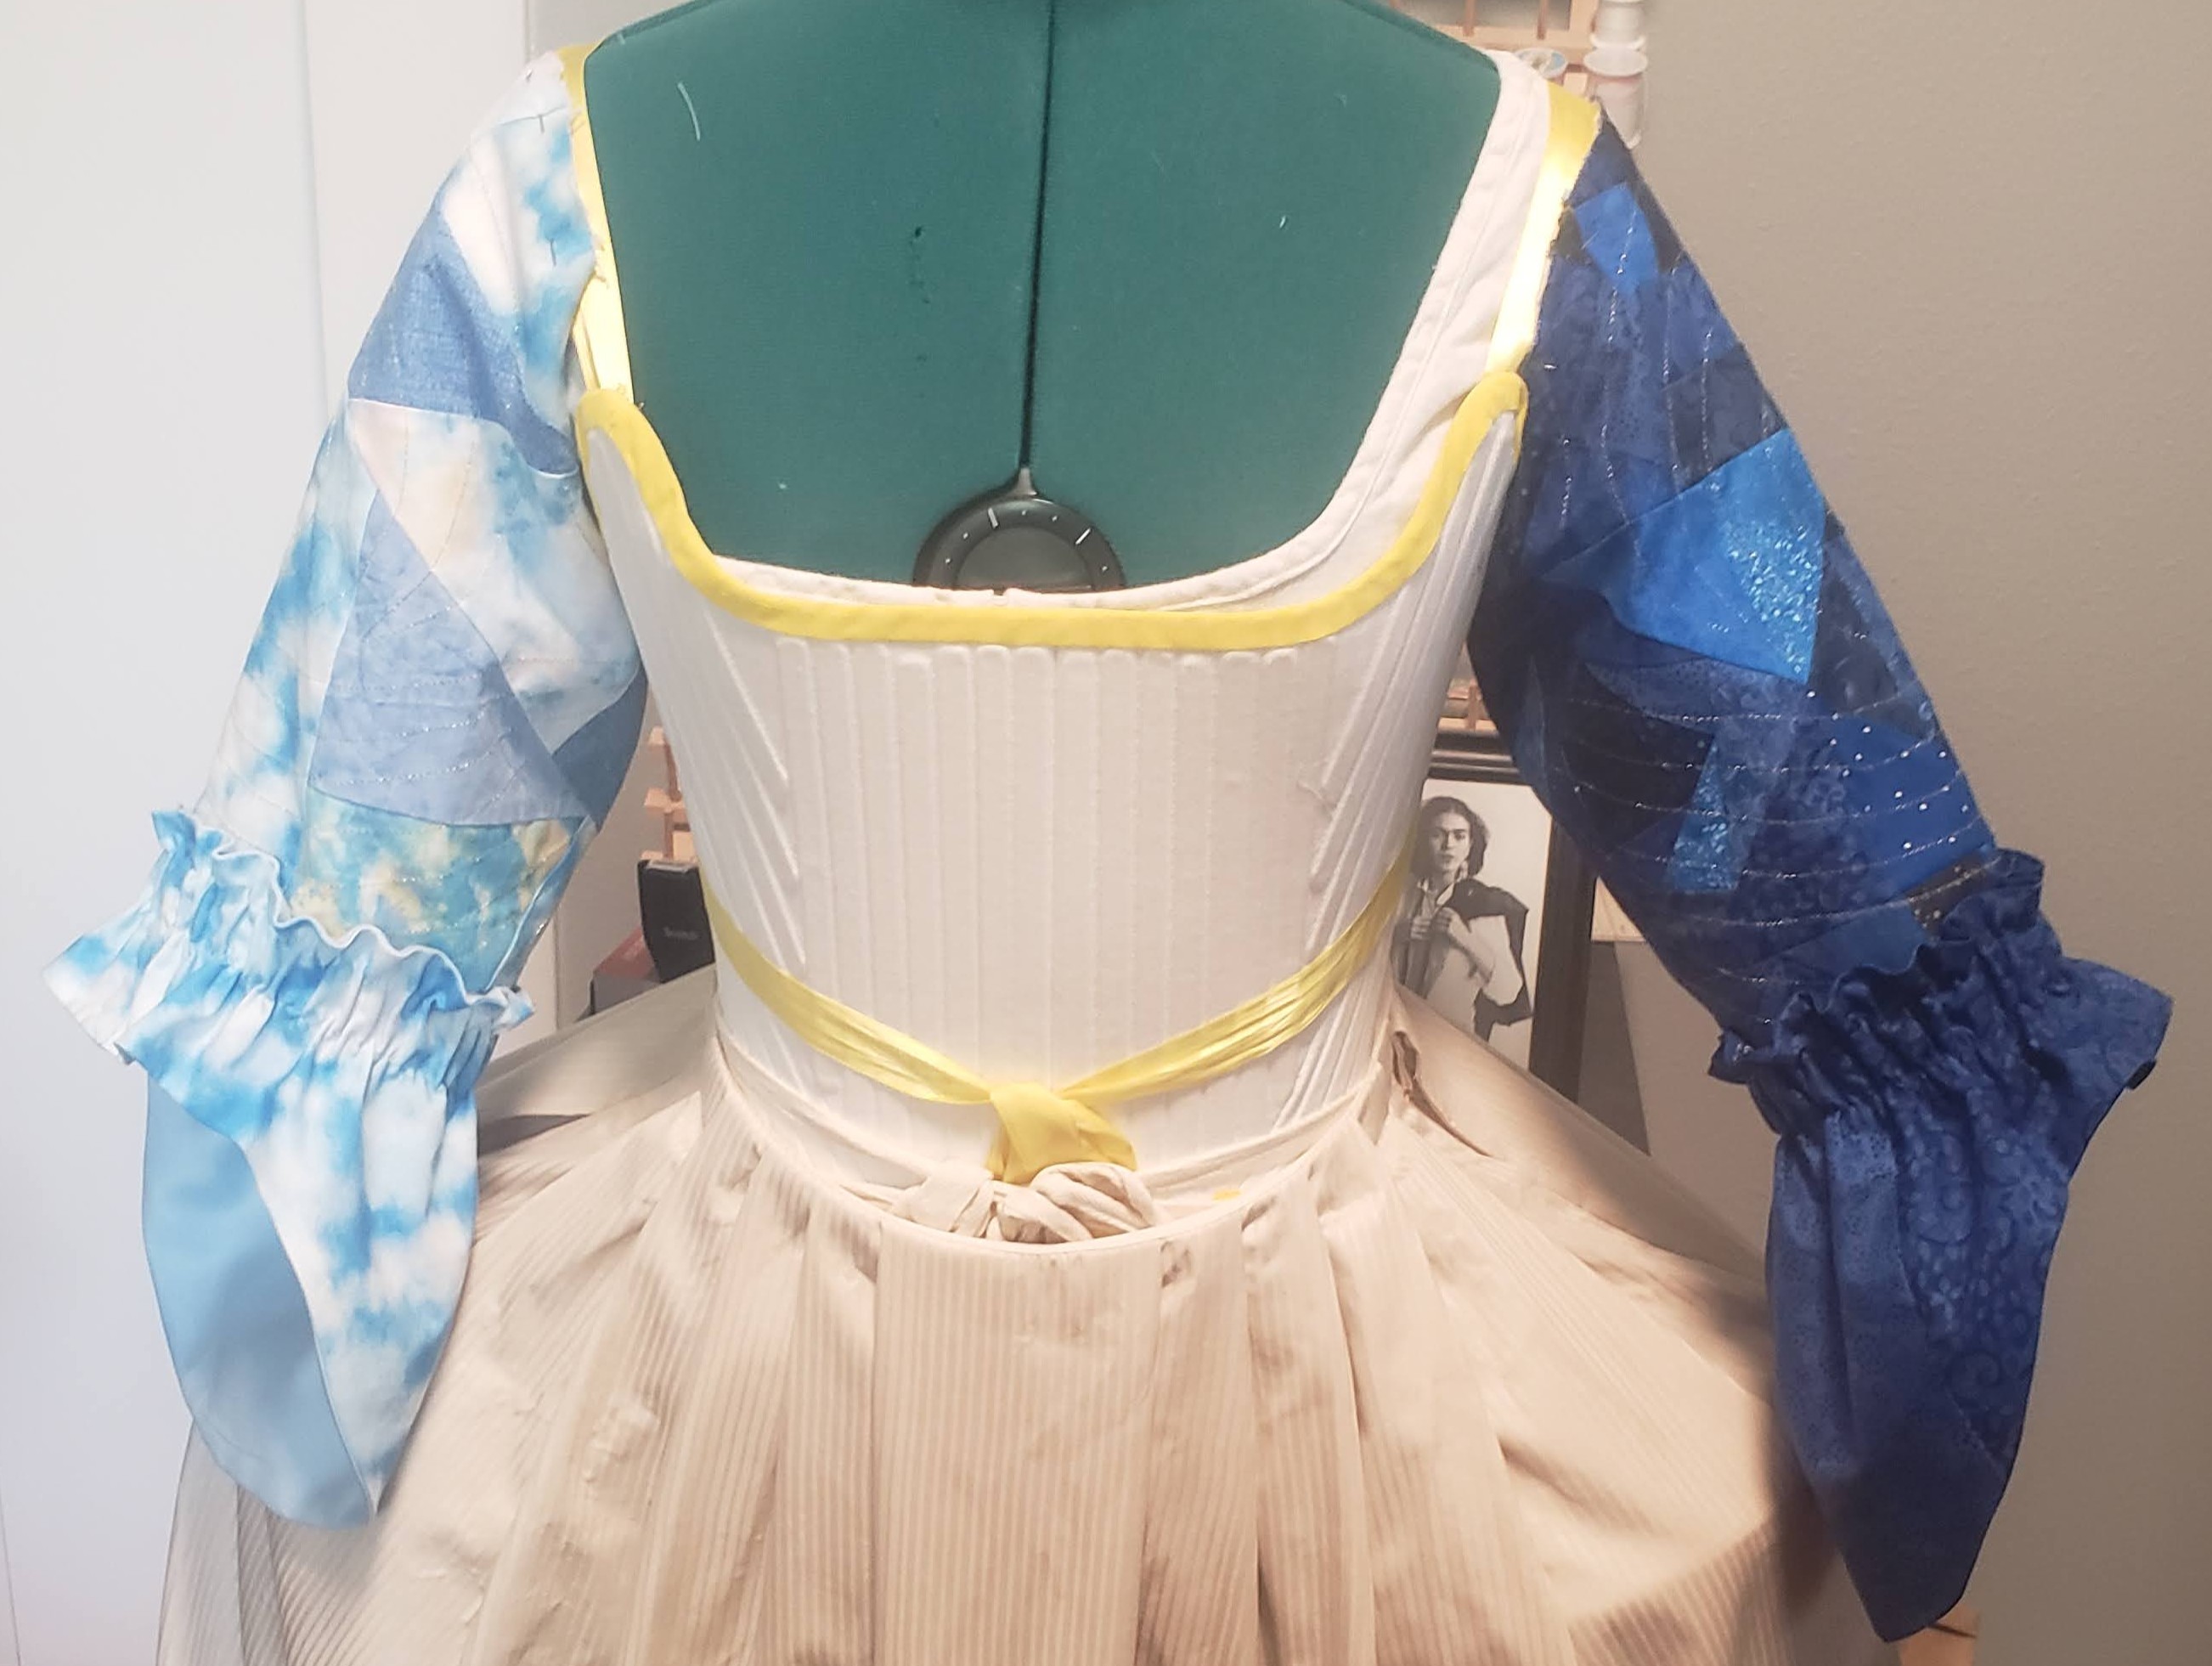
After talking with the longarm quilter to make sure she had all the materials and info, I finally started on the left side of the dress. It was Day Time ;)
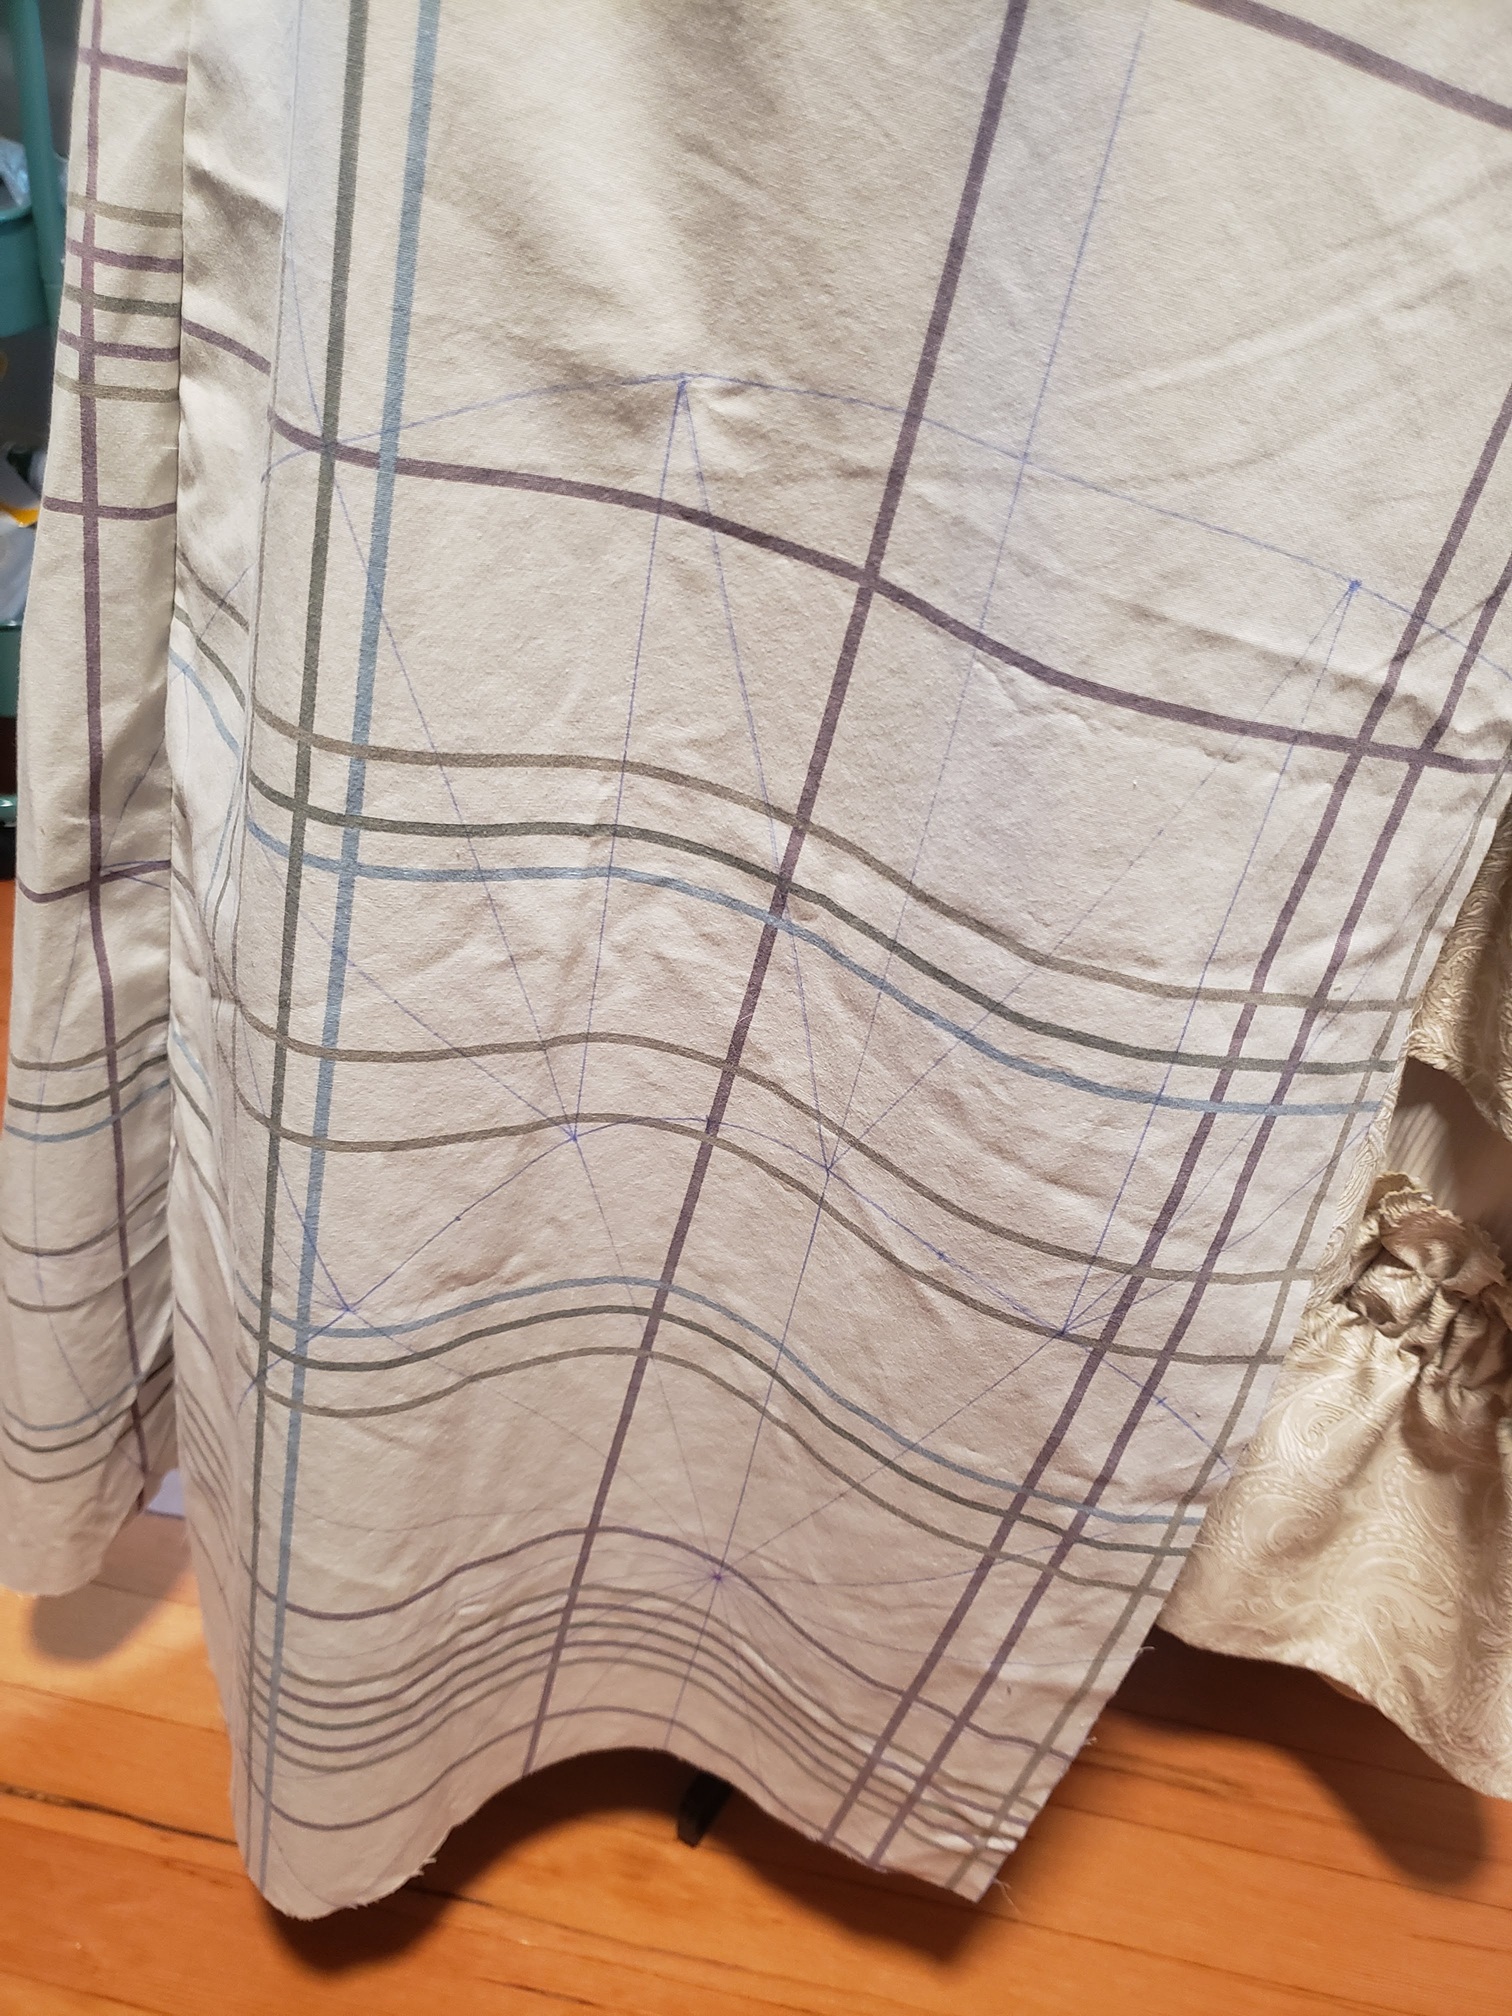
I started by attempting to draw the sun onto my mock-up fabric where I had it on my sketch. I knew it would be tricky, given all the pleats in that area, but I really wanted to make it work. (I know the lines are barely visible in these photos, but here is the sun pleated on the mannequin, and then laid flat on the table).
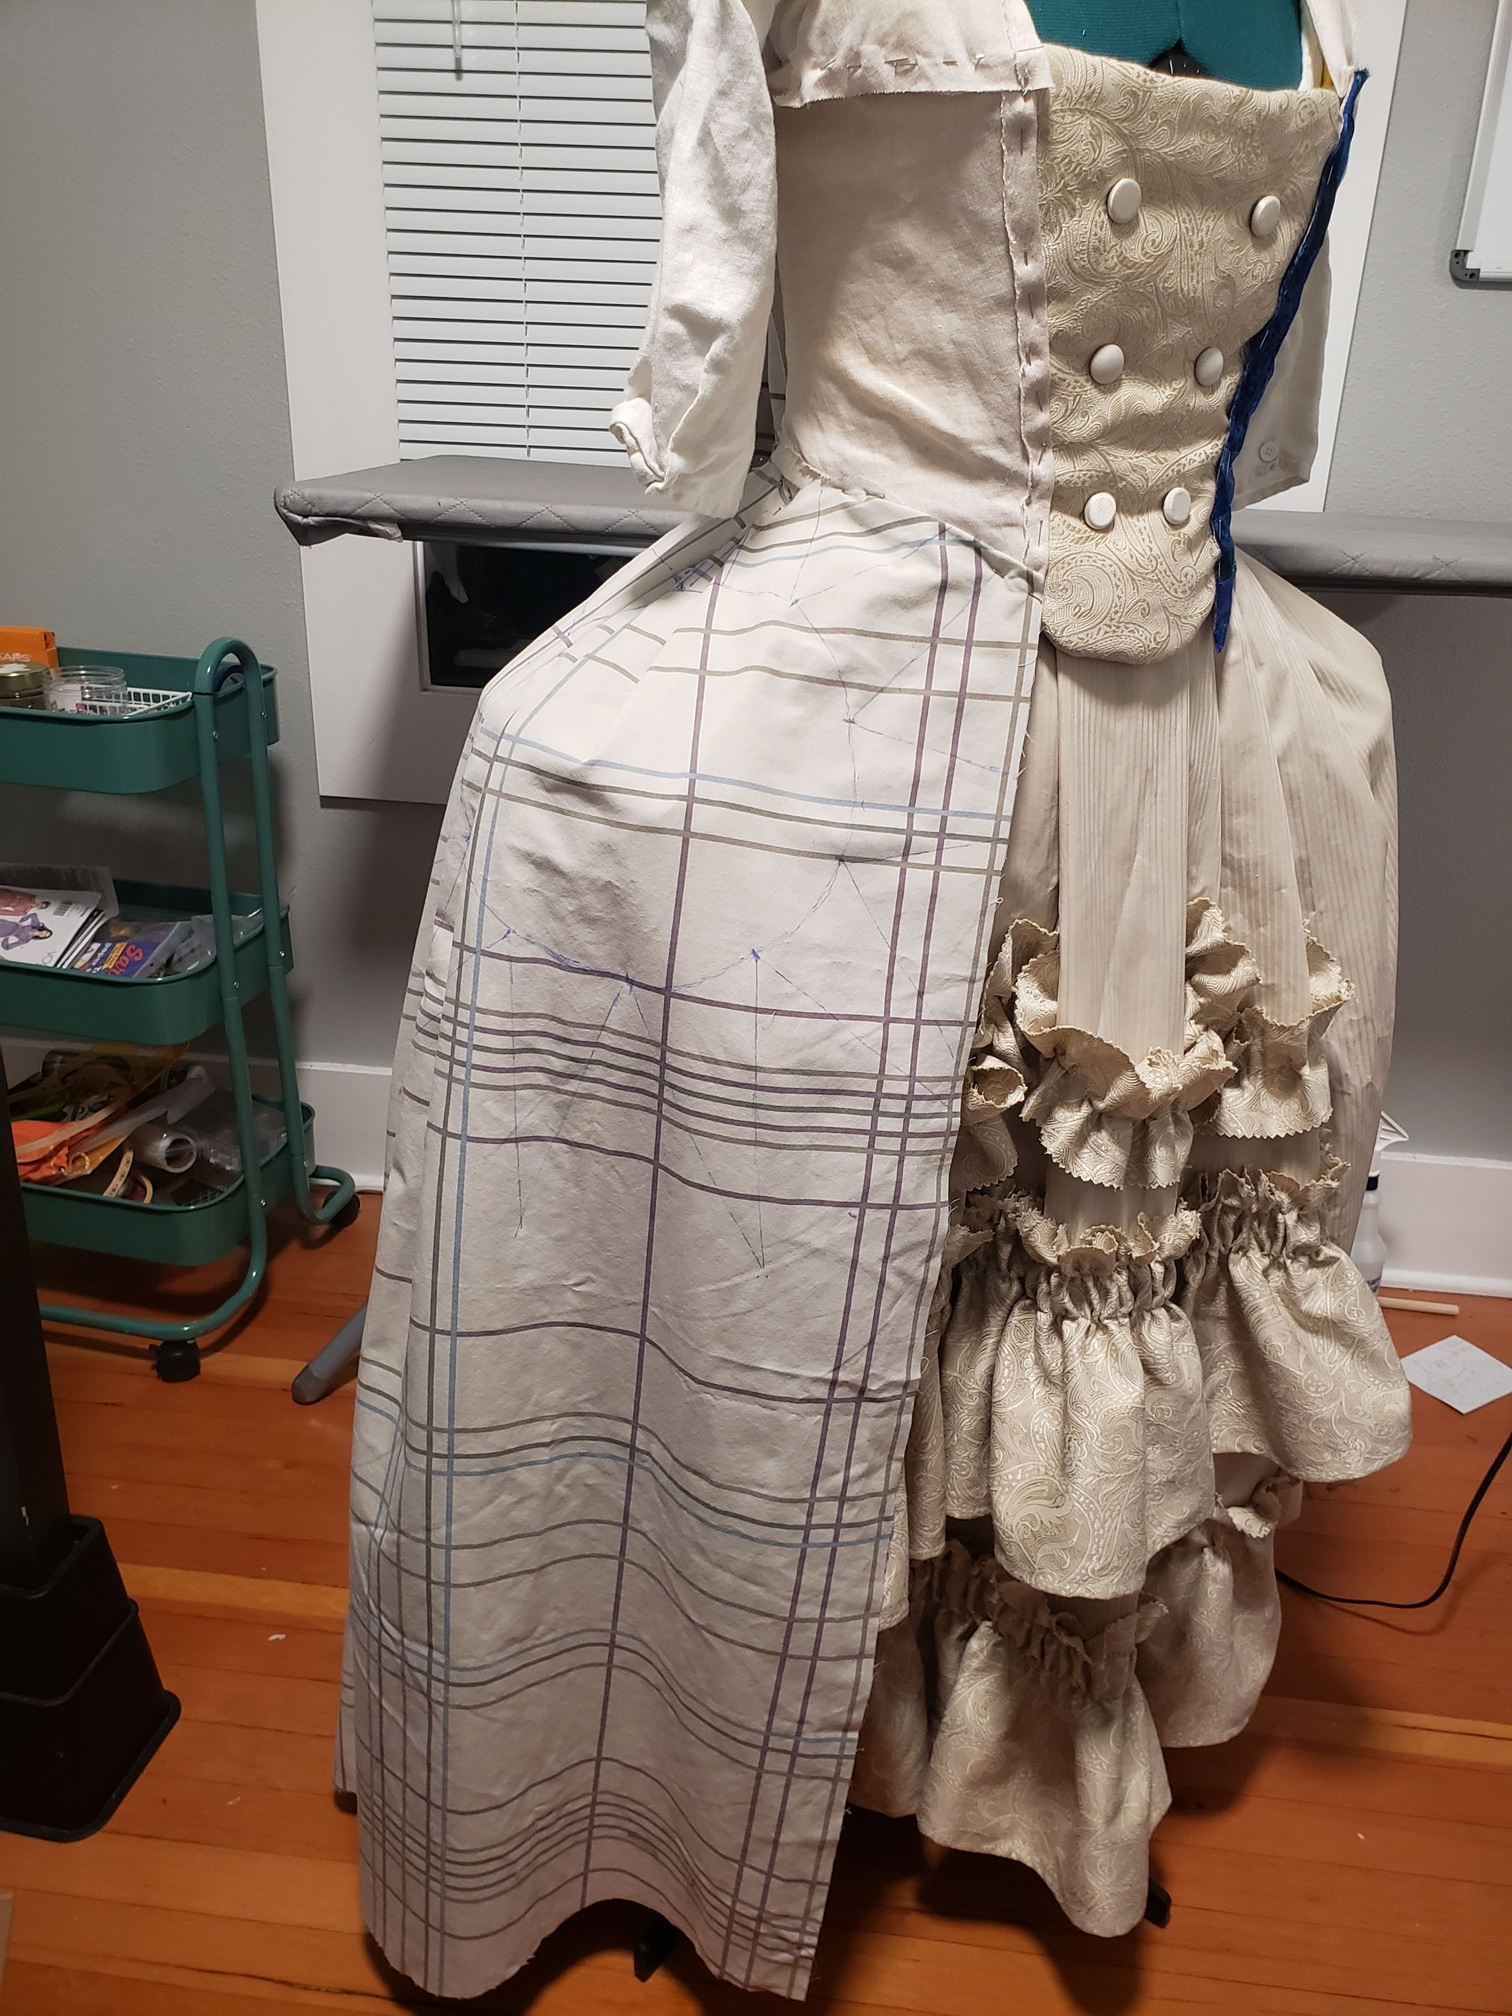
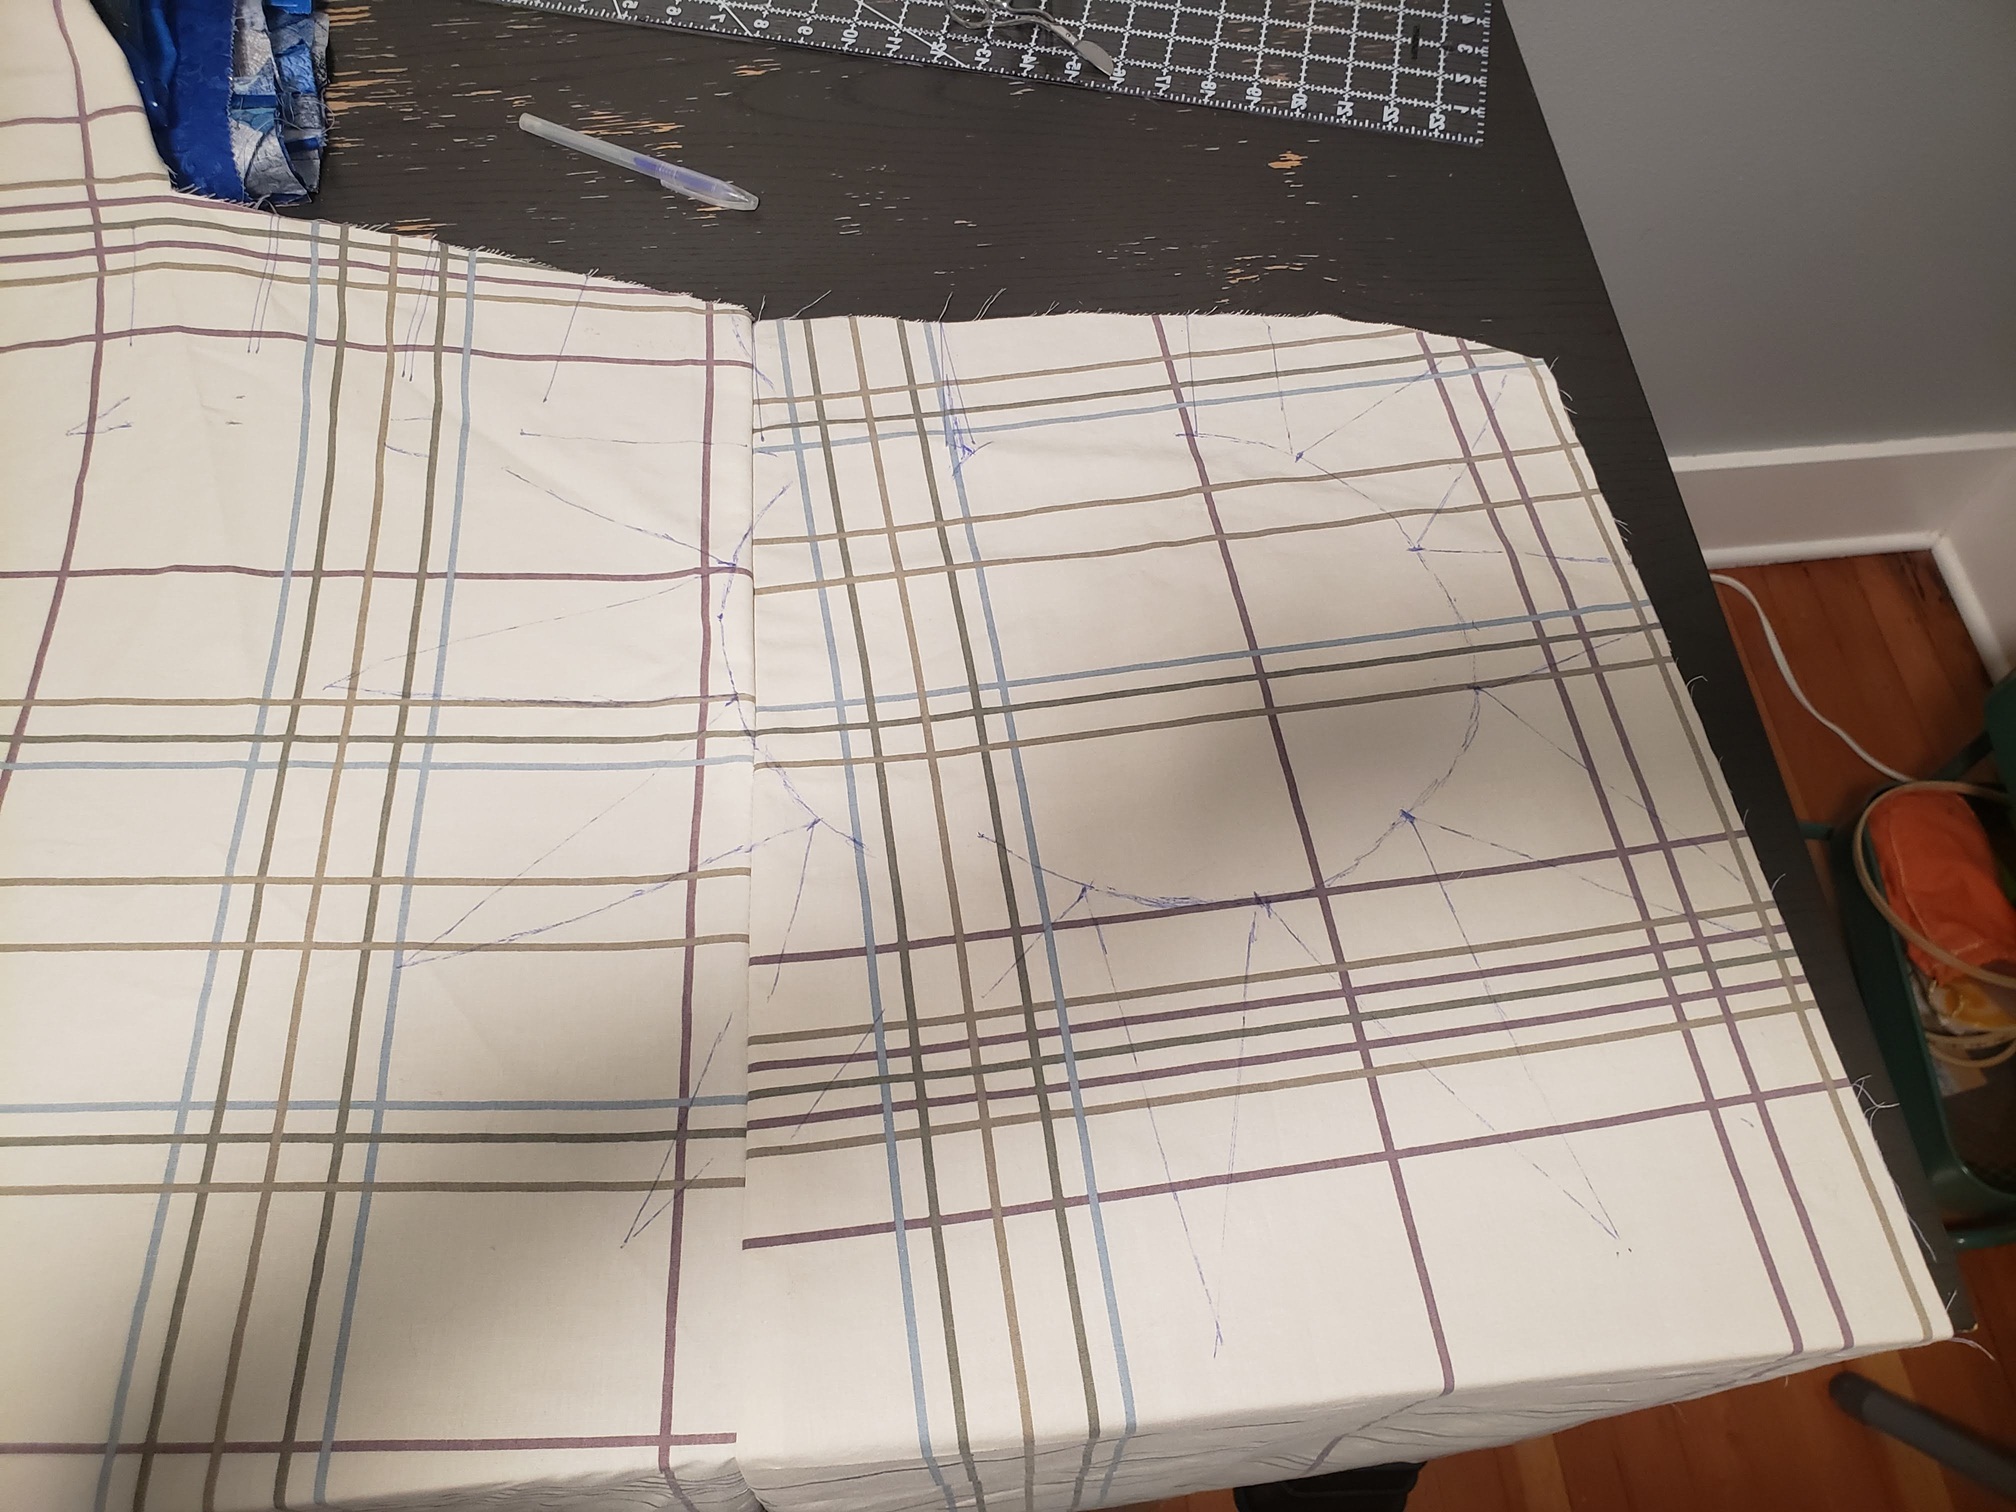
It would have been impossible to piece something that would look decent even when the fabric shifted. I decided to pivot and place the sun in a location that made more sense. I moved it to the bottom front corner of the dress.
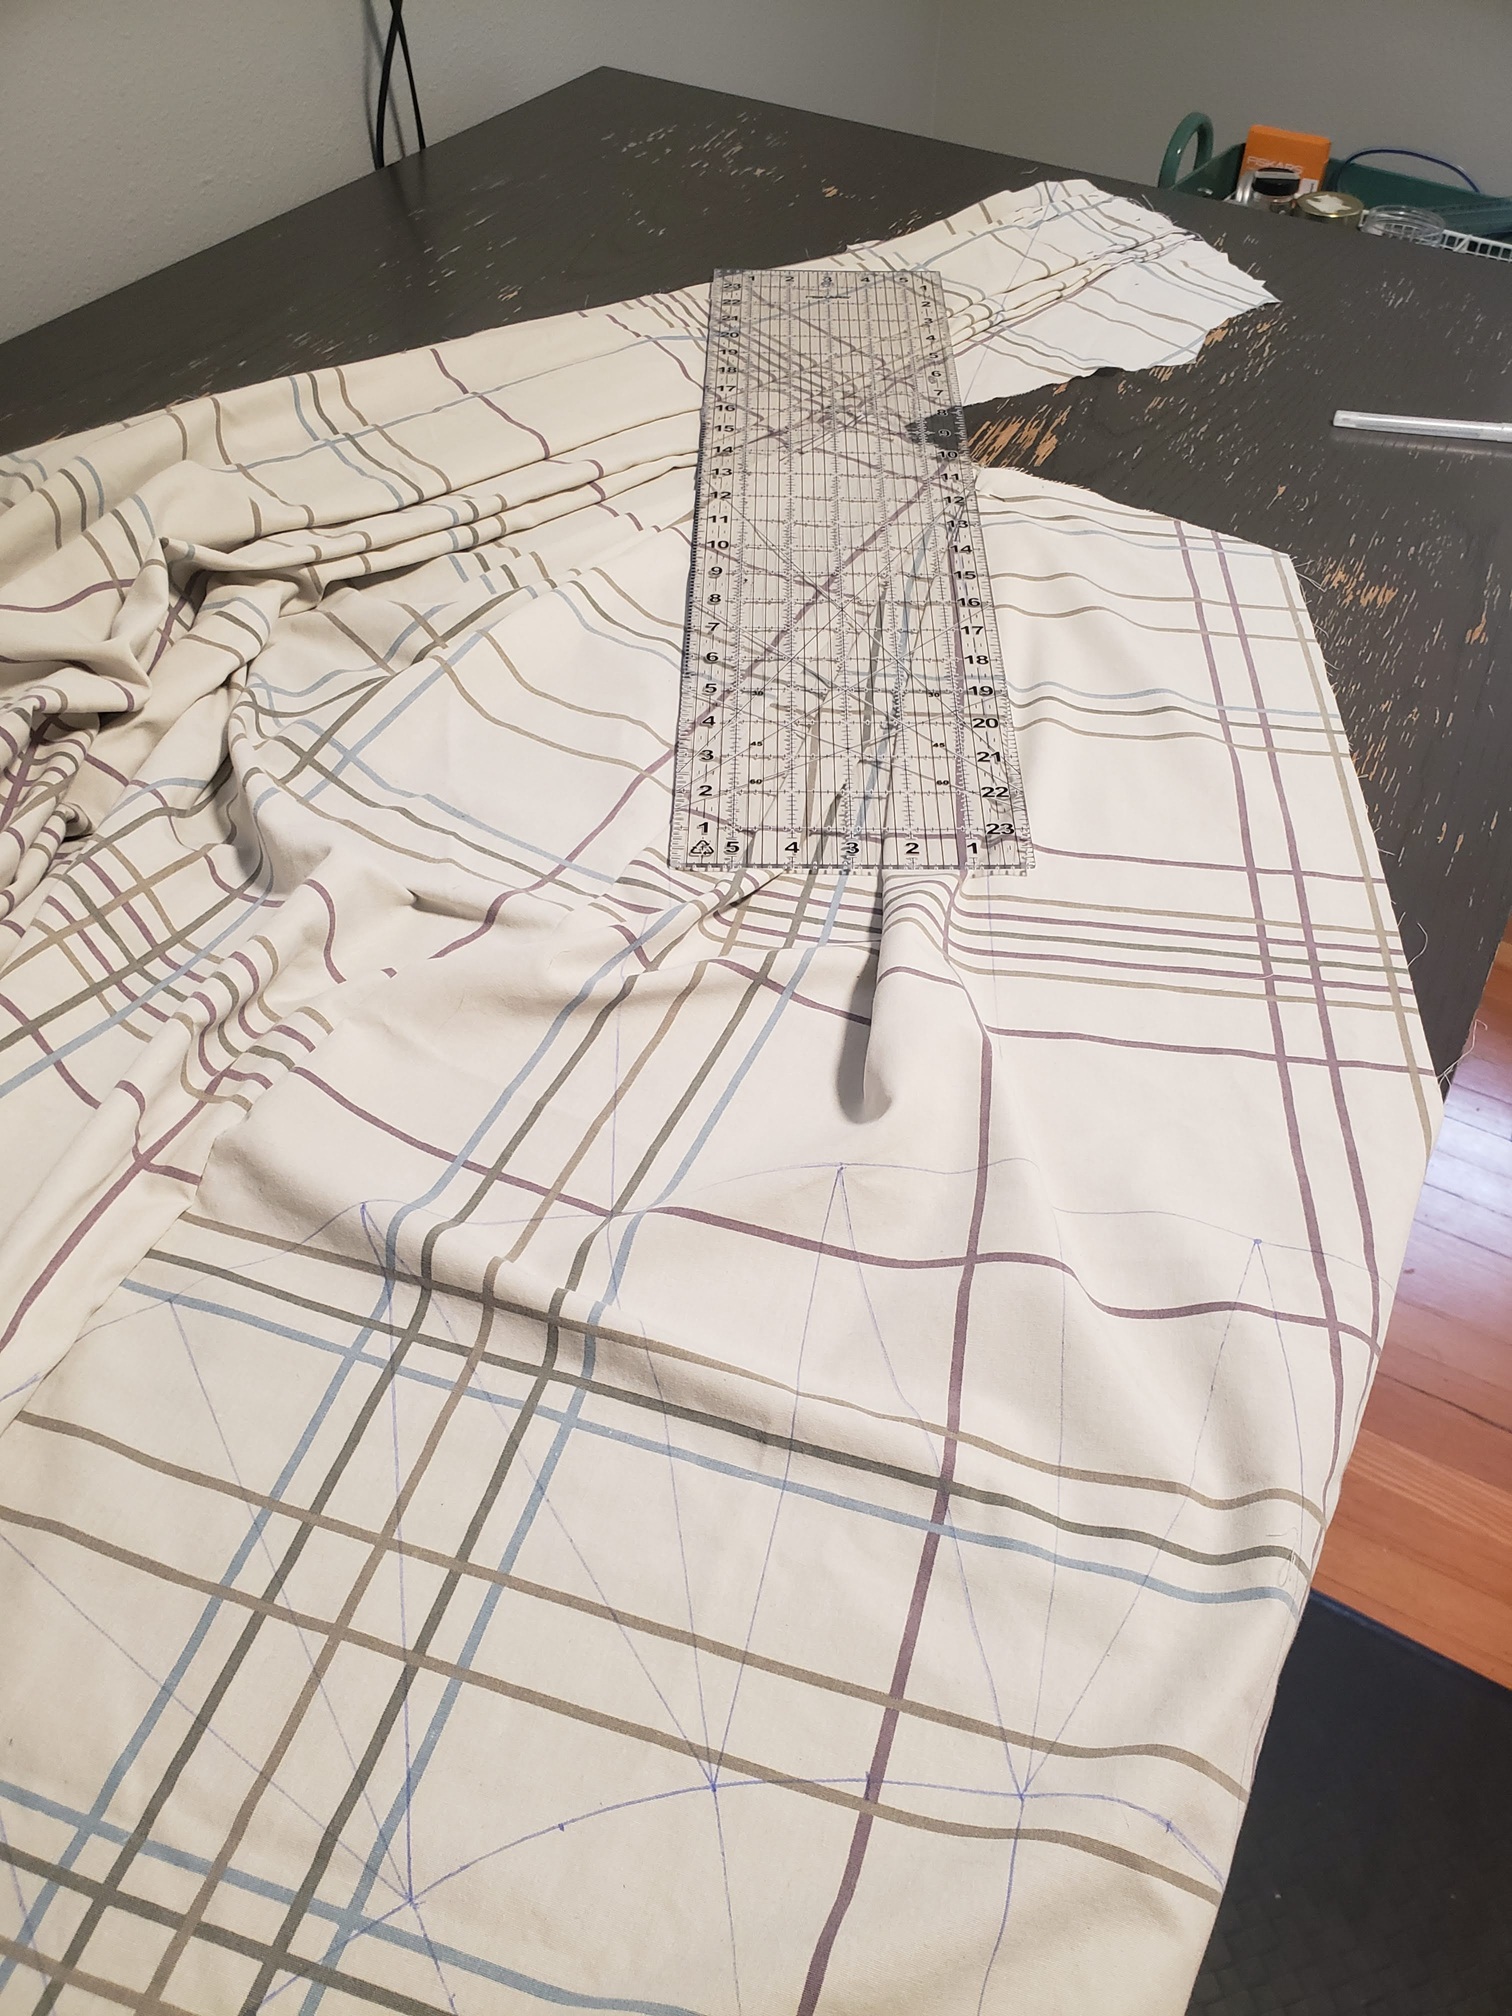
I drew lines extending out from the sun so that the sky patchwork would follow its rays. I also pleated it and drew more lines that would give the impression that the rays were straight even when folded. From there I drew somewhat random configurations of triangles and quadrangles to fill the area. At first I drew them a little too dense, but luckily, since I used a heat-erasable pen, I just ironed them away and started fresh.
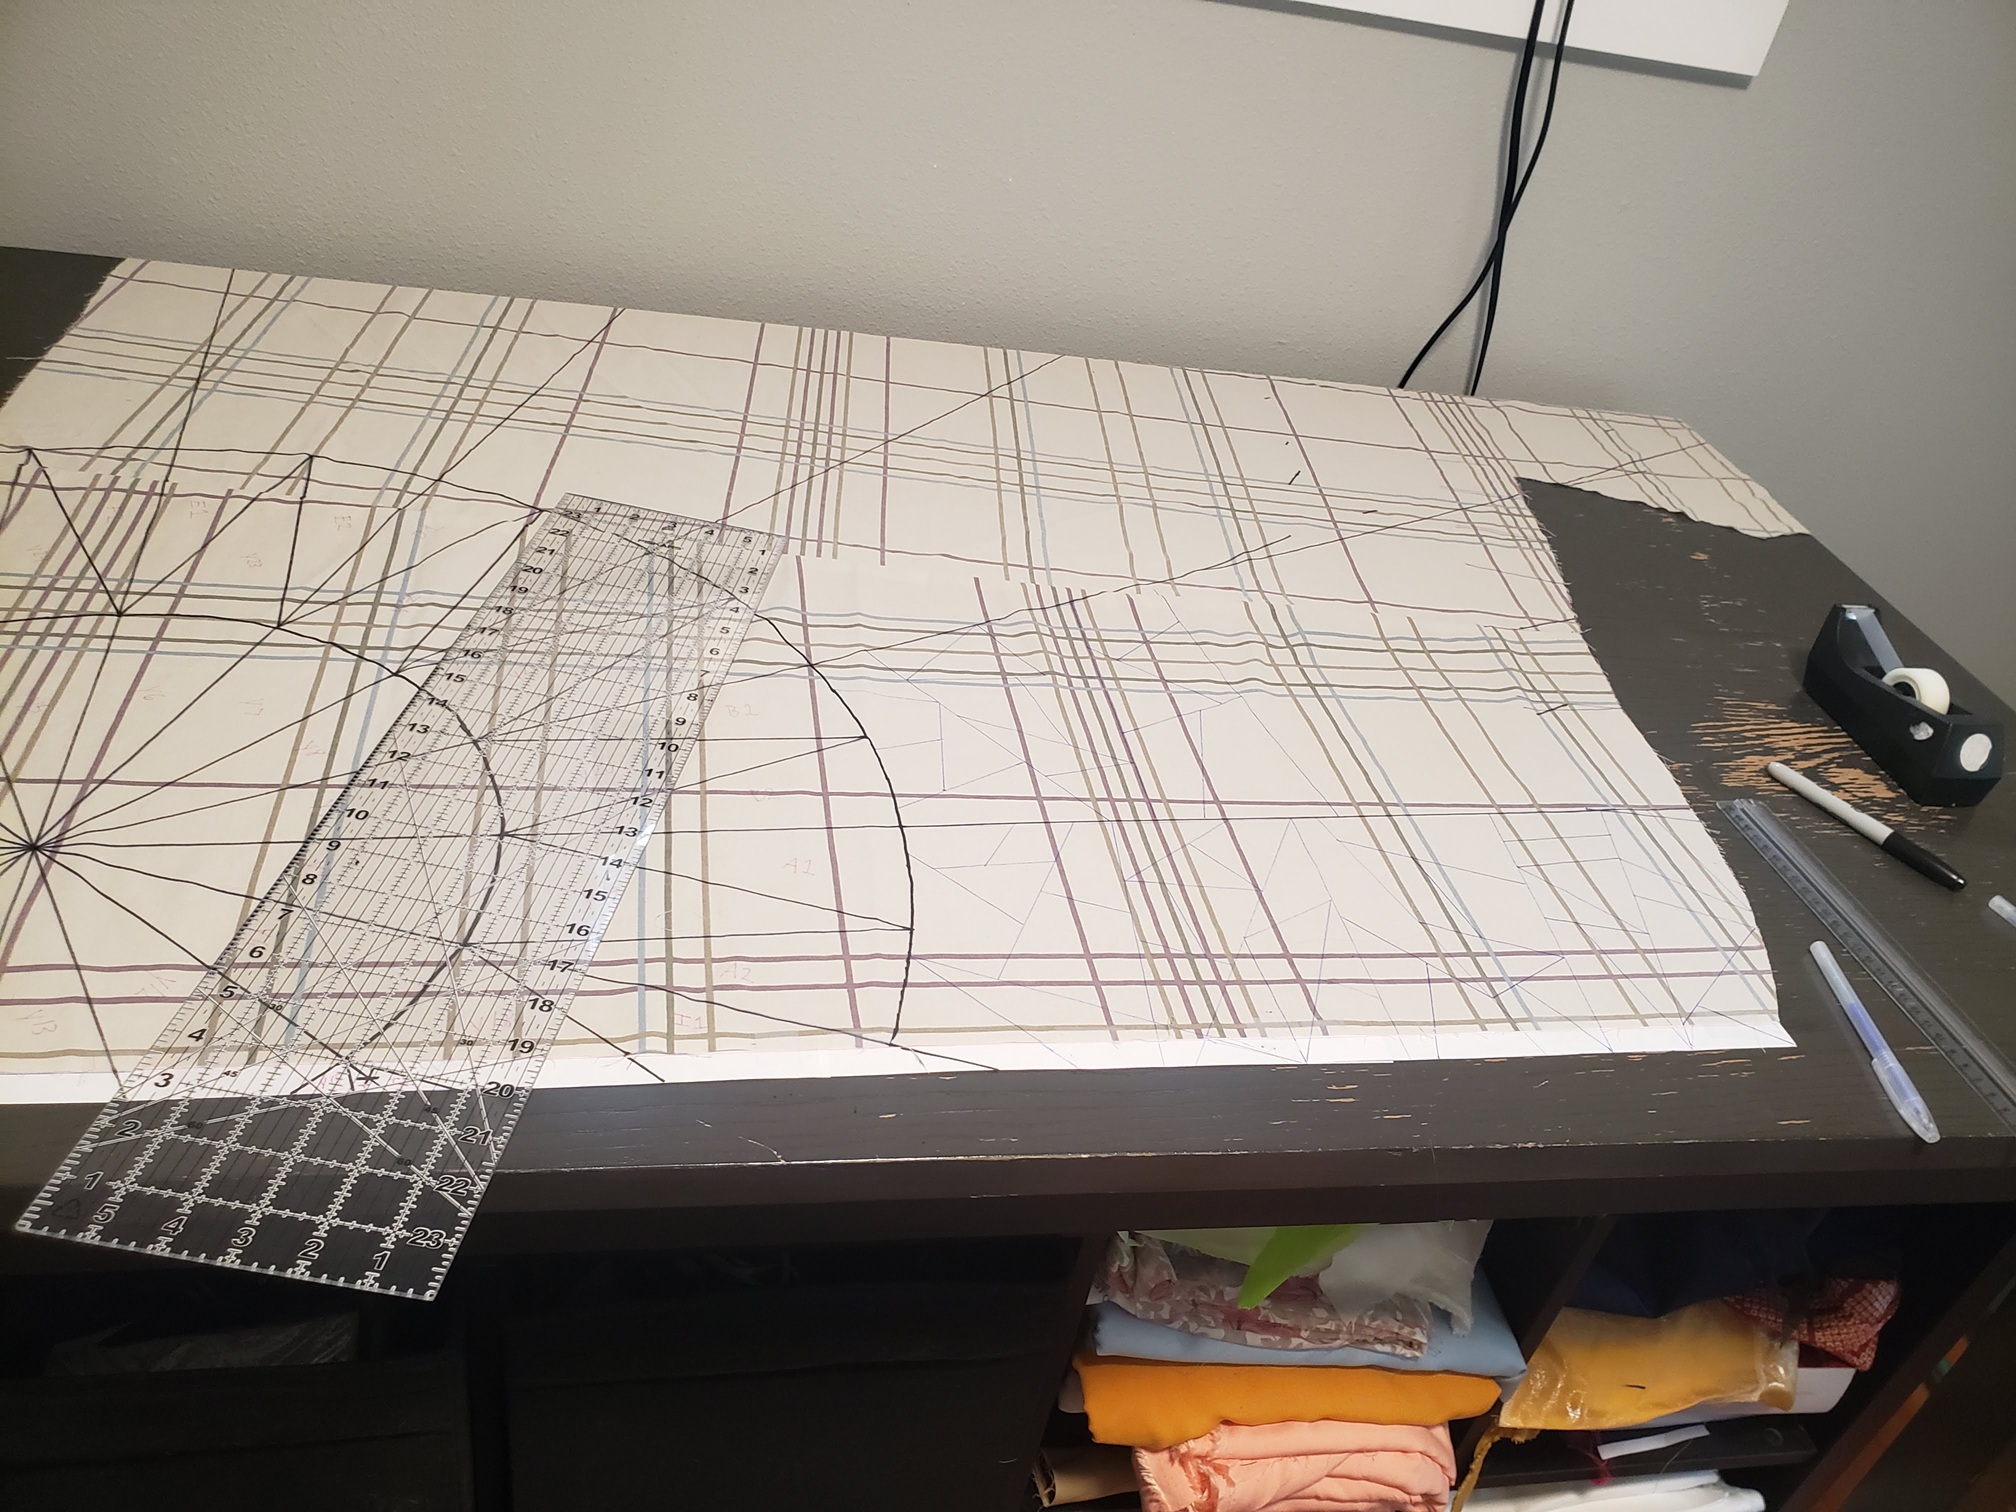
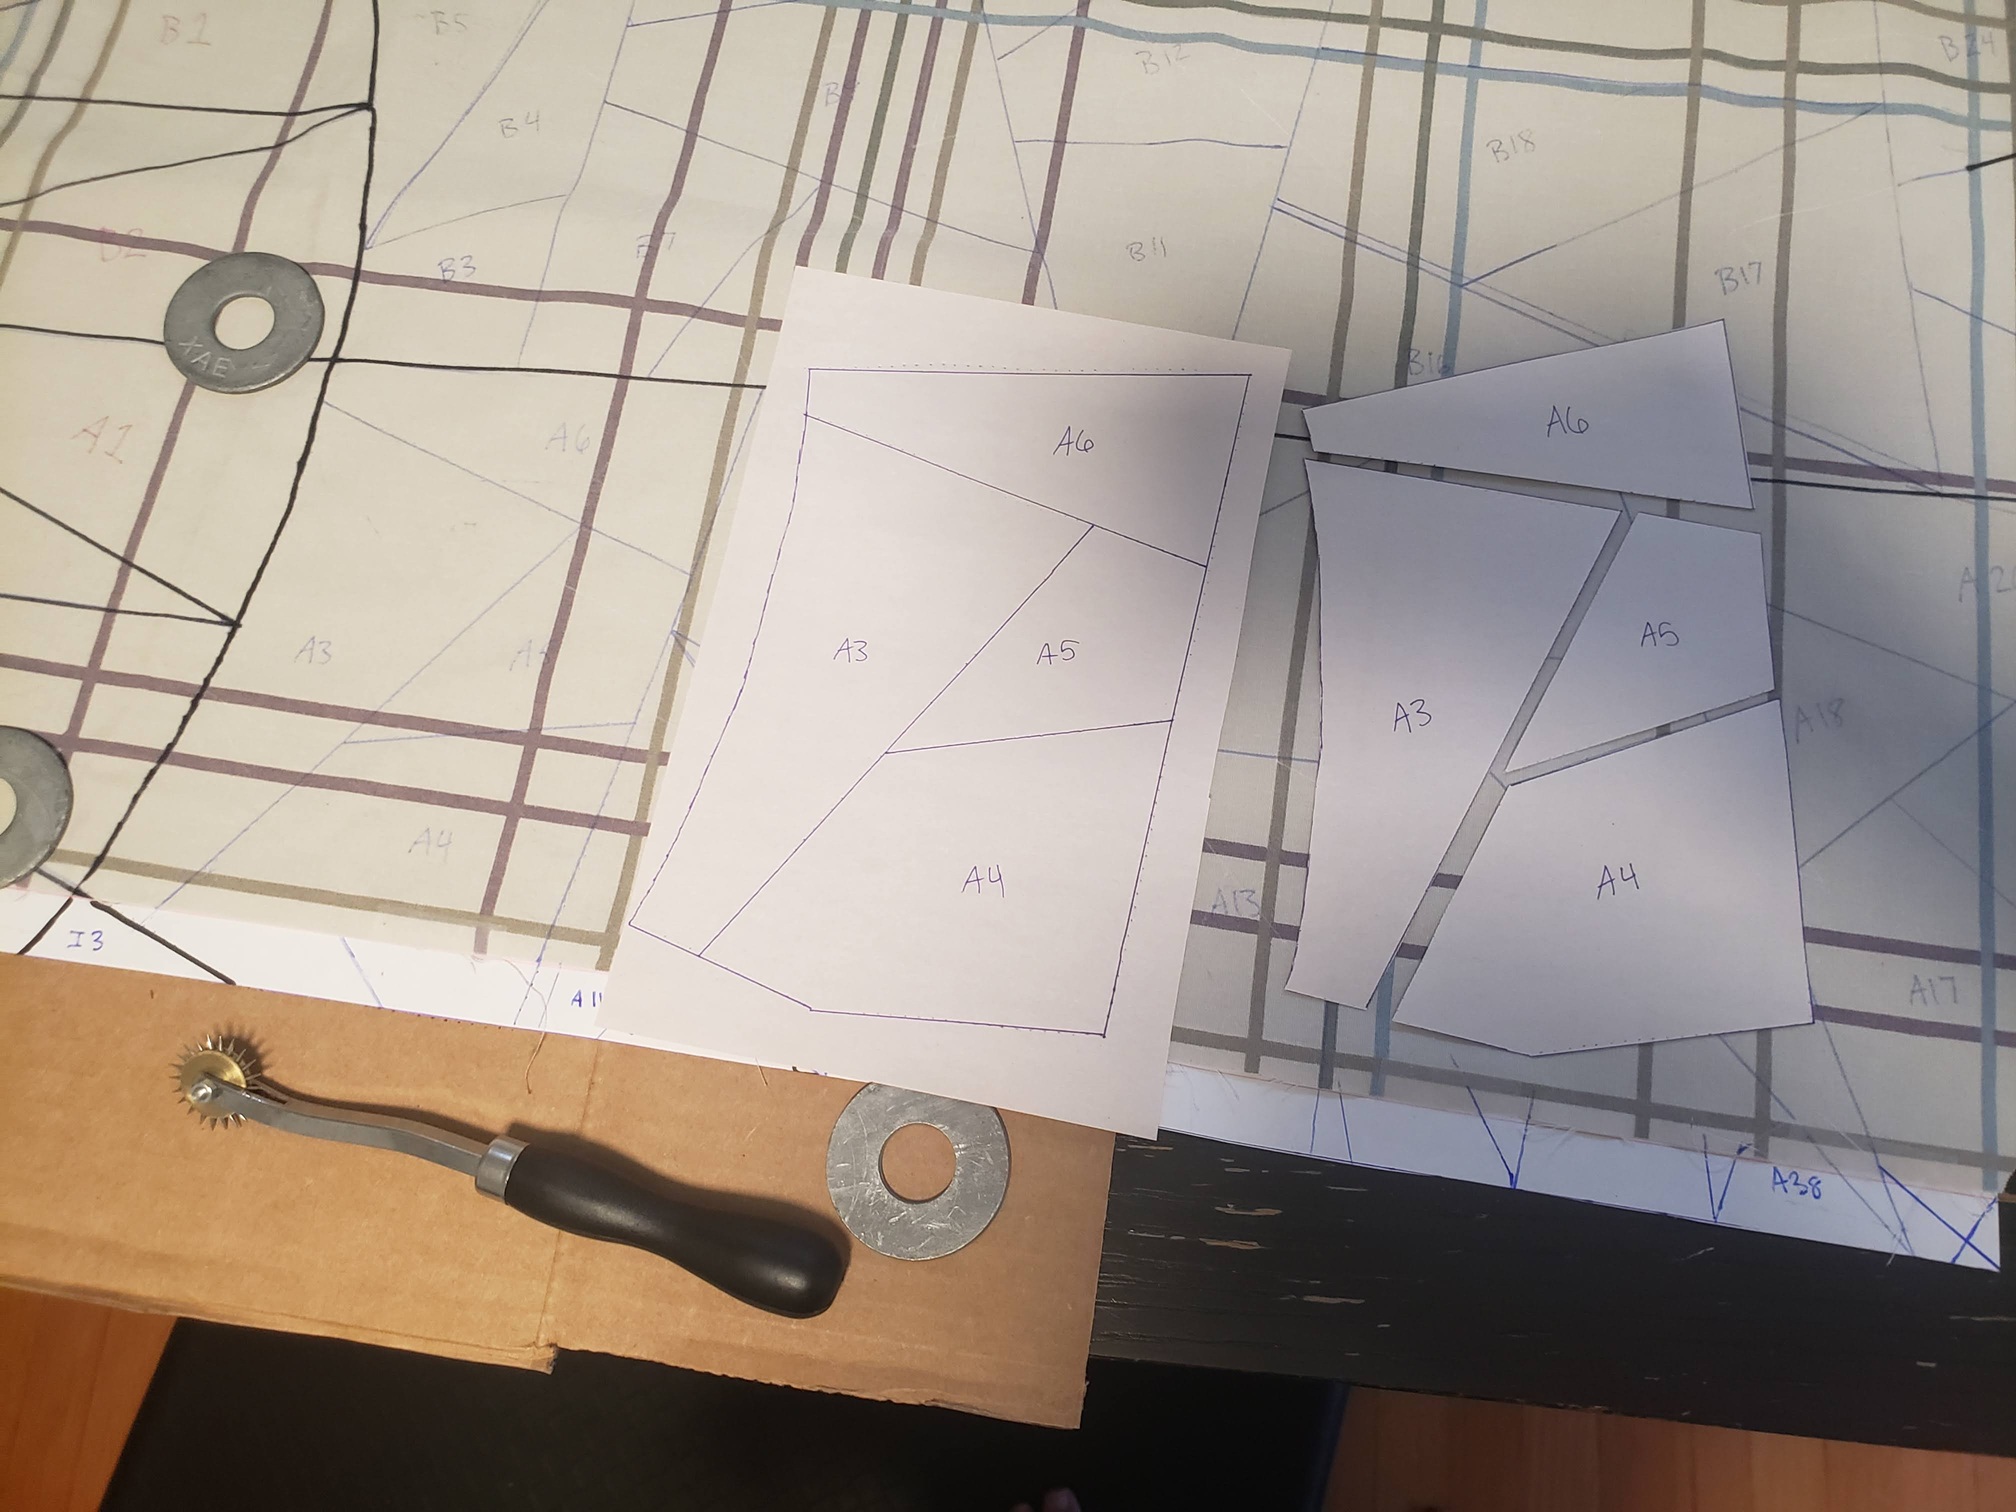
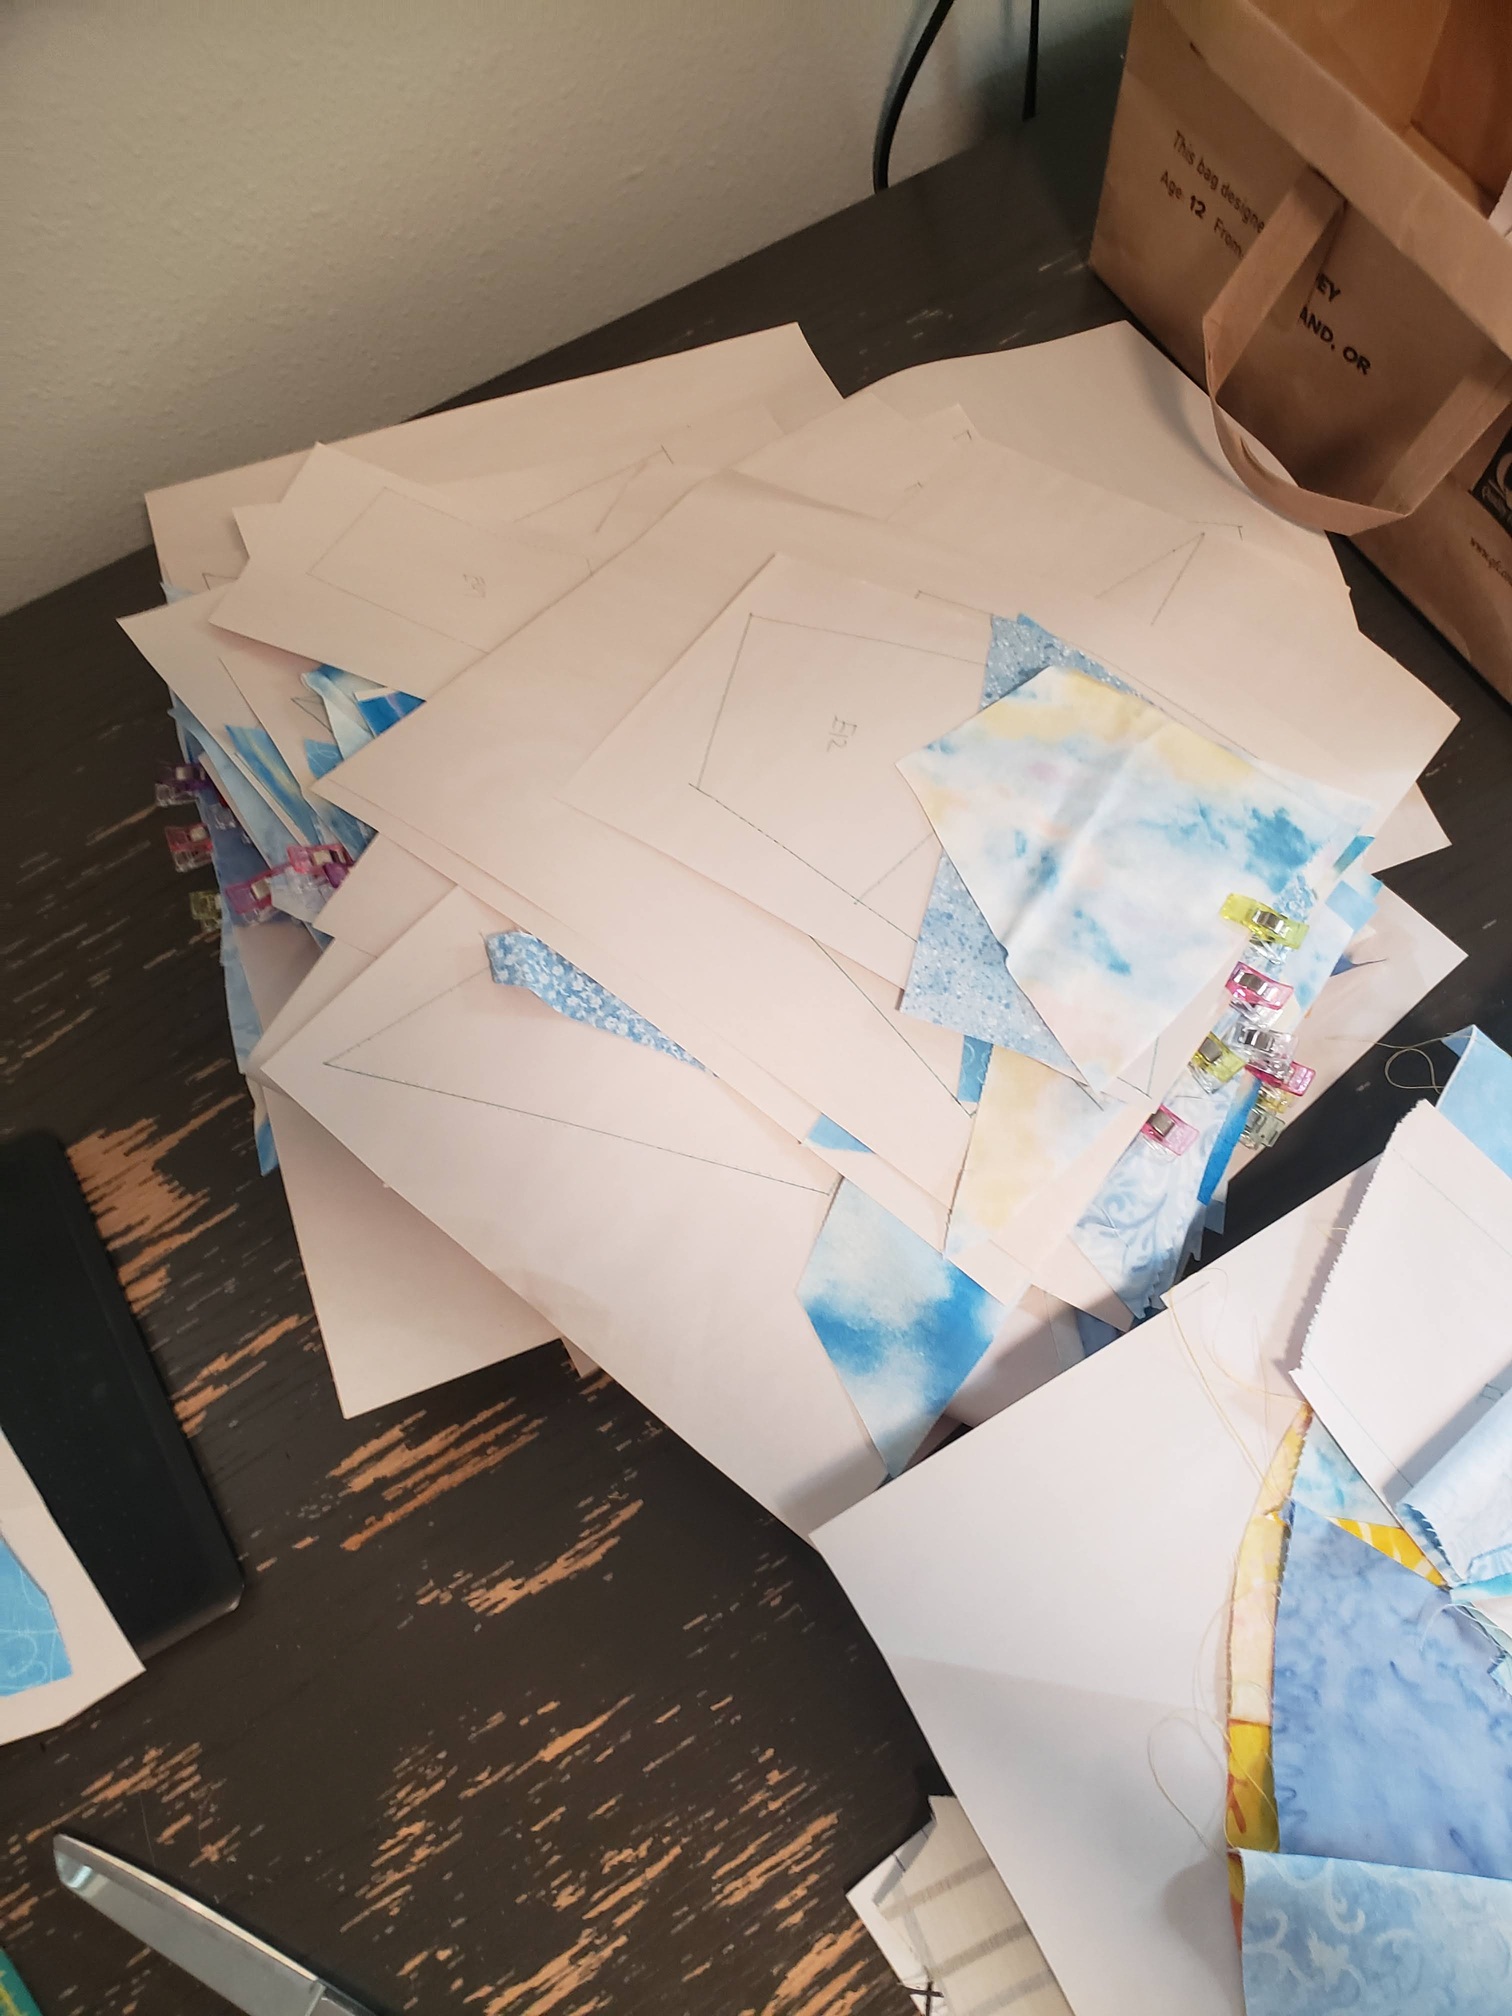
After that, I had to transfer these shapes to paper. I did so by placing a piece of cardboard under the area I wished to copy and two sheets of paper-piecing newspaper. I then used my pattern wheel to go over the area. I thus created both cutting templates for my fabric, and a foundation to sew on for my paper piecing. I labeled/counted all the pieces, and the final count came out to 278!
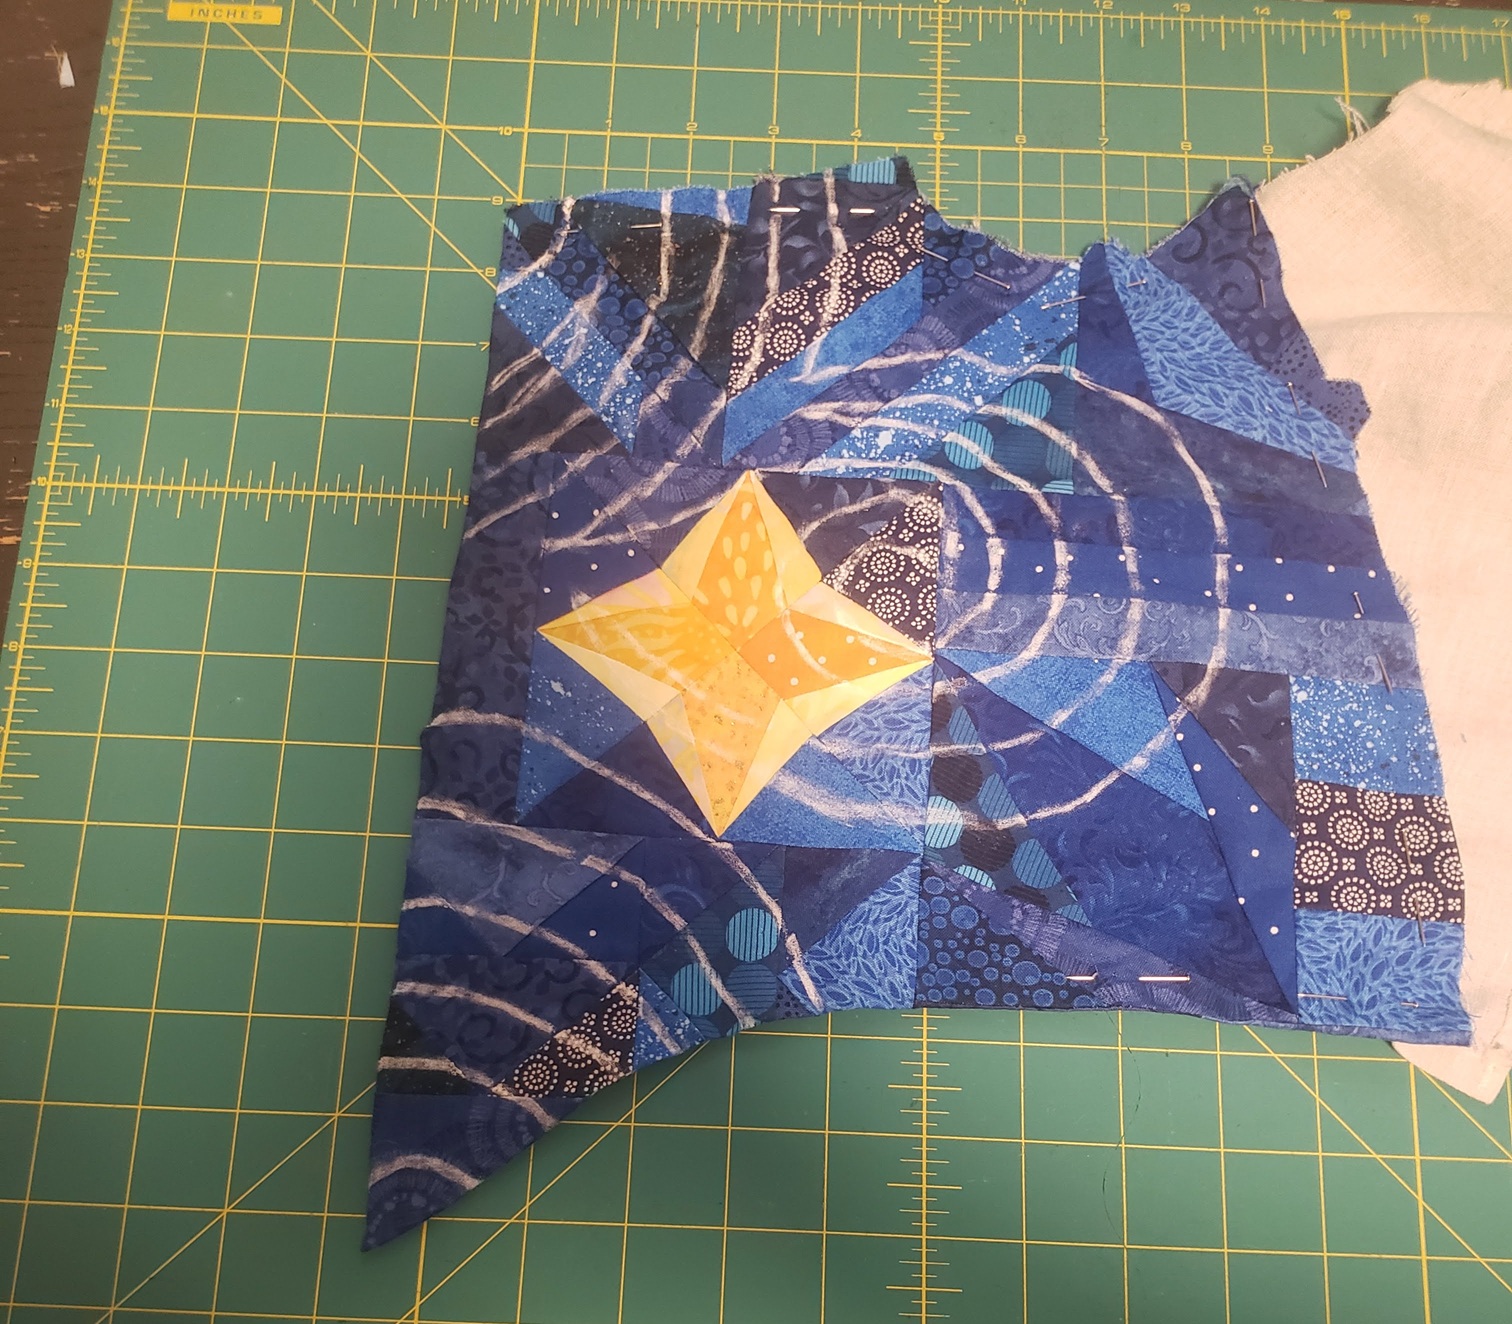
I started with my sun, but made a mistake. I forgot that with paper piecing patterns, it essentially creates a mirror image of whatever is on the front of the paper. All my patterns were backwards. Ugh. But, no matter! Since everything was traced with my pattern wheel, the lines were still visible on the other side, I just had to sew along the pricks. But, this did mean I made an extra sun, which I plan to eventually use on my partner's waistcoat, so it all worked out in the end!
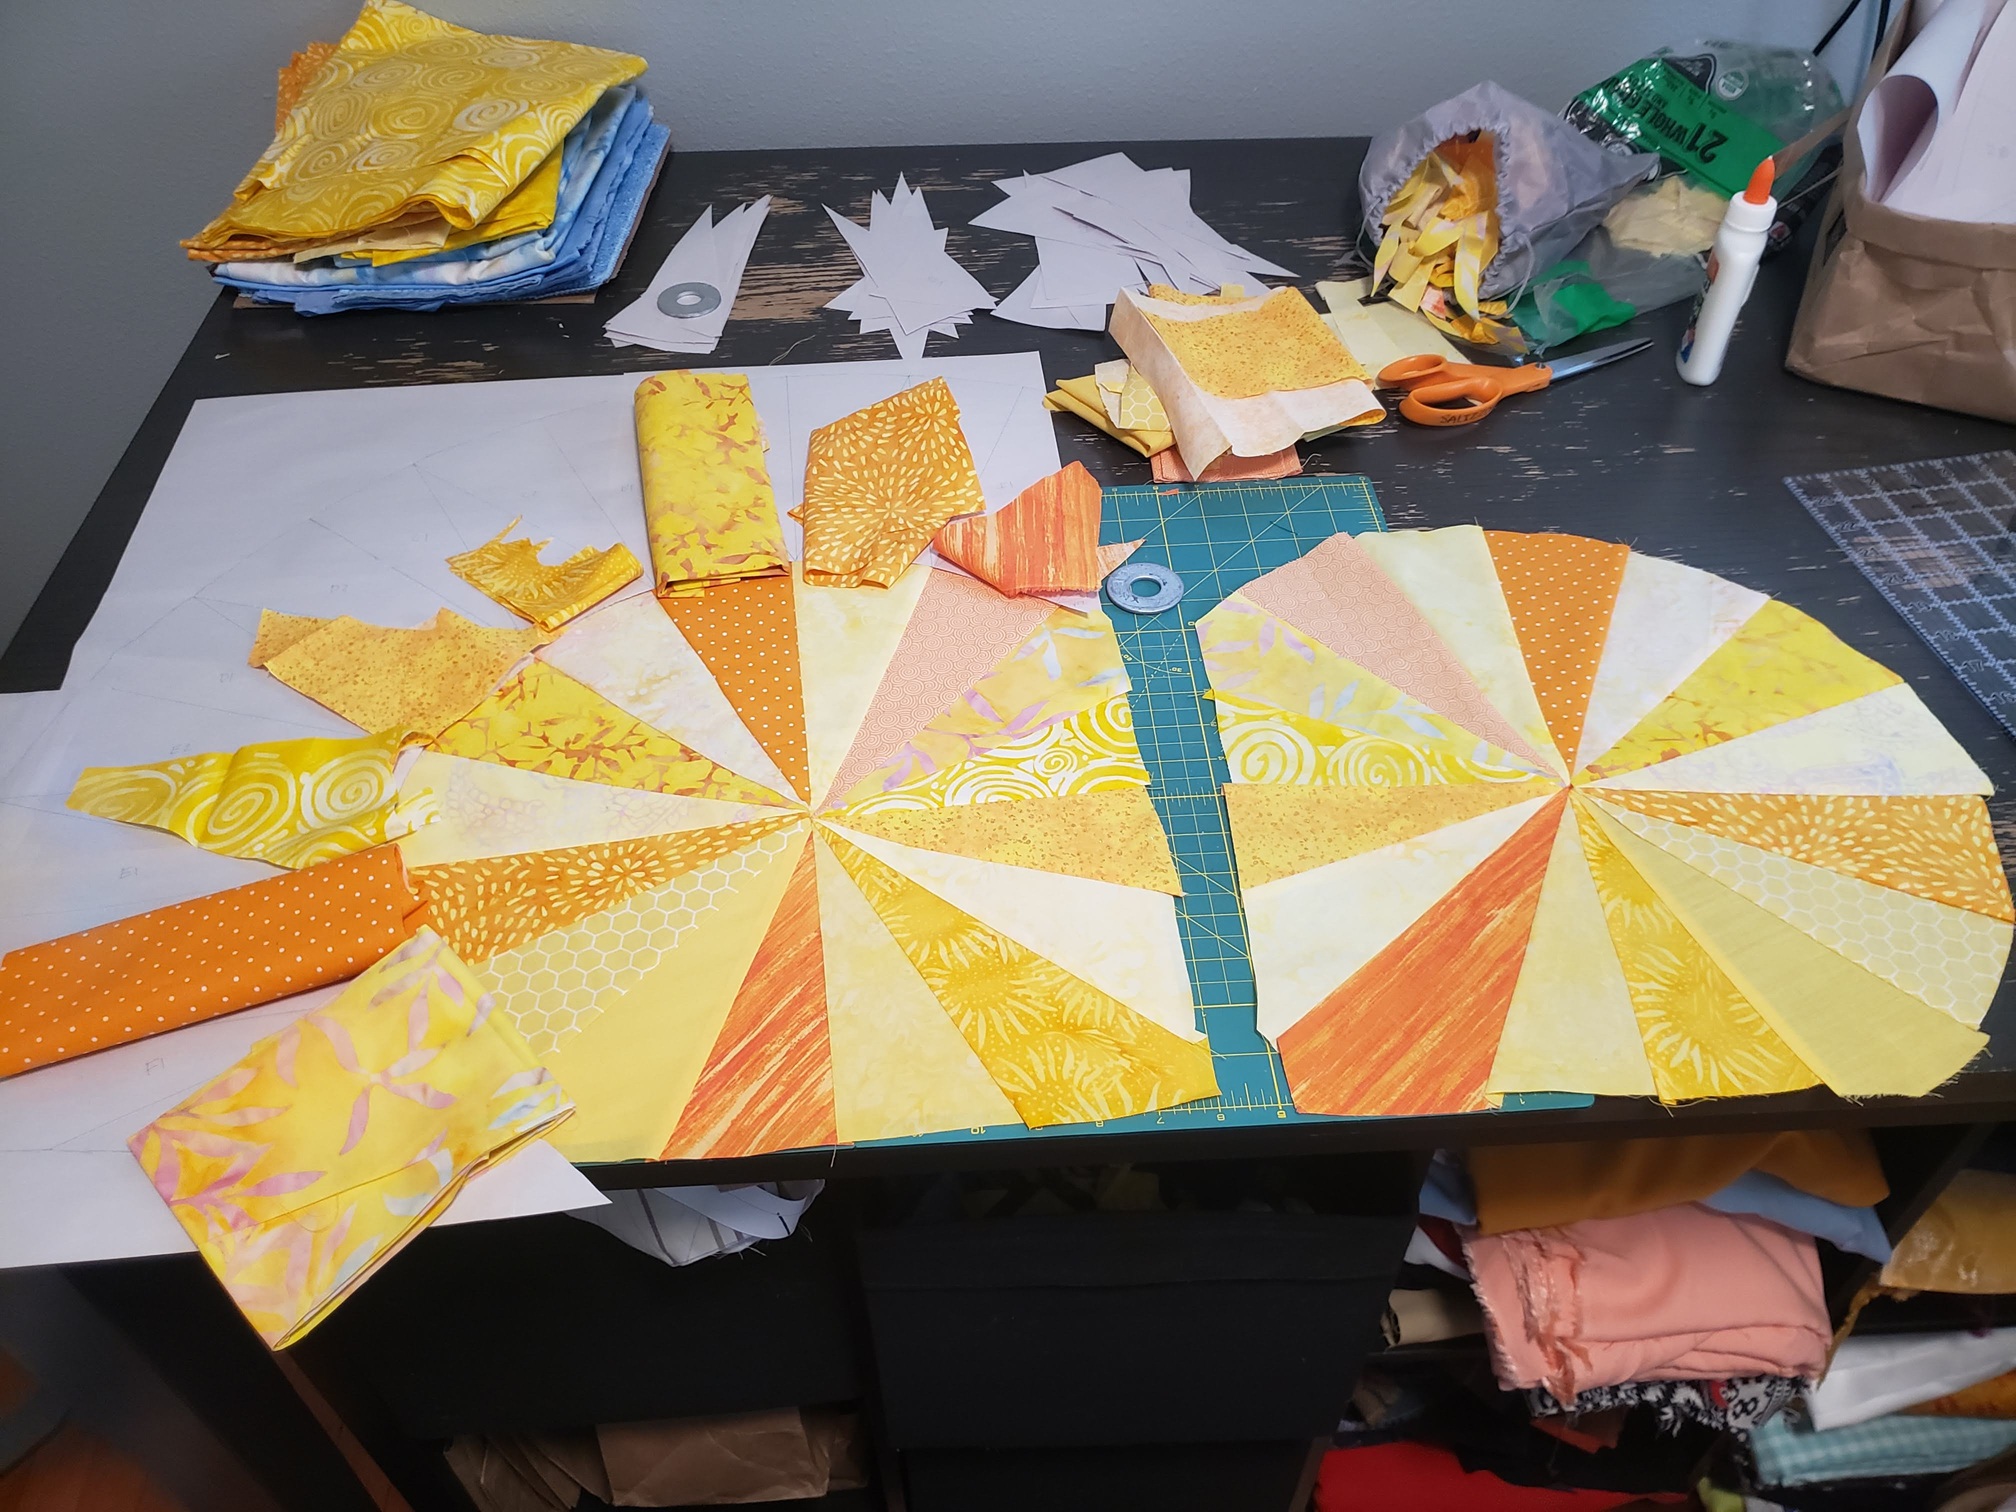
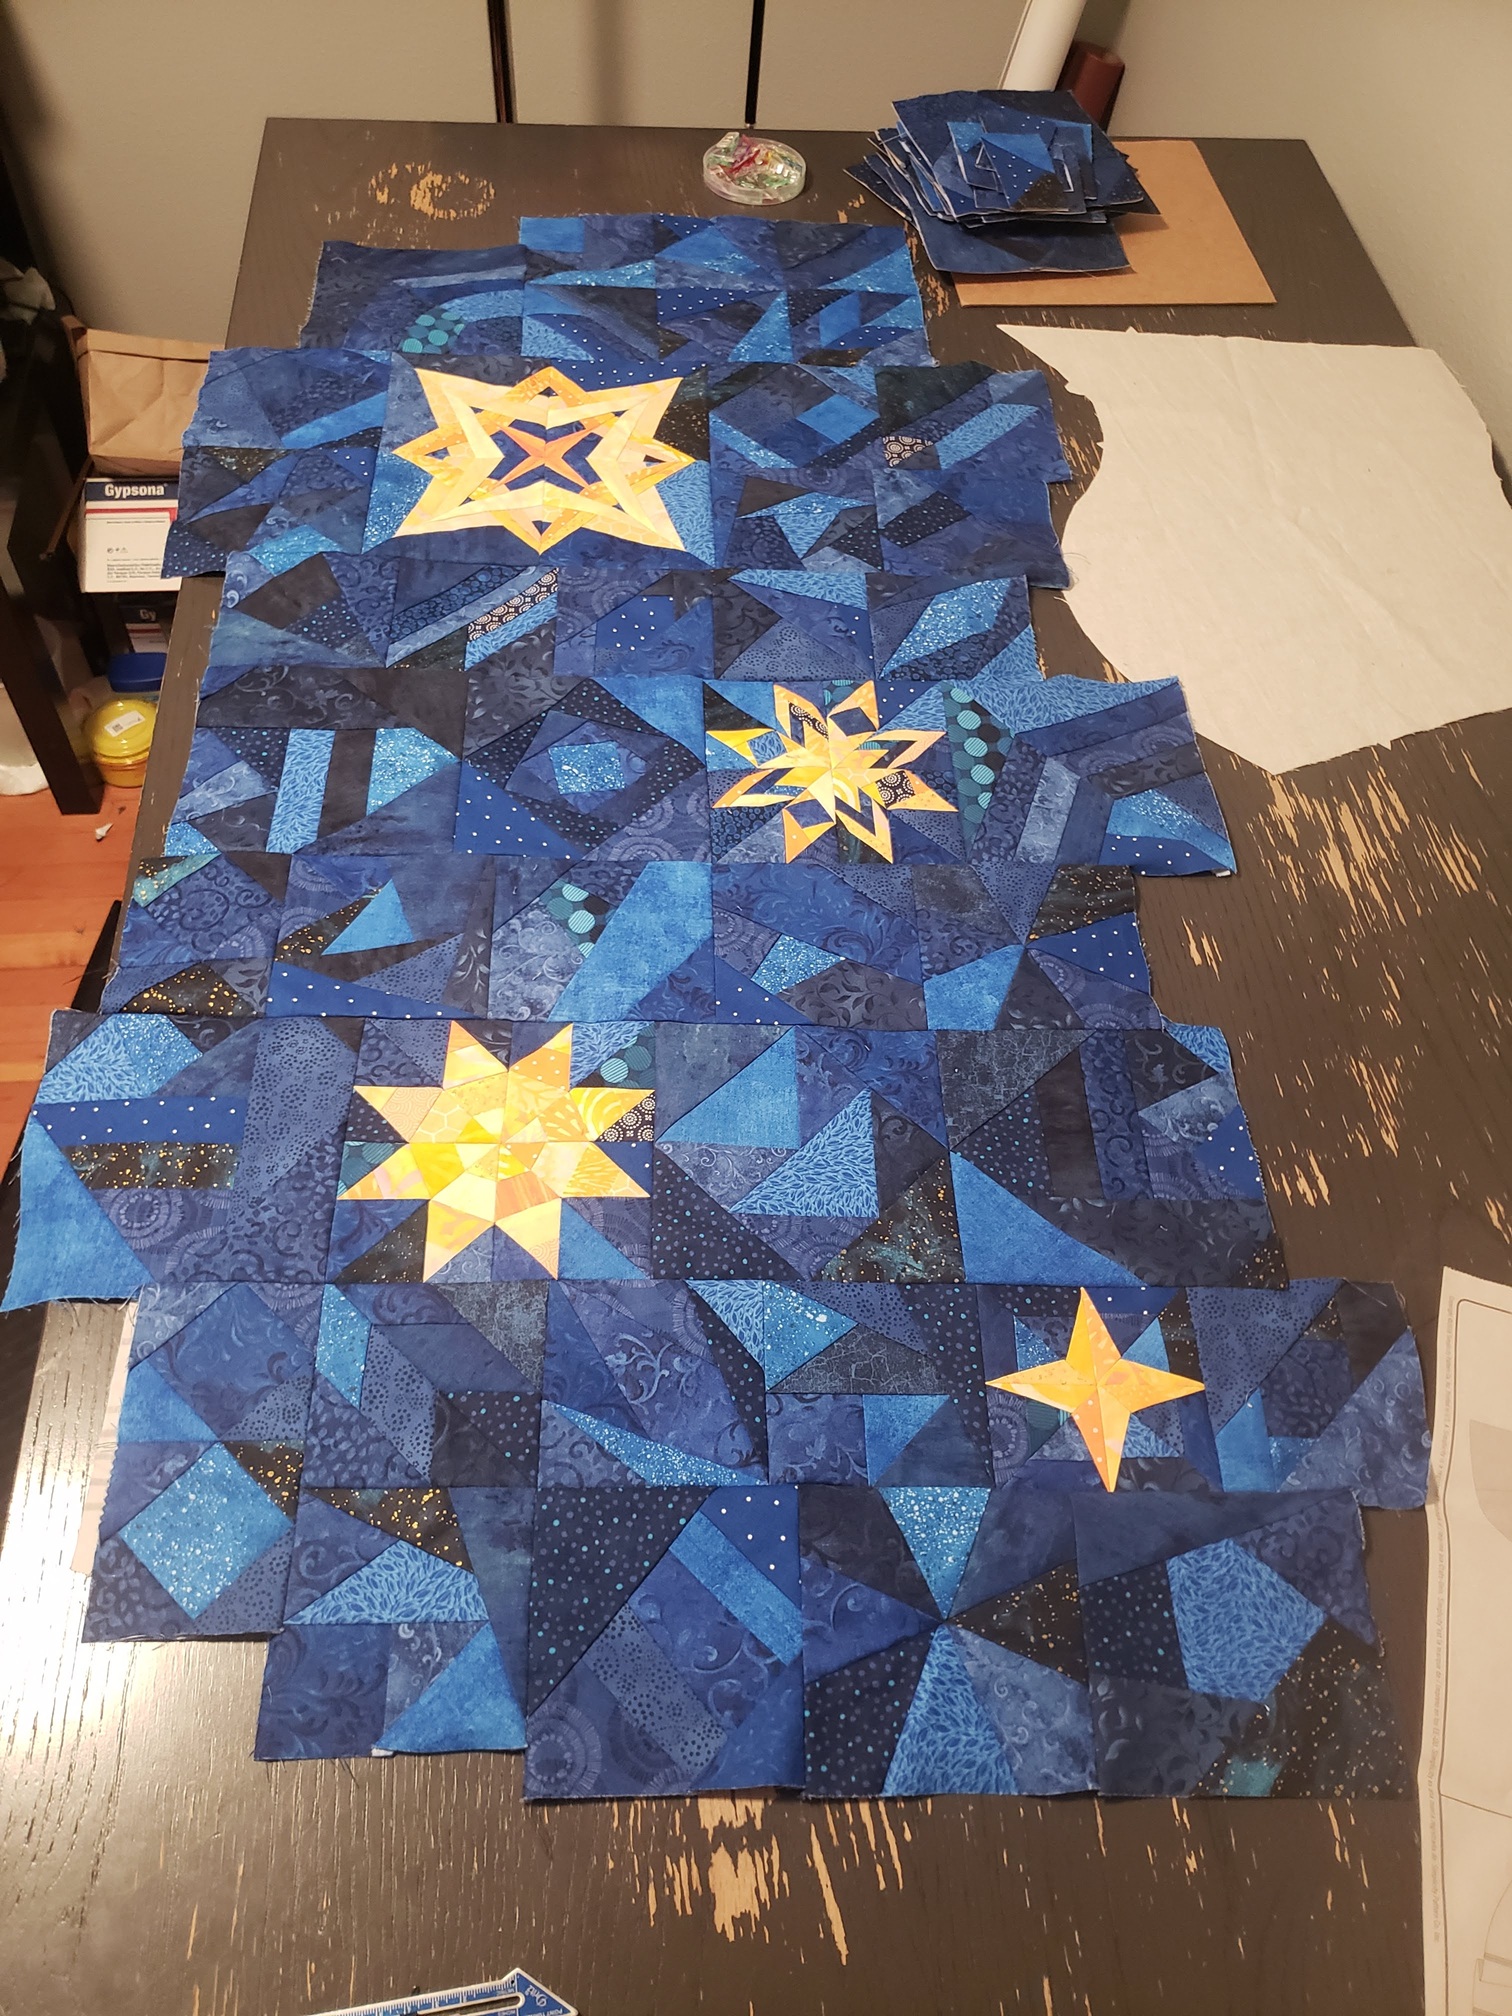
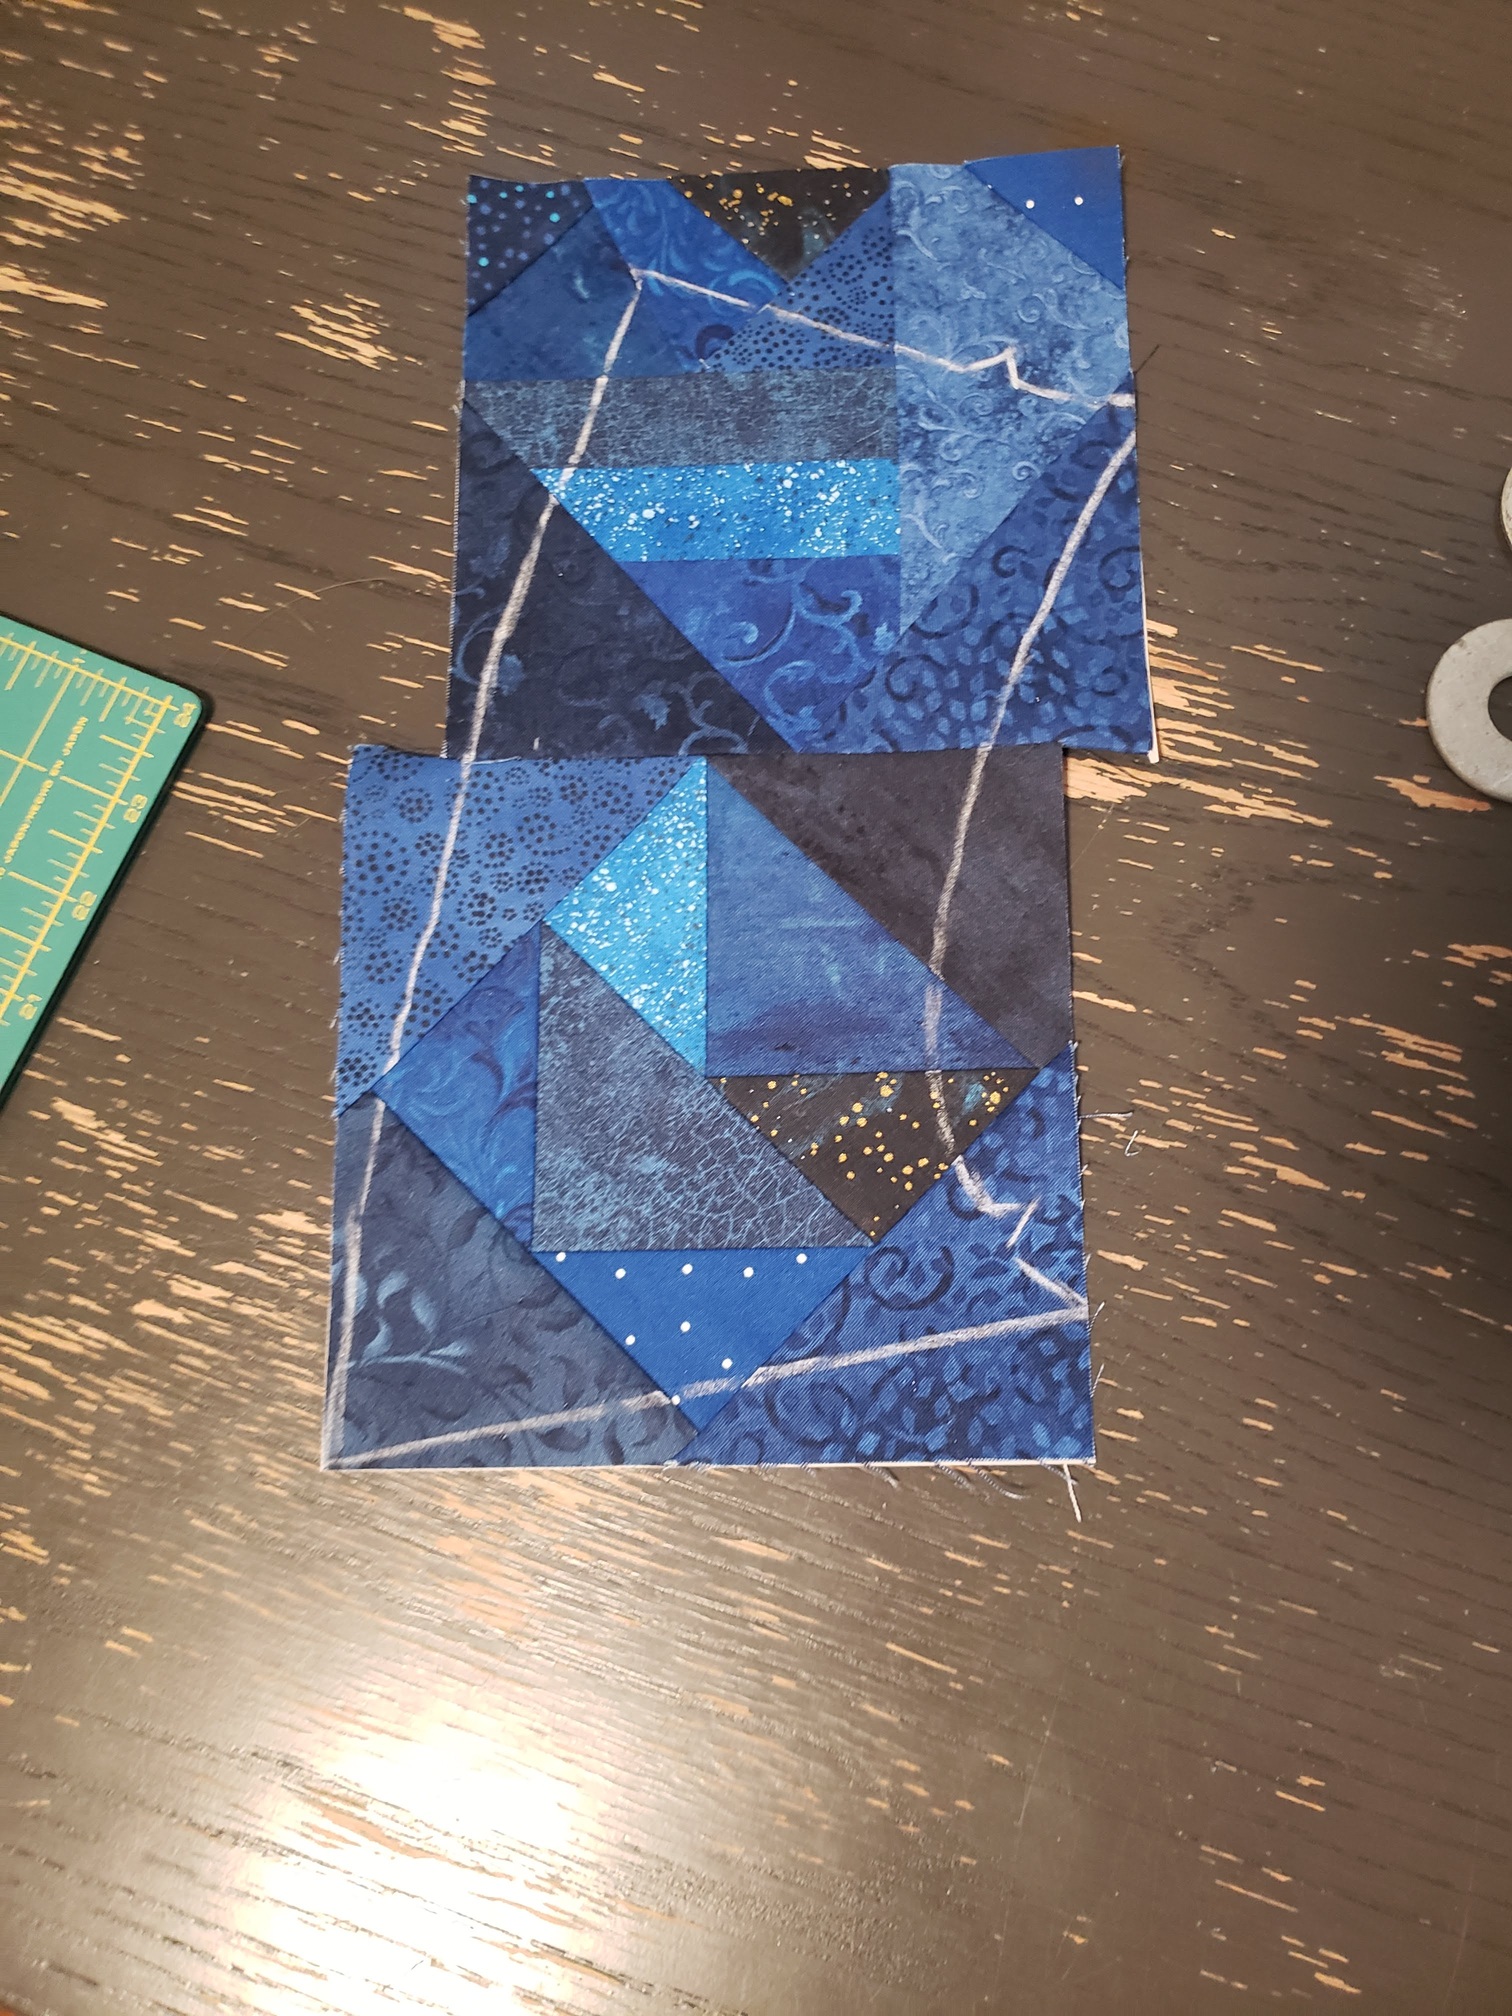
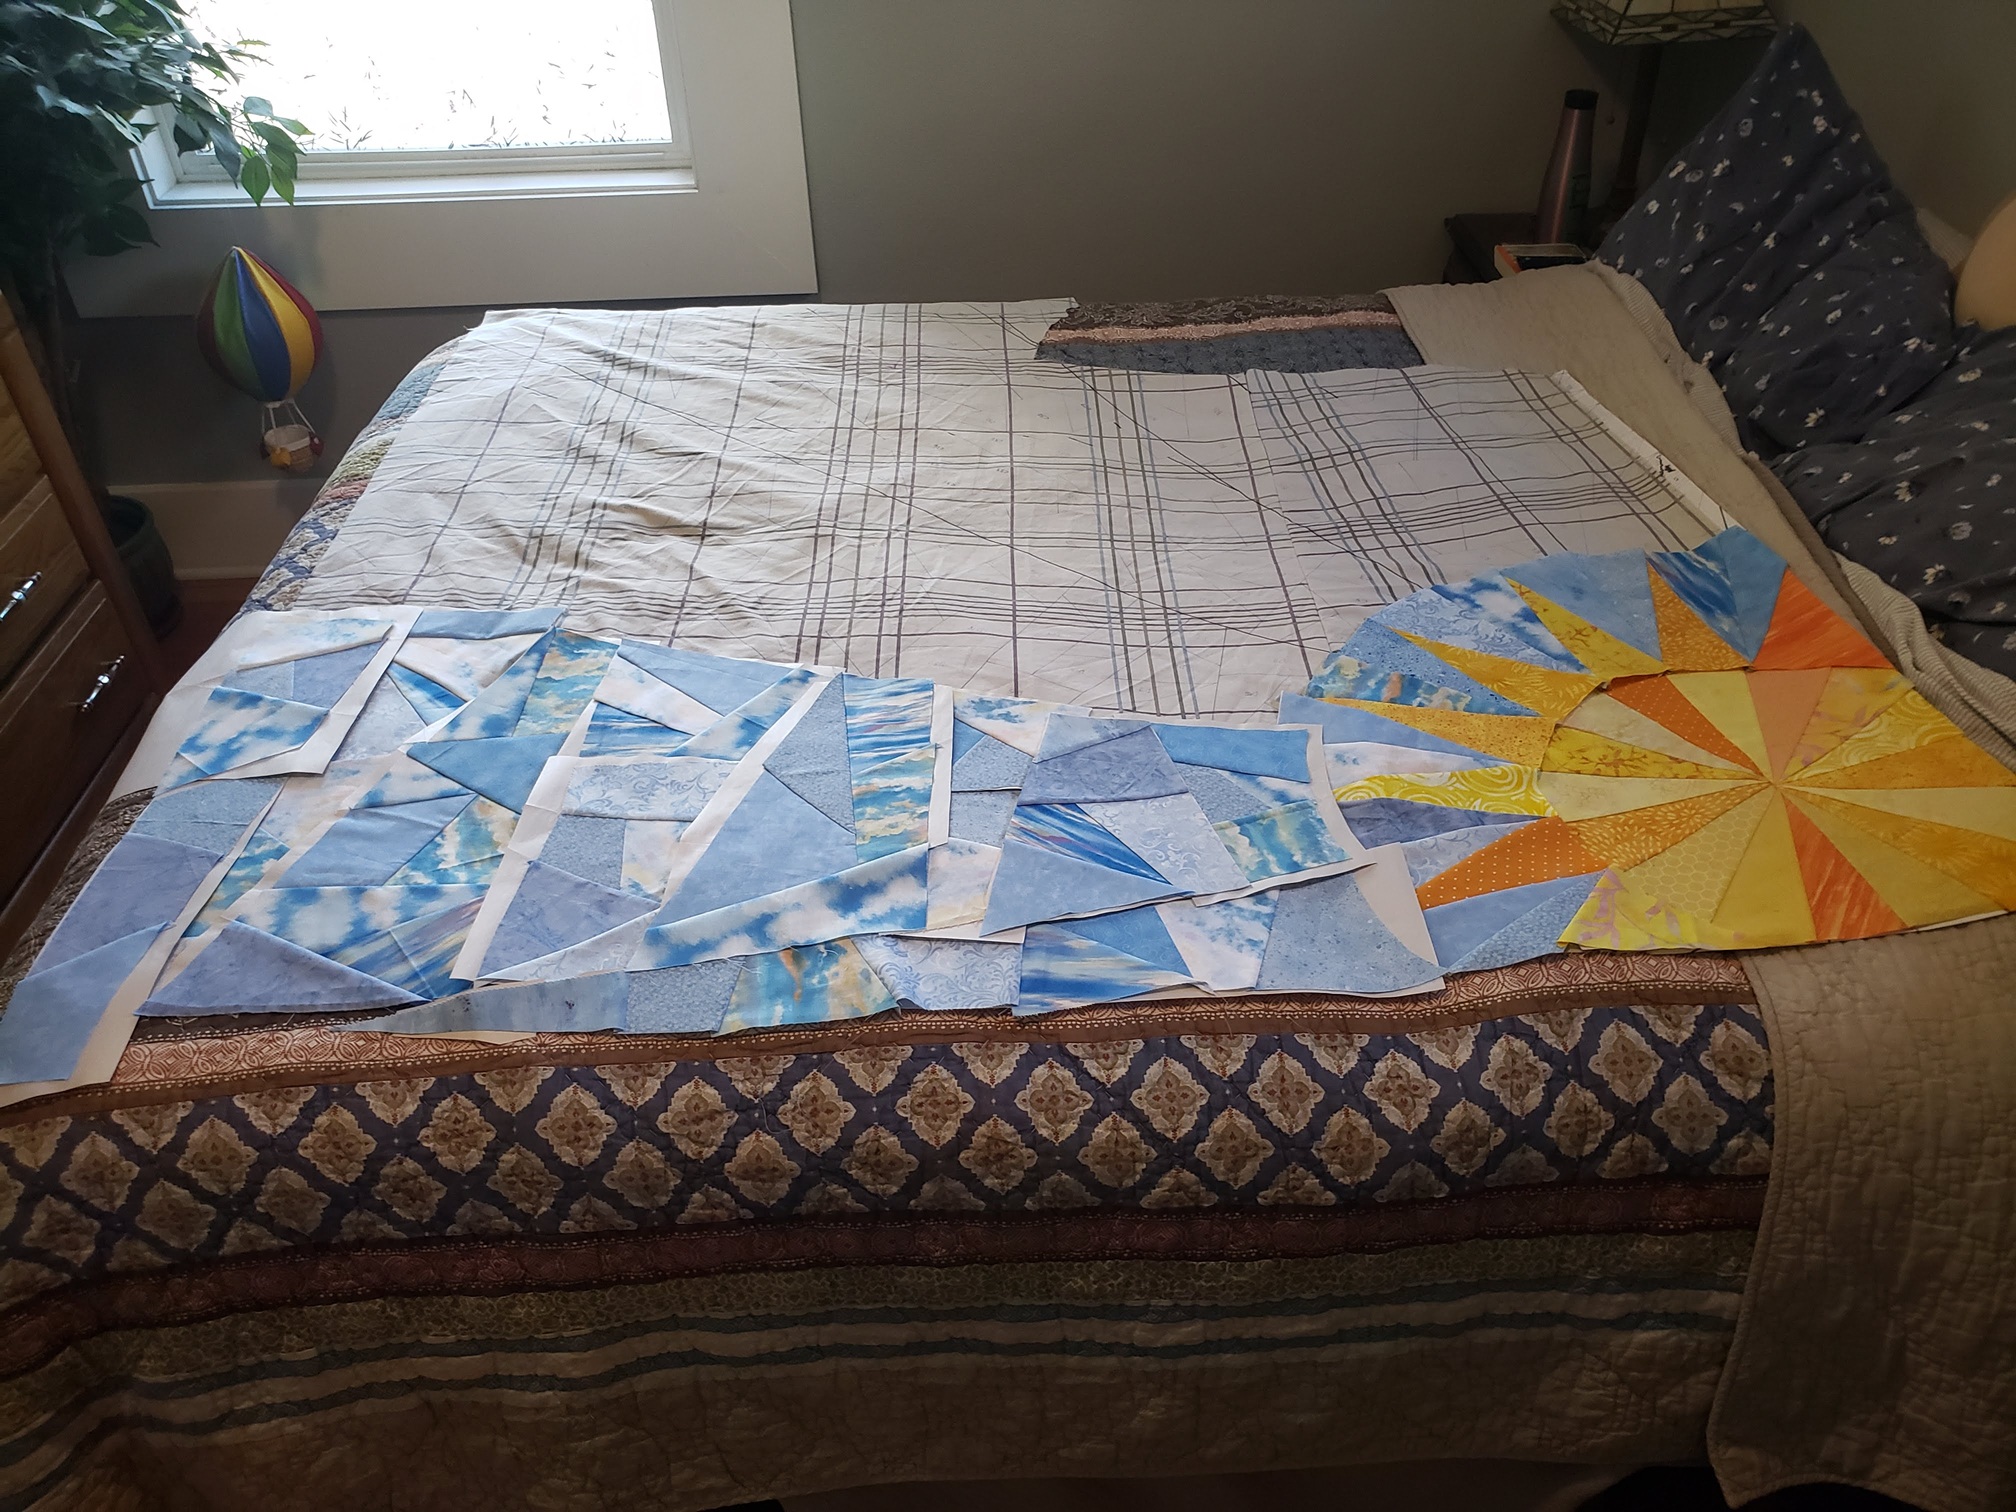
I then made the sun-rays, but did NOT sew them together (yet). At first, I included some darker sky fabrics, but after a bit of consideration, decided they were not the correct value. I seam ripped them out, and replaced them with lighter shades of blue.
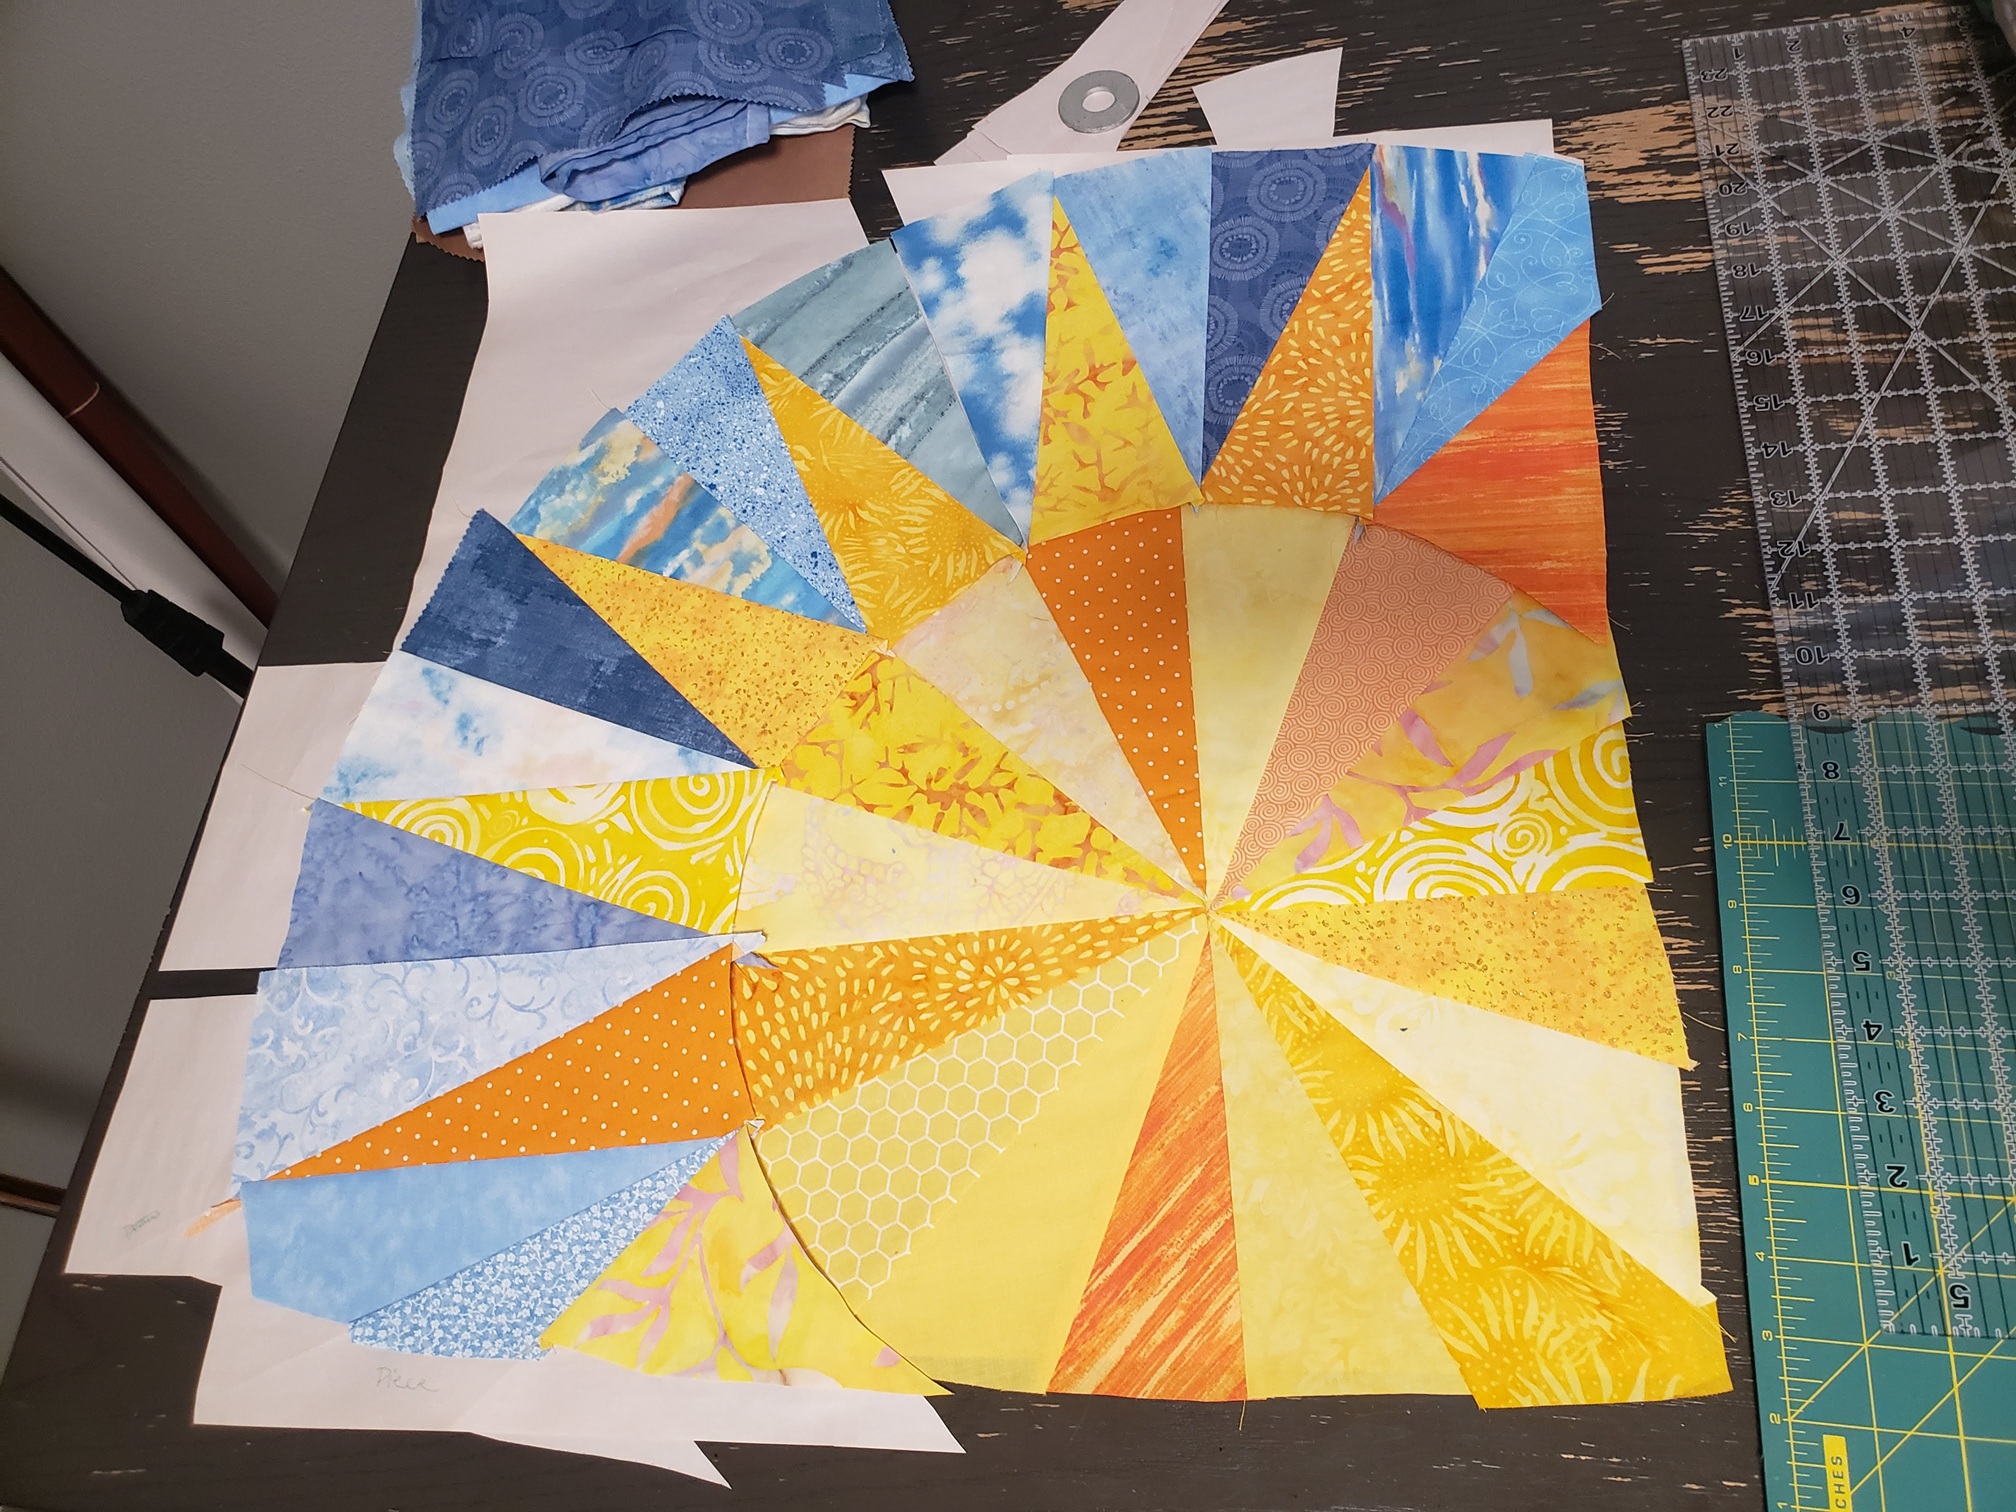
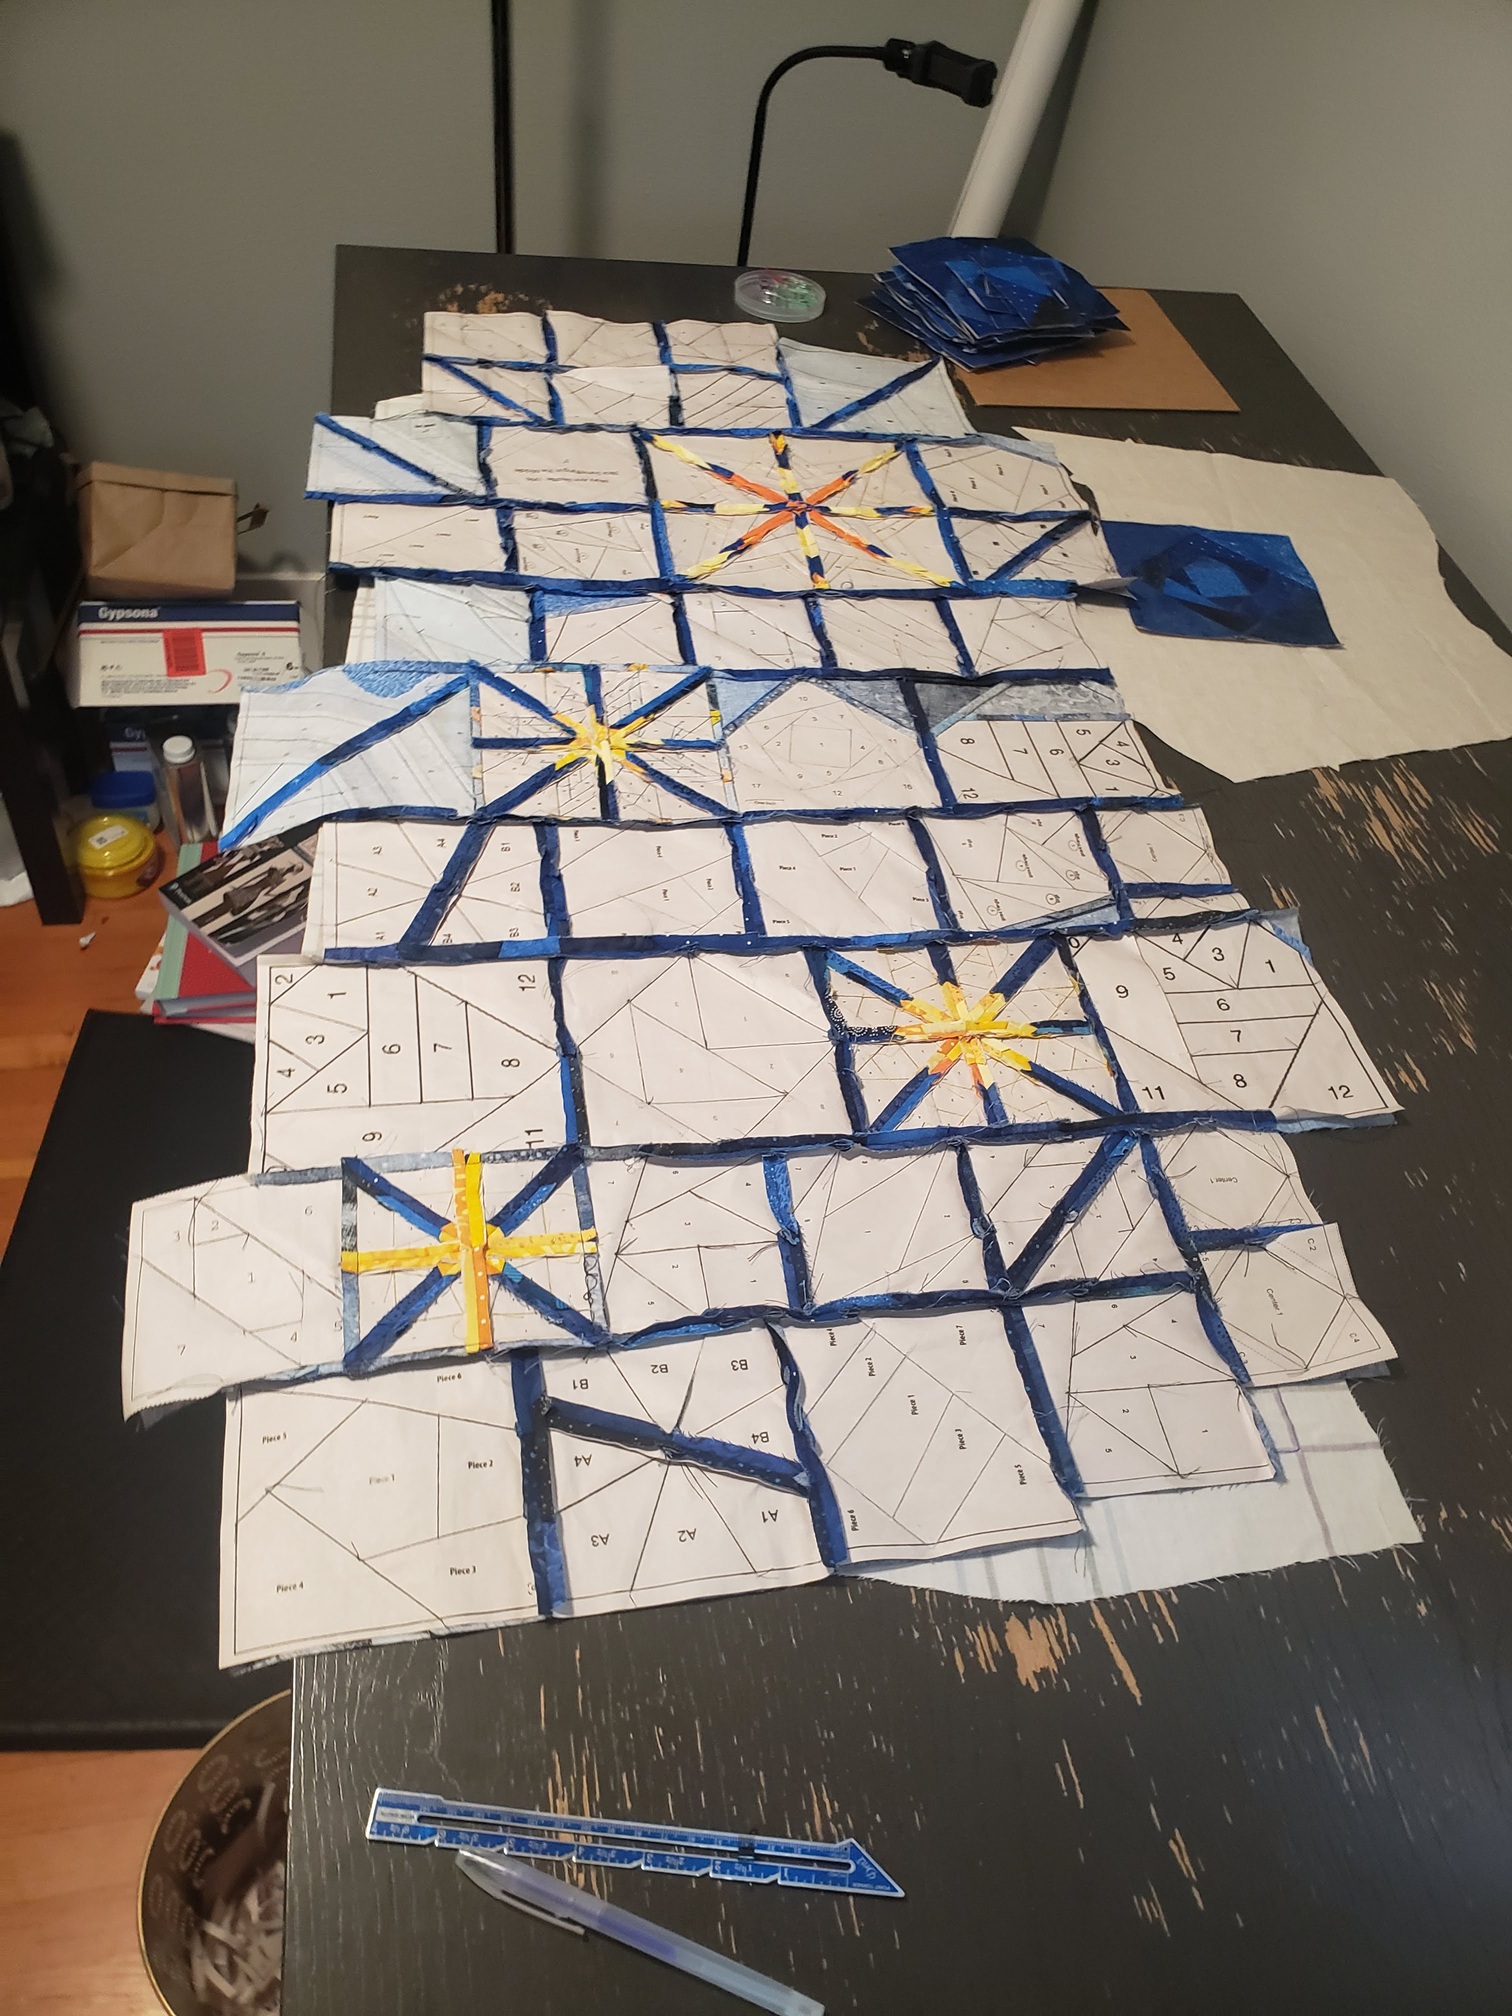
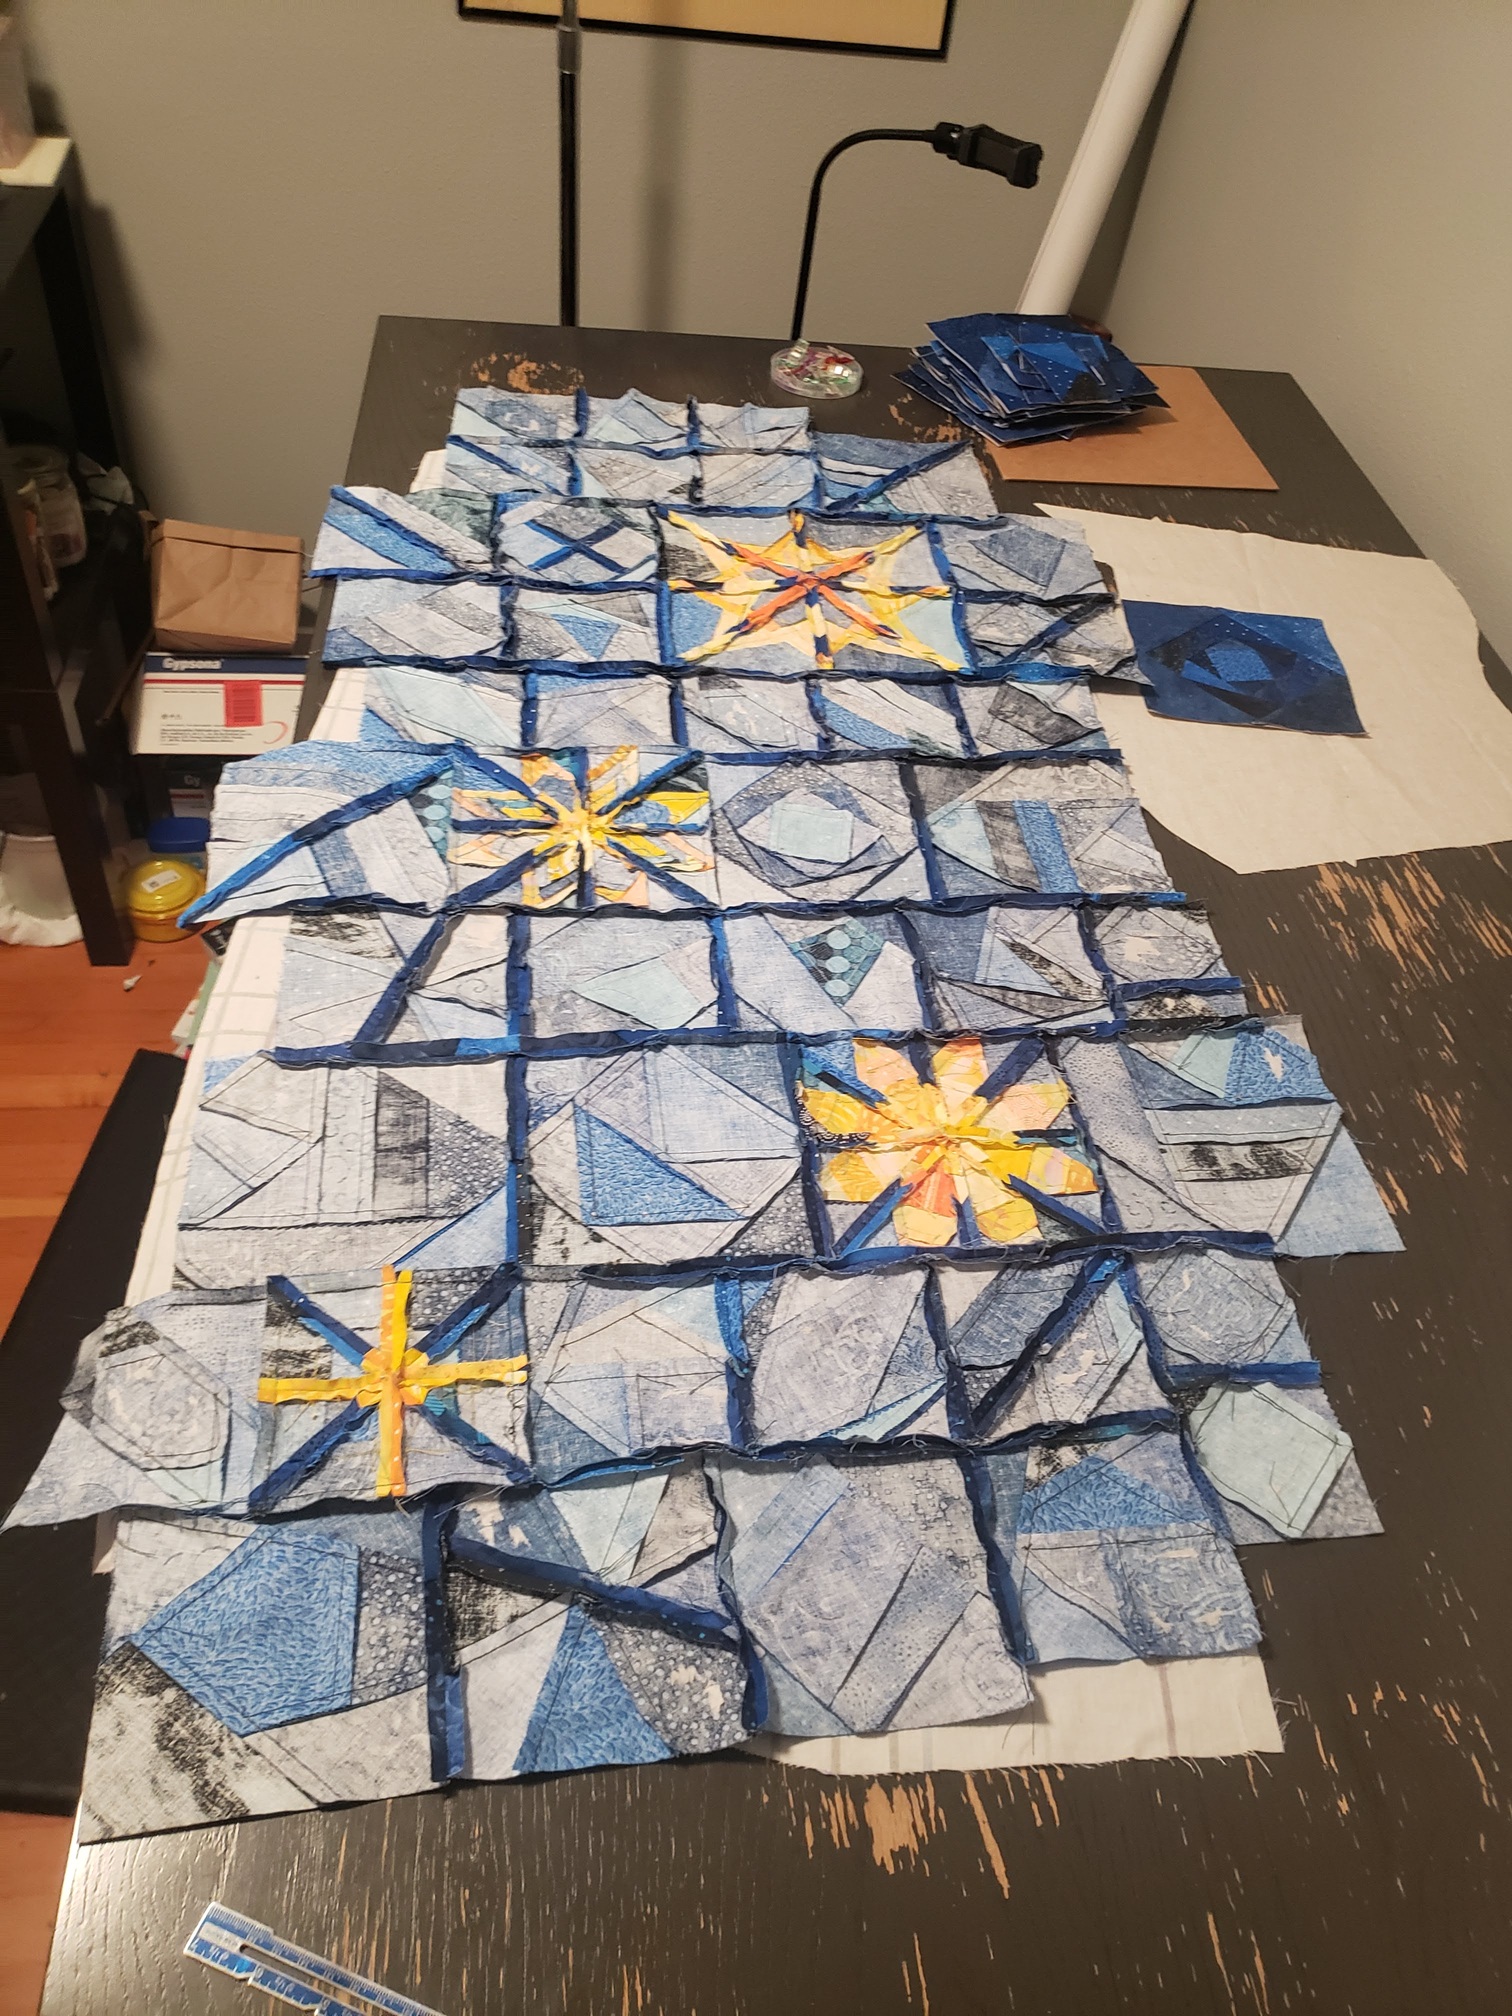
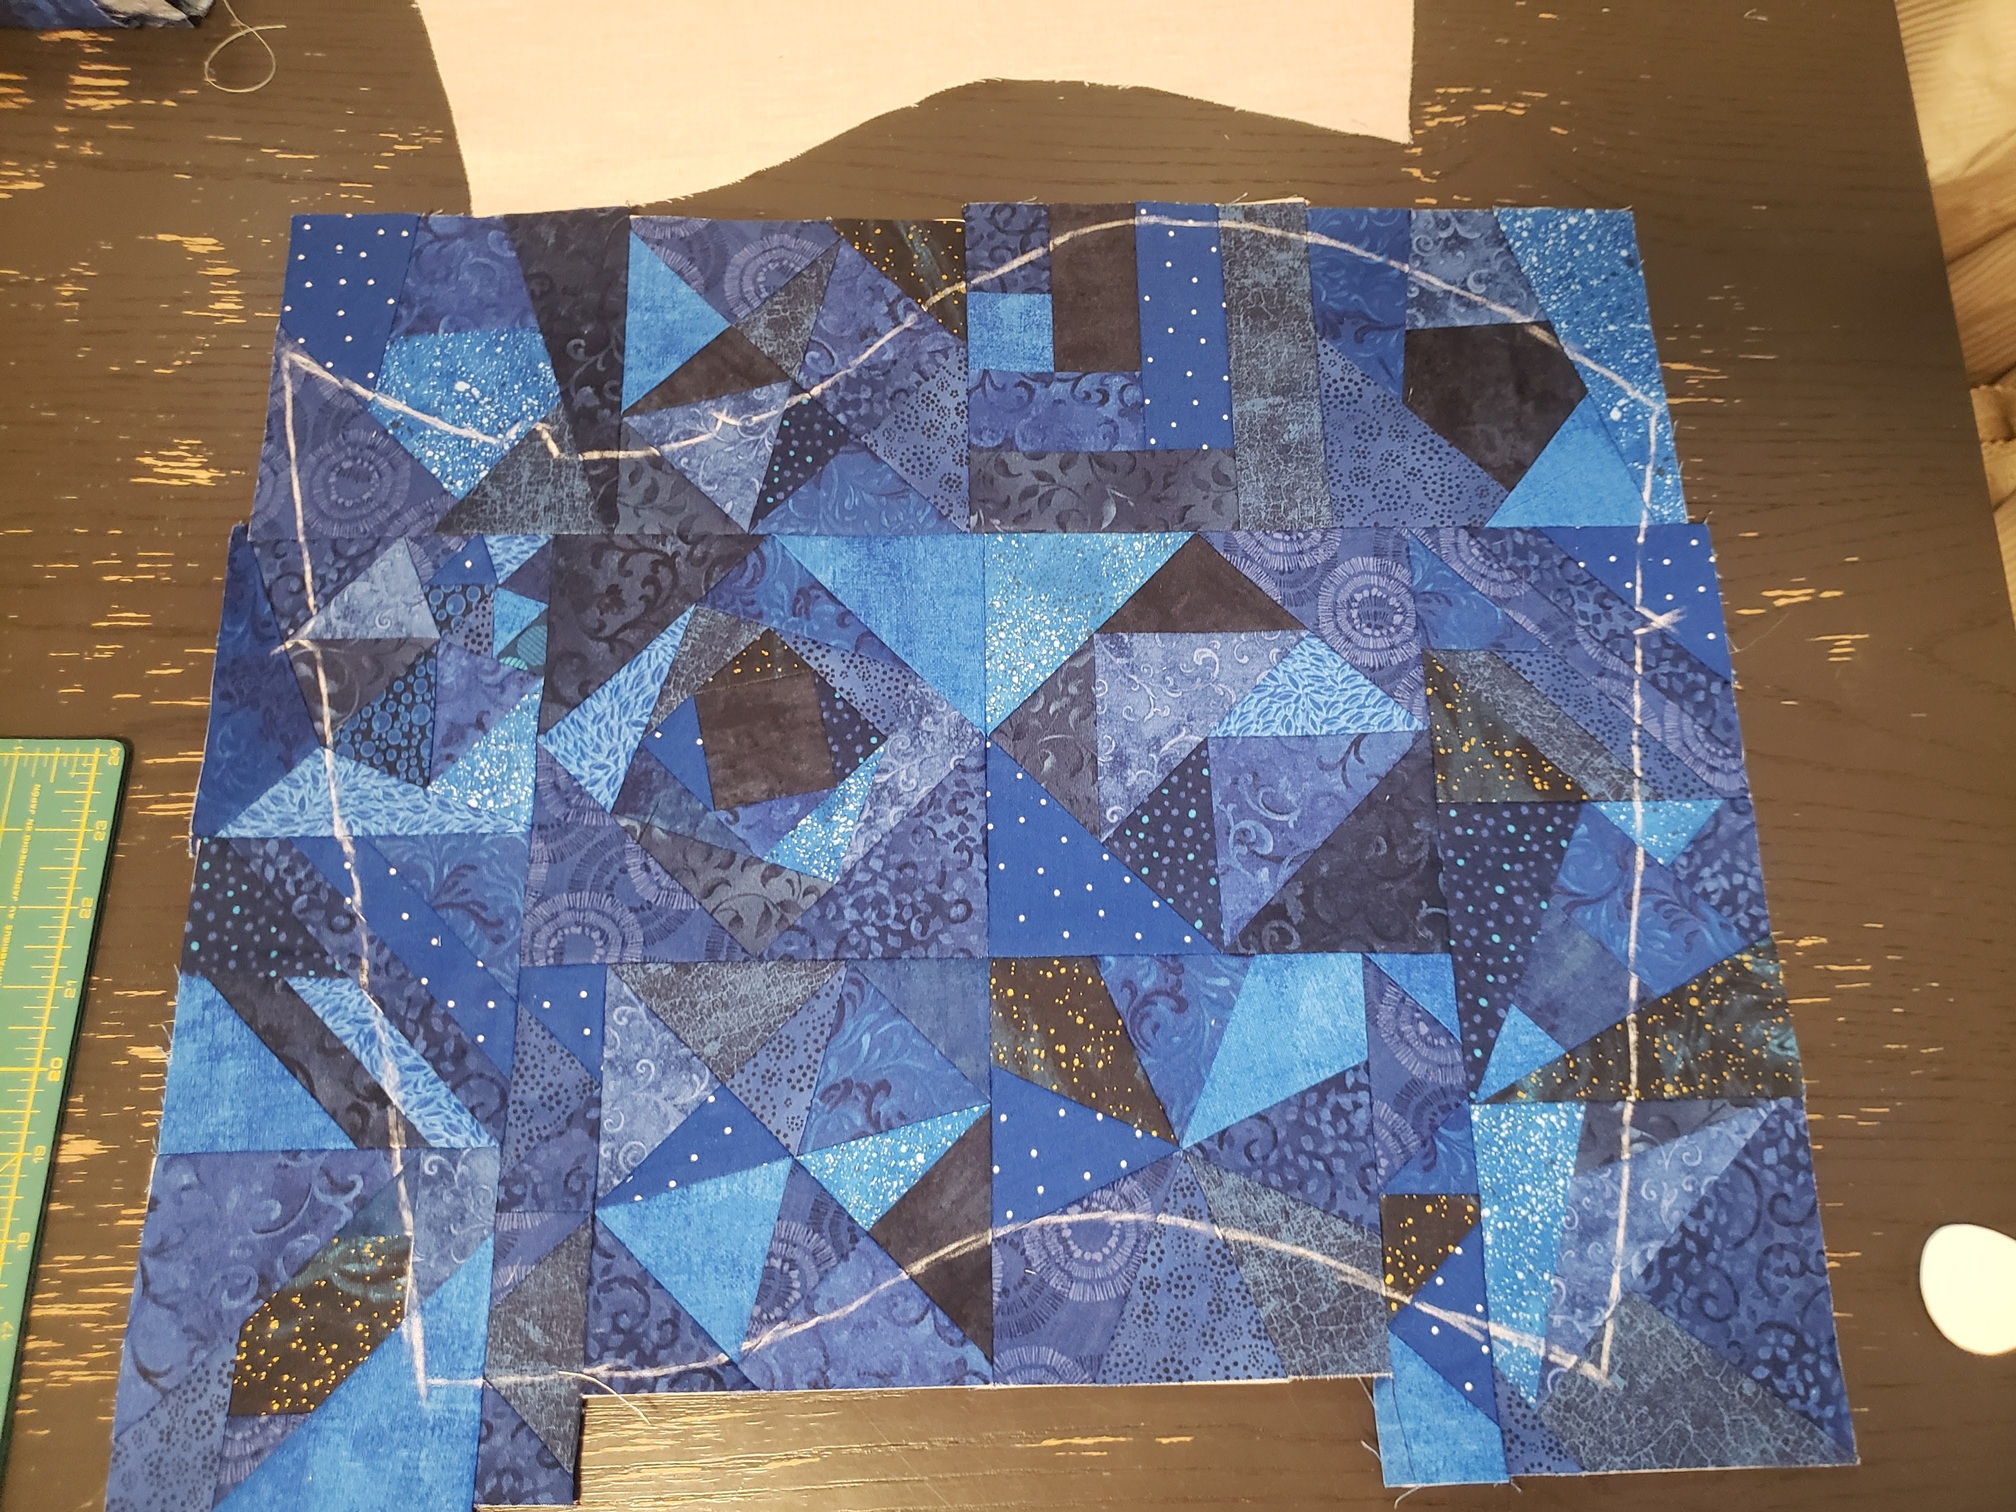
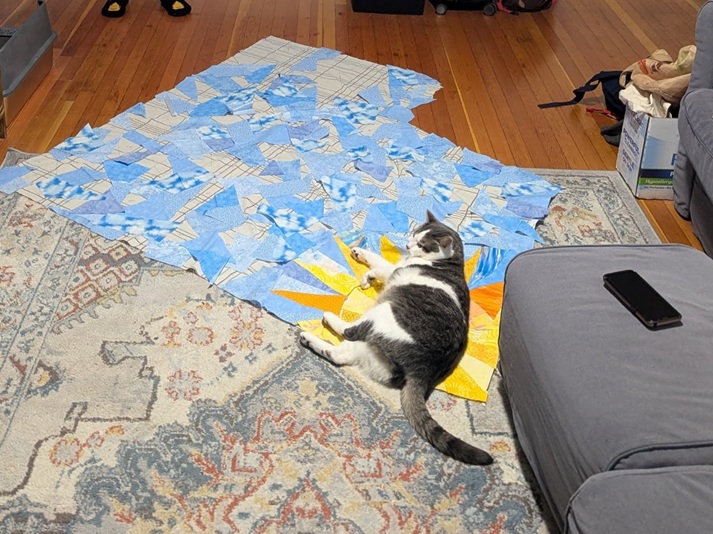
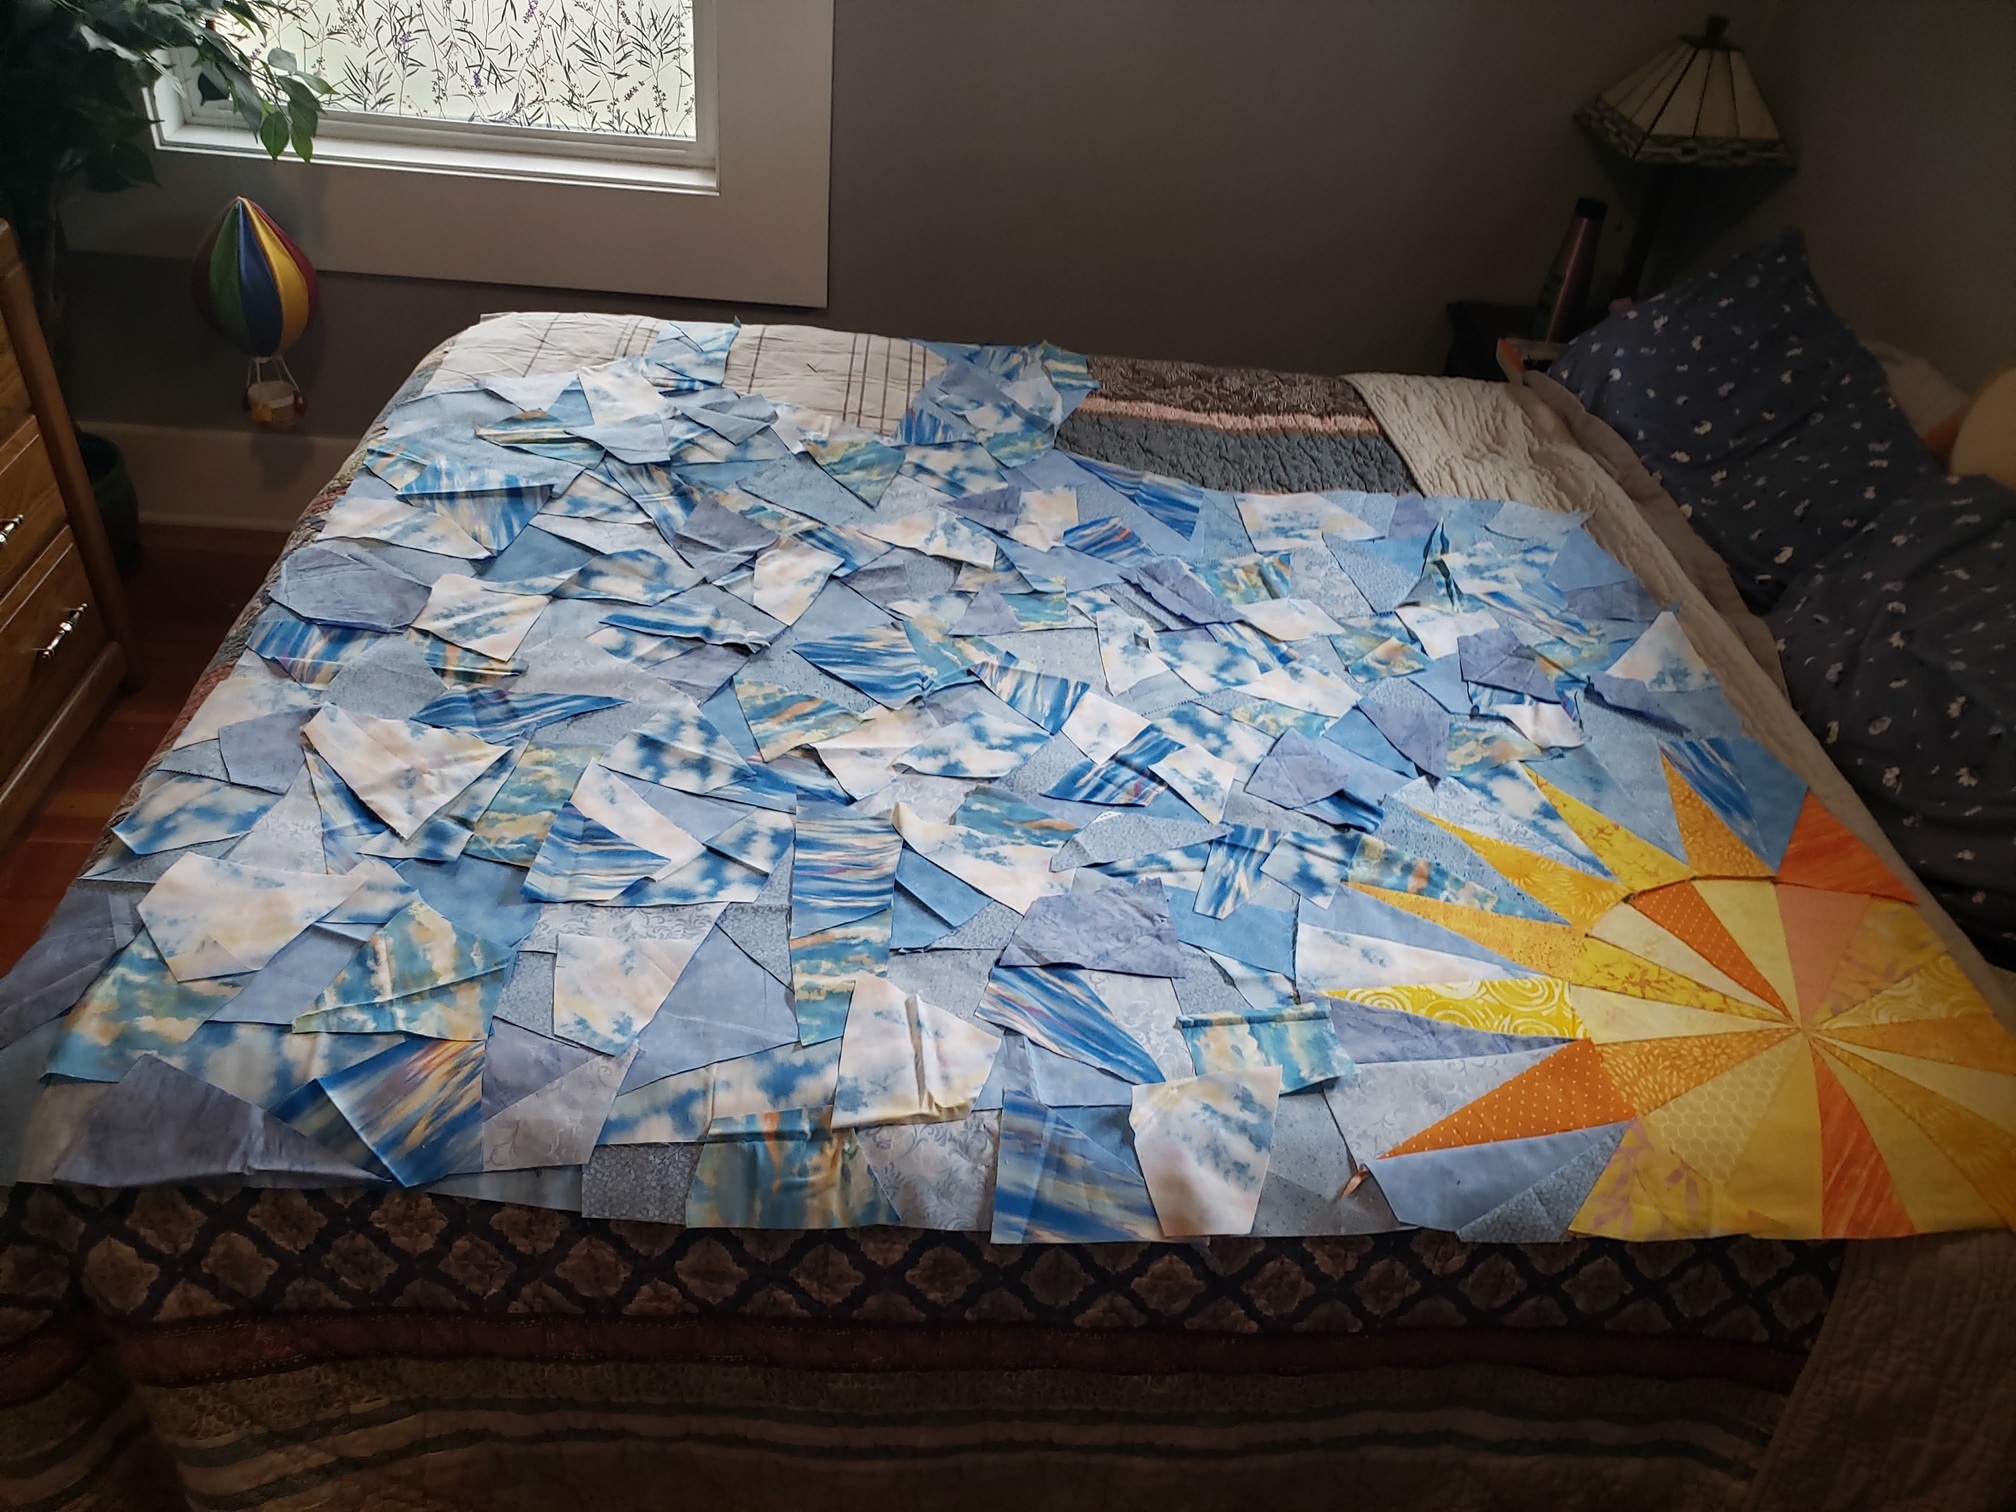
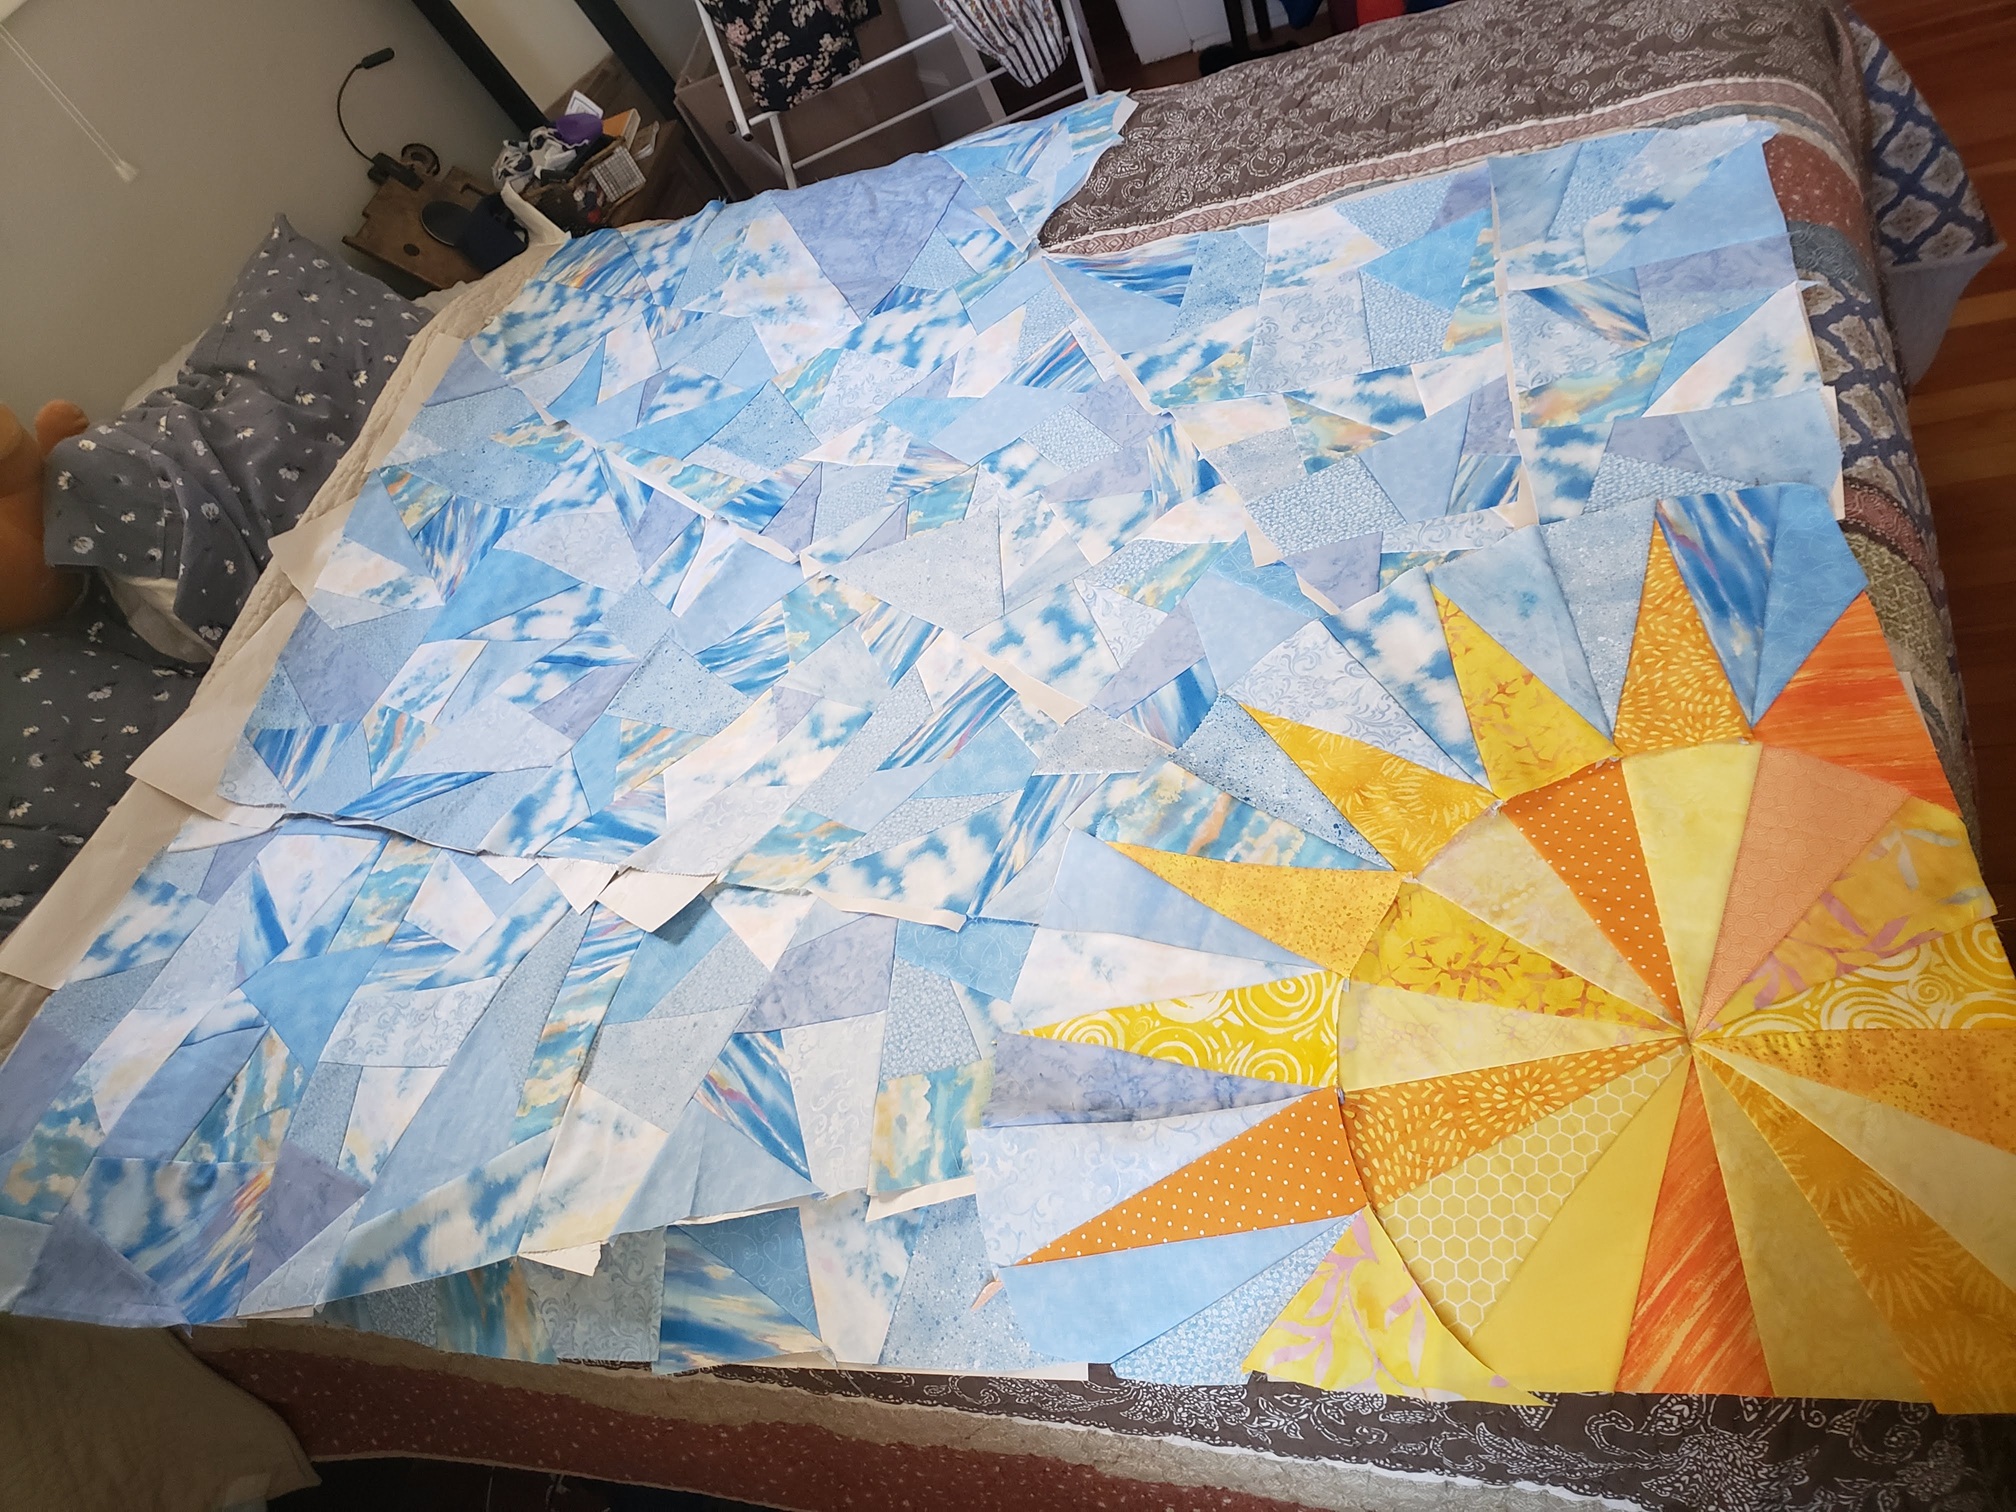
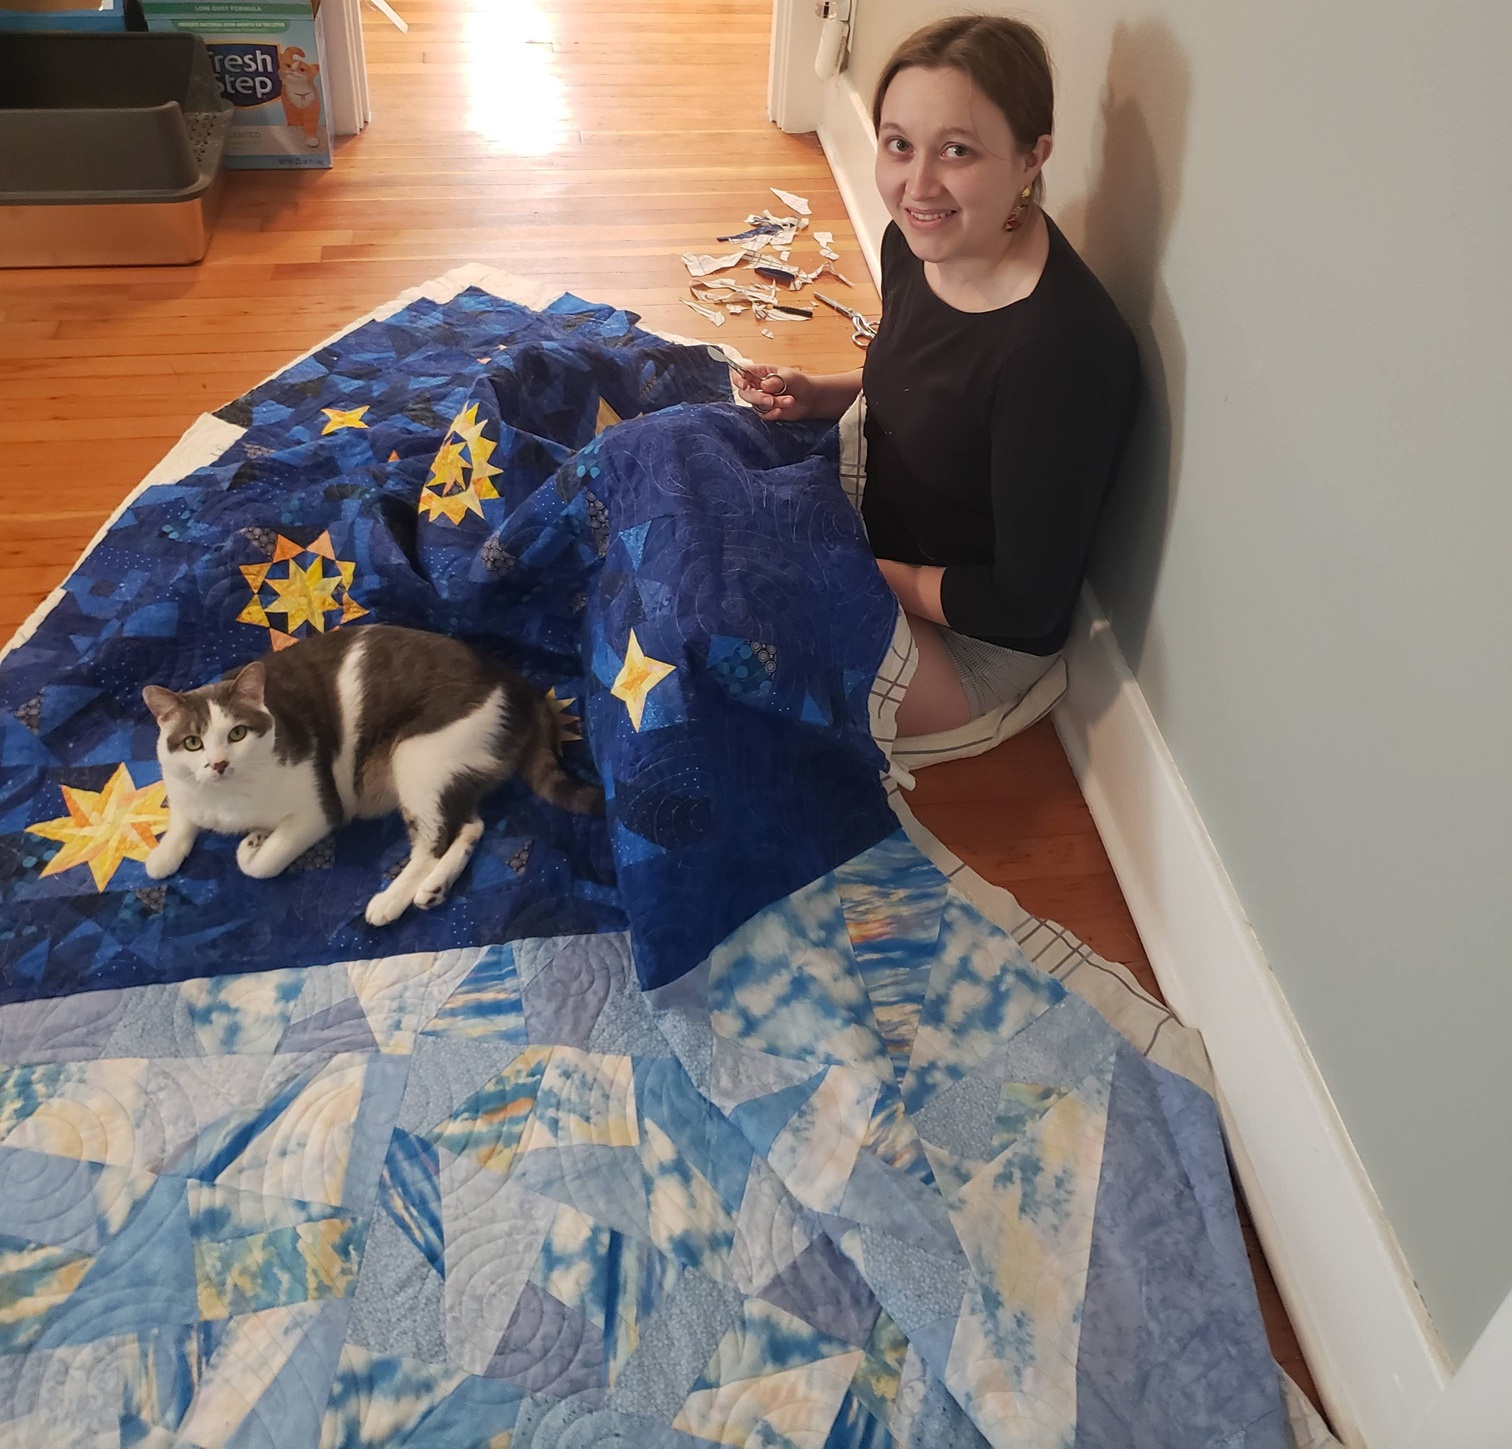
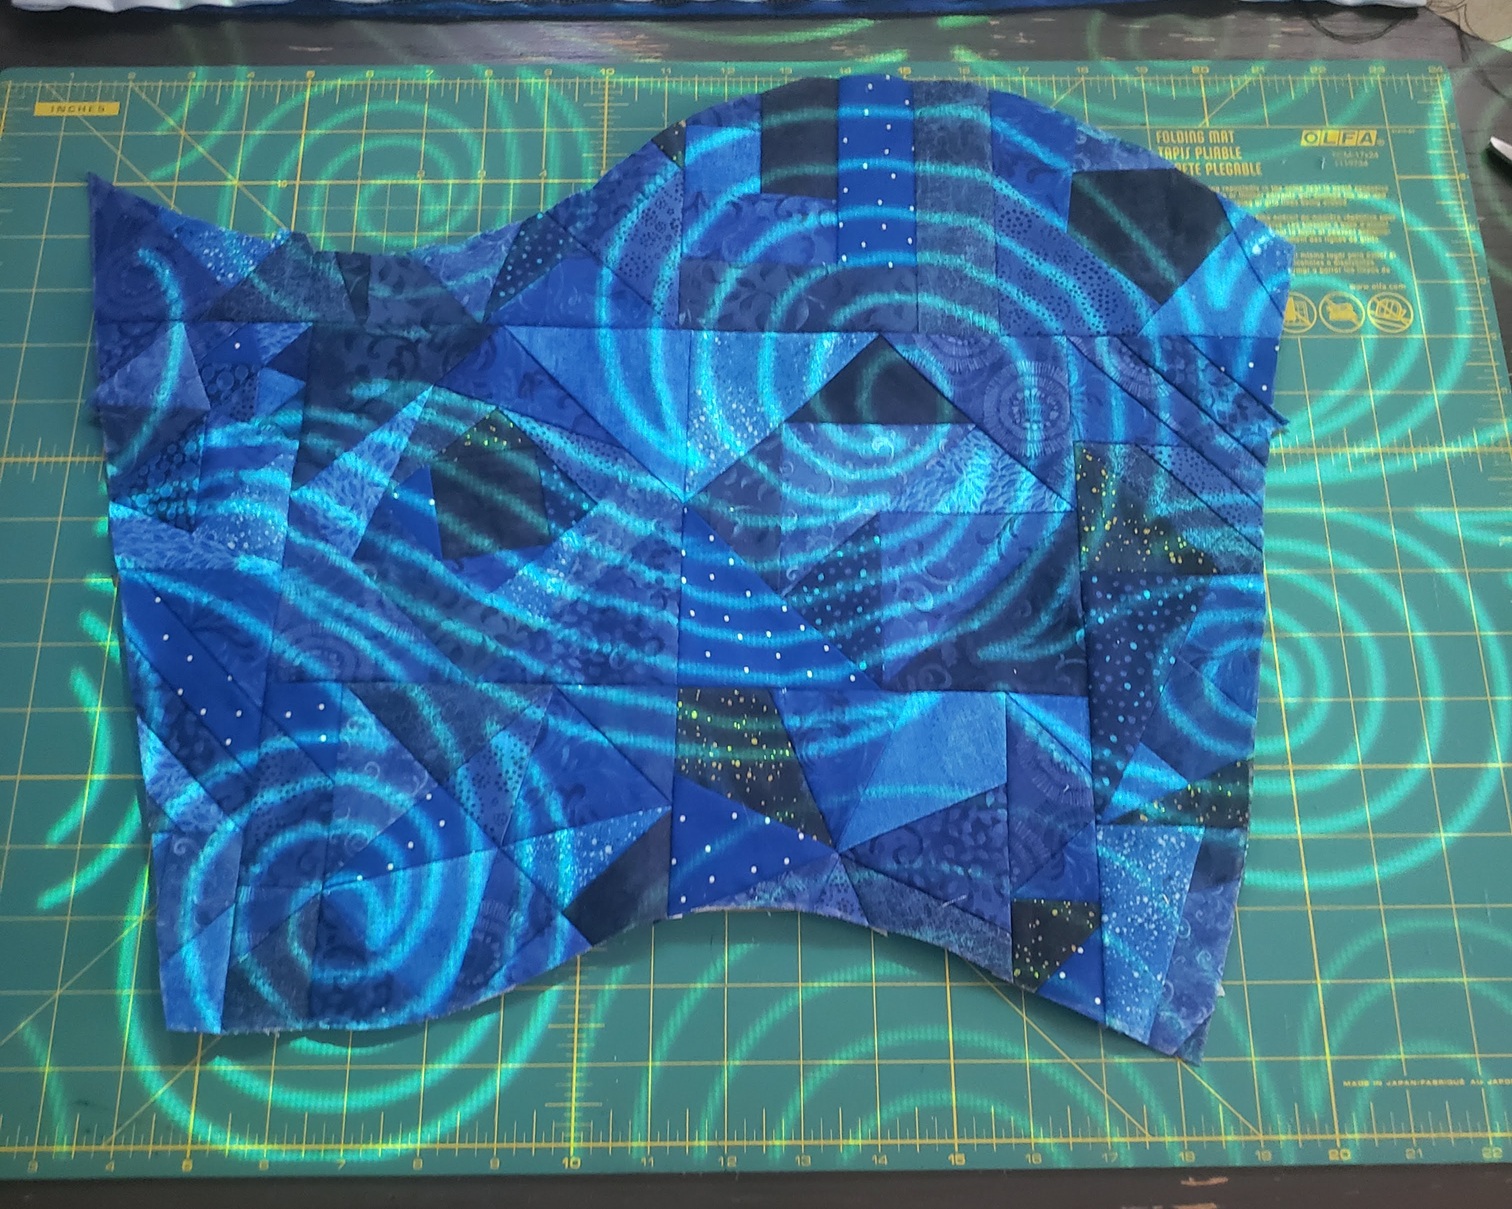
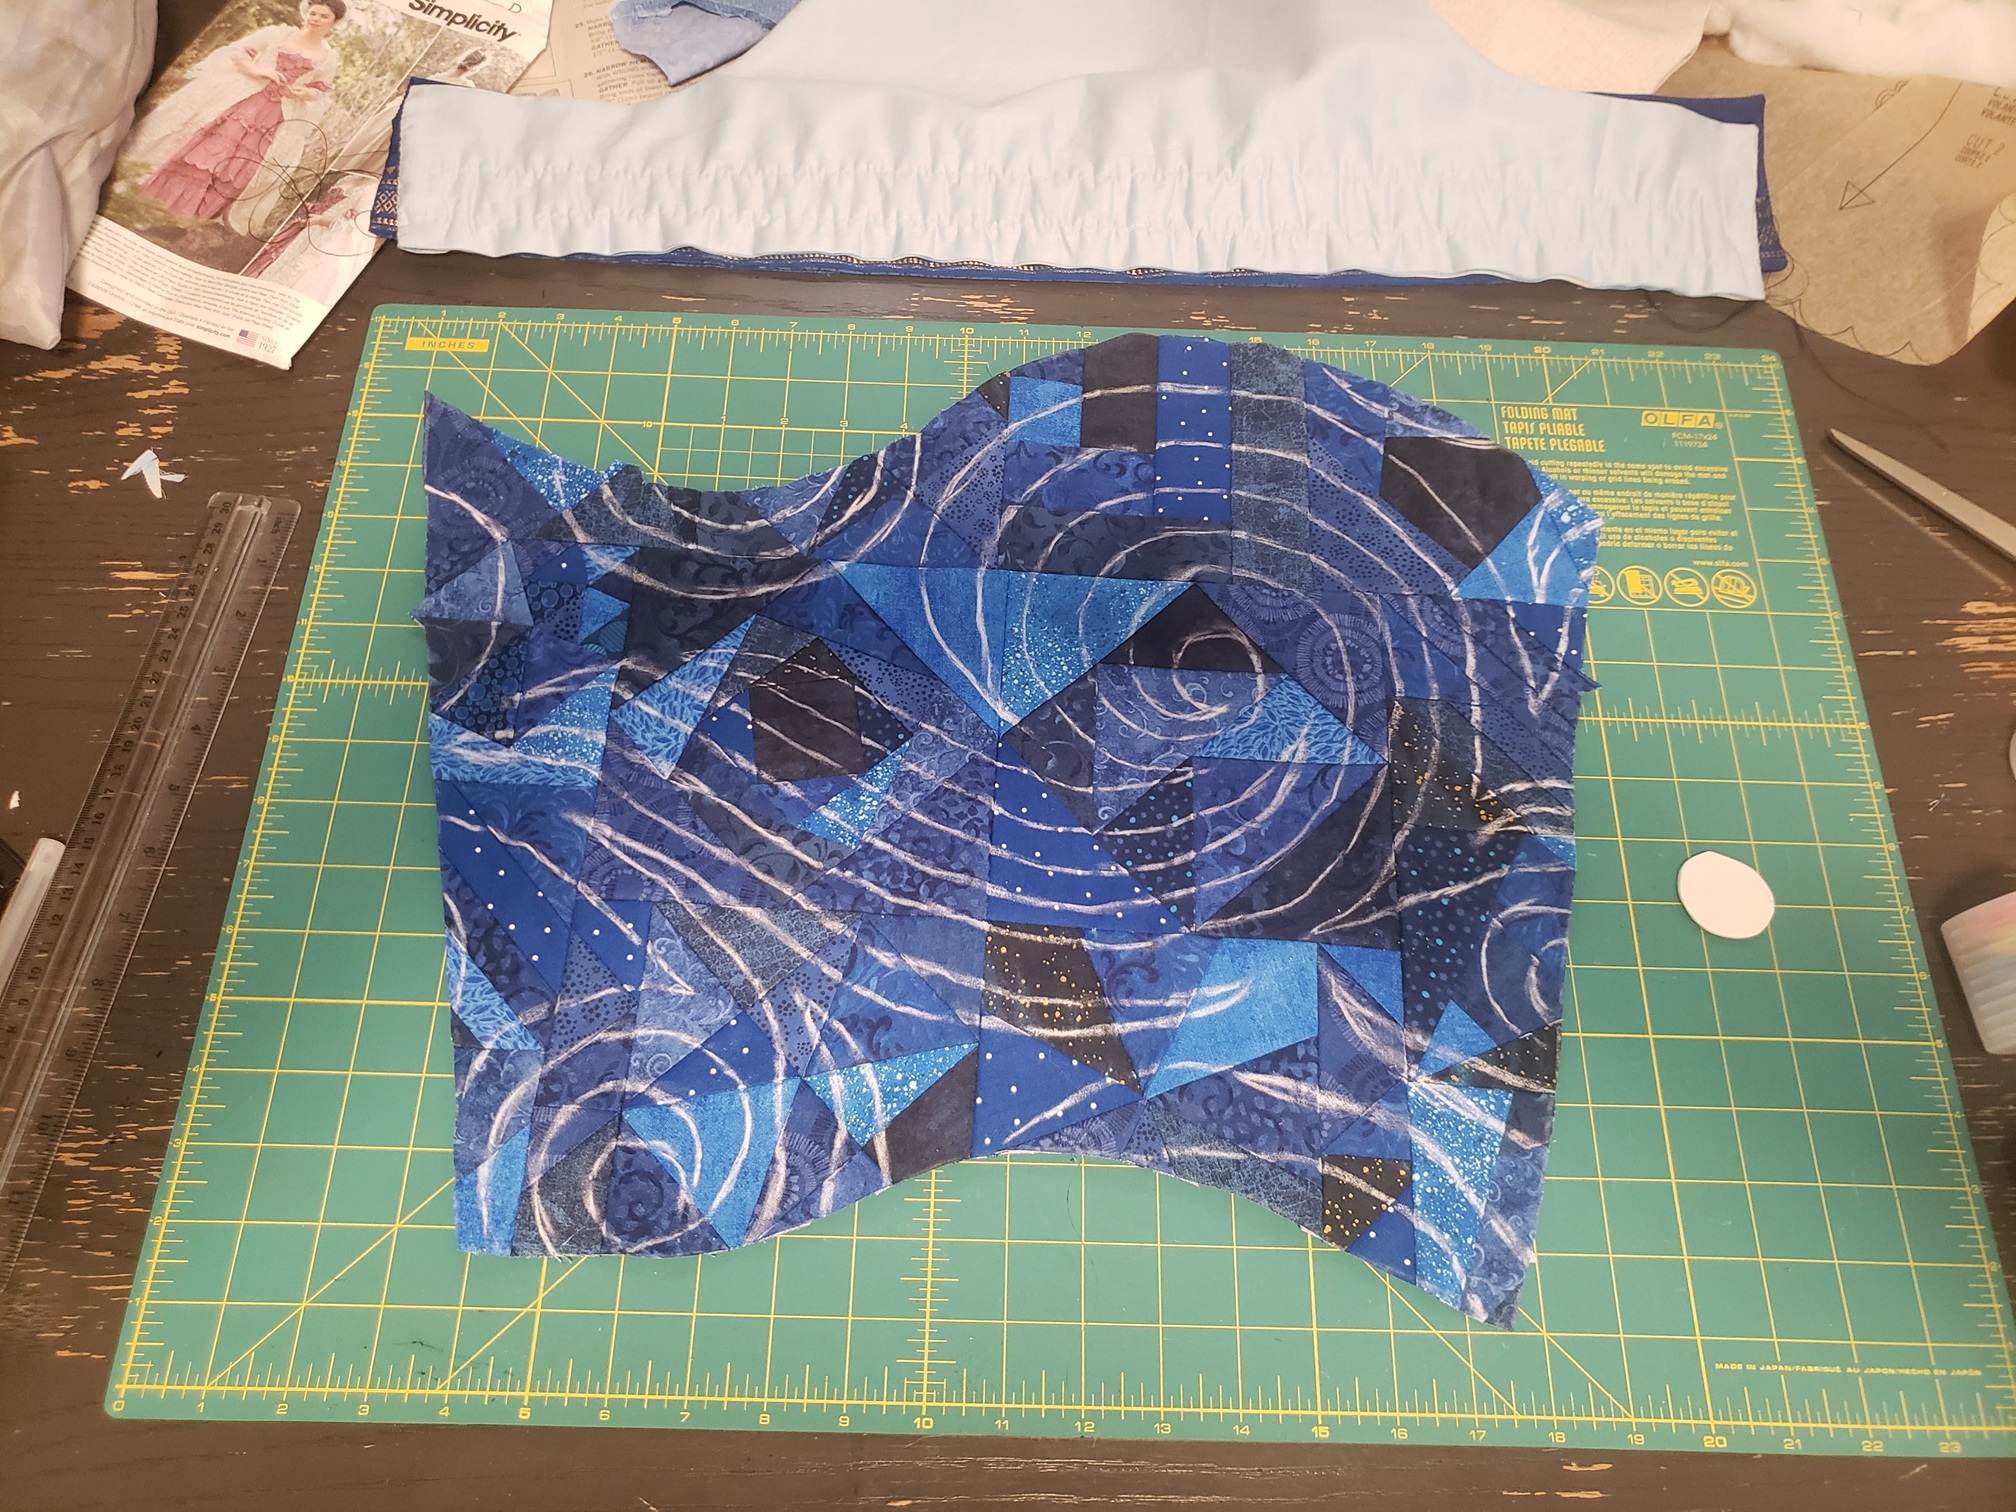
After those sections were finished, I began cutting my sky fragments. I had a system where I started with the fabric I had the least of, and wrote down every place I intended to use it. It actually kind of felt like I was a waiter taking orders :P I would go into the living room with a pad of paper and a pen (my sewing room table was not big enough to lay it out), and I would start listing 'coordinates'--like, "okay, the floral fabric will go on A1, A15, A40, B17…" I was trying to get a good dispersion of each fabric type and avoid the same pattern being placed next to itself. Once I was out of my more limited fabrics, I moved on to the ones I had an excess of, and filled in the rest of the gaps. At some point I became fed up with my cat running across my work and scattering all the pieces, so I moved it to my room where I could shut the door. It was at this point it actually felt like I was making a Queen Mattress dress because it legitimately started to look like a bed spread.
Once it was all cut out, I started to sew. I worked one 'ray' at a time, doing a first pass with all my smaller foundation patterns, then sewing those together, recursively until it was all one piece. My partner Zak said this was just like "when you let molten metal cool and form back into a solid!" A bit of a stretch, but I liked the analogy nonetheless. It did feel like I was forging armor.
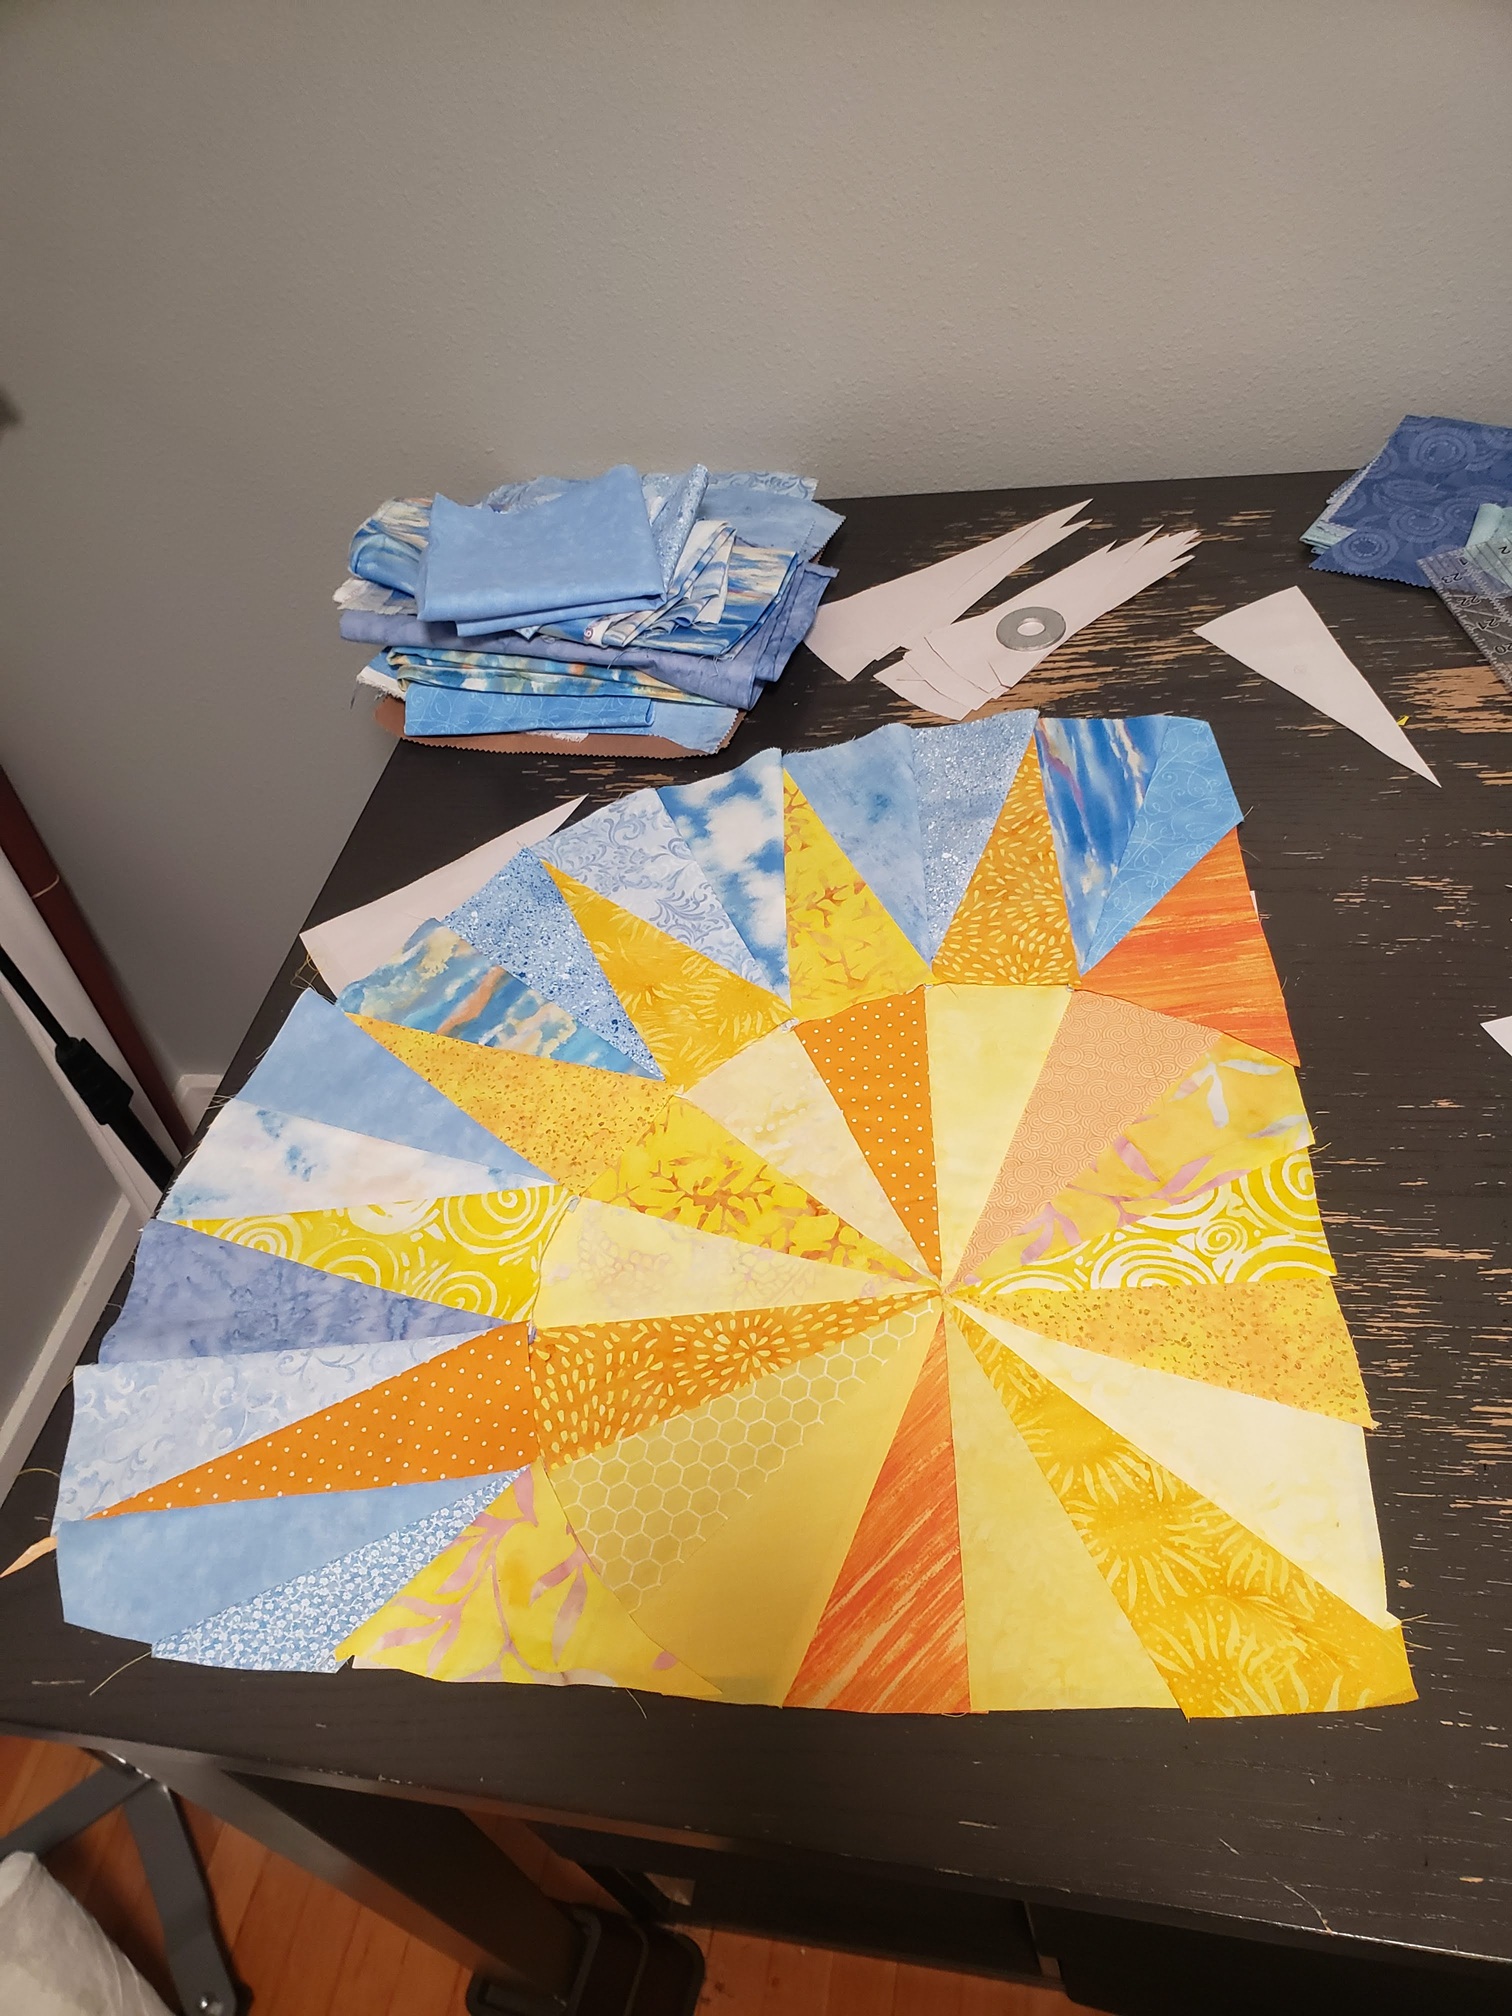
After all six 'rays' were complete, I could finally put it all together. I had left the sun-rays for last because I figured it would be easier to manipulate it to fit around a curve if it wasn't attached to the center sun, which was sewn on last.
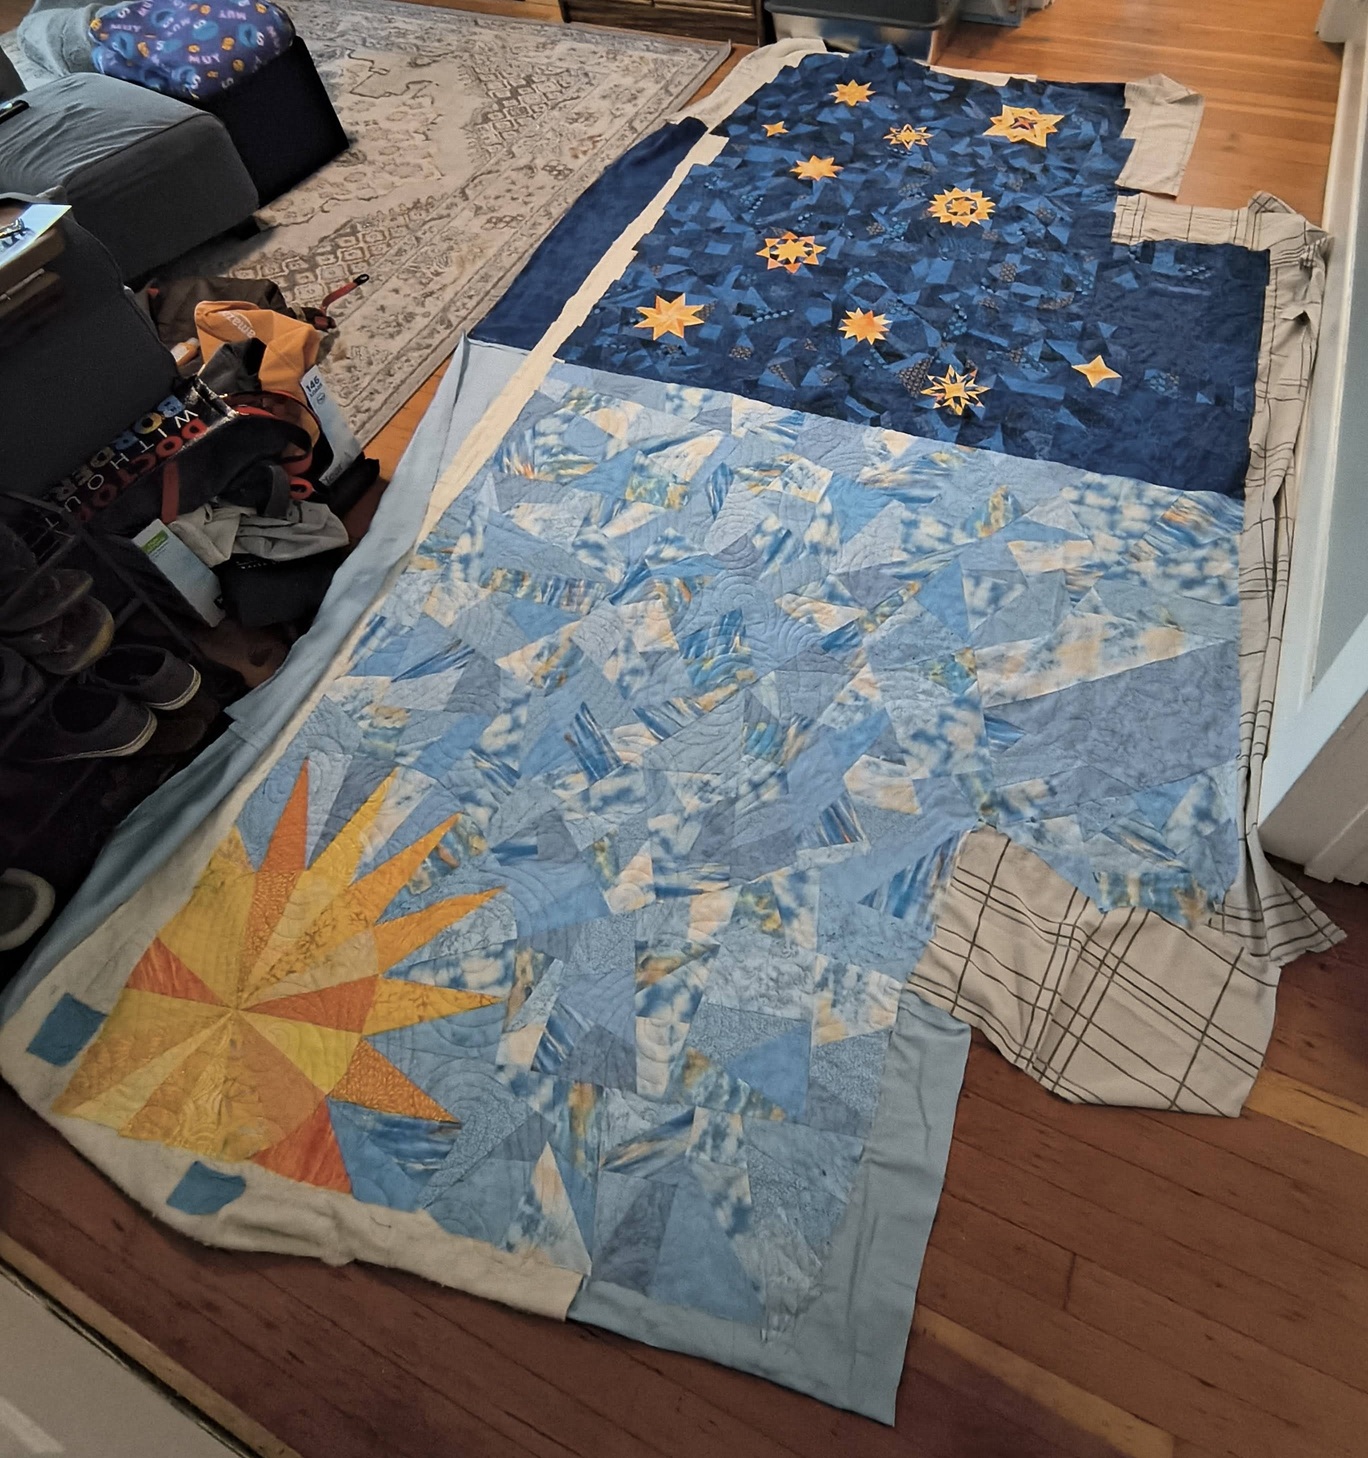
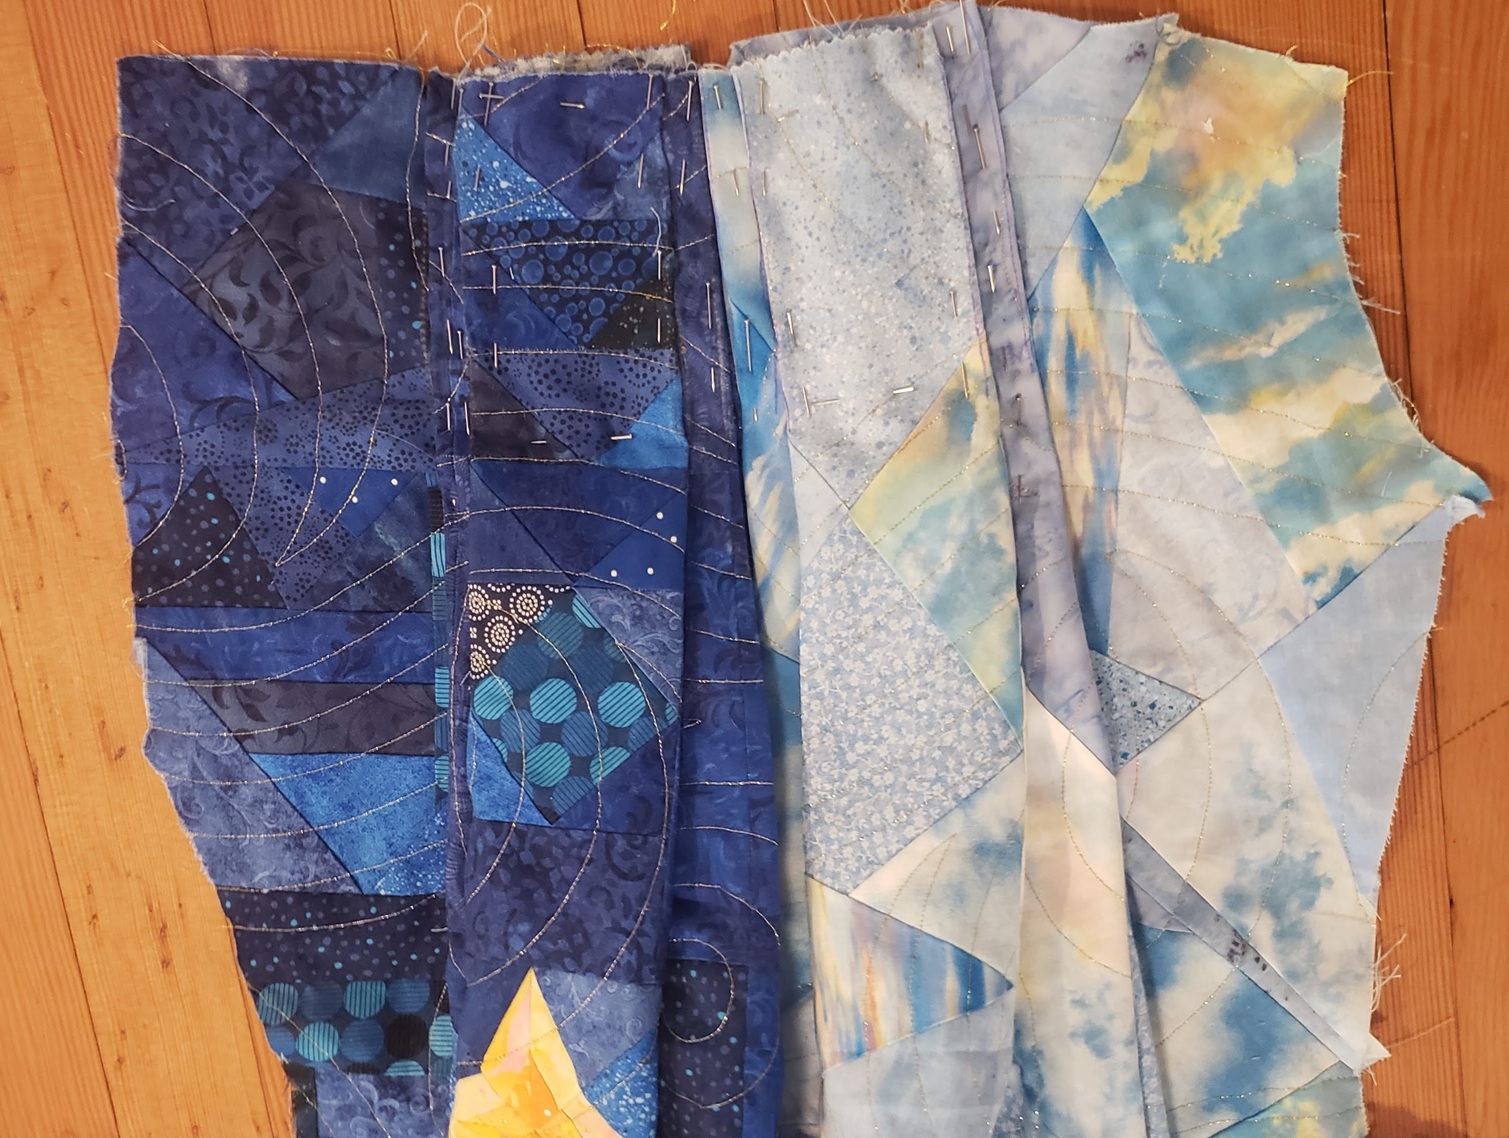
I was then able to finally combine the two 'night' and 'day' halves!
I contacted the longarm quilter, Laura, to tell her the good news and go over the plan one more time. I outlined where the backing and batting would start and end. I also sewed the two different backing pieces together and basted extra fabric along the top for easier mounting onto the machine. Sadly, I didn't get any pictures of this step :/ I was kind of in a rush to get them over to her.
When I dropped off the dress with her, I stayed a bit longer just to make sure everything was aligned how it needed to be, but after that, I finally left the rest up to the professional. I appreciate that she let me stay as long as I did to give me peace of mind :)
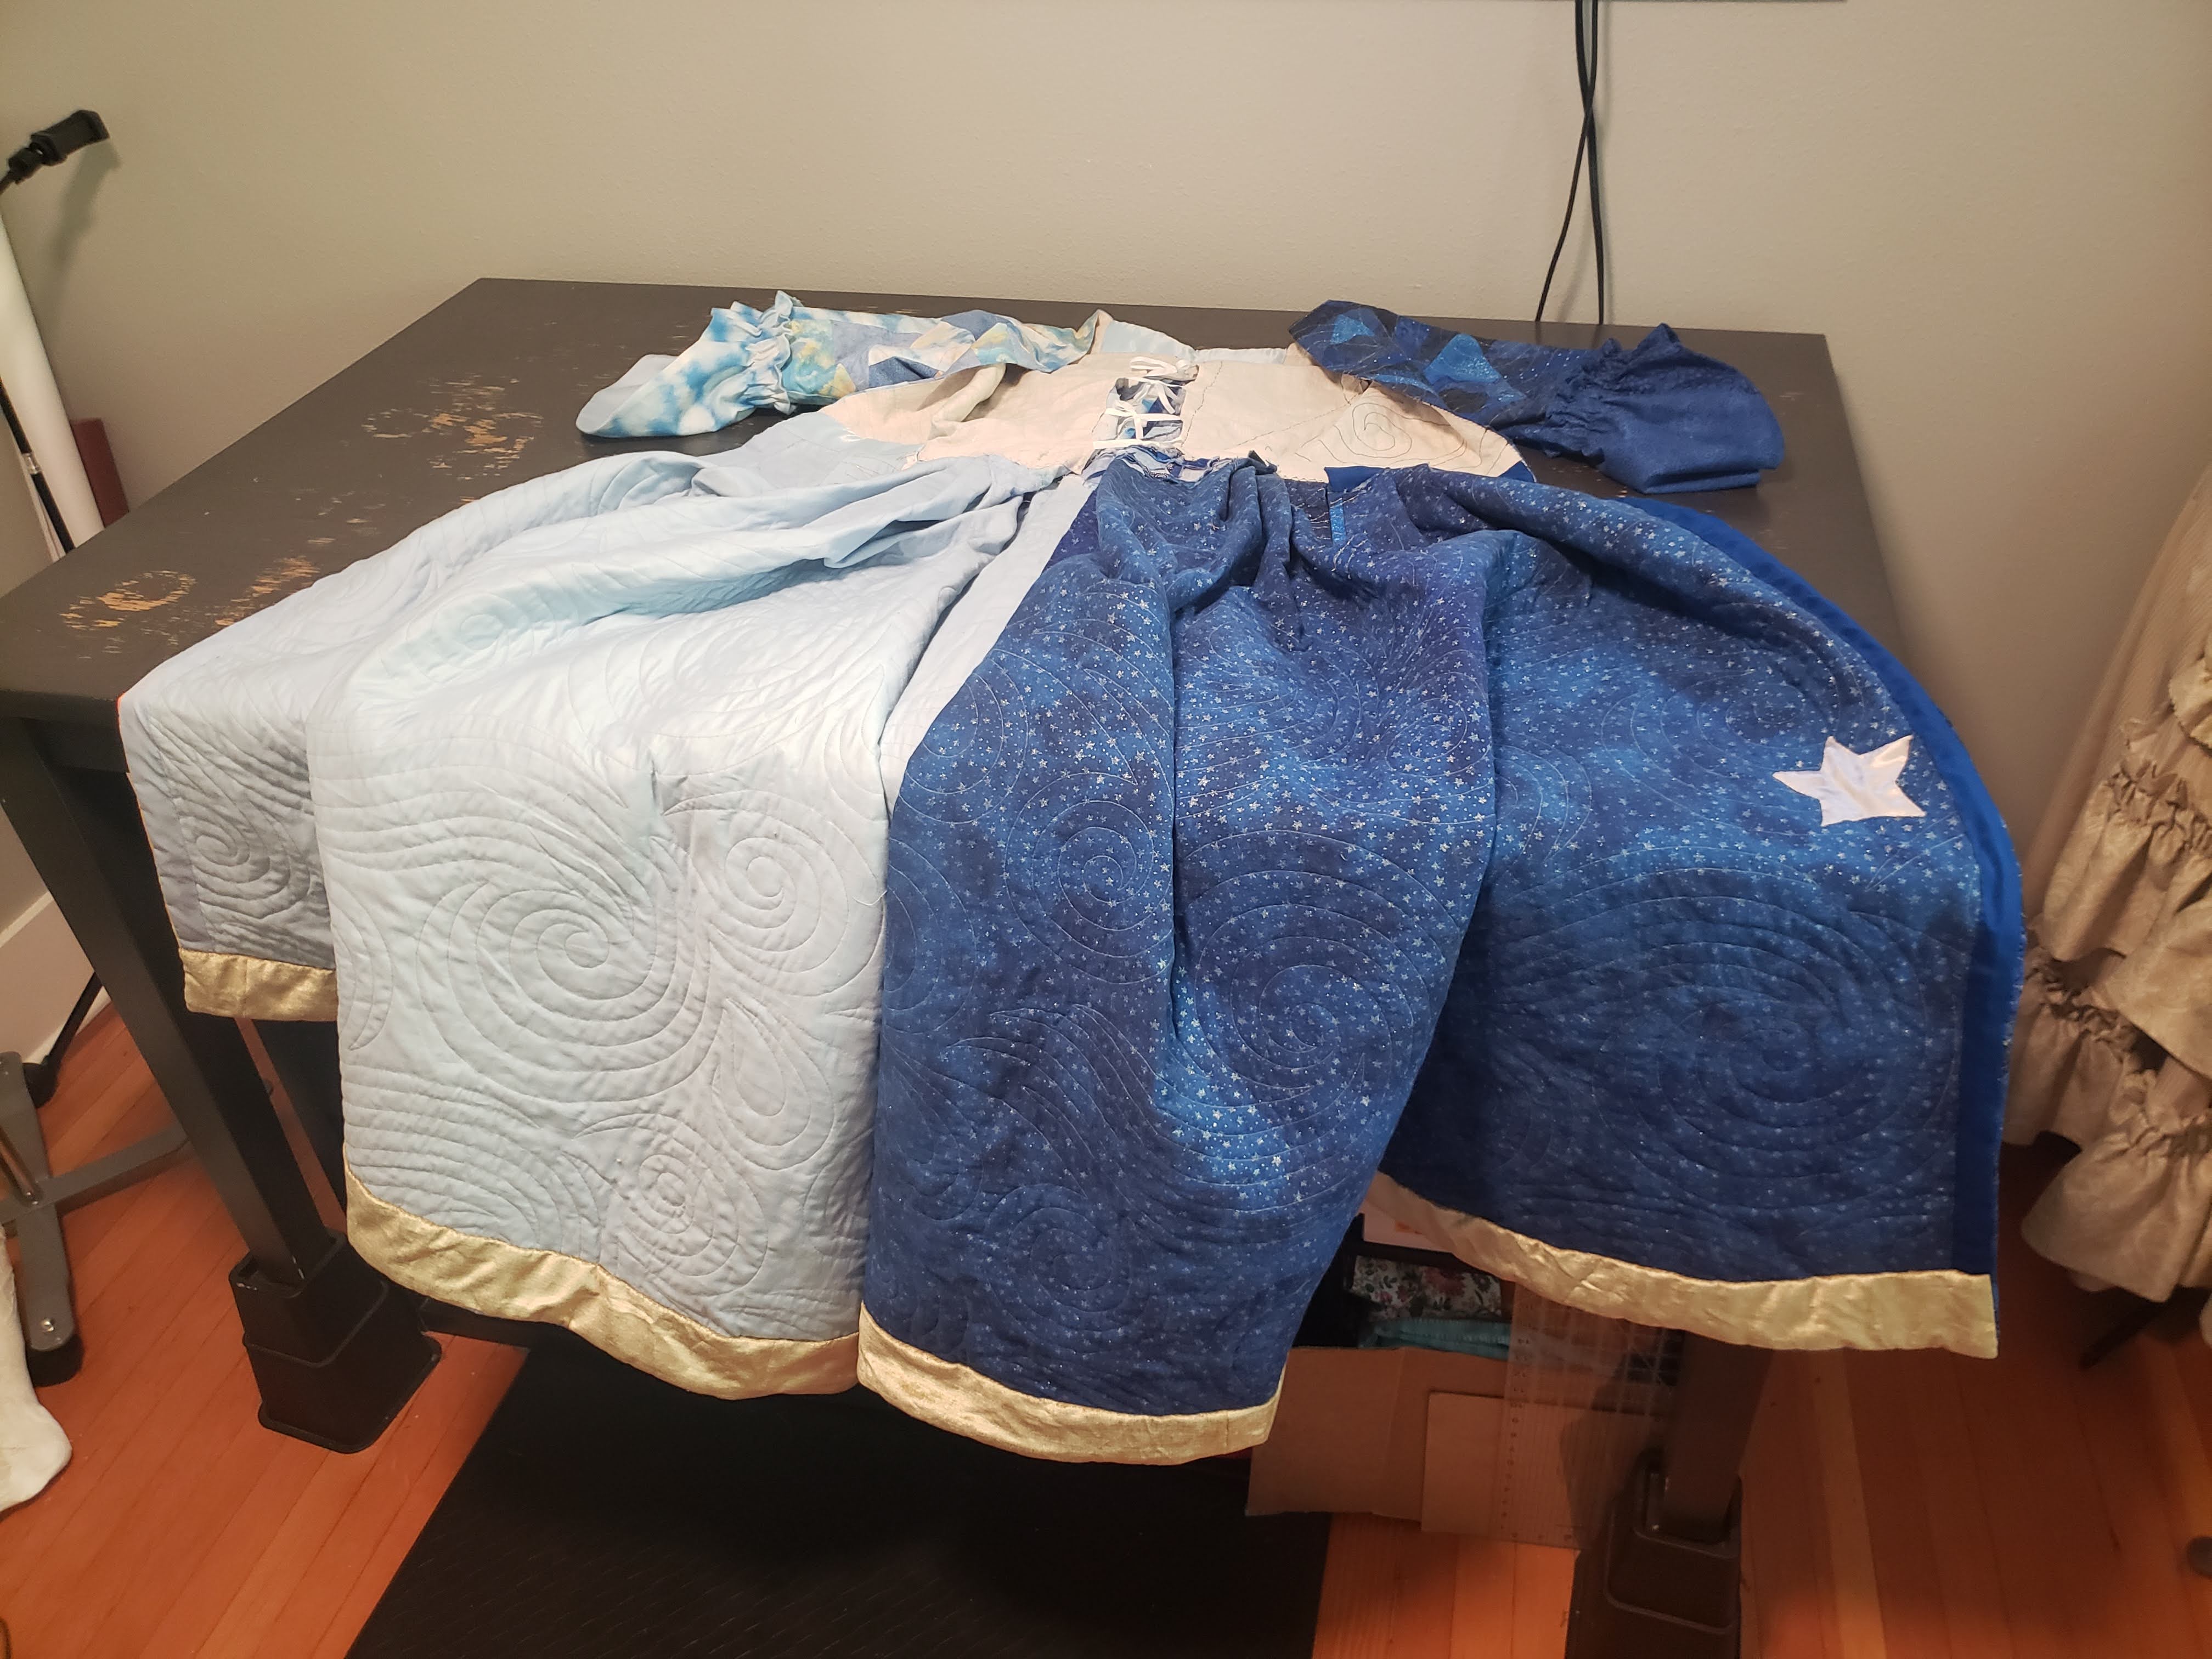
After just a few short days, she handed it back to me, fully quilted and
OH. MY. GOD.
IT WAS GORGEOUS!!!!
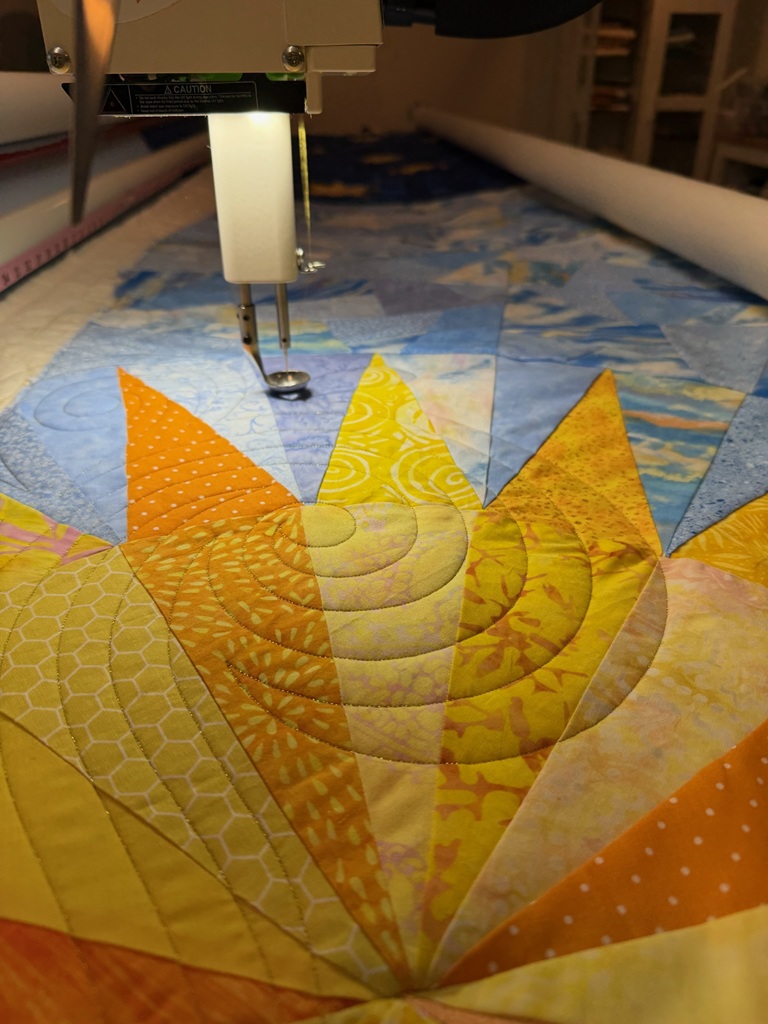
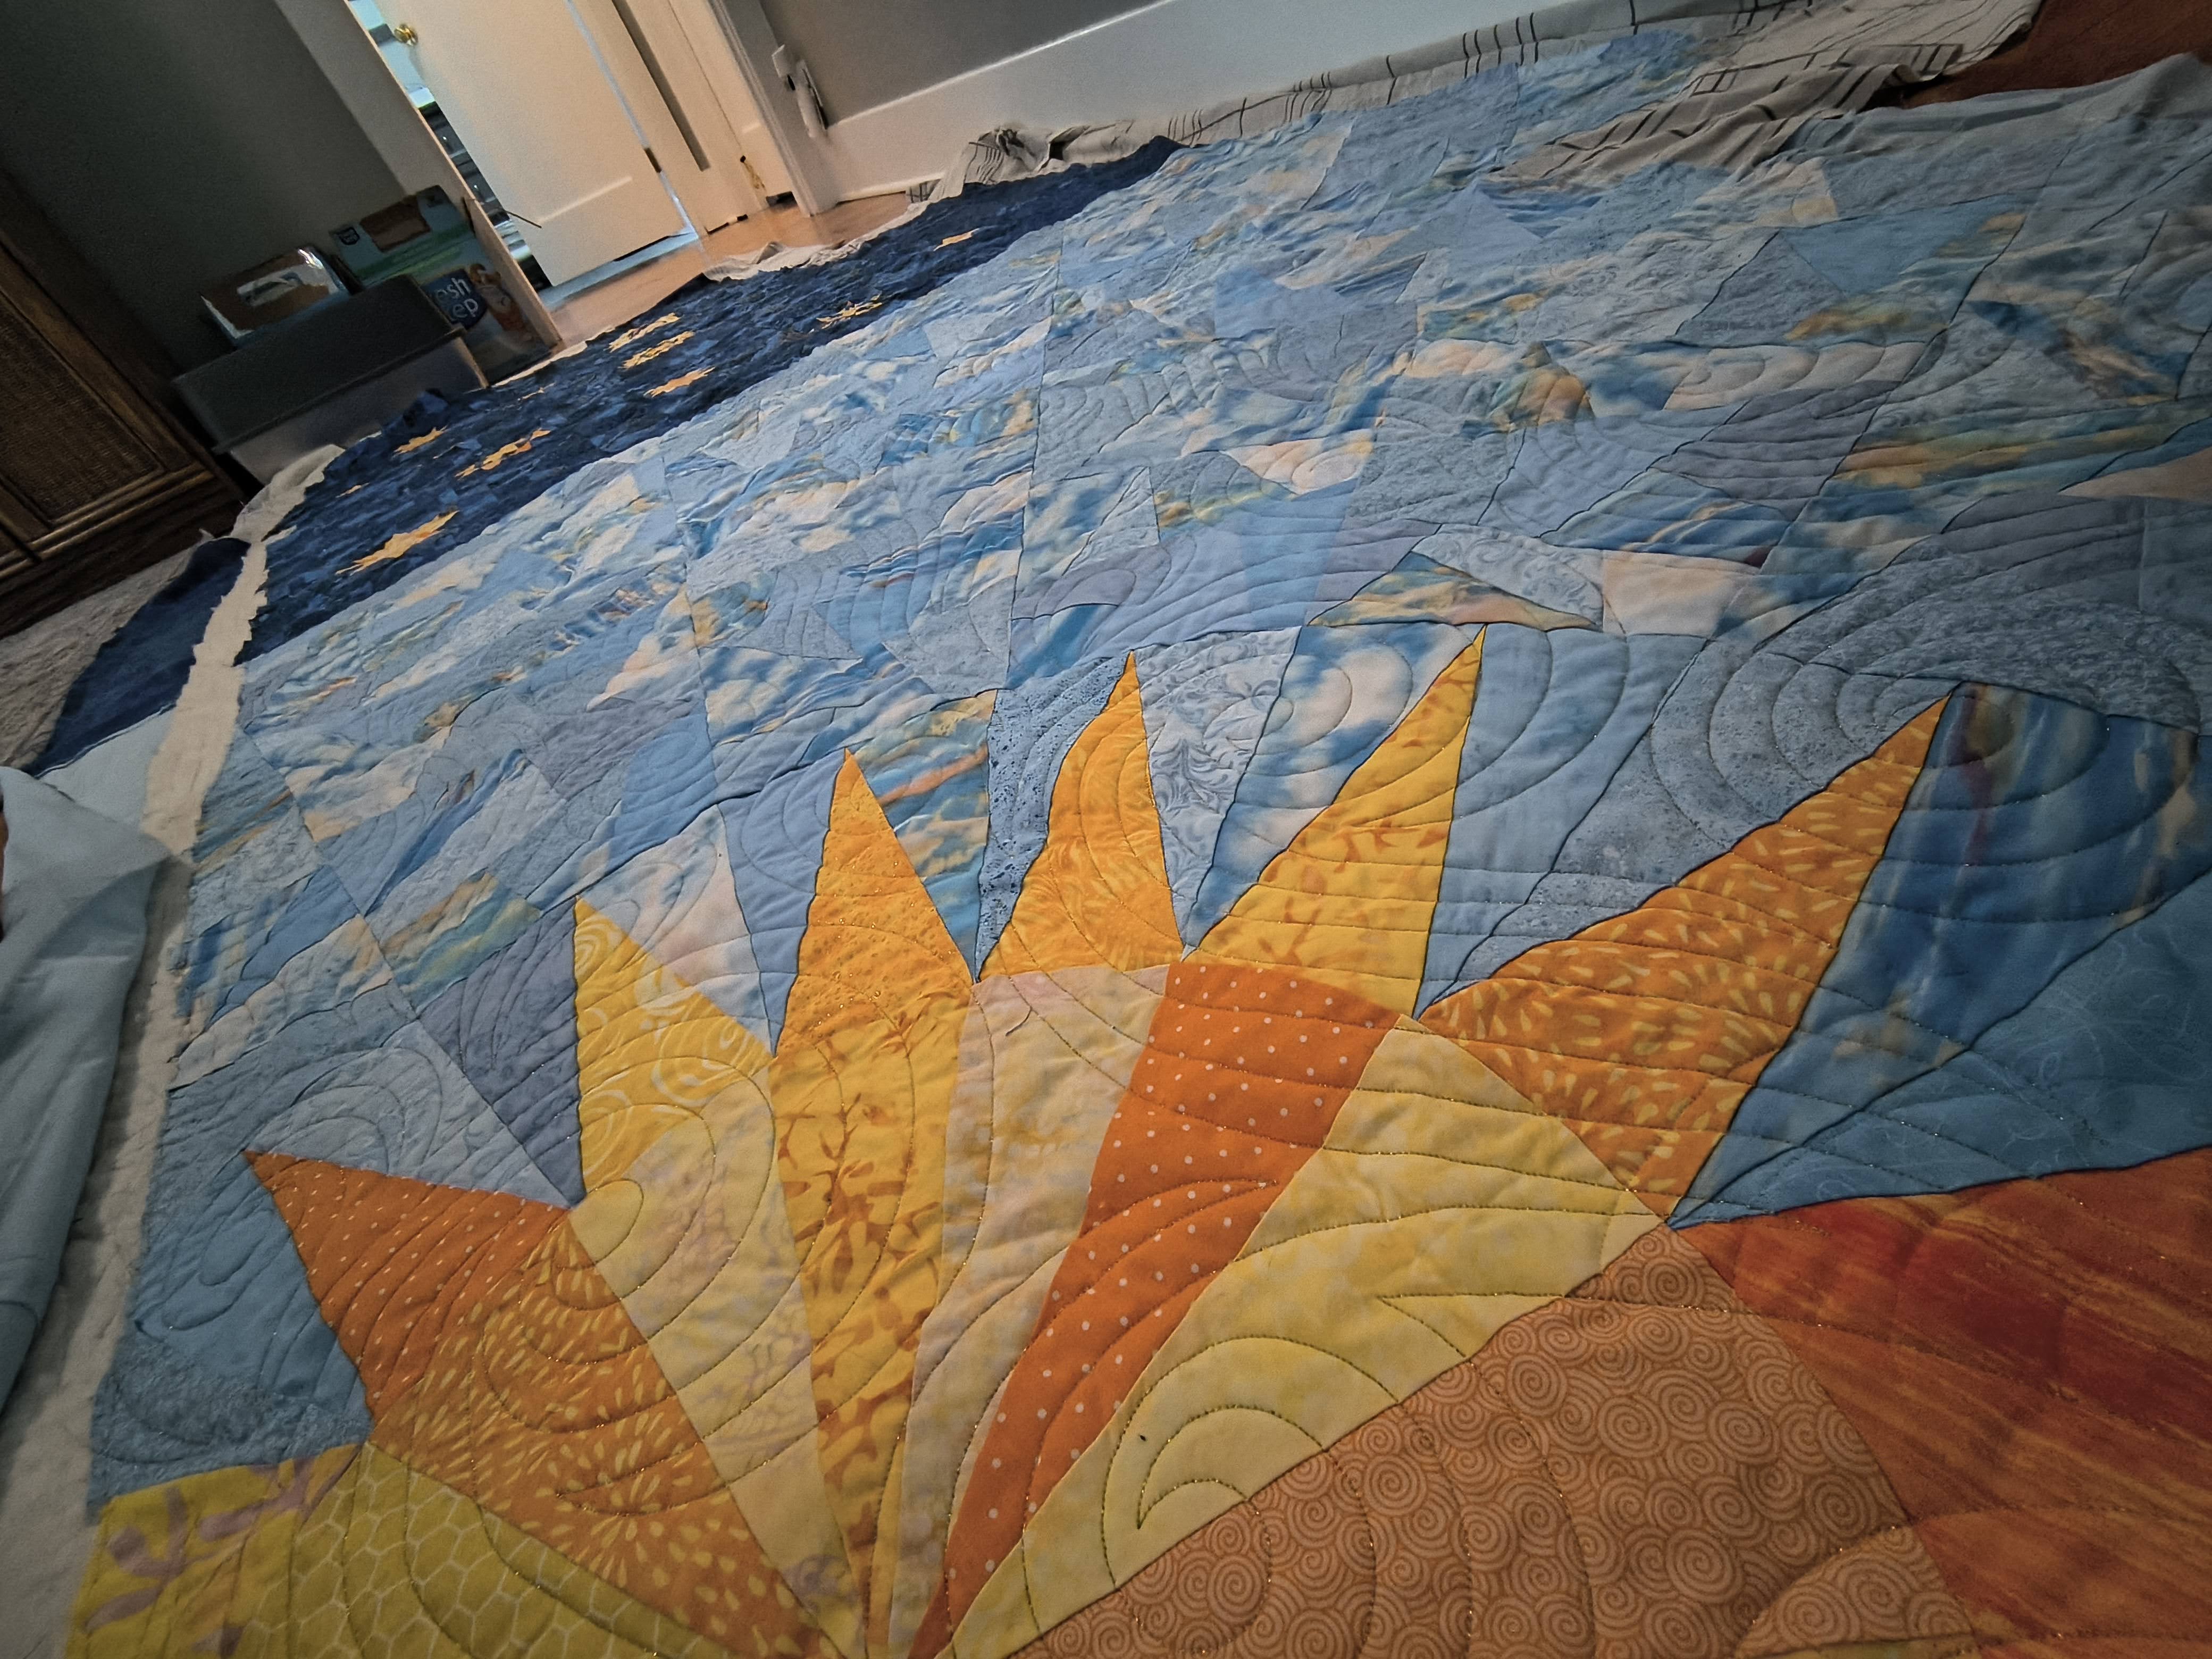
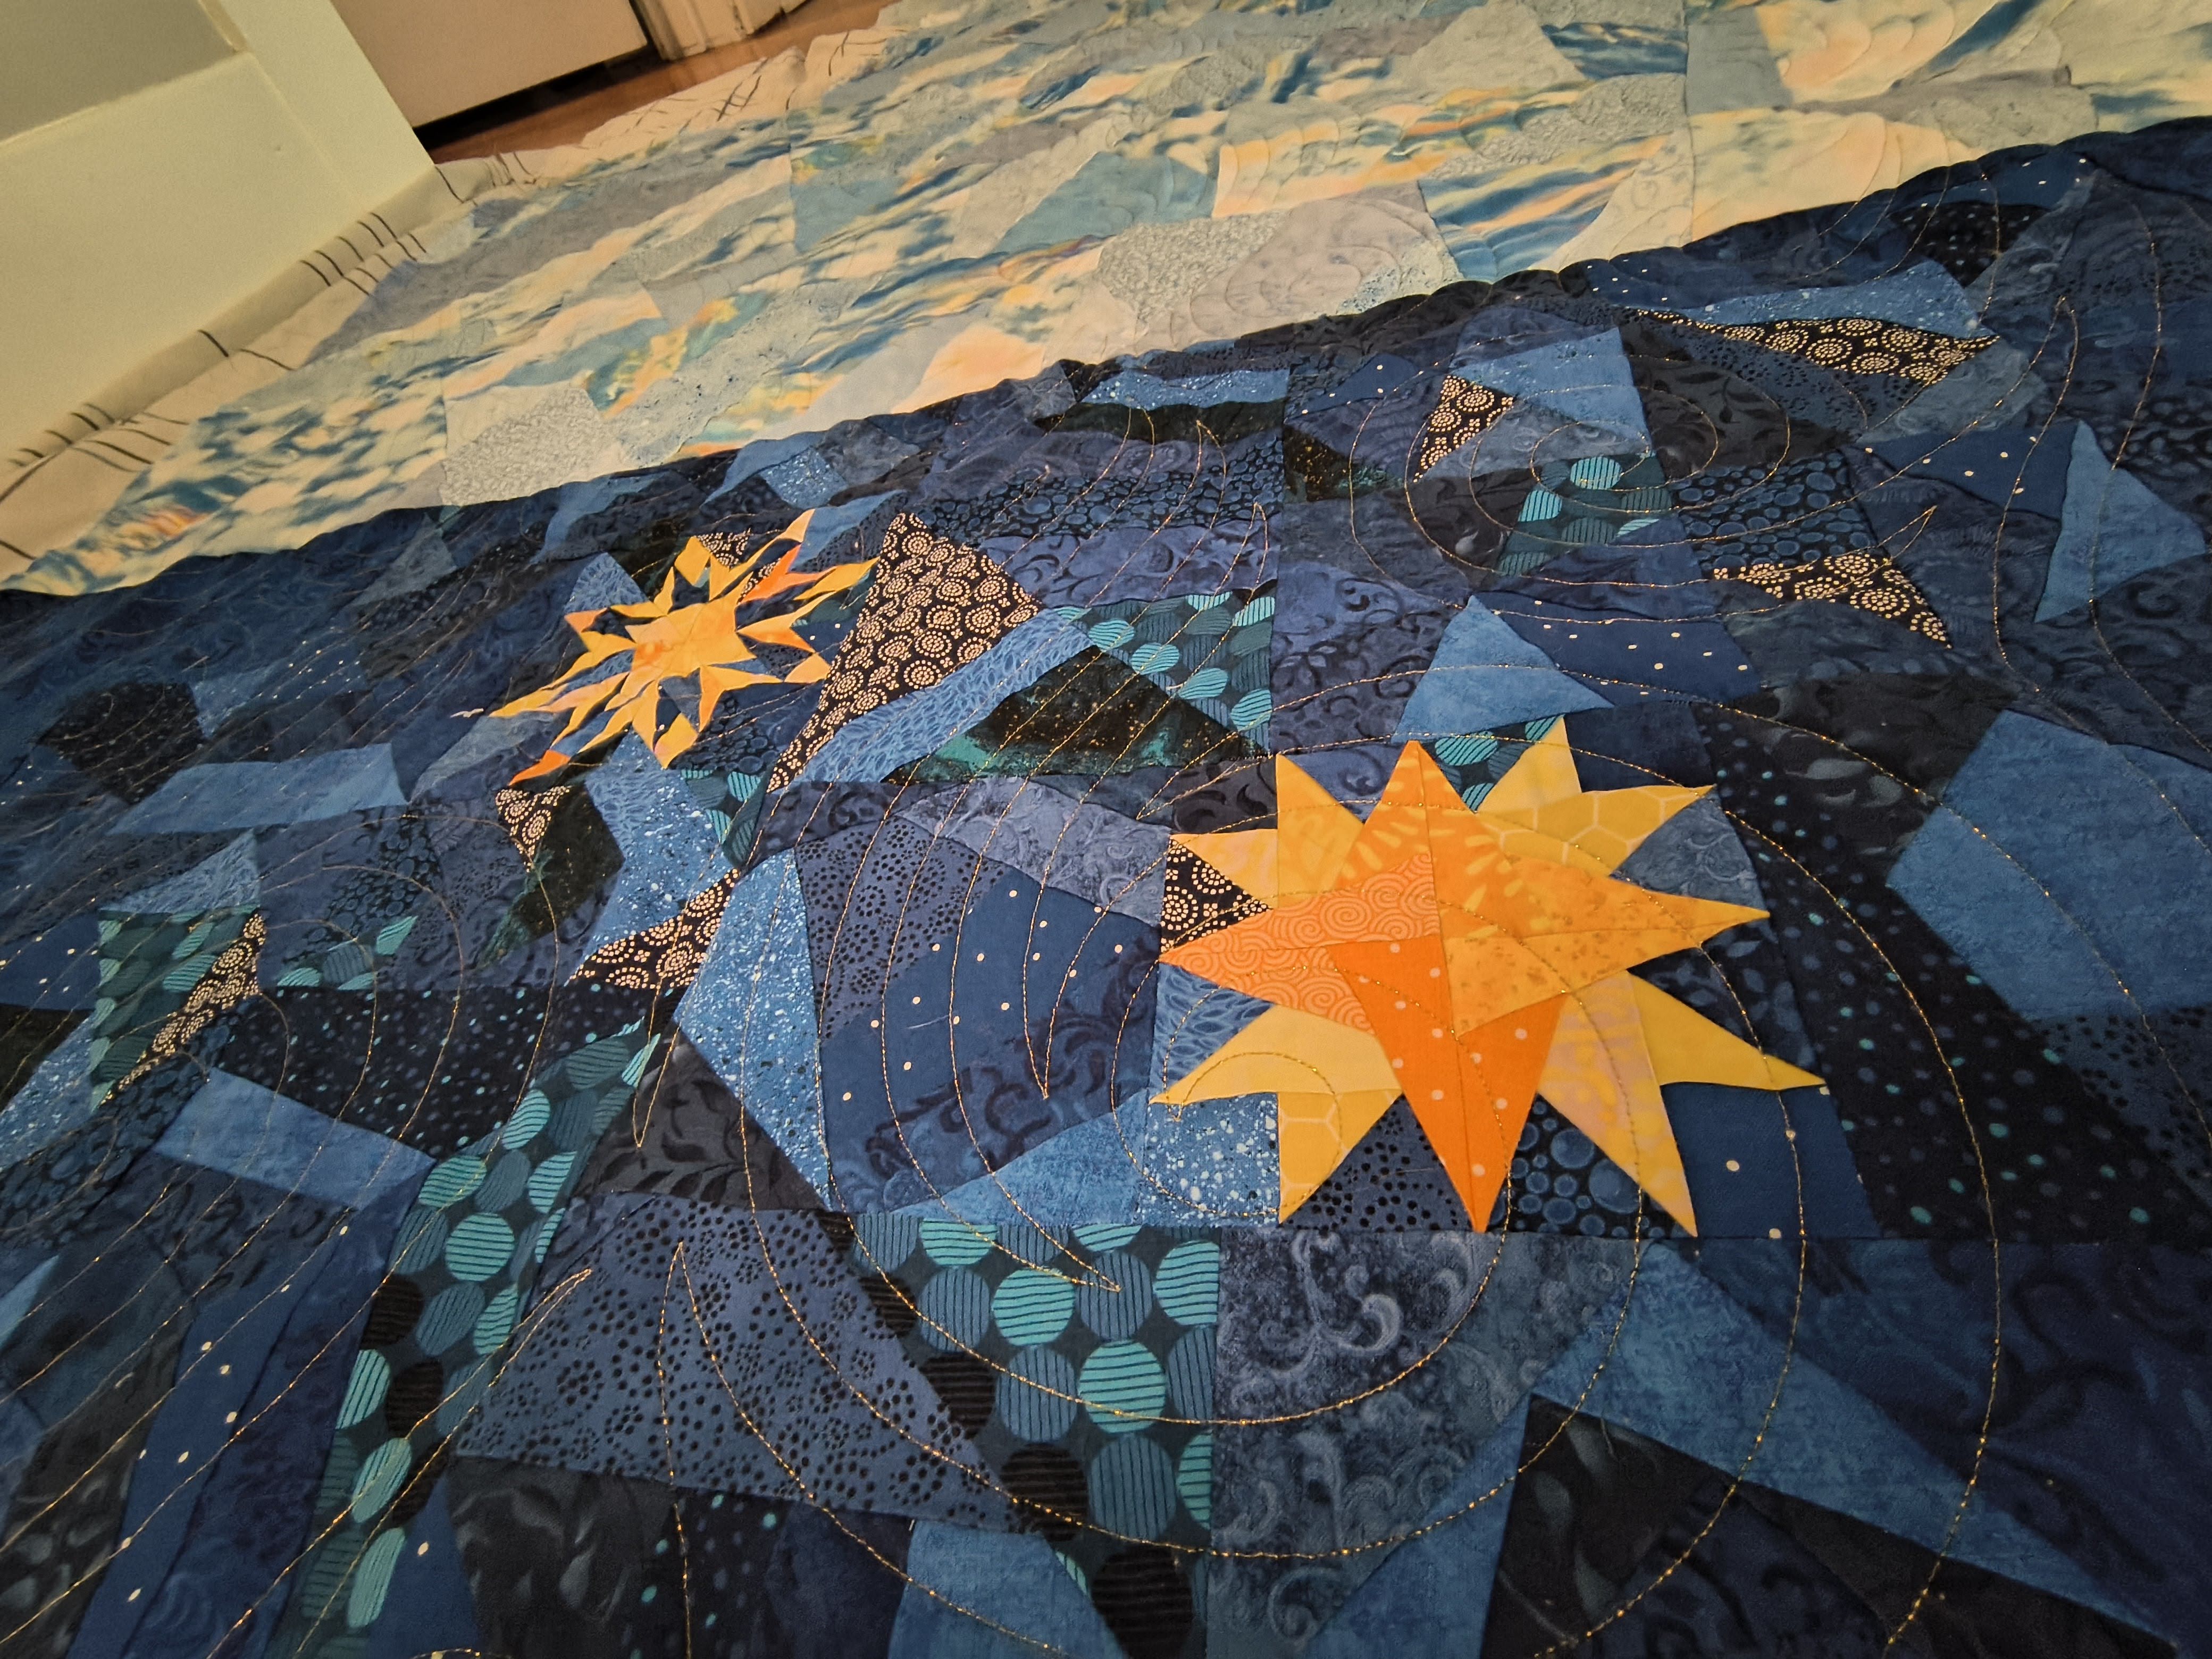
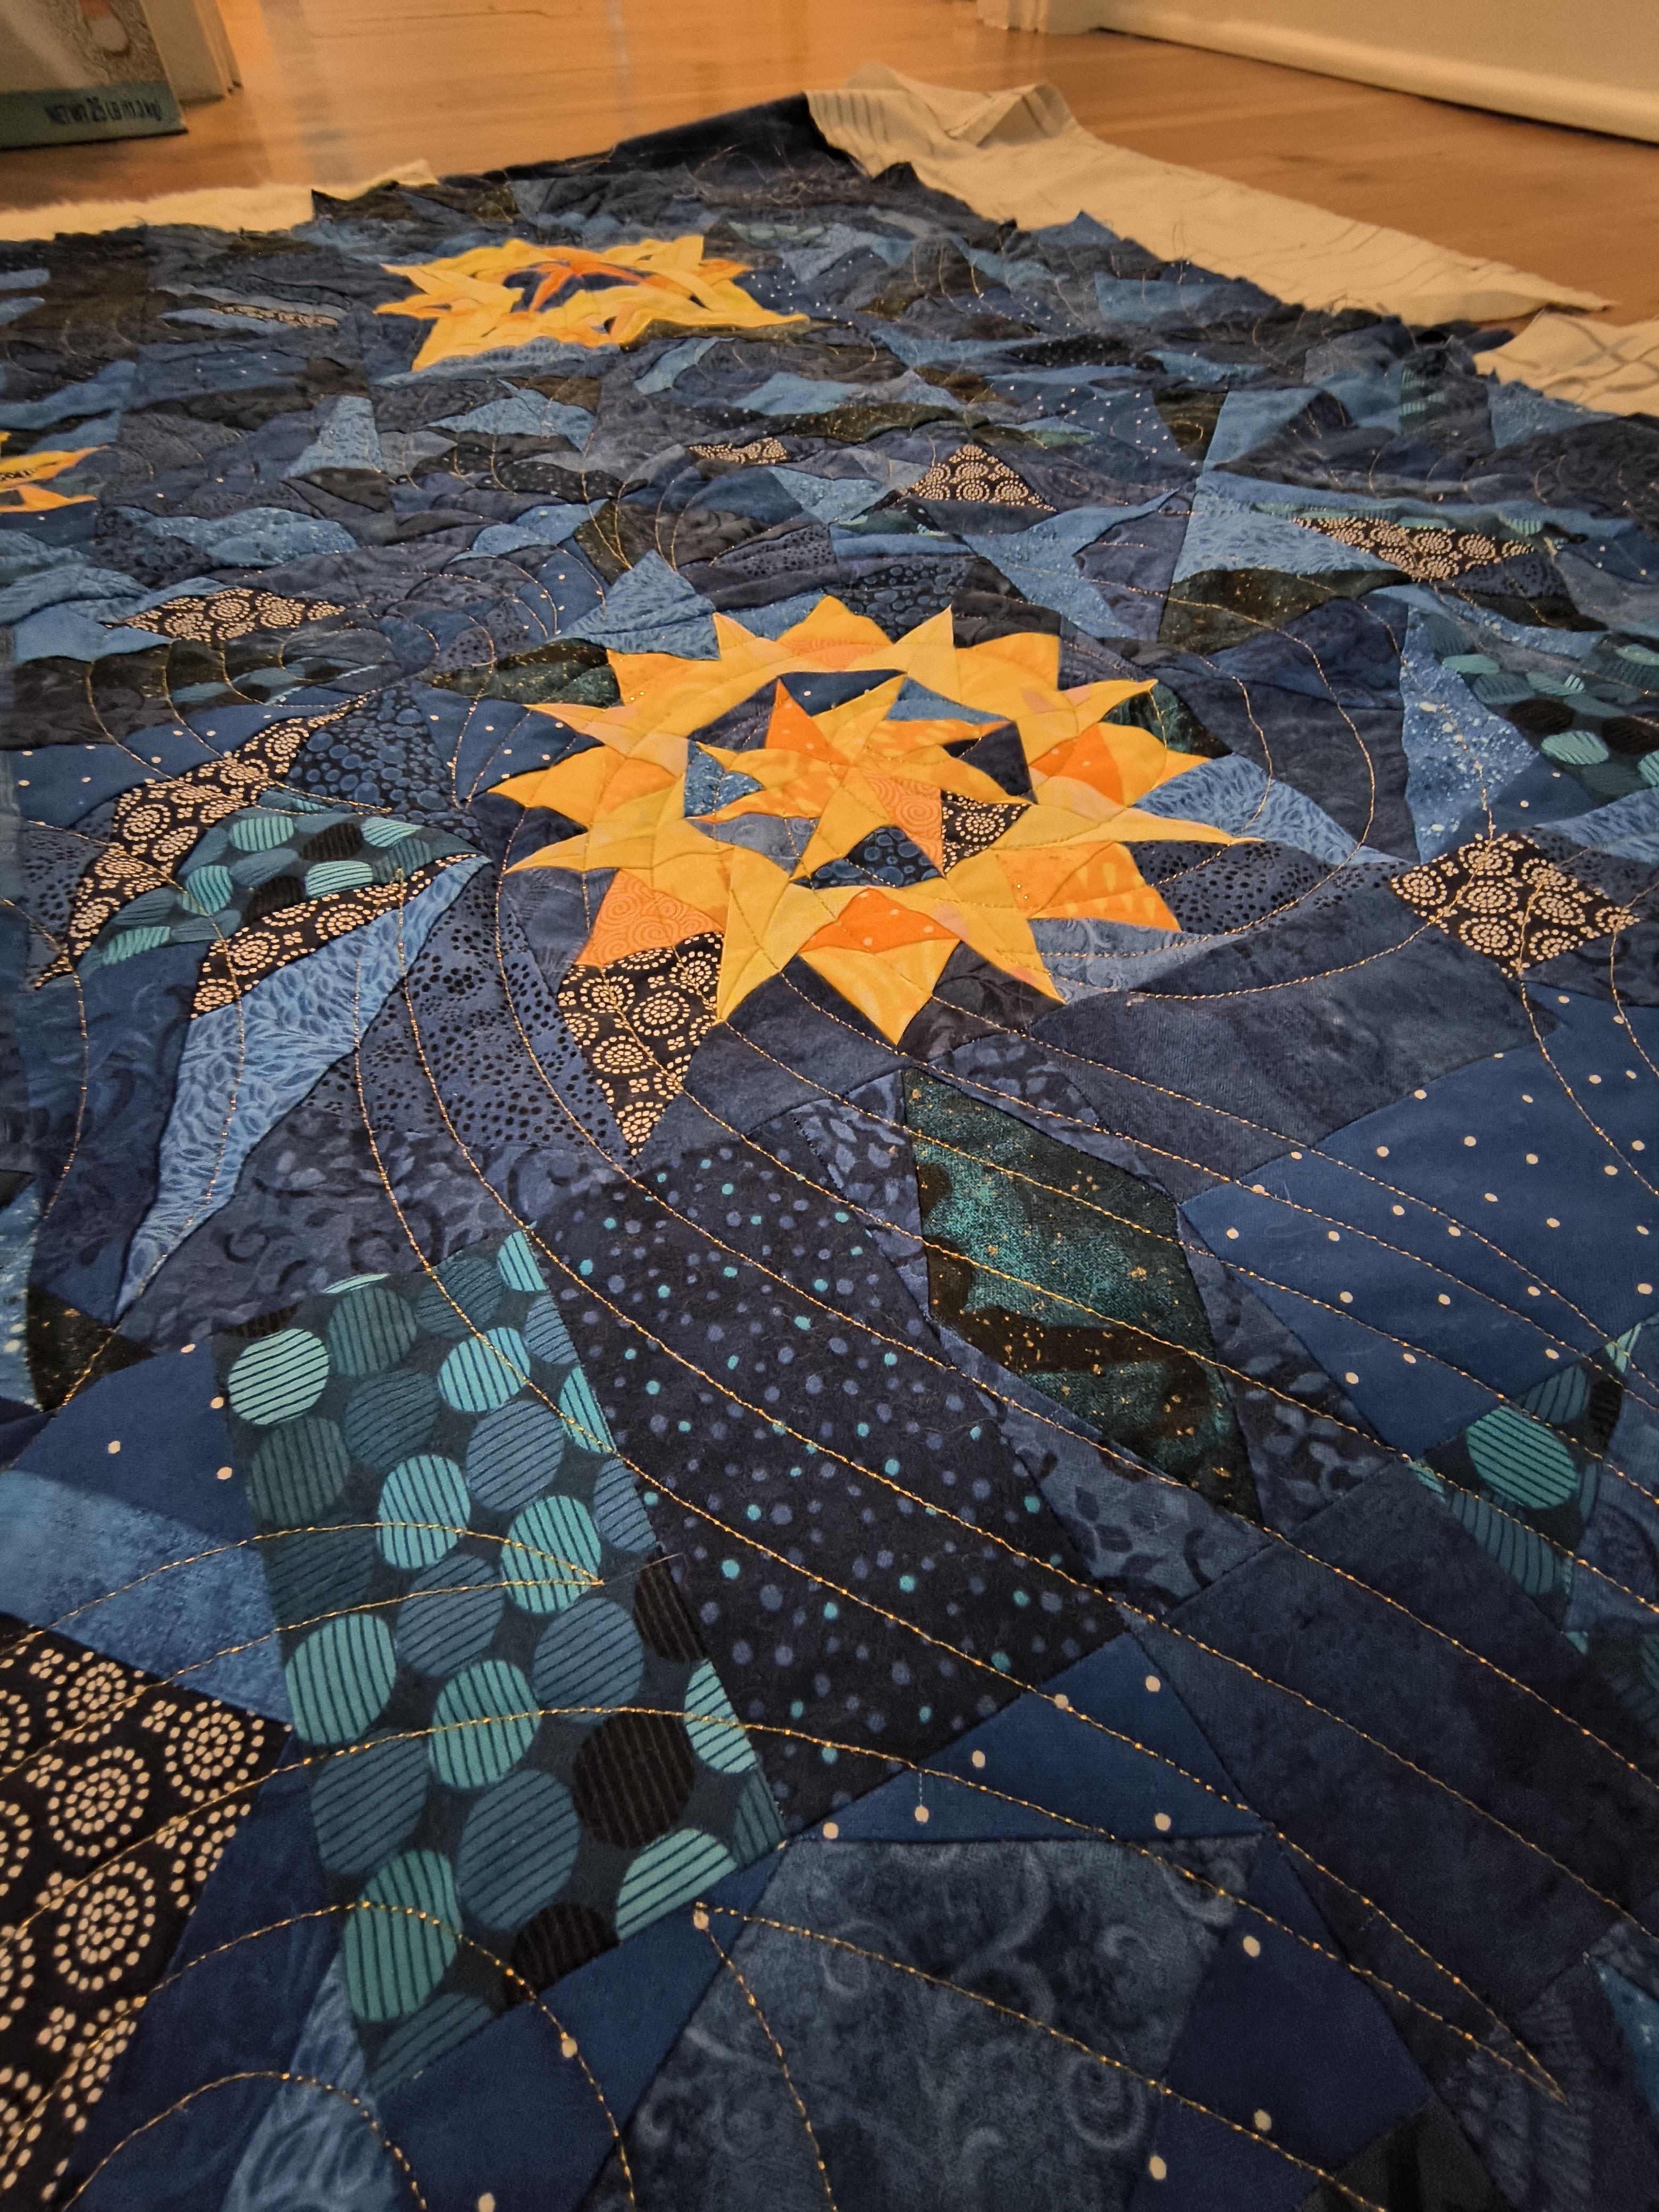
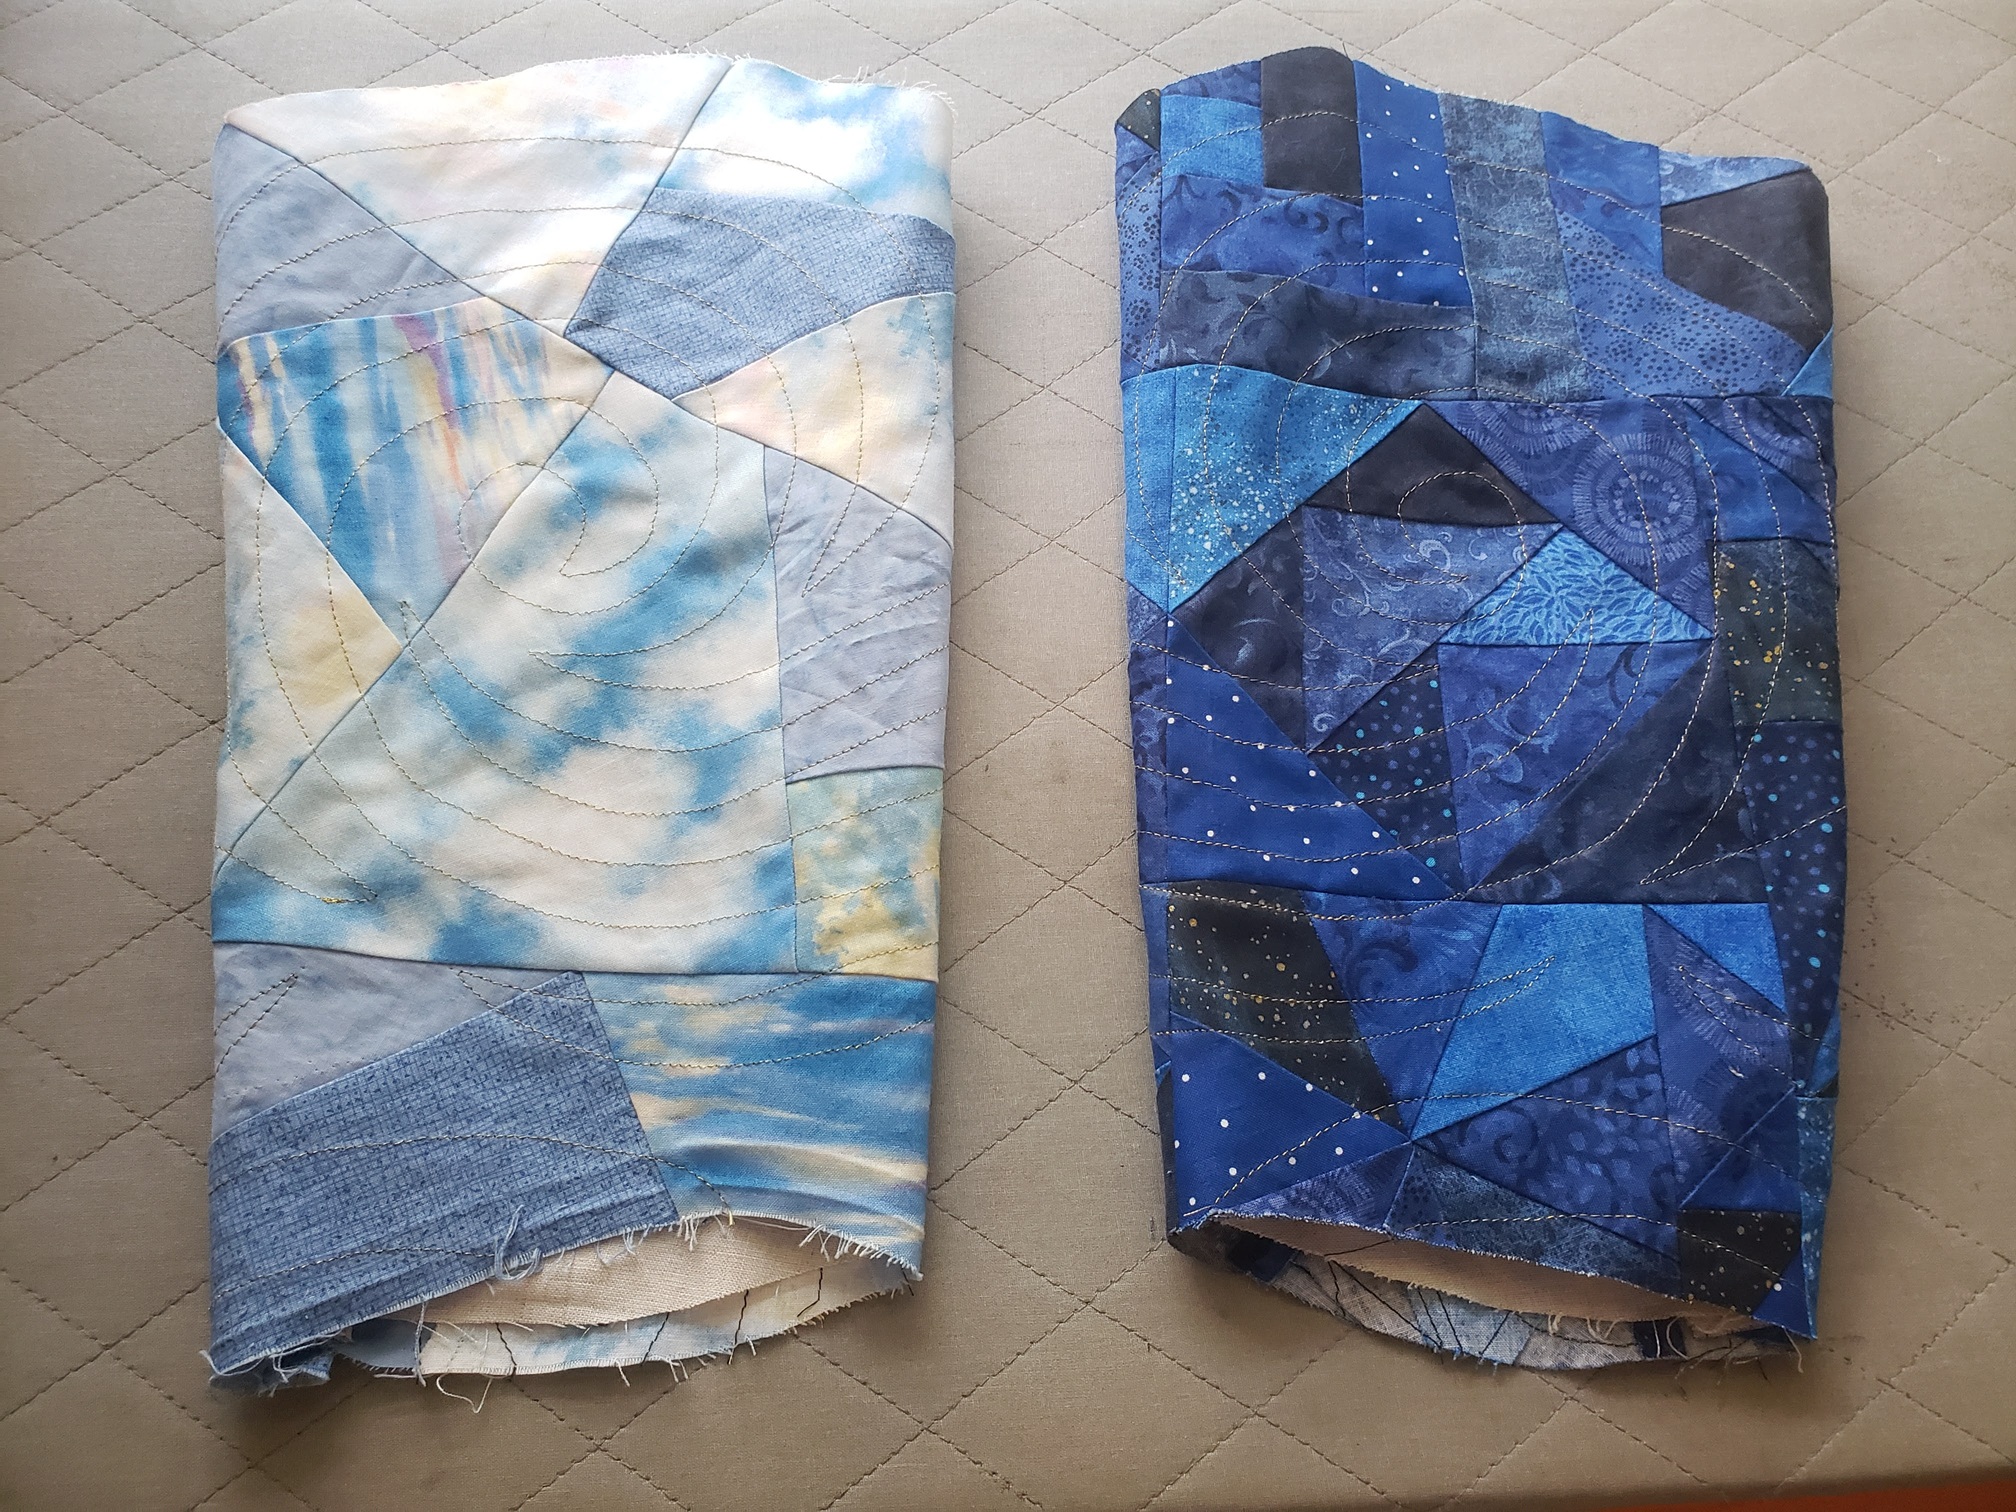
The original pantograph I chose was called Echoed Swirls, but unfortunately it was too large. At the scale we wanted, it would have been 22 inches tall, which was longer than the working bed size of the longarm machine. So we had to do a quick pivot to a new design. I ended up choosing Breeze. It maintained the 'Vincent van Gogh, Starry Night' look I was going for, while also fitting into the quilting 'zone.' We chose a gold metallic for the upper thread, and a stronger grey for the bobbin. Apparently, metallic threads require a lot of supervision, as they are prone to breaking, but Laura assured me that she had it handled. And boy, did she have it handled. I cannot praise her enough! Even with all of my weird requirements, she did a remarkable job :)
I feel like the pictures don't do it justice, since it's hard to capture the beautiful sparkle of the gold threads, but here are a few close up shots I took:
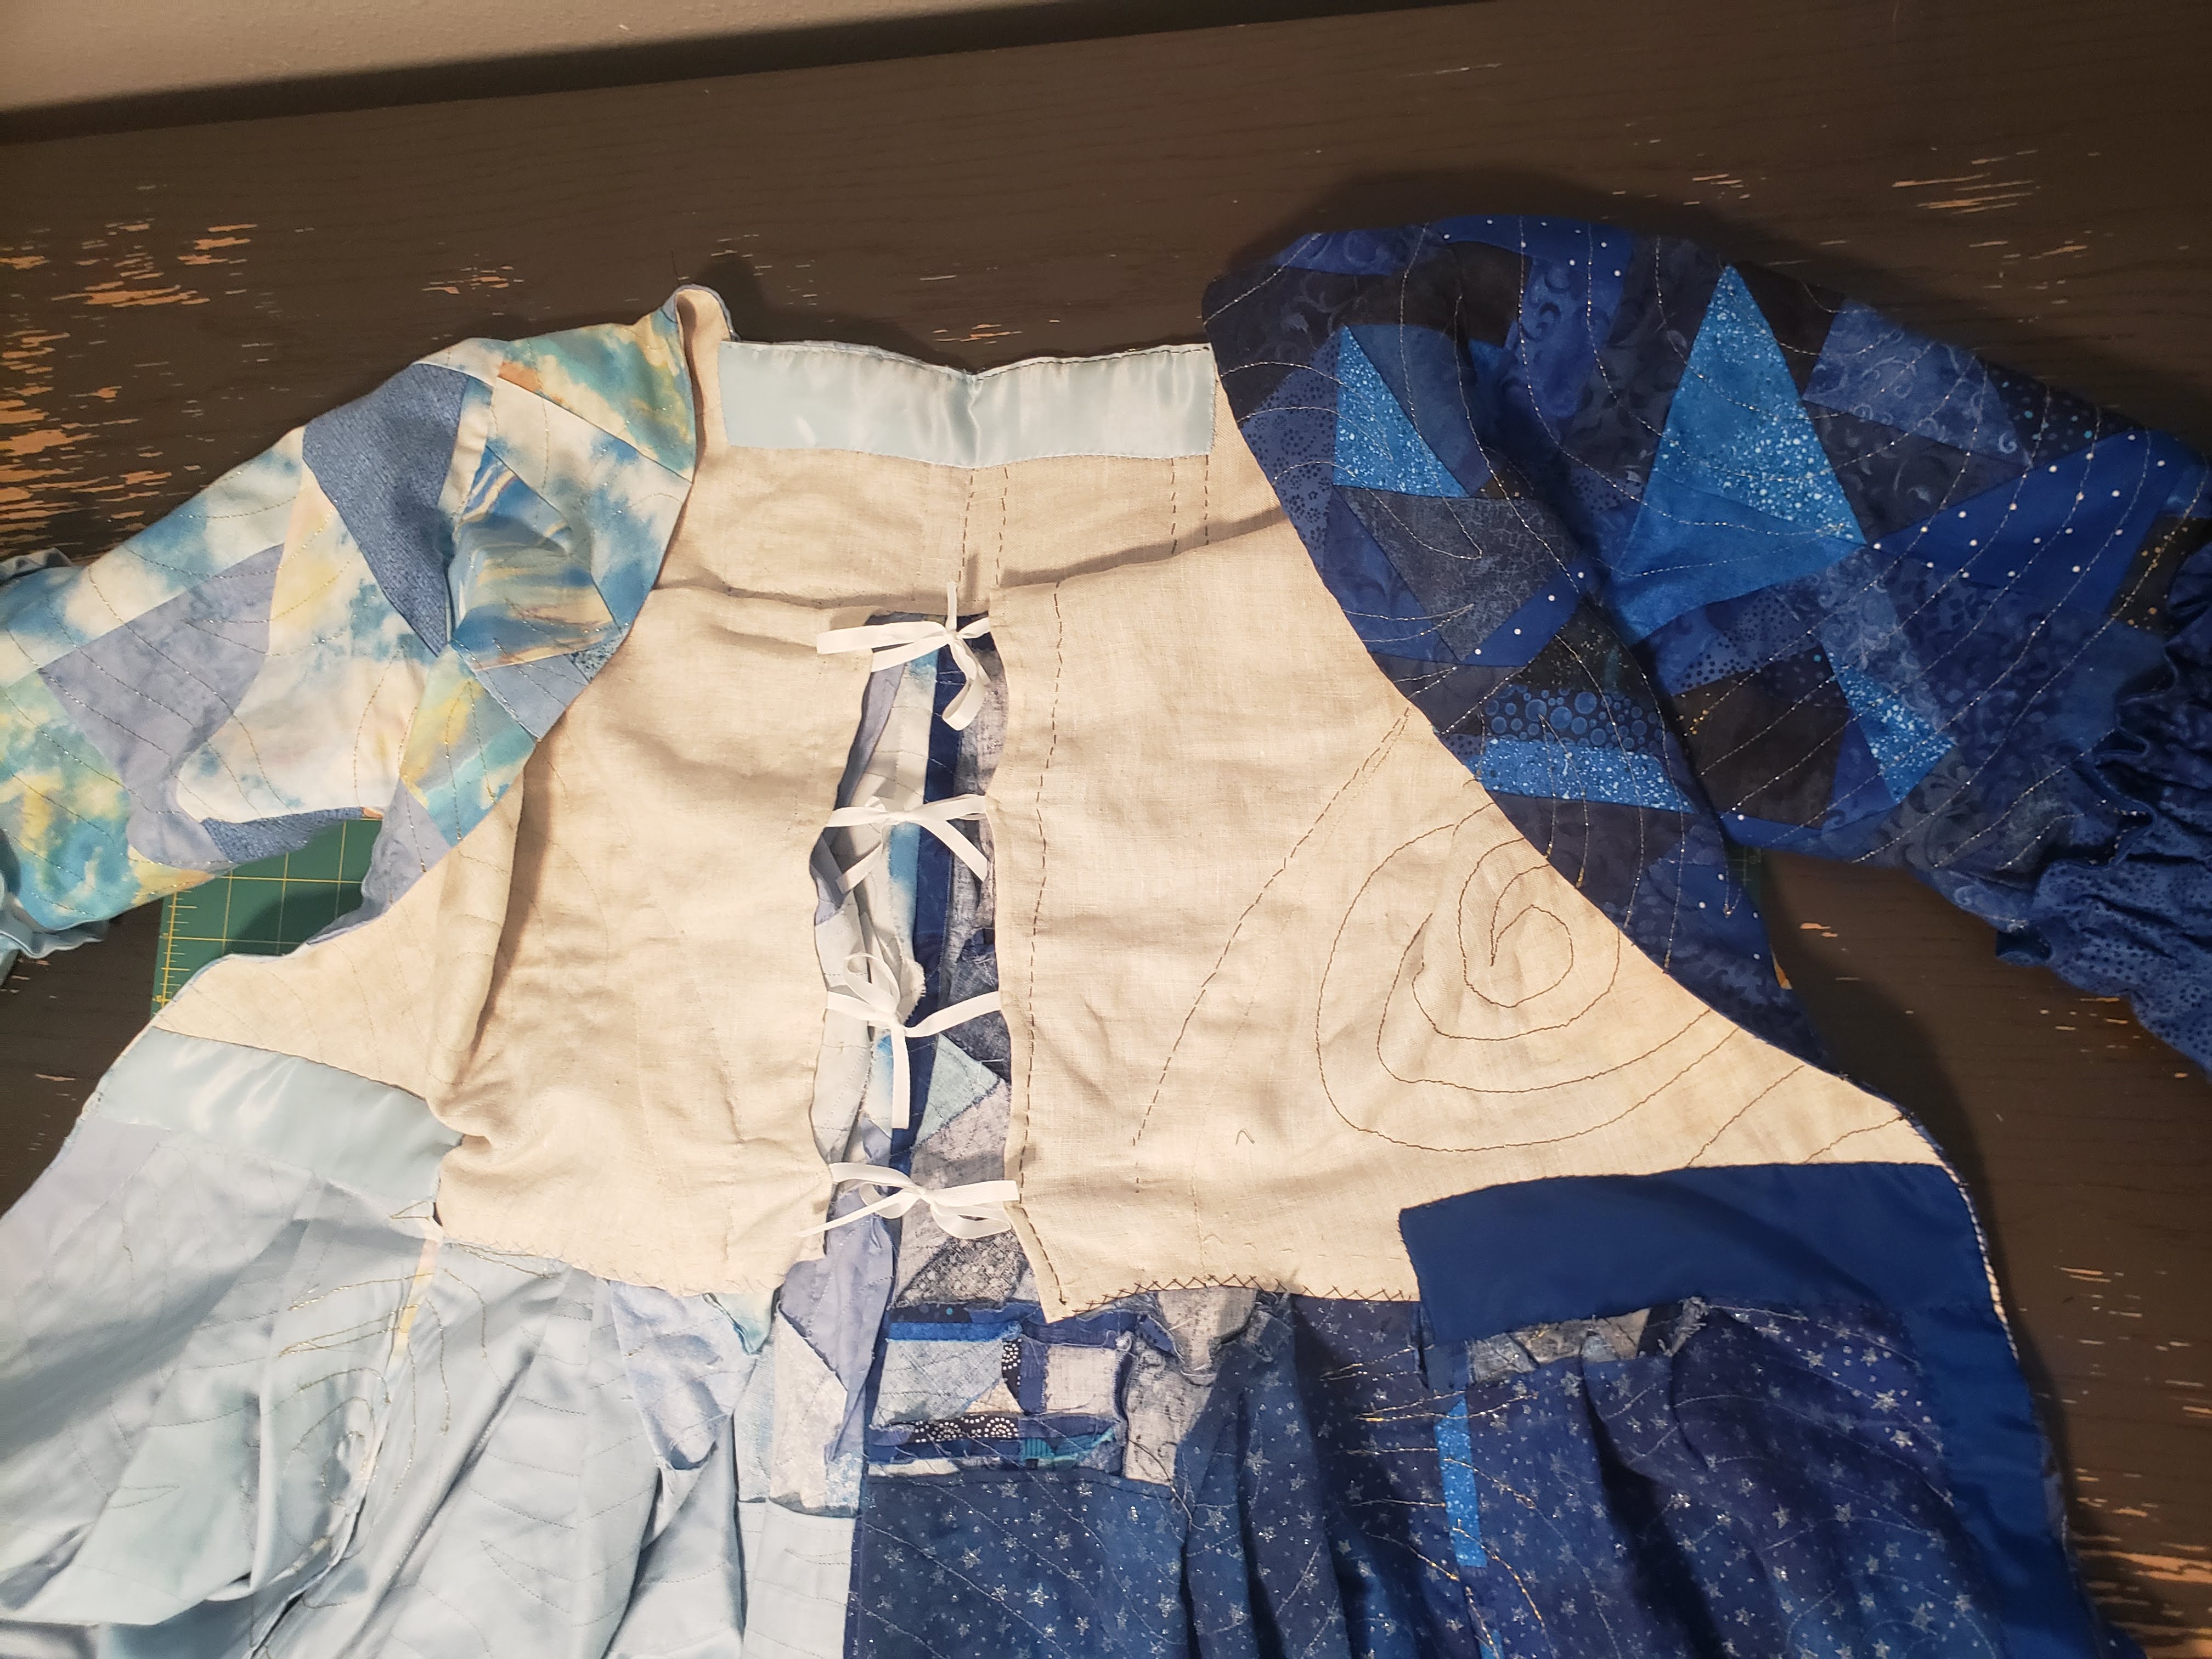
I then did the work of trimming and cleaning up the edges. All along the top where I had sewn scrap fabric to help with mounting onto the longarm, I had to painstakingly cut around the fabric with applique scissors and then tease out the scraps from beneath the quilting. Could I have just trimmed about half an inch away all around? Technically yes, but I was a bit worried about losing more seam allowance just in case I ended up needing that extra wiggle room for adjustments. Especially since quilting already has a slight shrinking effect on the fabric. I also had to seam rip the pocket slits open and tie off all the loose quilting threads. I re-drew the quilting lines that I had to rip out with a heat-erasing pen and back-stitched over them by hand, using the same gold thread that Laura was kind enough to give to me!
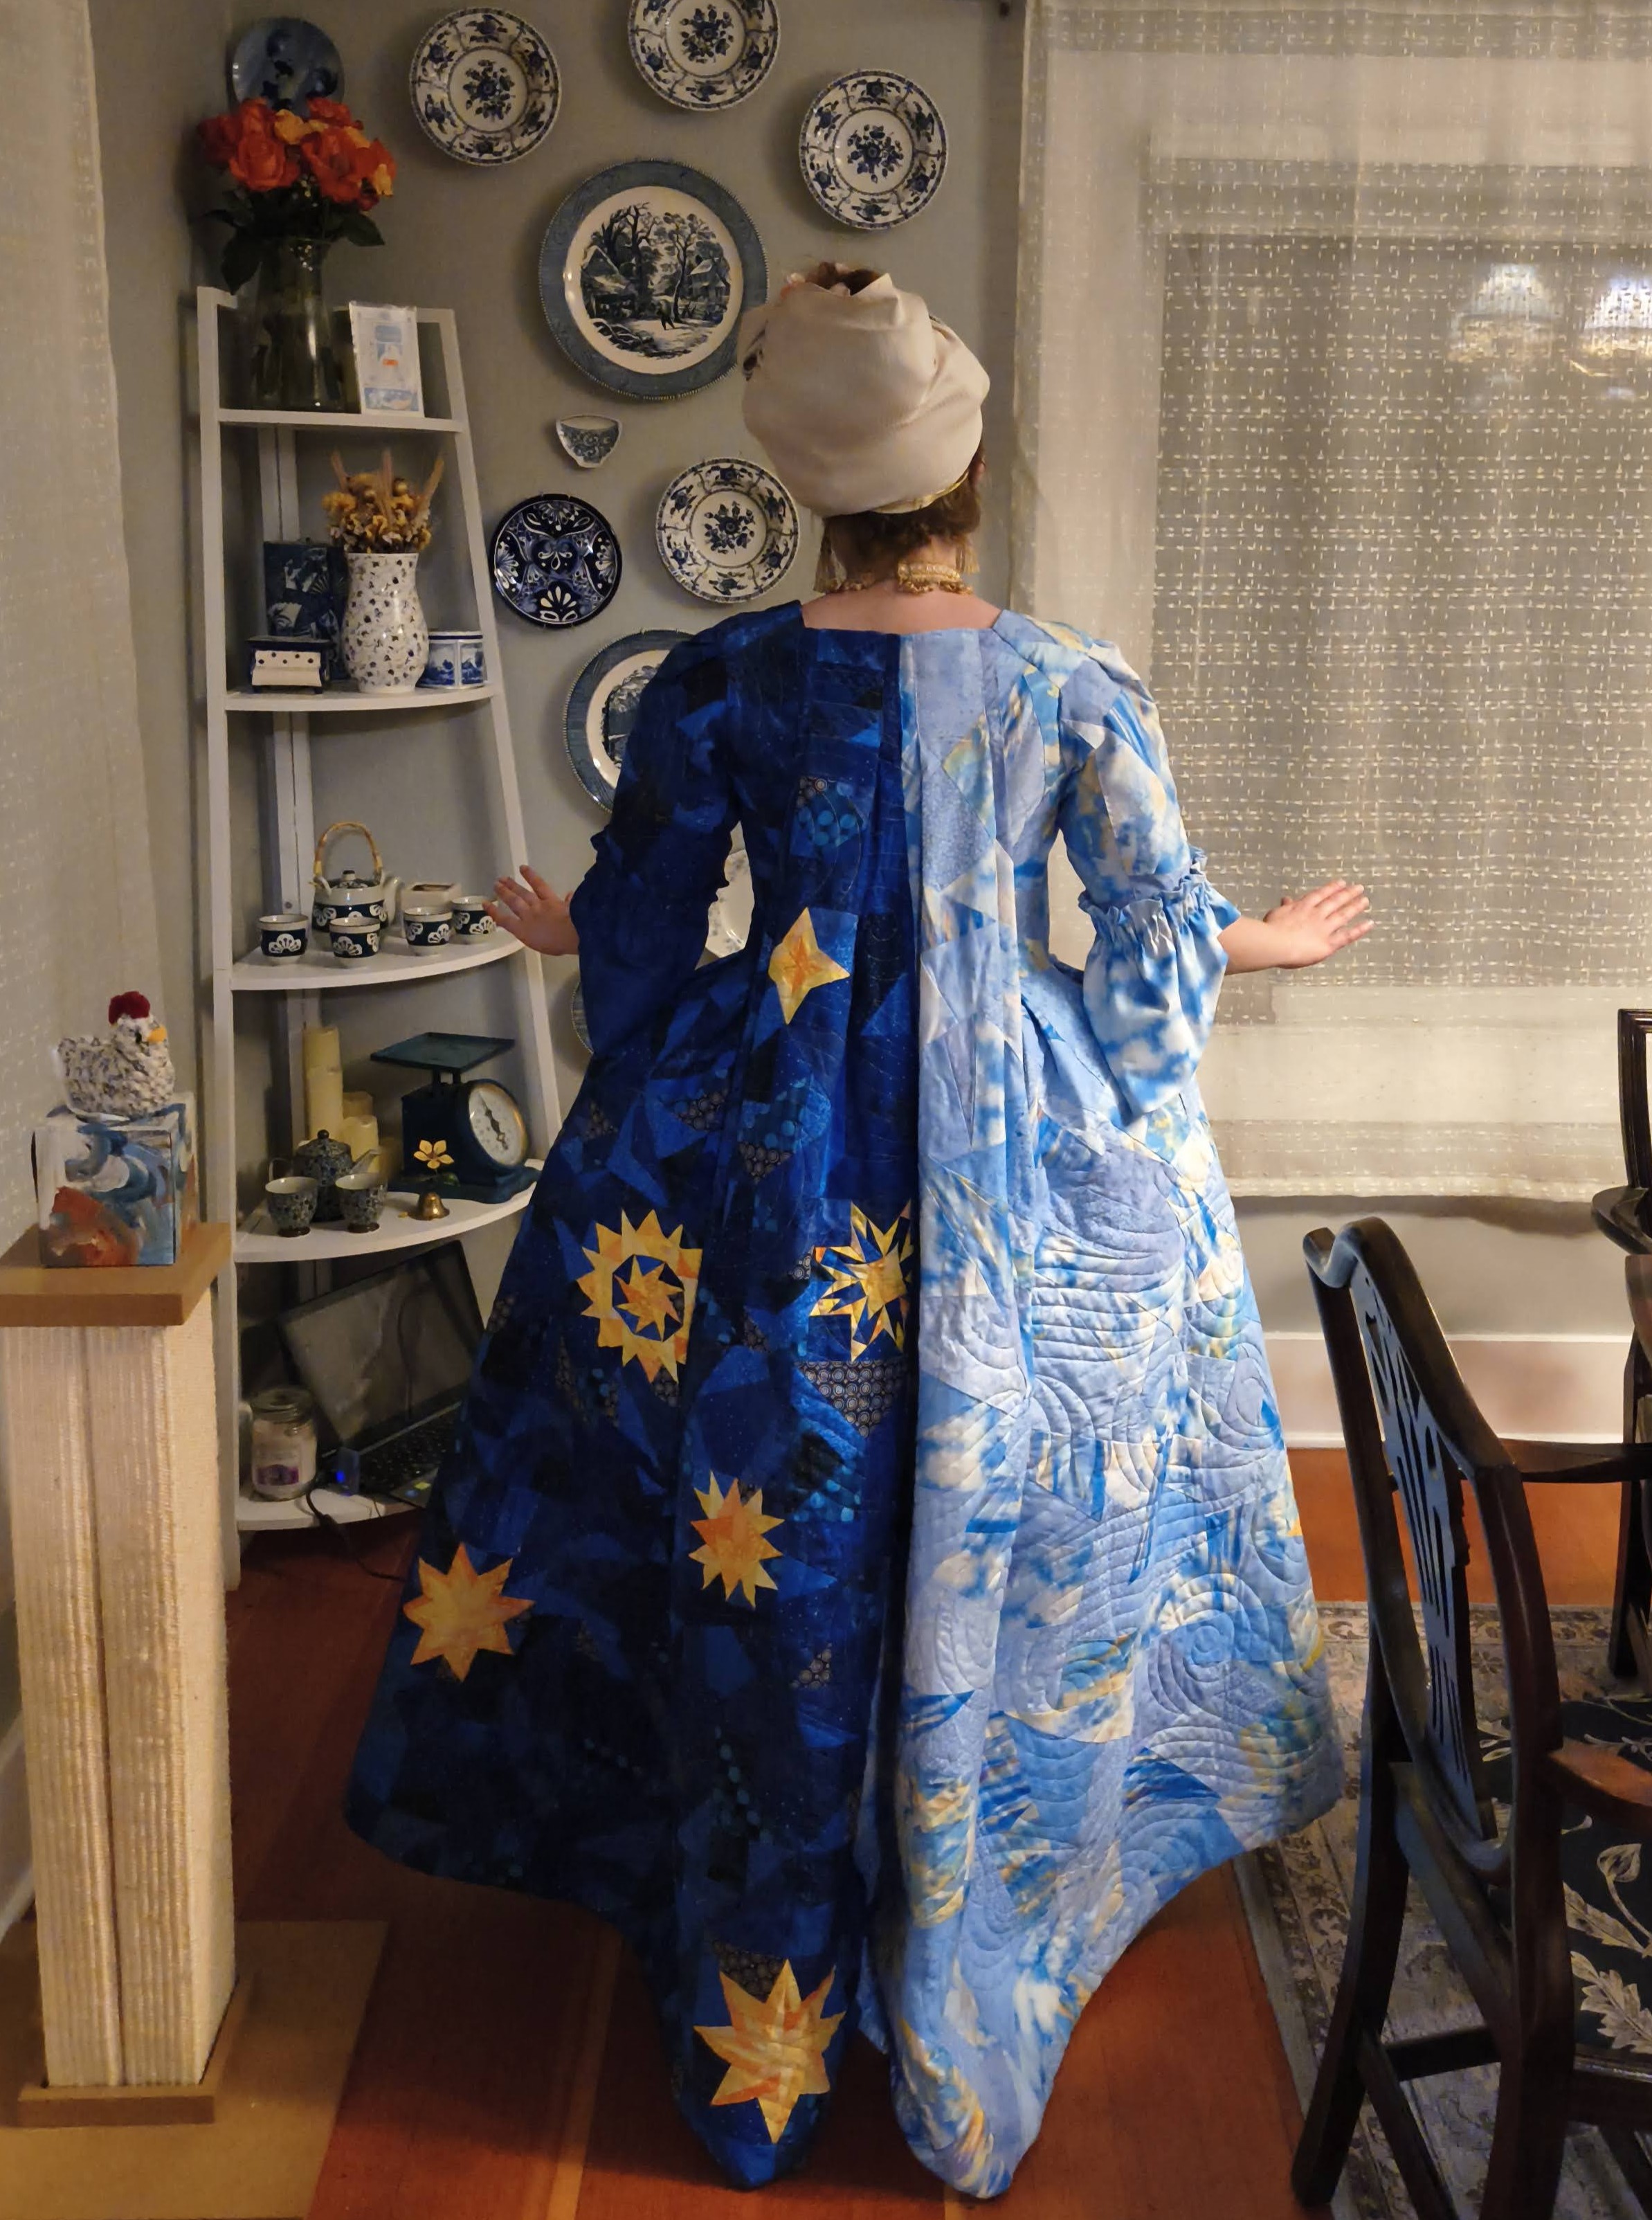
Once all my edges were trimmed, I began working on the watteau pleats. I pretty much just followed the instructions in The American Duchess Guide to Eighteenth Century Dressmaking by Lauren Stowell and Abby Cox. My pleats measured about 4 inches in length down the back, and each center pleat was about 2.5 inches. While laid flat, I pinned them, and then prick-stitched in place.
I then worked on topstitching the other pieces of my dress that I had assumed were too small to bother with the longarm for. I used the image of the pantograph and scaled it to the same size that was used on the rest of the dress. Using my projector, I traced the image onto the sleeves, shoulder straps, and bodice fronts. I then followed the chalkmarks on my sewing machine. I assembled the sleeves, and prepared the dress for my final fitting.
I don't have any pictures of this process, but it involved trying on the dress, and having my wonderful partner help to pin the skirt and sleeves in a flattering way. I then went back, and sewed them permanently to the bodice lining. The shoulder strap edges were turned under and sewn on last to cover the raw edges of the sleeve heads. Strips of fabric were sewn to the front skirt openings to cover the raw edges, which were likewise folded under. A strip of gold velvet was used for the hem facing.

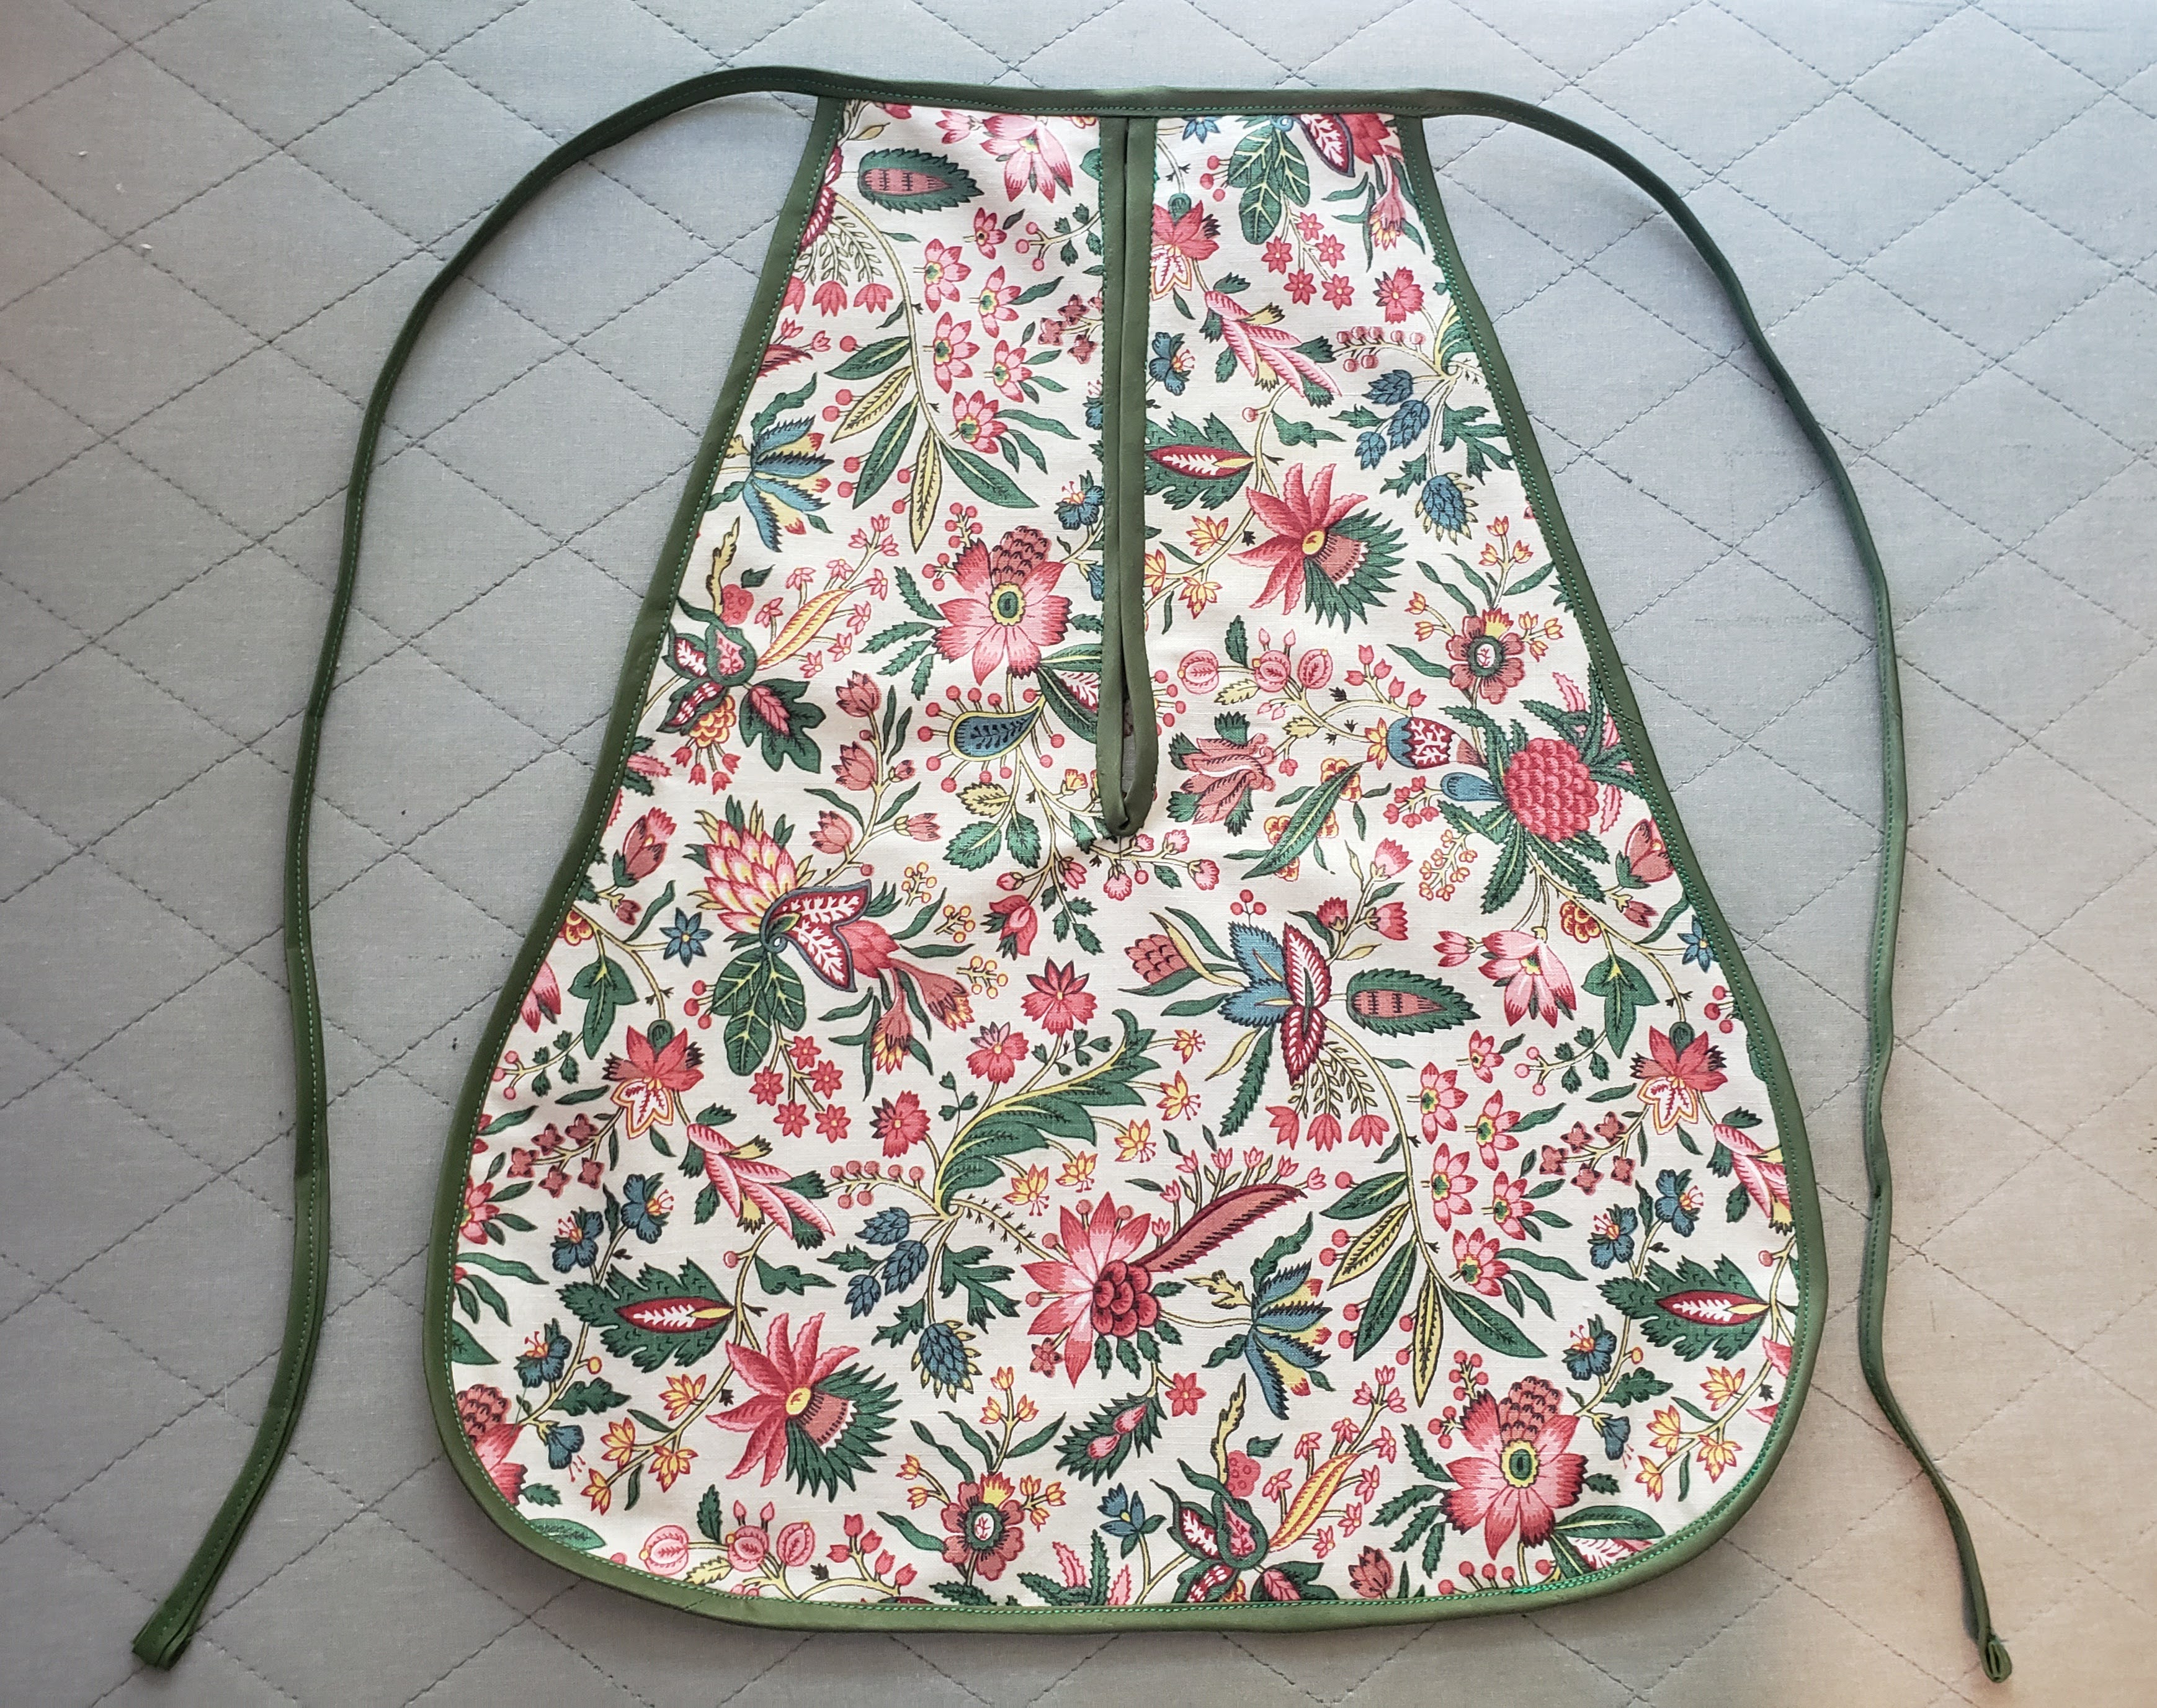
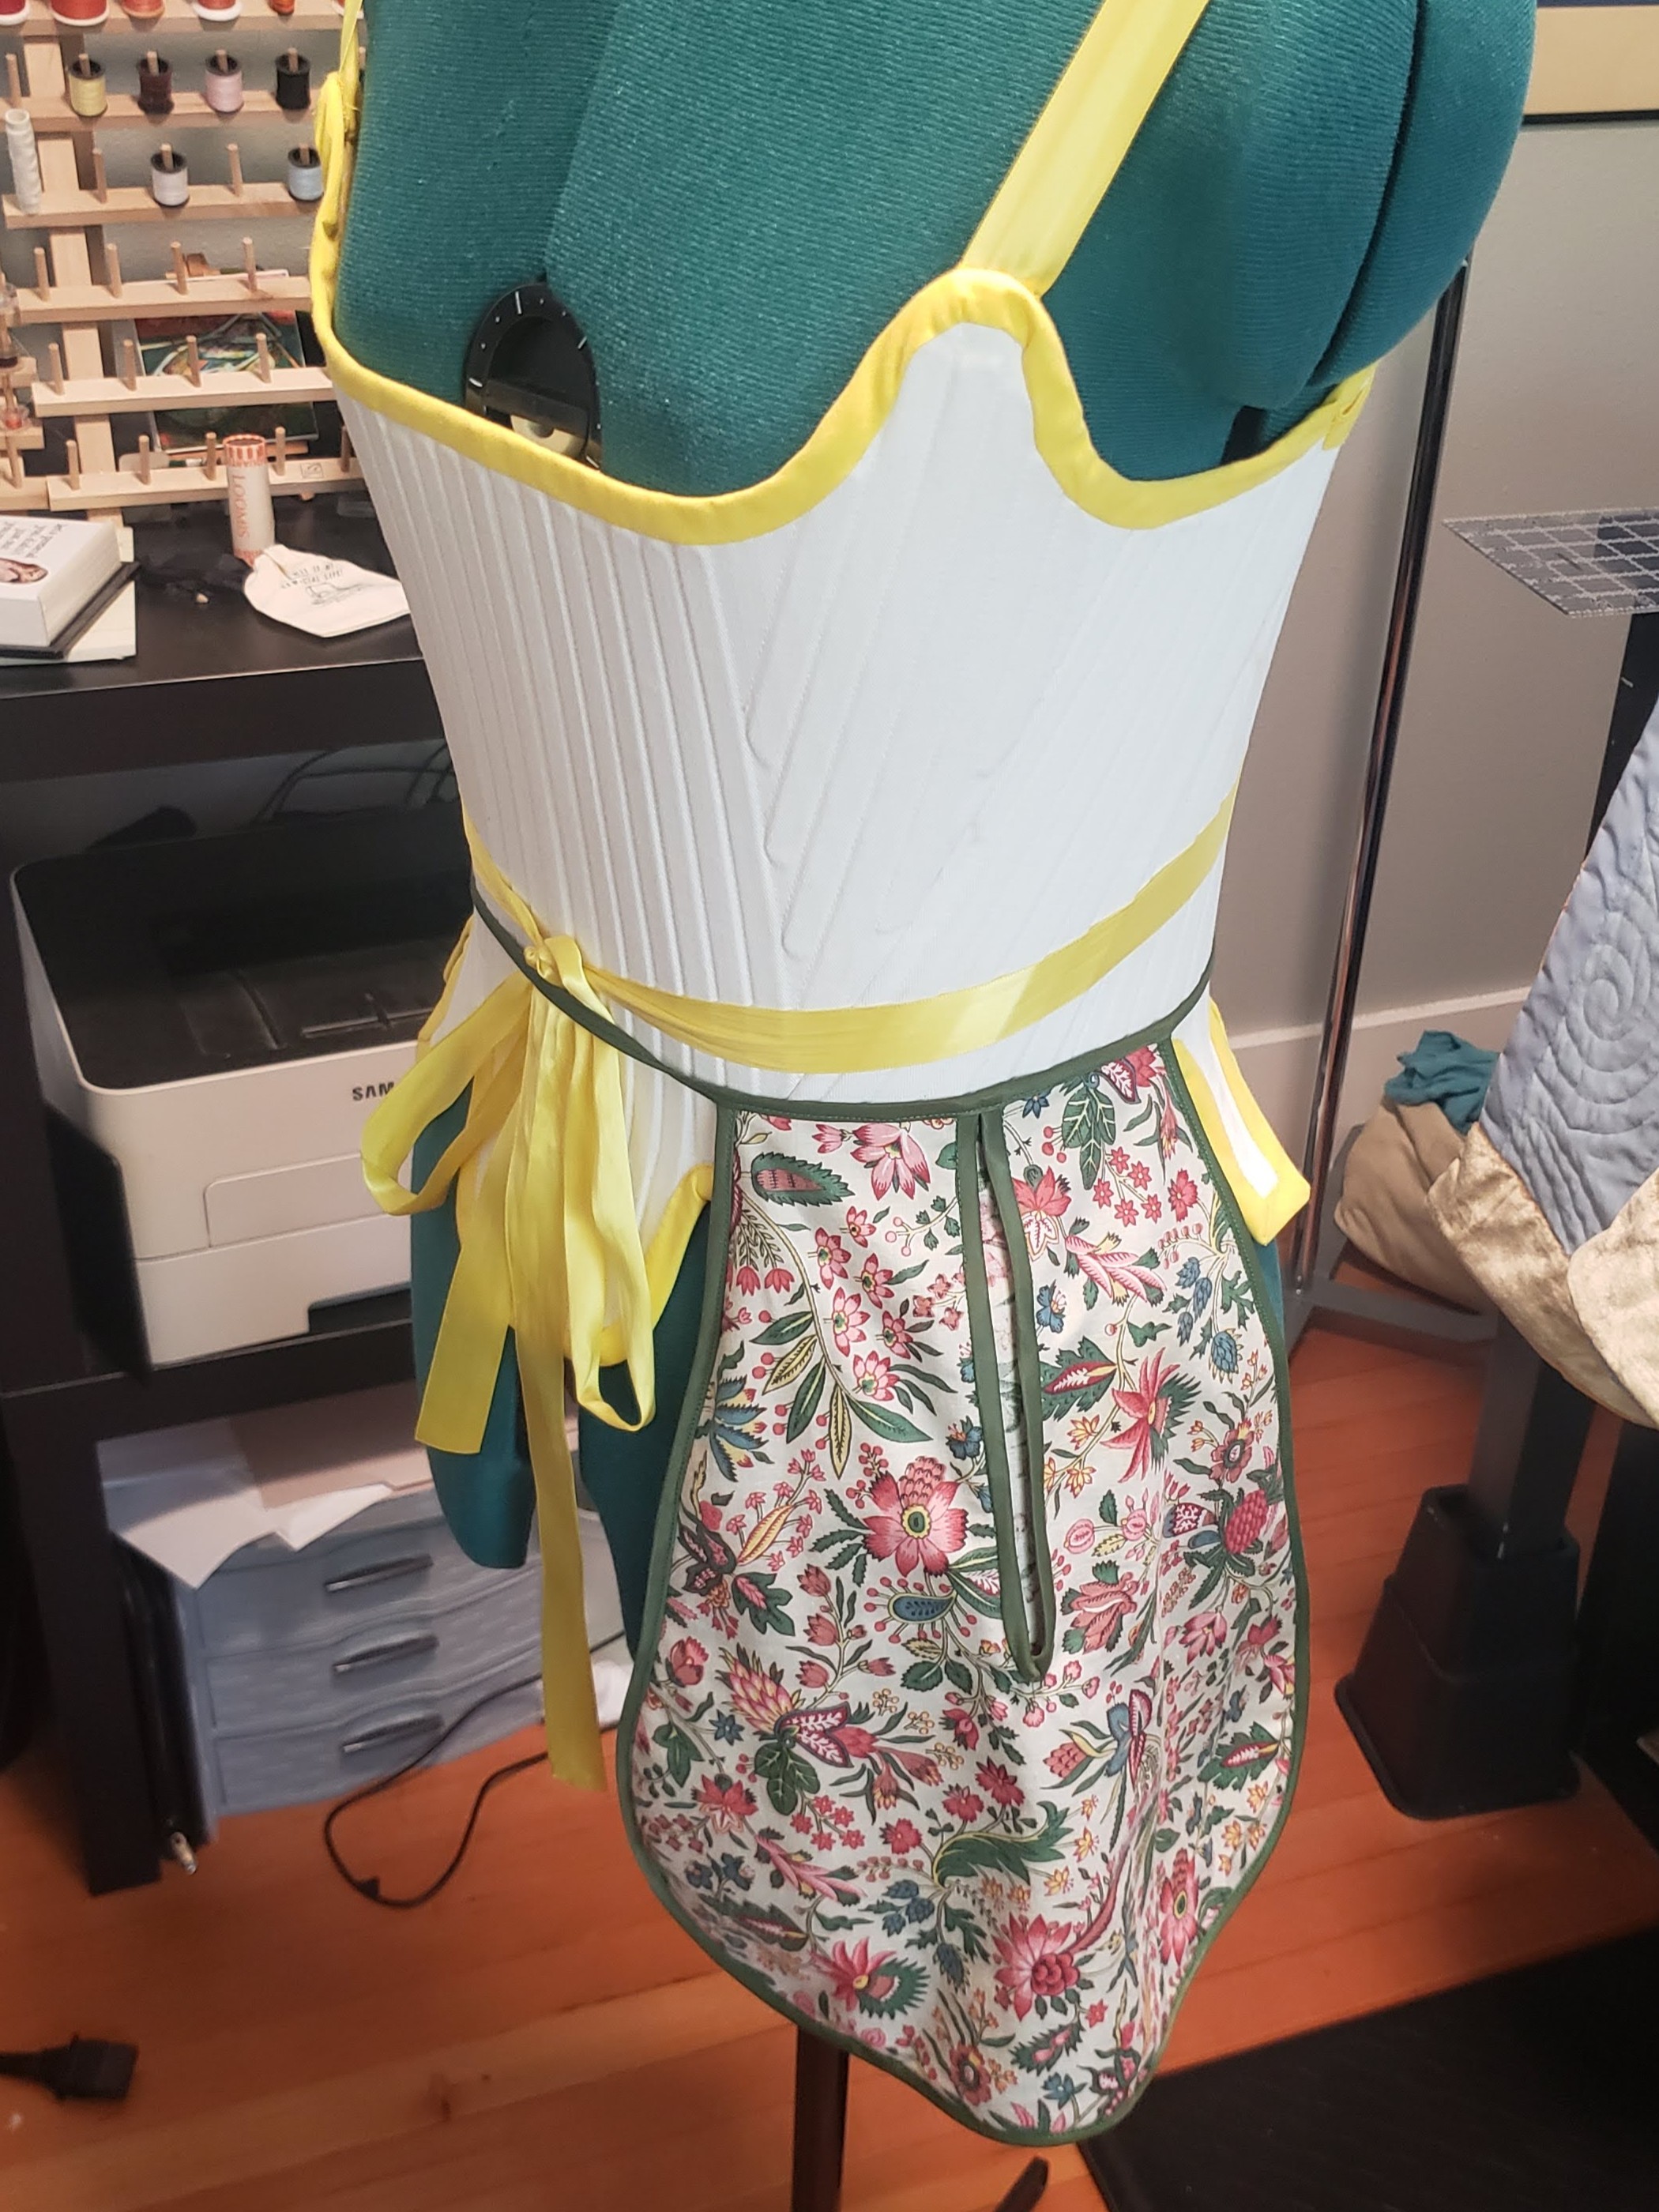
And with that, the dress was complete! All I had left to do was gather my accessories (including a pocket bag I made to wear under my panniers), and don my battle armor (a.k.a heavy, quilted dress).
Comments