
A Me-Made Wardrobe: Part 2
Table of Contents
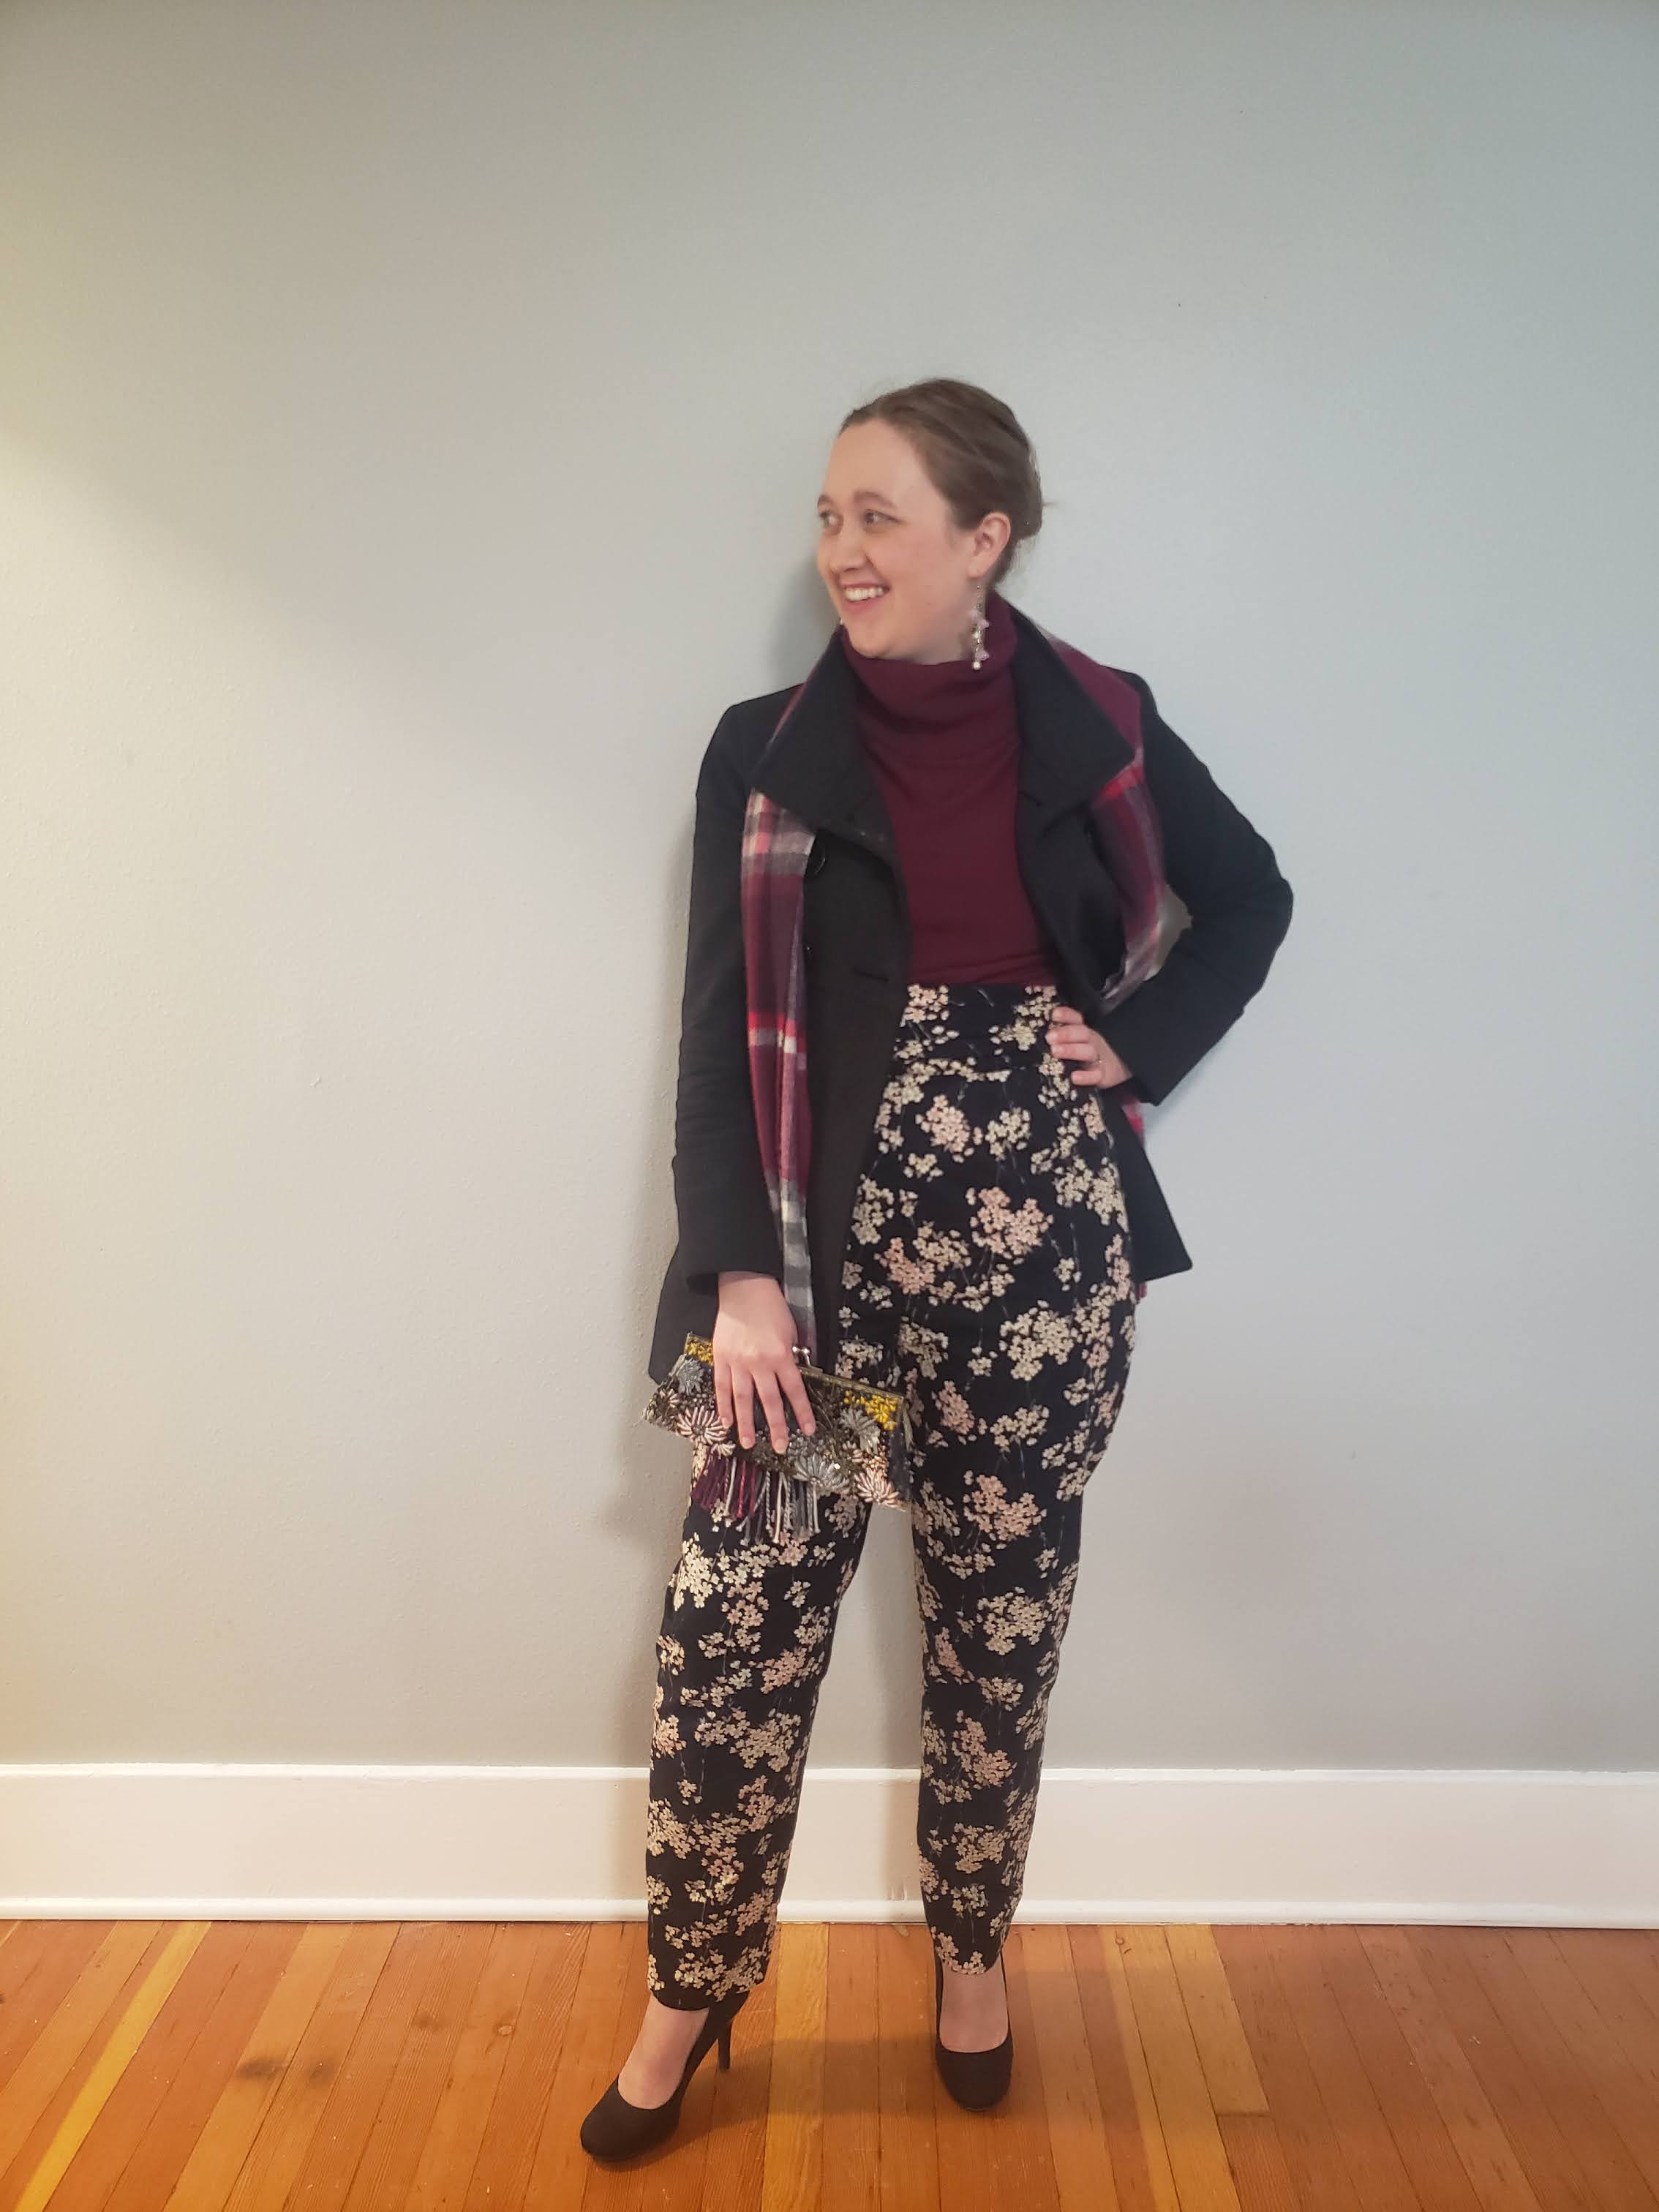
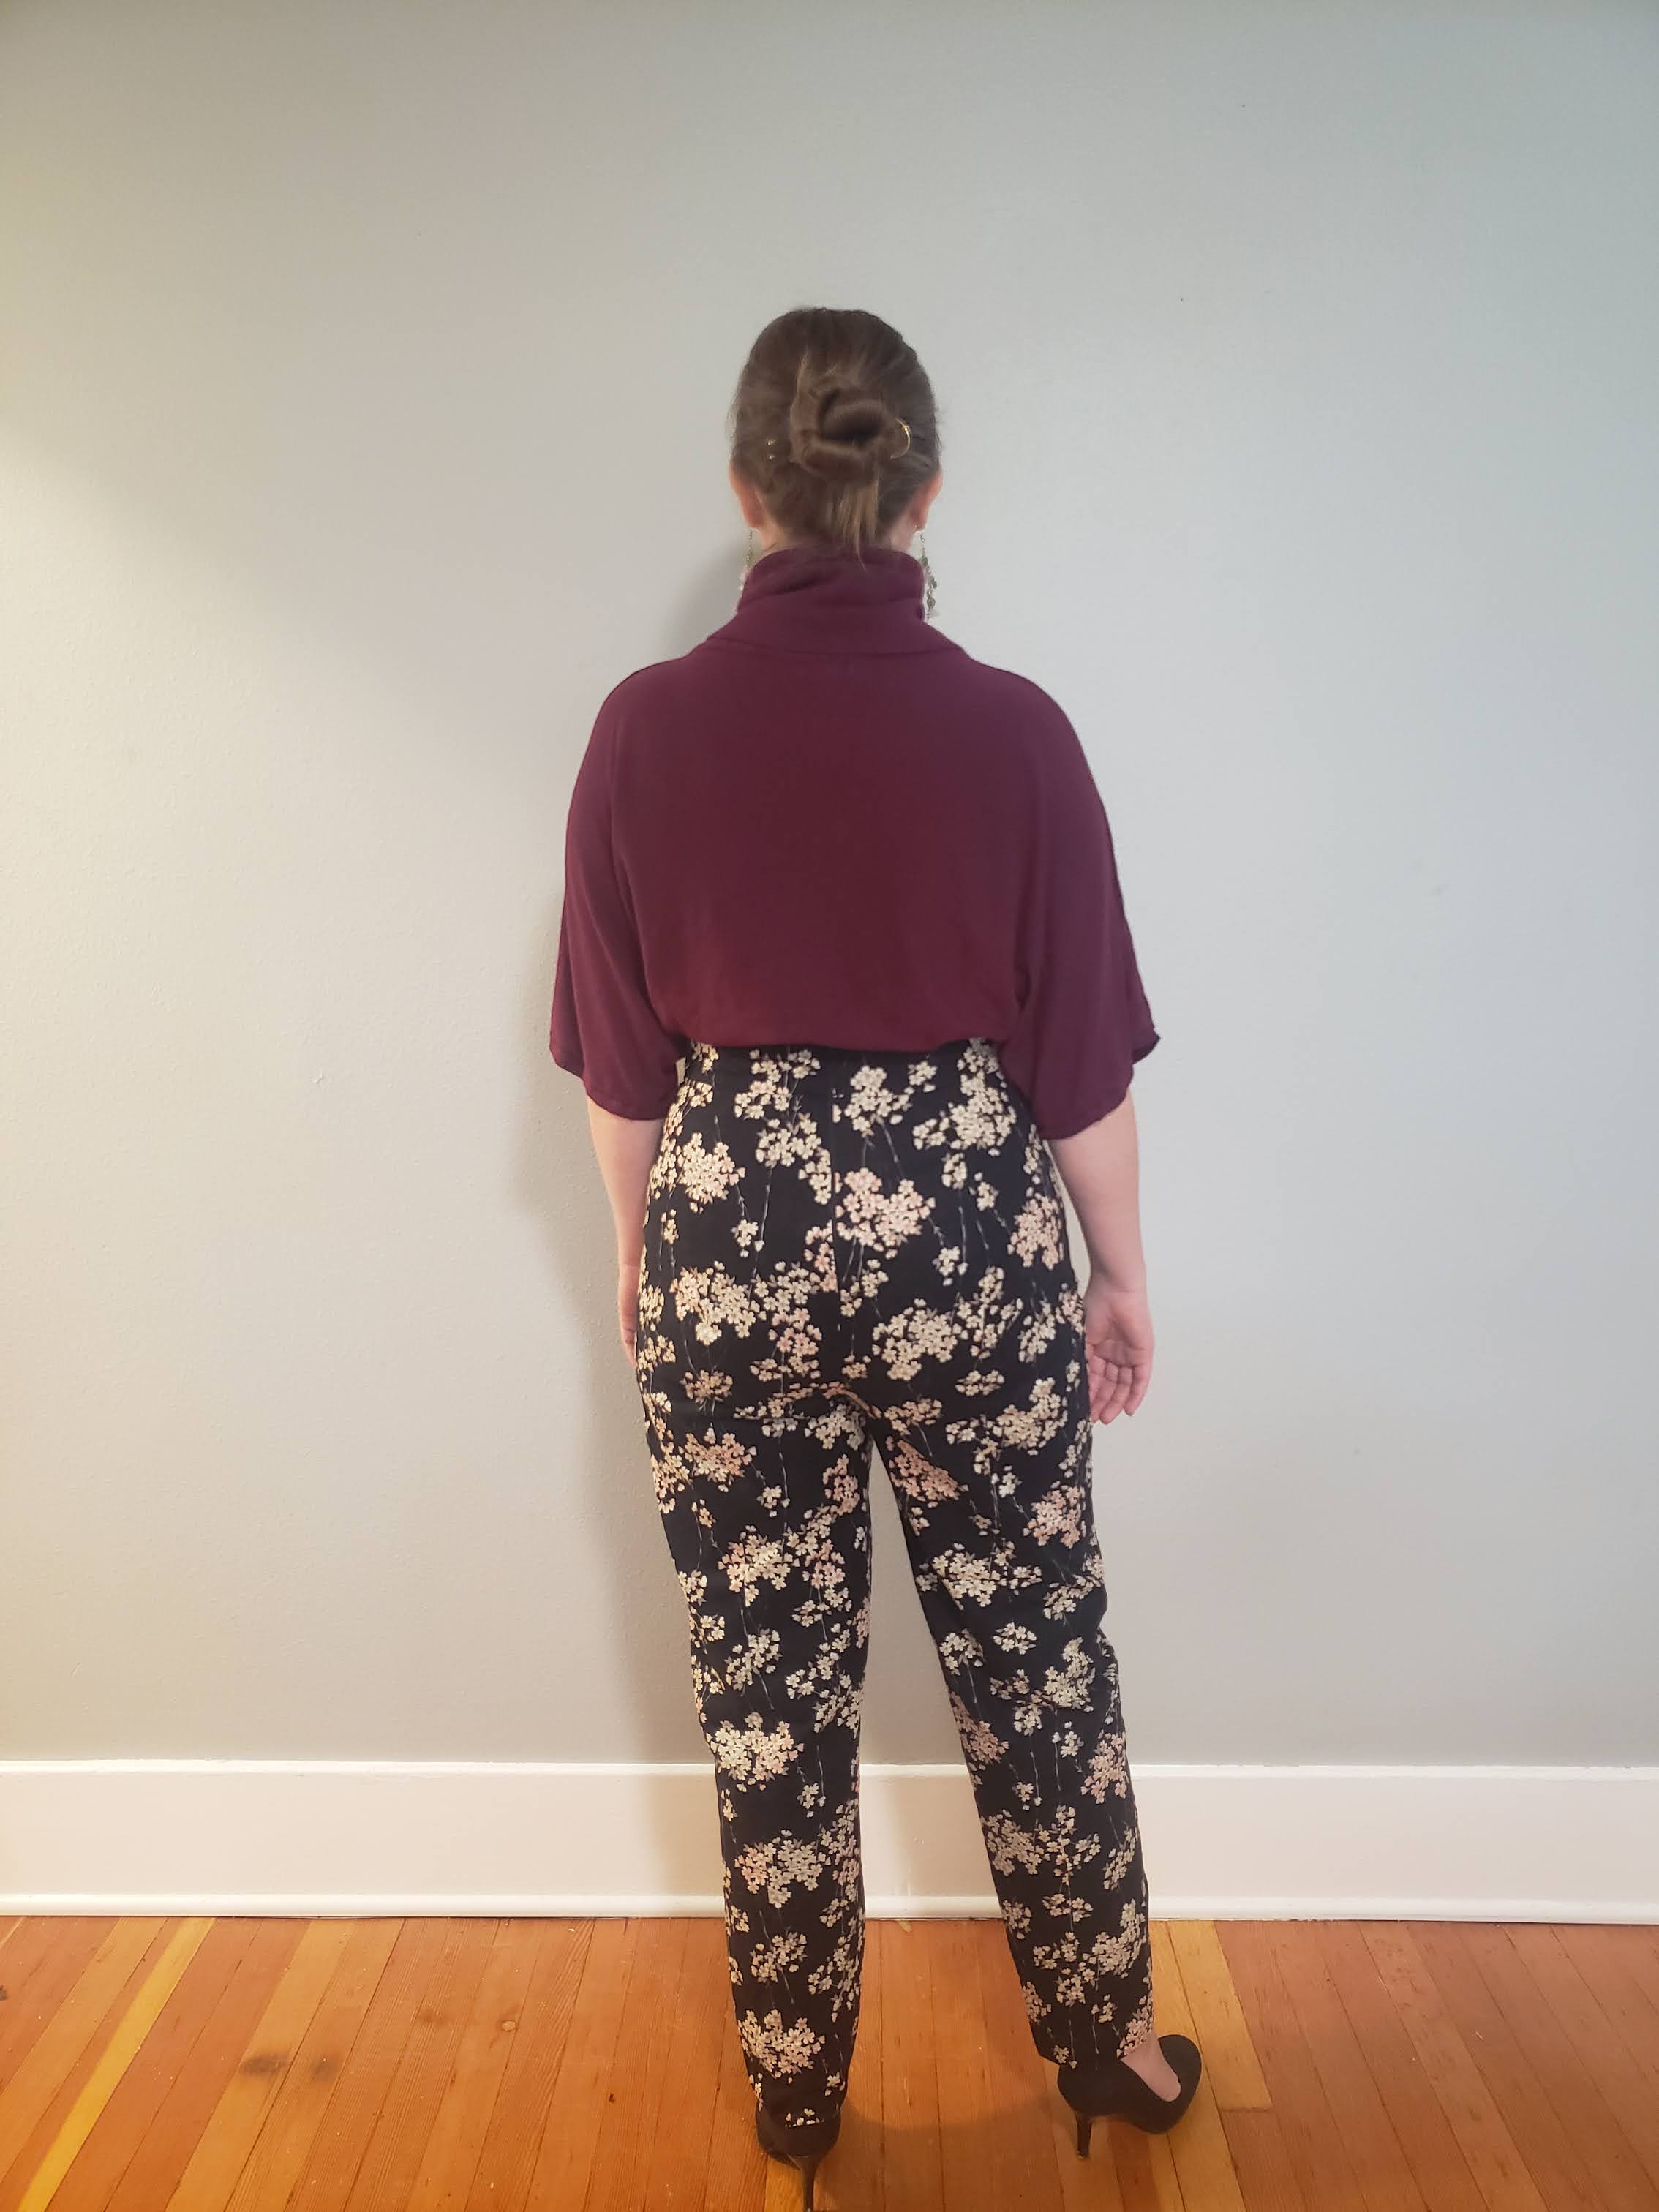
Cherry Blossom Tuxedo Pants
Normally, when I am deciding what to make, I start with my fabric first (I like to choose an appropriate pattern that suits the fabric). This time, however, I just knew I needed a pair of dress pants, since they were missing from my wardrobe. The pattern I chose was #LN2429MS Tuxedo Pant from Sew Chic Pattern Company. I loved the high waist and slim leg, and ultimately chose to go with option A, which featured a cummerbund instead of belt loops. Based off of the other items I was planning to make, I tentatively chose to make them green, as I thought they might pair reasonably well with my red & green shirt, stripey blouse, and the wool plaid vest. When I bought this really cute cherry blossom fabric during my trip to Japan, that plan changed. I love a patterned pant, and this seemed like a perfect fit.
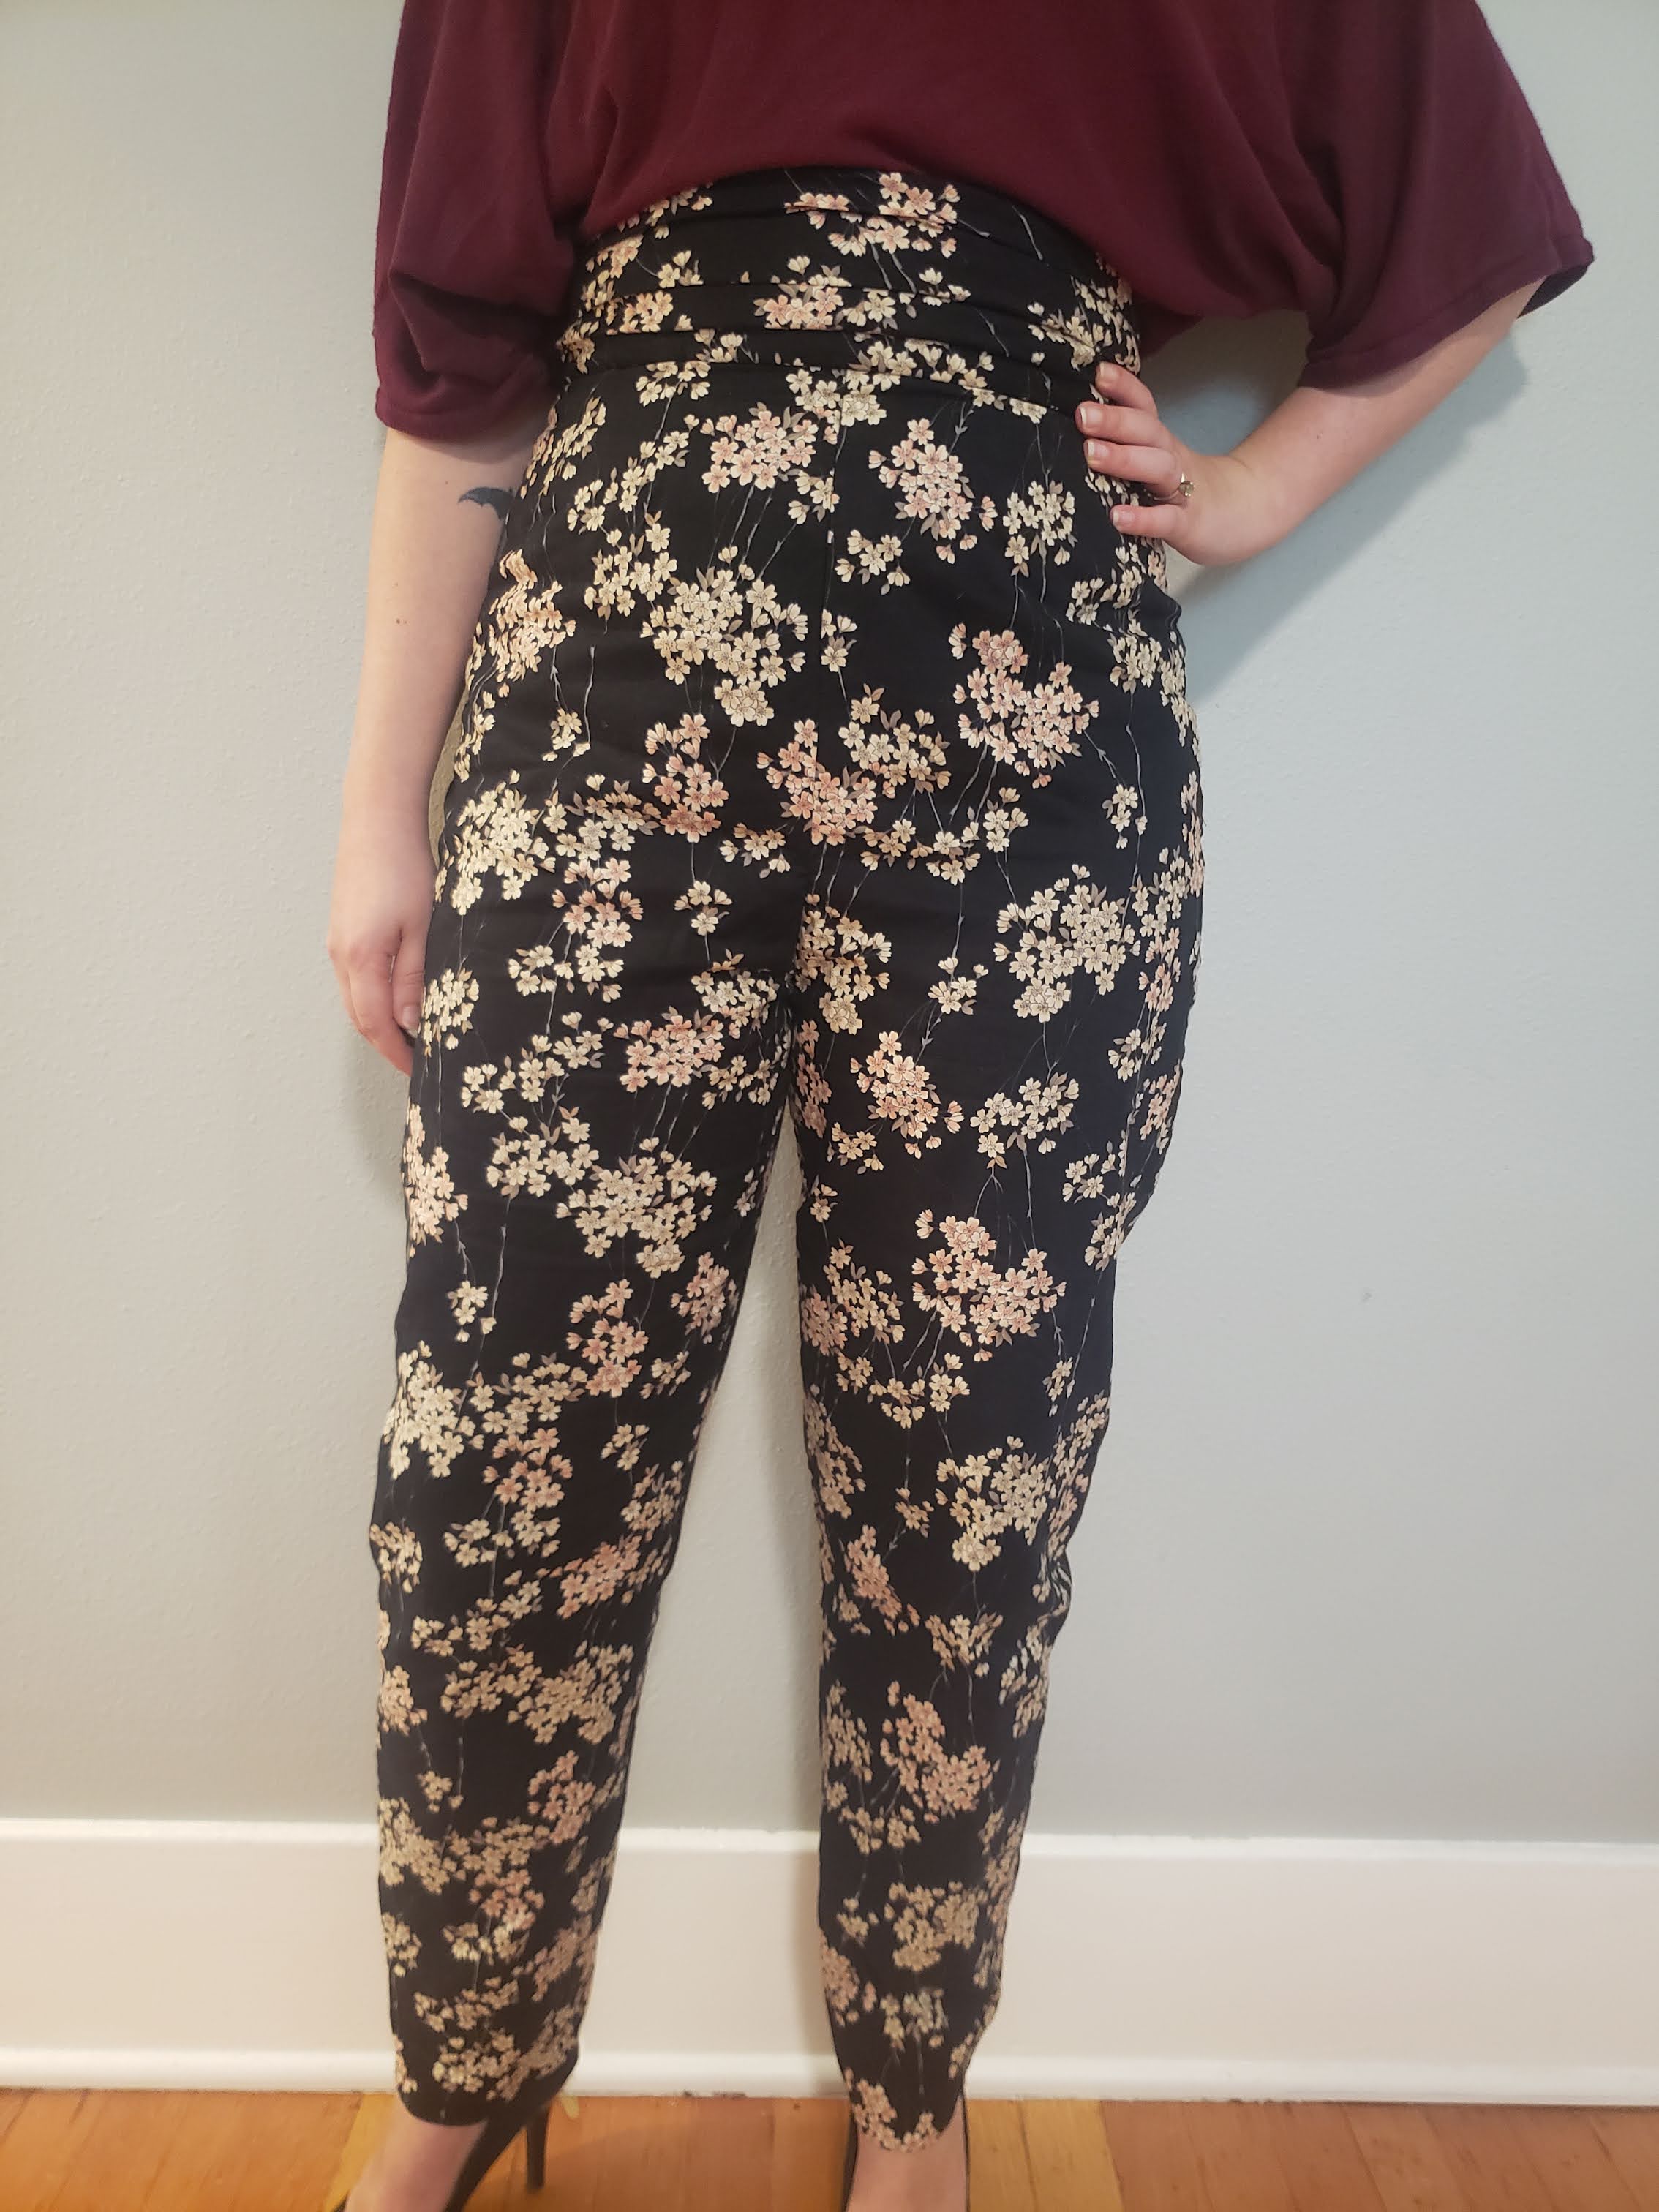
After washing and ironing my fabrics, I started by creating a mock-up out of the plain black cotton that I would eventually use as my lining. My hope was that the changes I needed to make would be minor enough that I could still use them. If the changes required cutting new pieces, it would be no big deal since black cotton fabric isn't exactly hard to come by. Luckily, that wasn't needed. My measurements were between two sizes, so I chose the larger one, a size 14, and just pinned it down from there. The crotch went up my butt slightly, and the back pulled down when I sat, so I feared I might have to do a full seat adjustment and cut new lining pieces. I know when it comes to alterations, scooping the back crotch curve is sometimes seen as a bit of a no-no, but it worked for me so the full adjustment wasn't necessary in the end.
After mirroring my pin placement on both sides, and re-sewing to double-check the fit, I marked my new seam allowance, cut off excess fabric, and seam ripped my lining pieces. I laid them flat to trace the new lines onto my paper pattern. I then got to work cutting my fashion fabric.
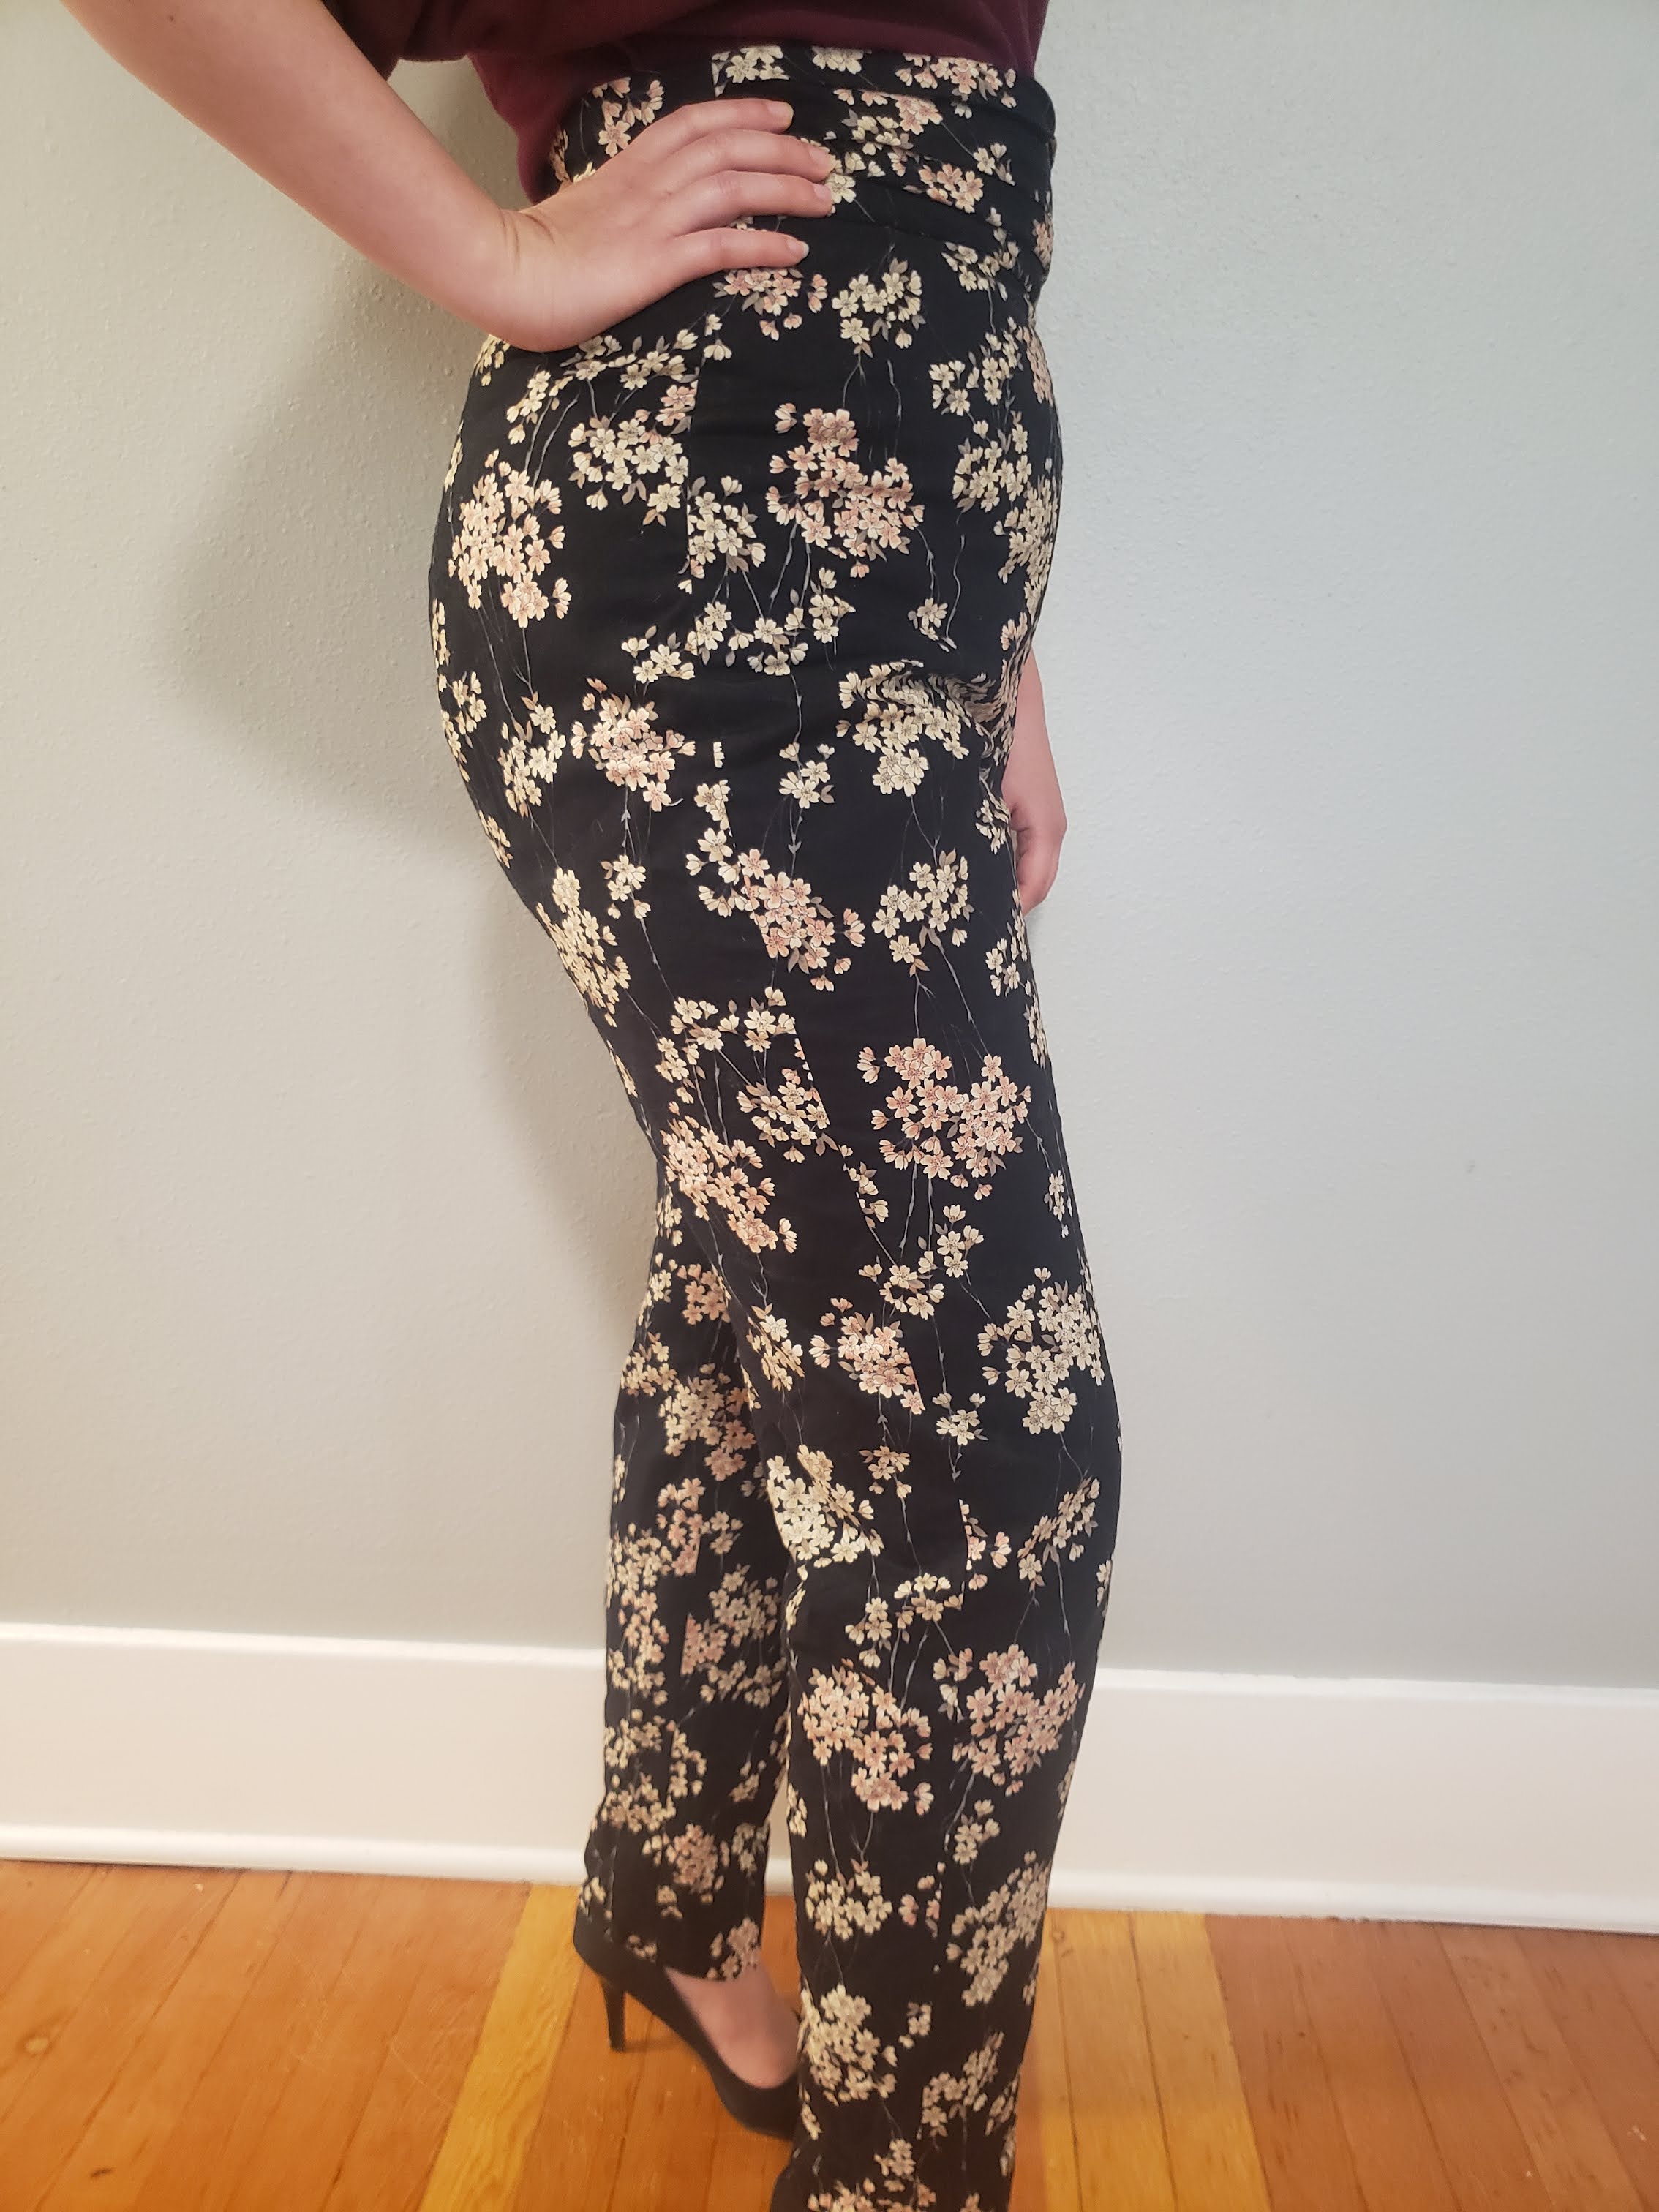
The actual sewing was pretty straight forward. The instructions were easy to follow. I appreciate that it has you add boning to the front waist to keep the cummerbund straight and prevent it from folding over on itself when sitting or bending down. Now that I have made the necessary adjustments to the pattern, I will definitely be making these again in some other fabrics, as I think they are flattering, but also professional enough for the workplace. The only gripe I have is the pocket placement; The pocket opening sits right underneath the waistband at the very front of the pants. If I put anything in there (which I won't) they sit right on my abdomen instead of at my sides. Not very flattering or comfortable. Guess I'll stick with a purse. Luckily, I already have one which matches pretty well ;)
Whaddya think?
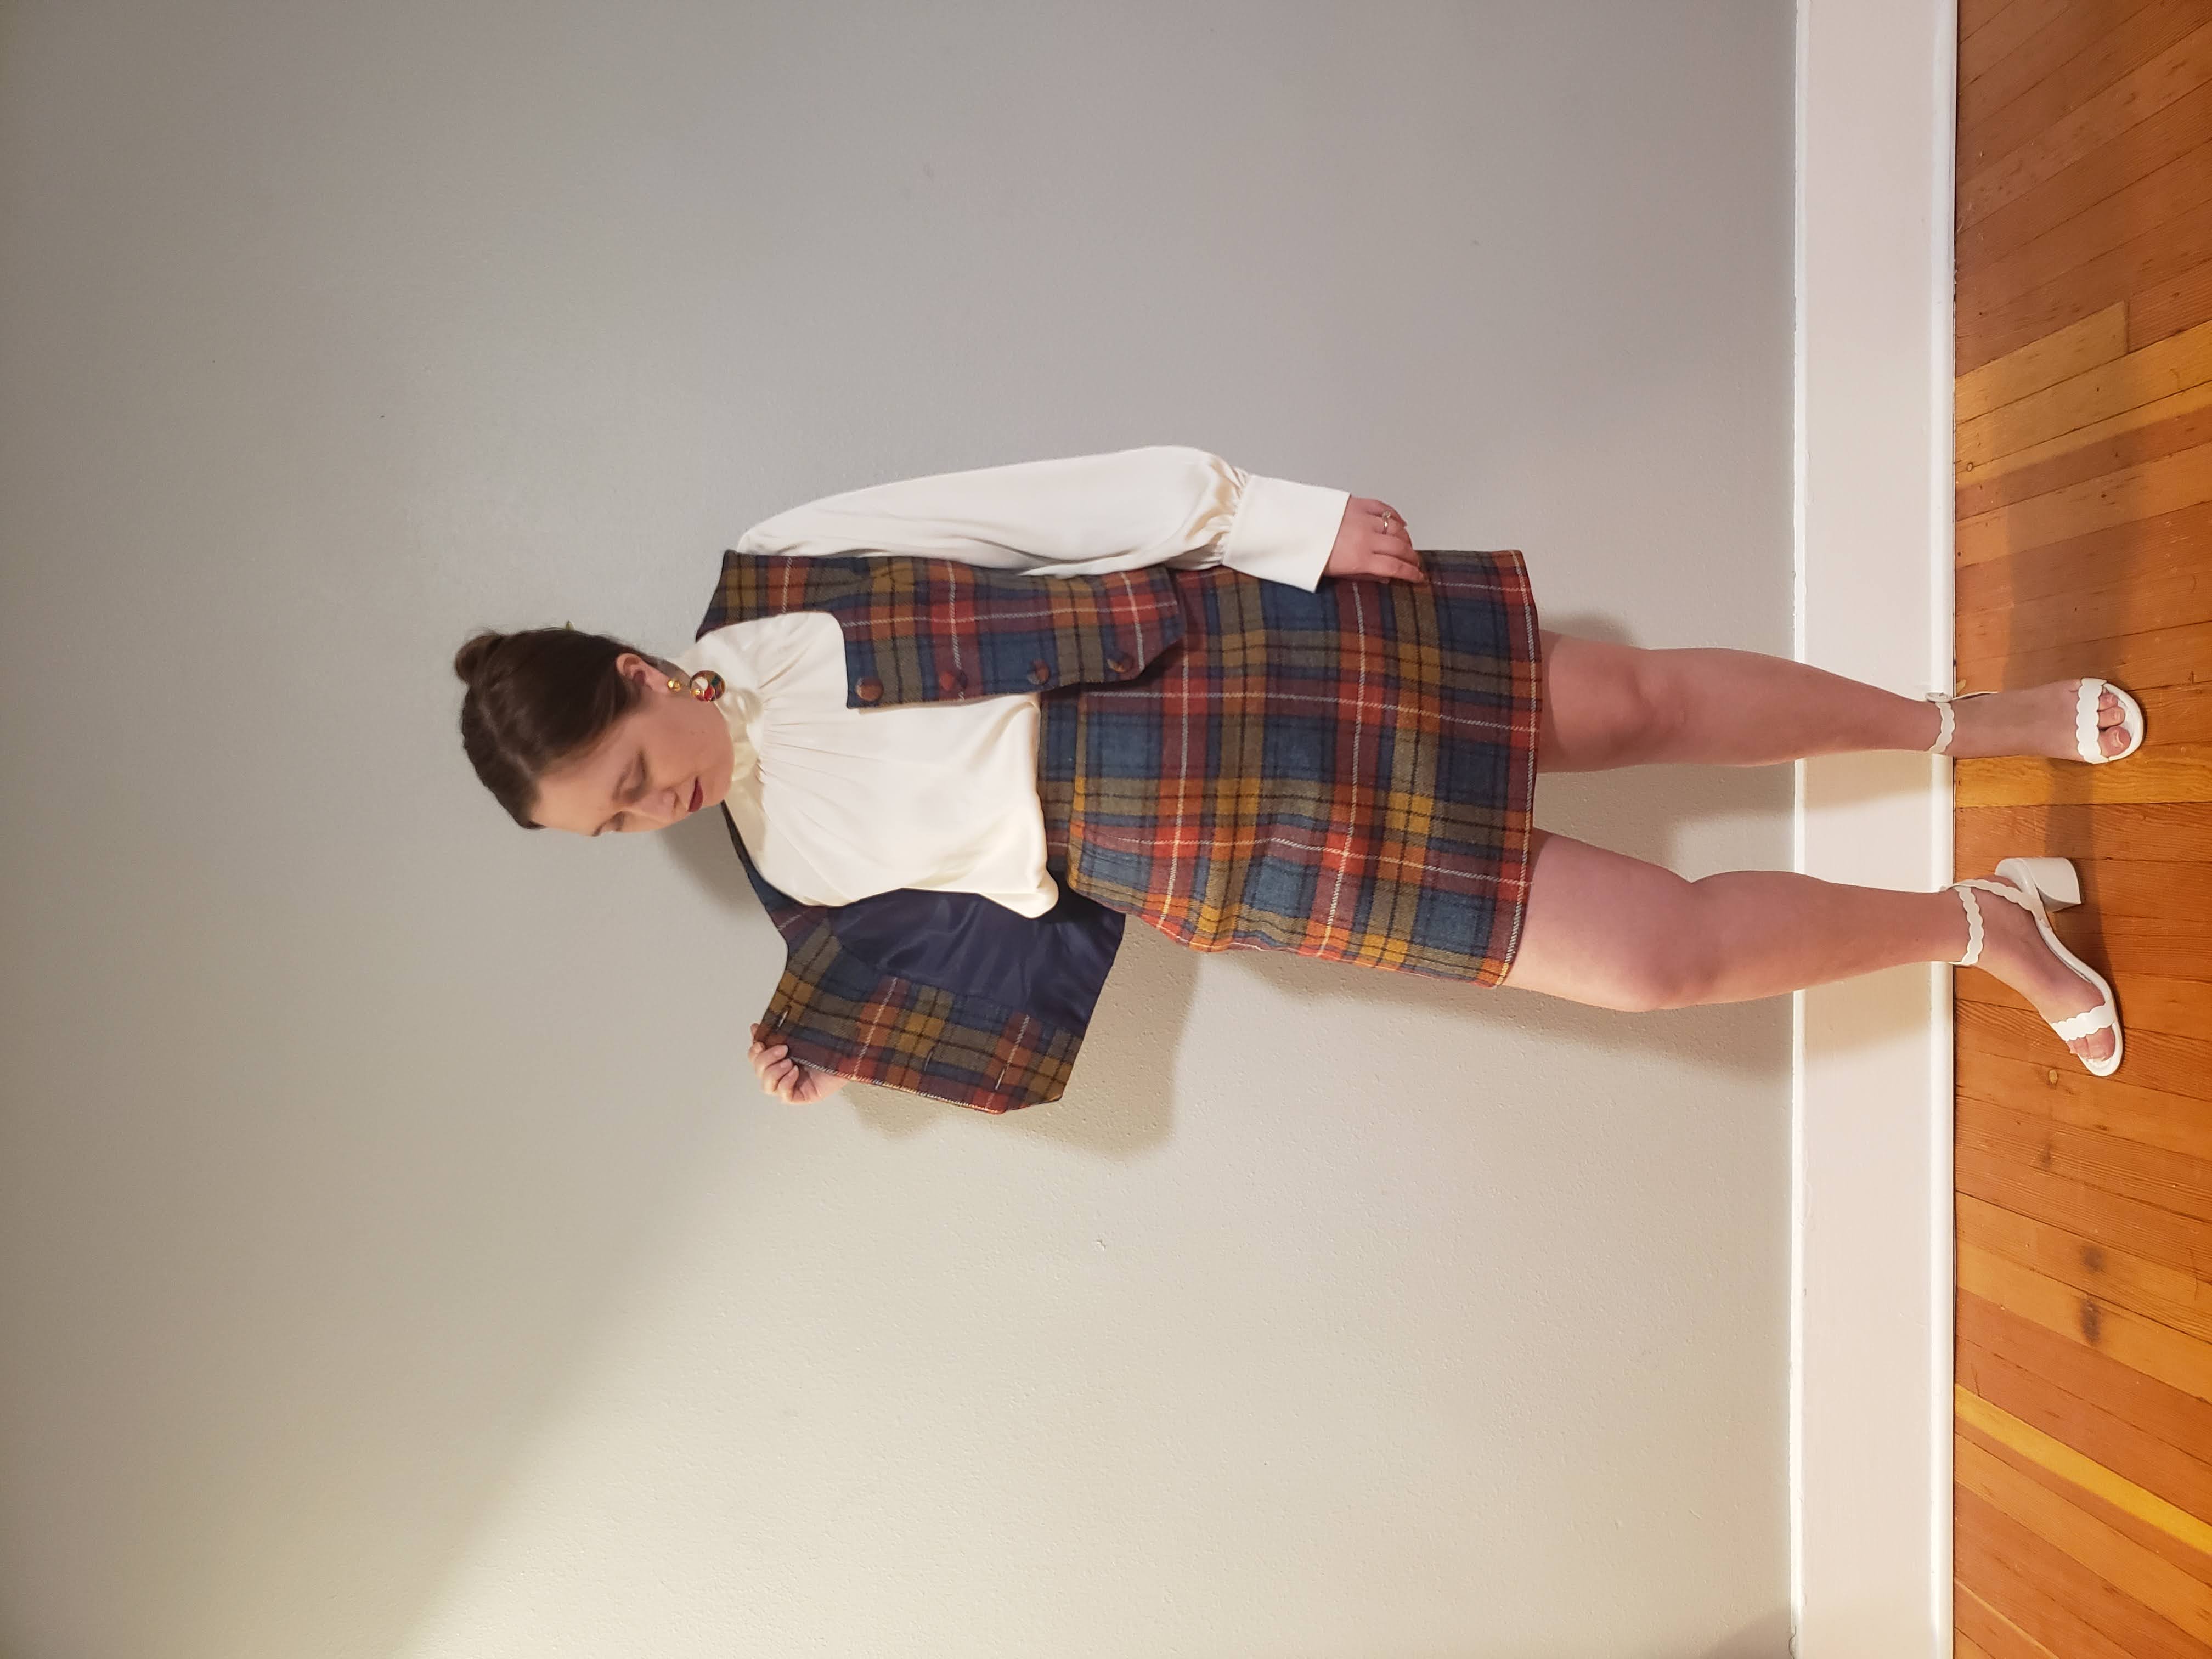
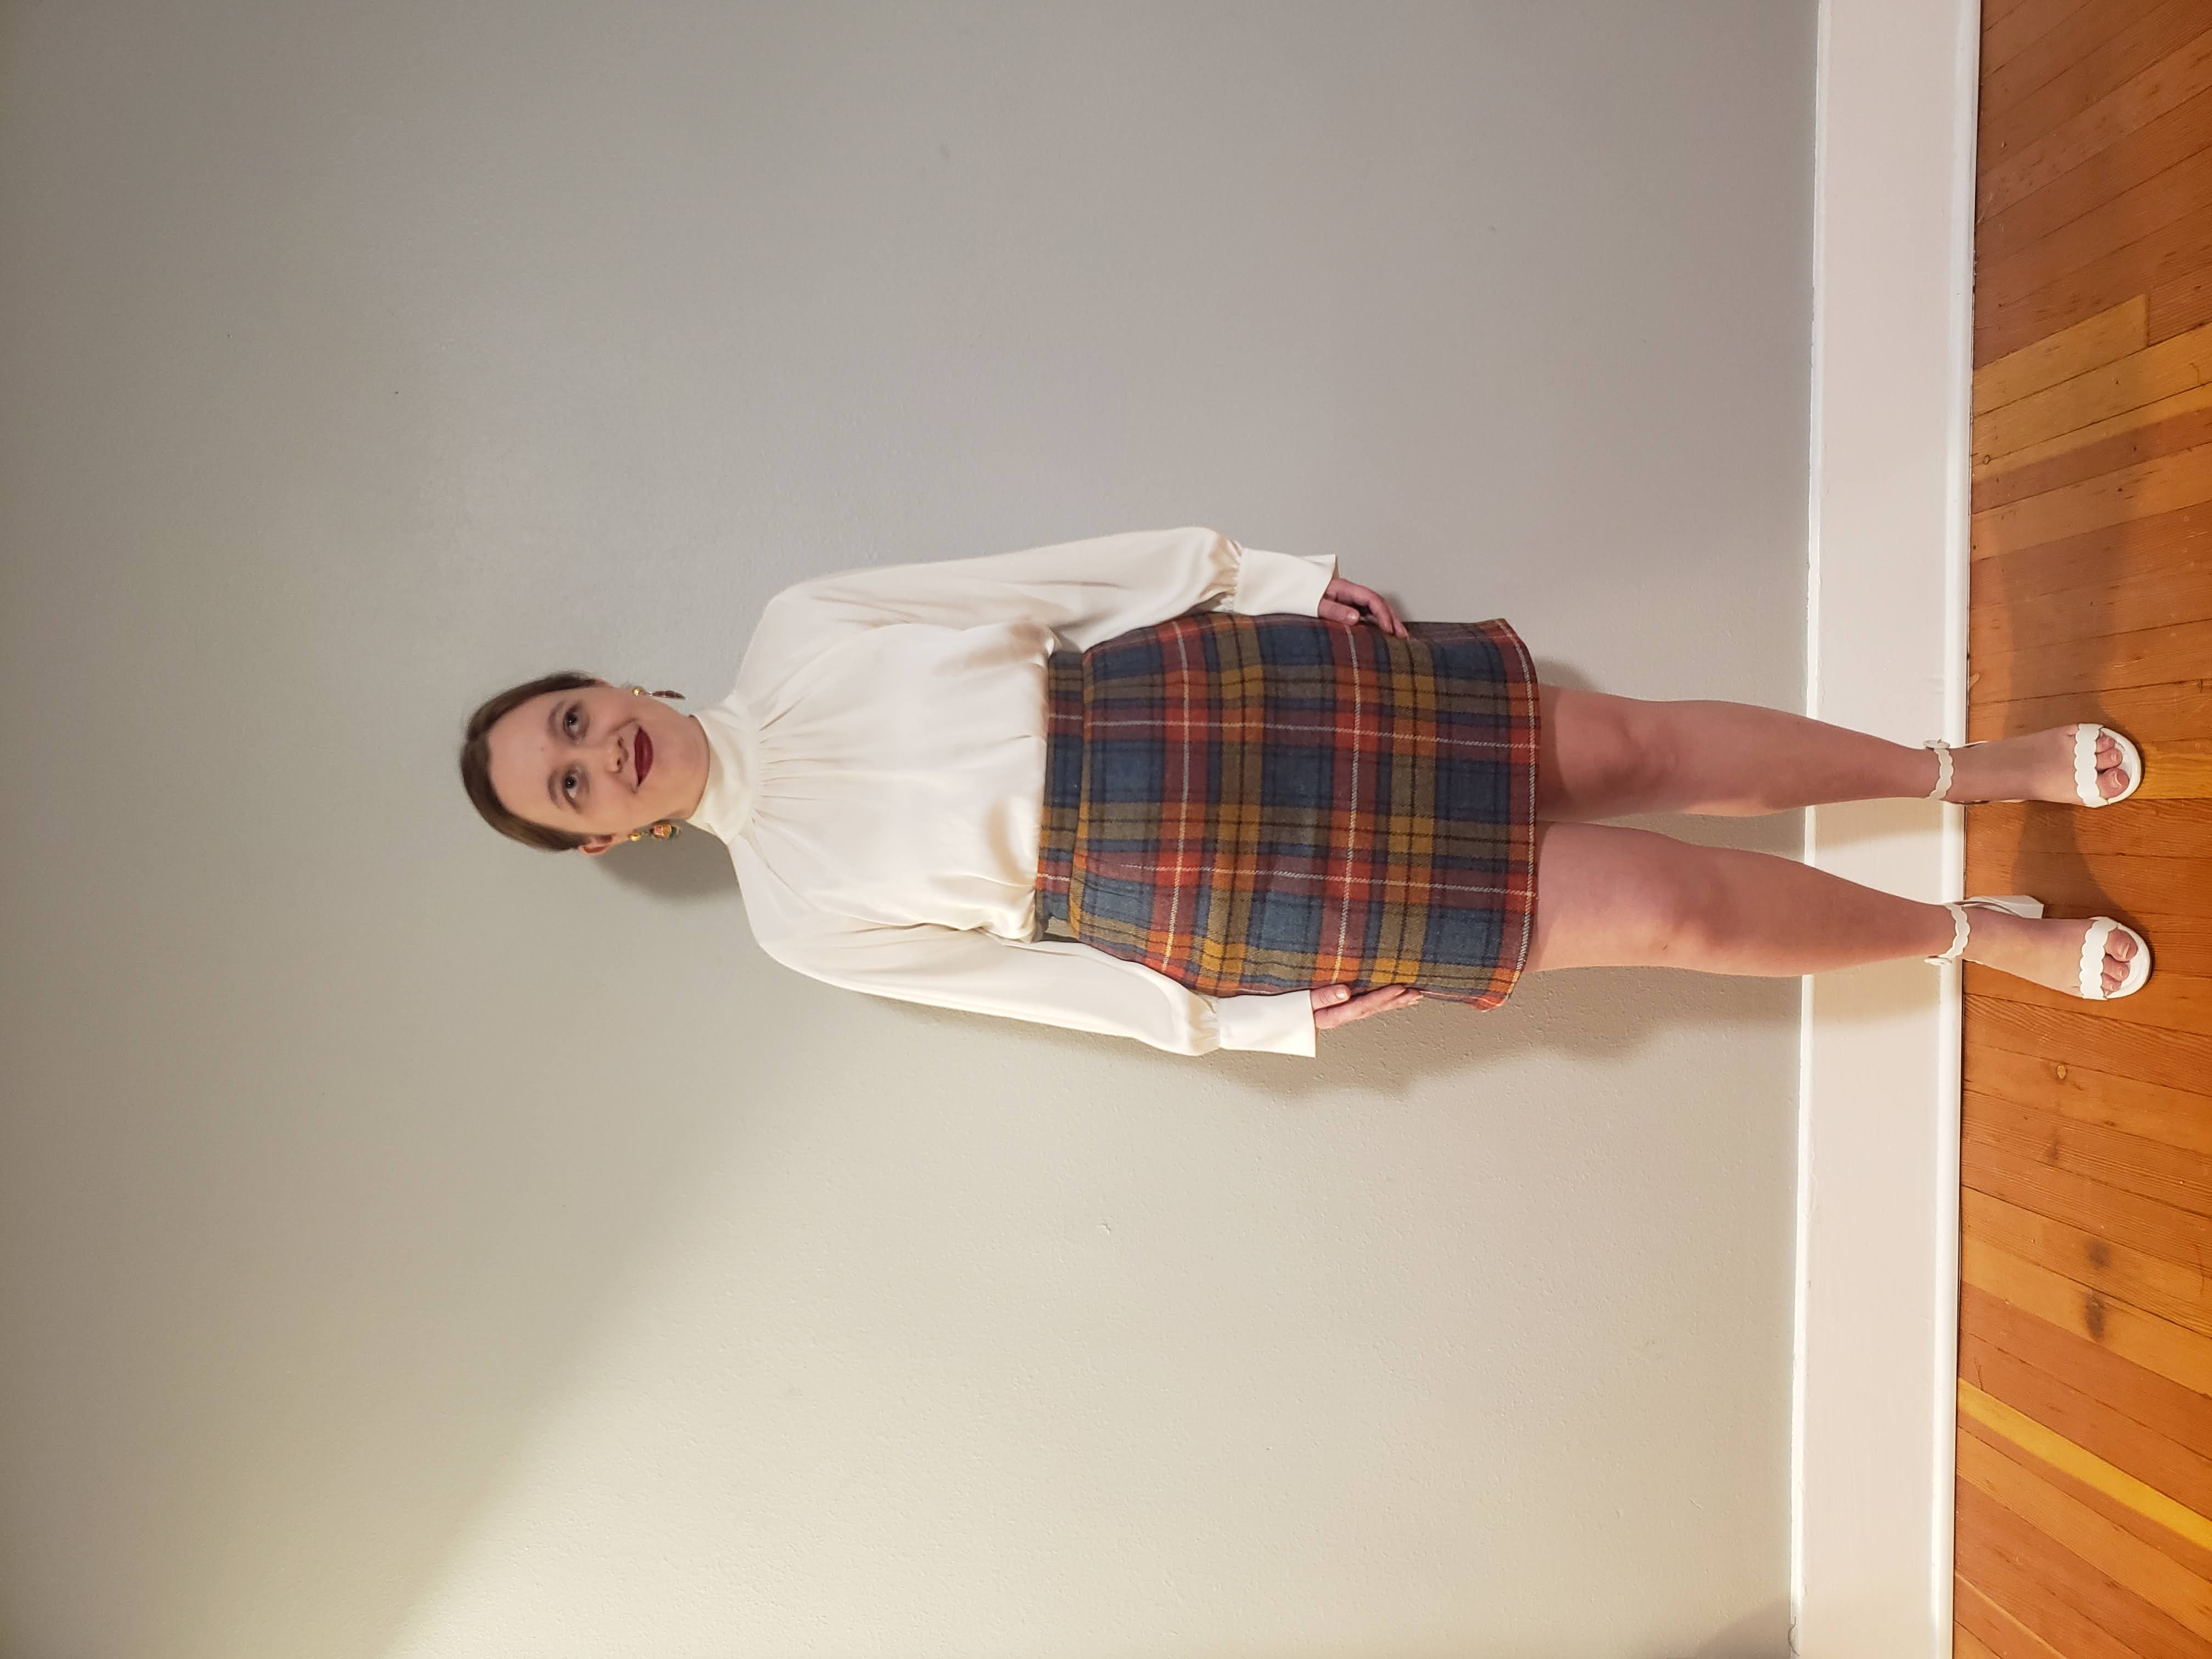
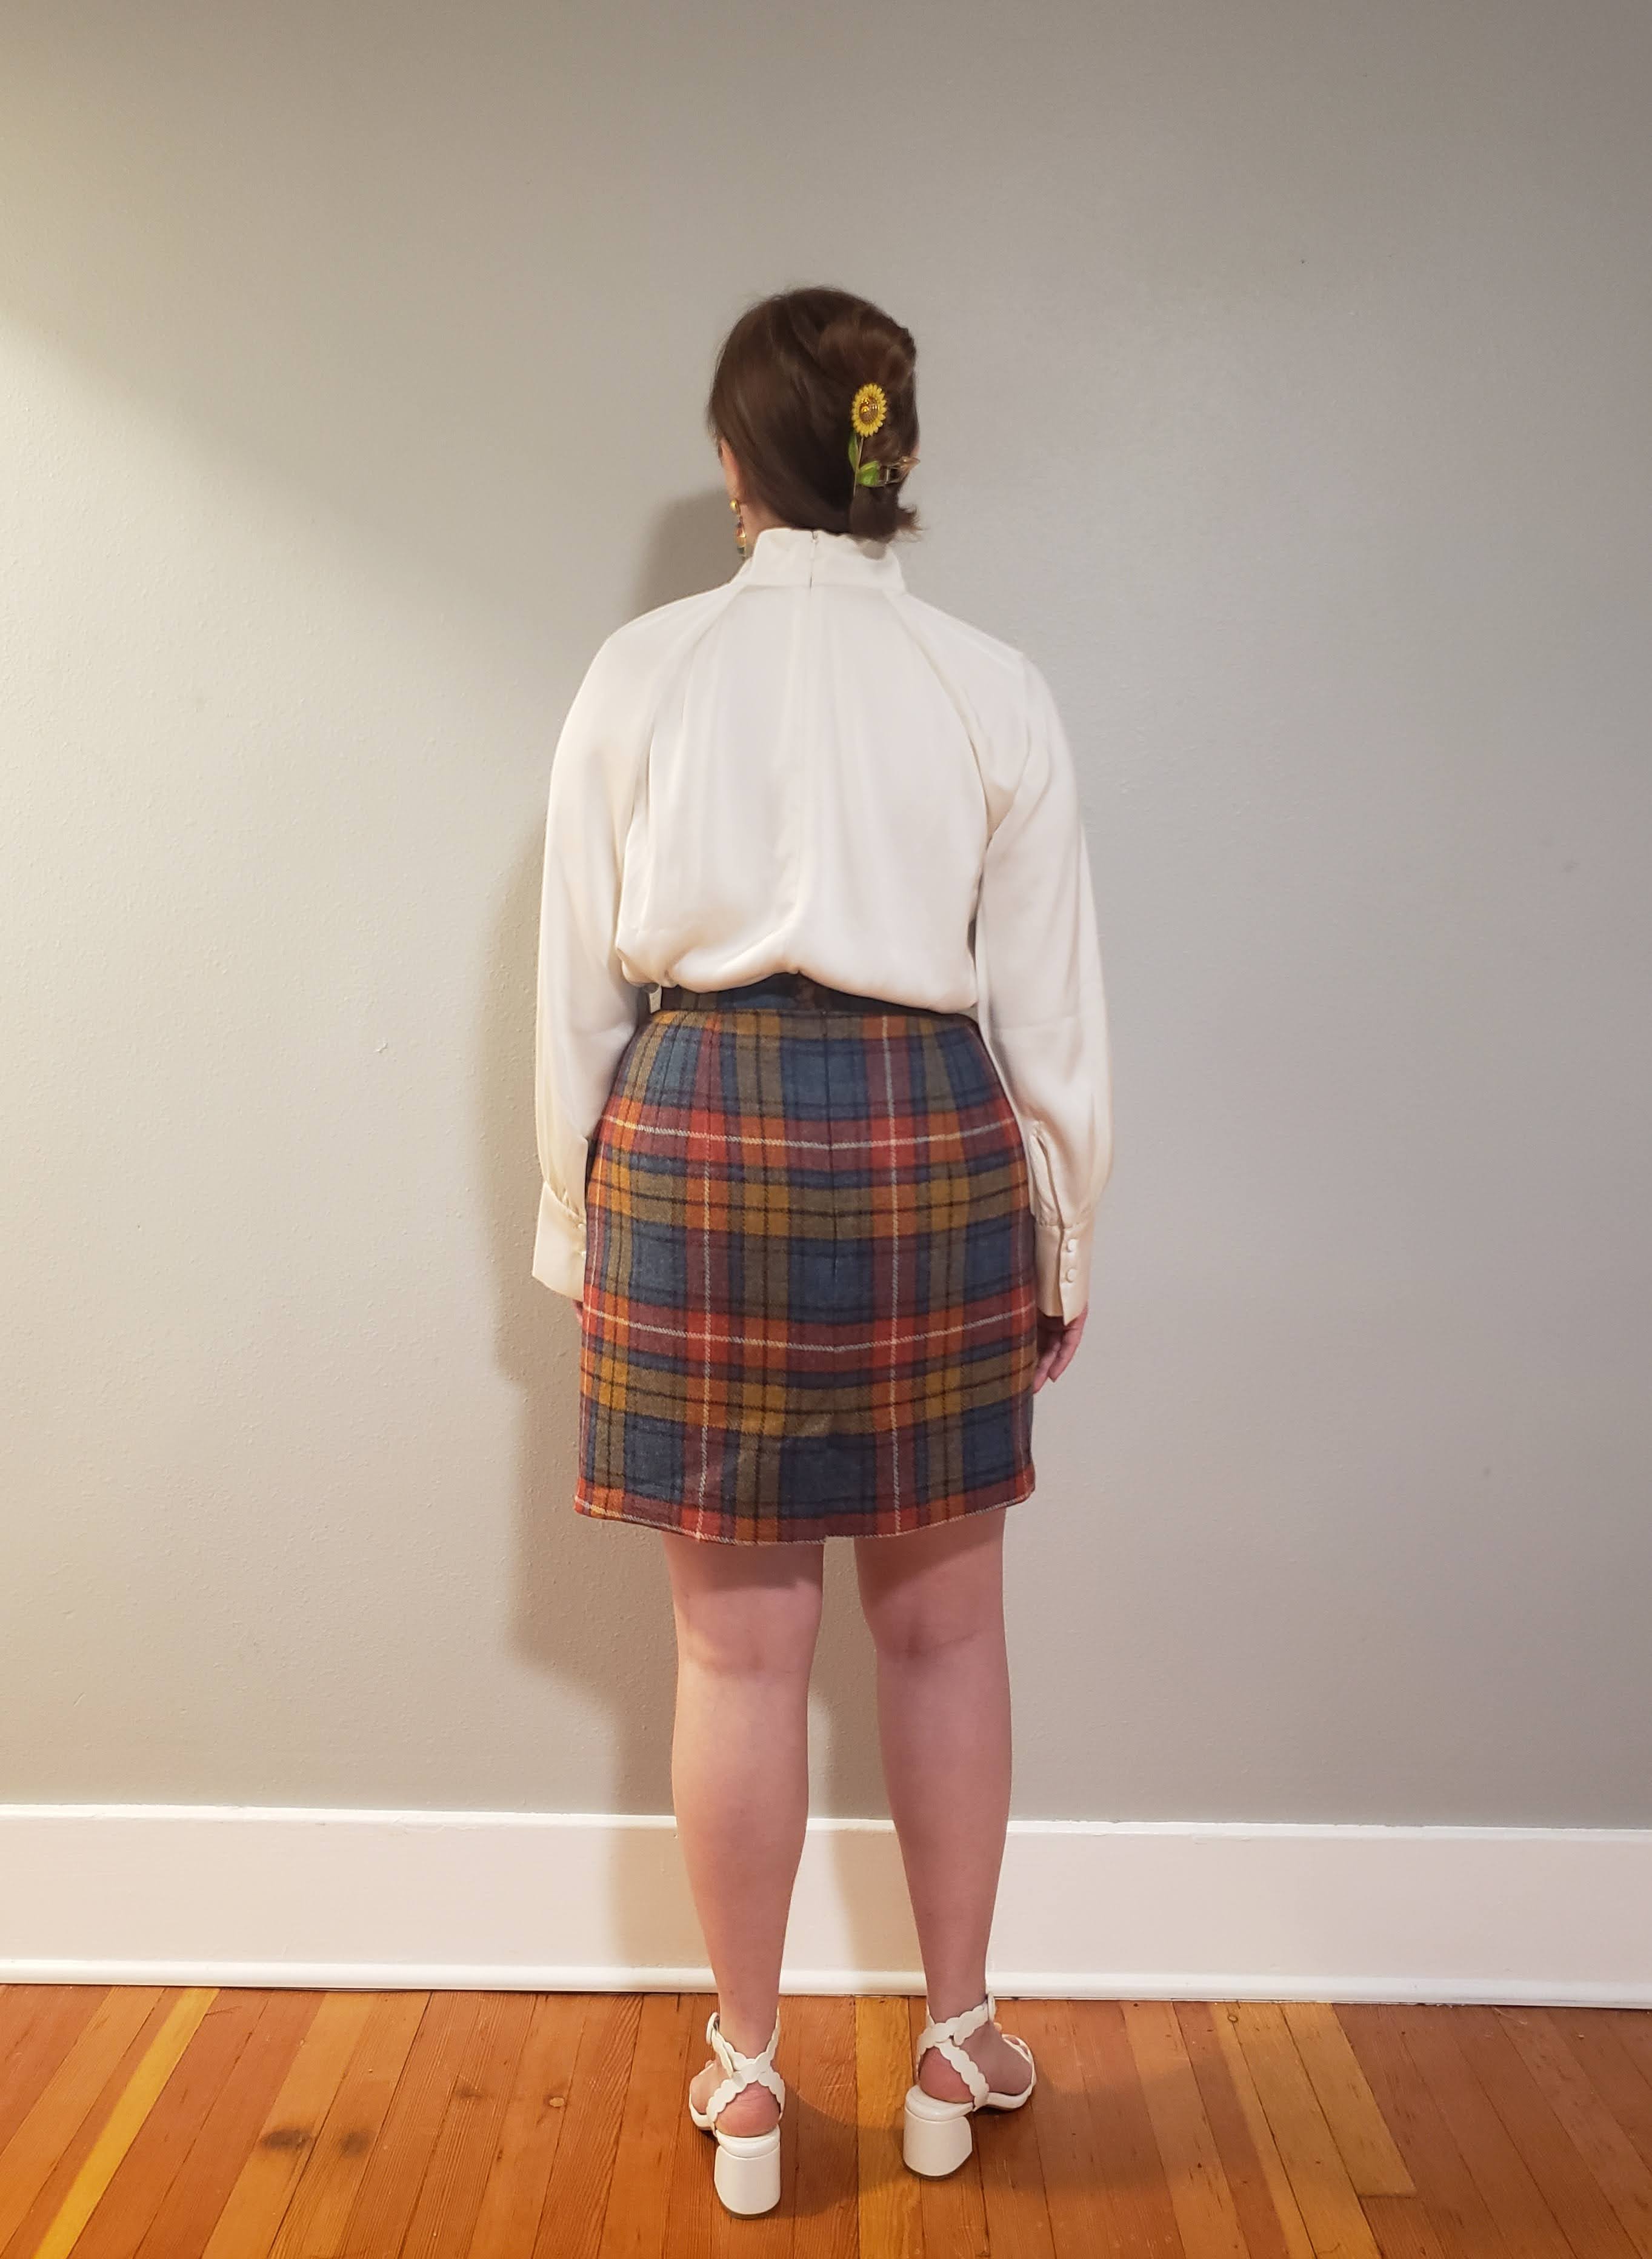
Wool Plaid Vest & Skirt Set
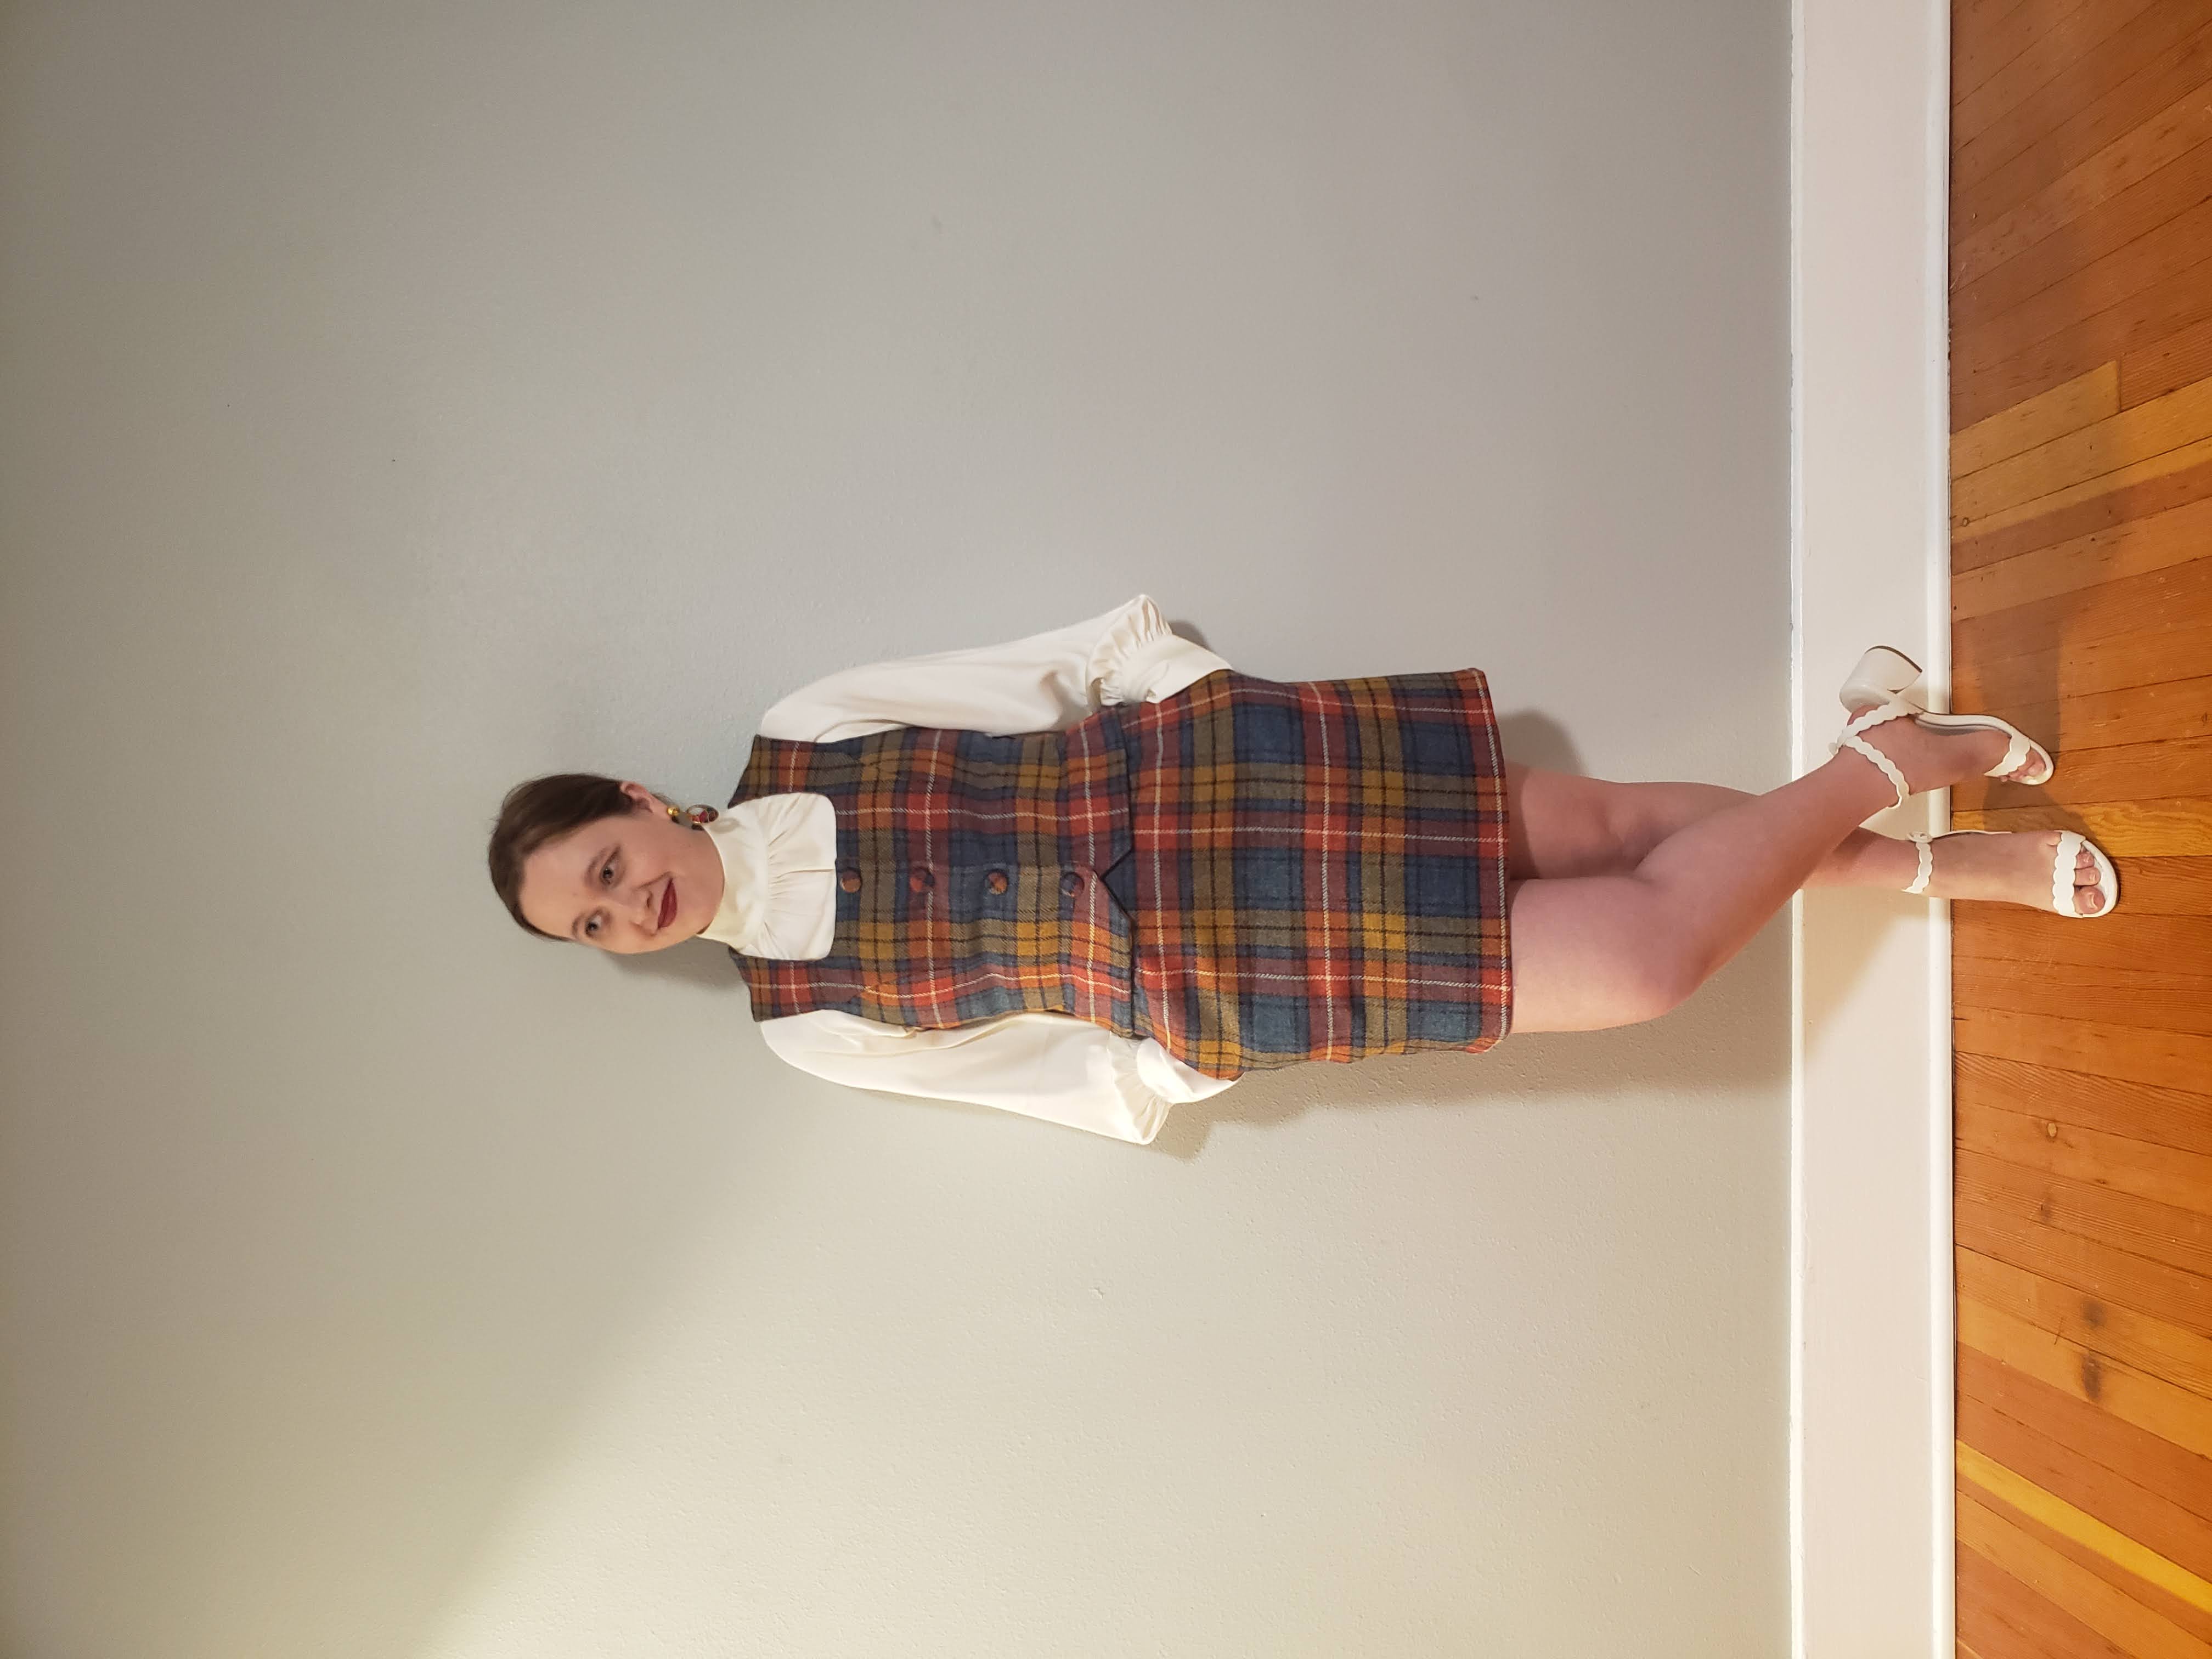
Ever since my mom and brother visited Scotland, and brought me back this tartan fabric, I have been dying to make something from it. It is a beautiful plaid with all the colors of the rainbow, but muted enough not to be too in-your-face. My mind immediately jumped to Cher from Clueless in her matching yellow pleated skirt and jacket (you know the one)
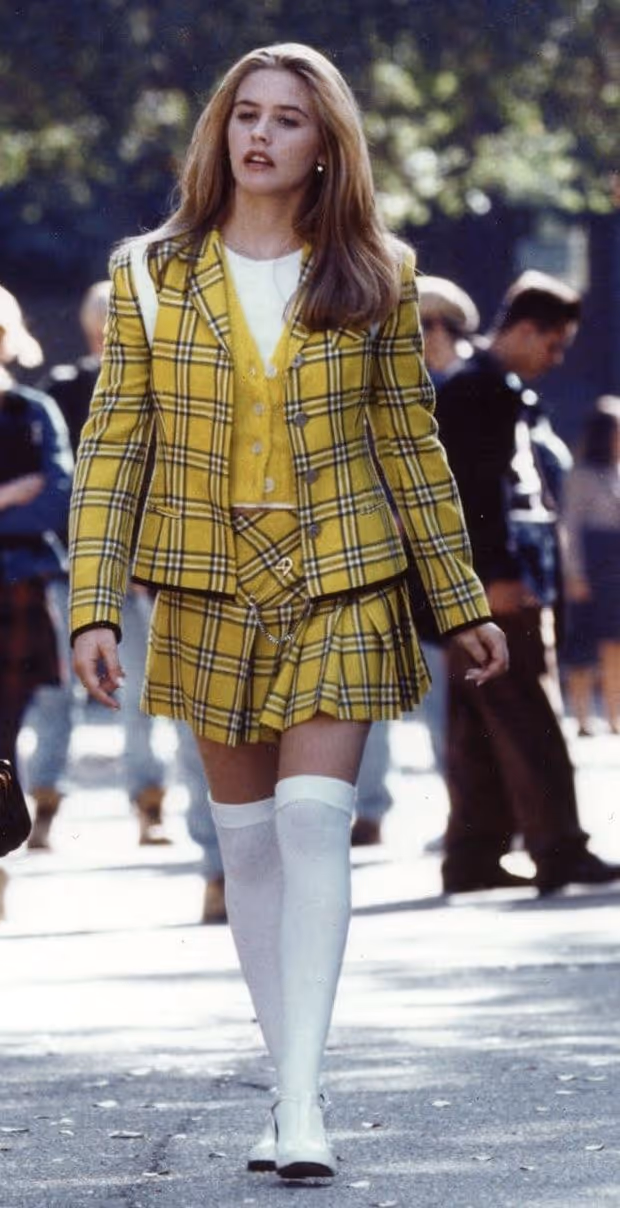
Unfortunately, I did not have enough fabric to do a full jacket or pleated skirt, so I decided to do a matching vest and a basic thigh-high skirt. For the skirt, I took my sloper, shortened it, straightened the waist curve, and added some extra fabric at the center back seam for a kick pleat. I didn't bother patterning out a waistband, because I figured I would just cut a rectangle long enough to go around my waist, plus a little extra for a button tab and seam allowance.

As for the vest, I browsed sewing.patternreview.com and found a vest I liked the look of that user Jed Keller had sewn and reviewed. The pattern was from Lekala—a website where you plug in your measurements and they give you a custom pattern pdf. It was only like $3 so I figured I'd give it a shot! The instructions are trash, but the pattern looked decent when I made my mock-up. However, I prefer a more snug fit, so I took it in at my waist by about half an inch on the side and side back seams. I then transferred these changes to the pattern by editing the original PDF in inkscape.
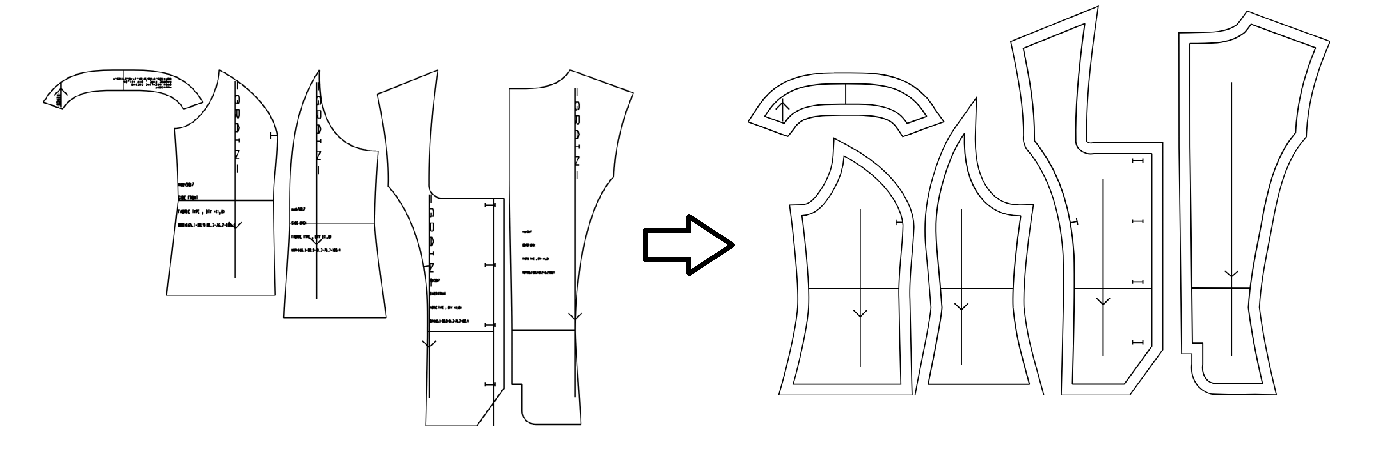
I cut all my pieces from the wool first, making sure to pattern match to the best of my abilities. I started with my back vest piece, which I cut on the fold, then cut the side back, side front, and finally the fronts. With each piece, I made sure it continued the pattern from the last one that I cut. I was more concerned about the pattern being continuous horizontally, and aligning at the waist, since it's impossible to pattern match perfectly along the curves. I also cut the skirt pieces in a similar manner.
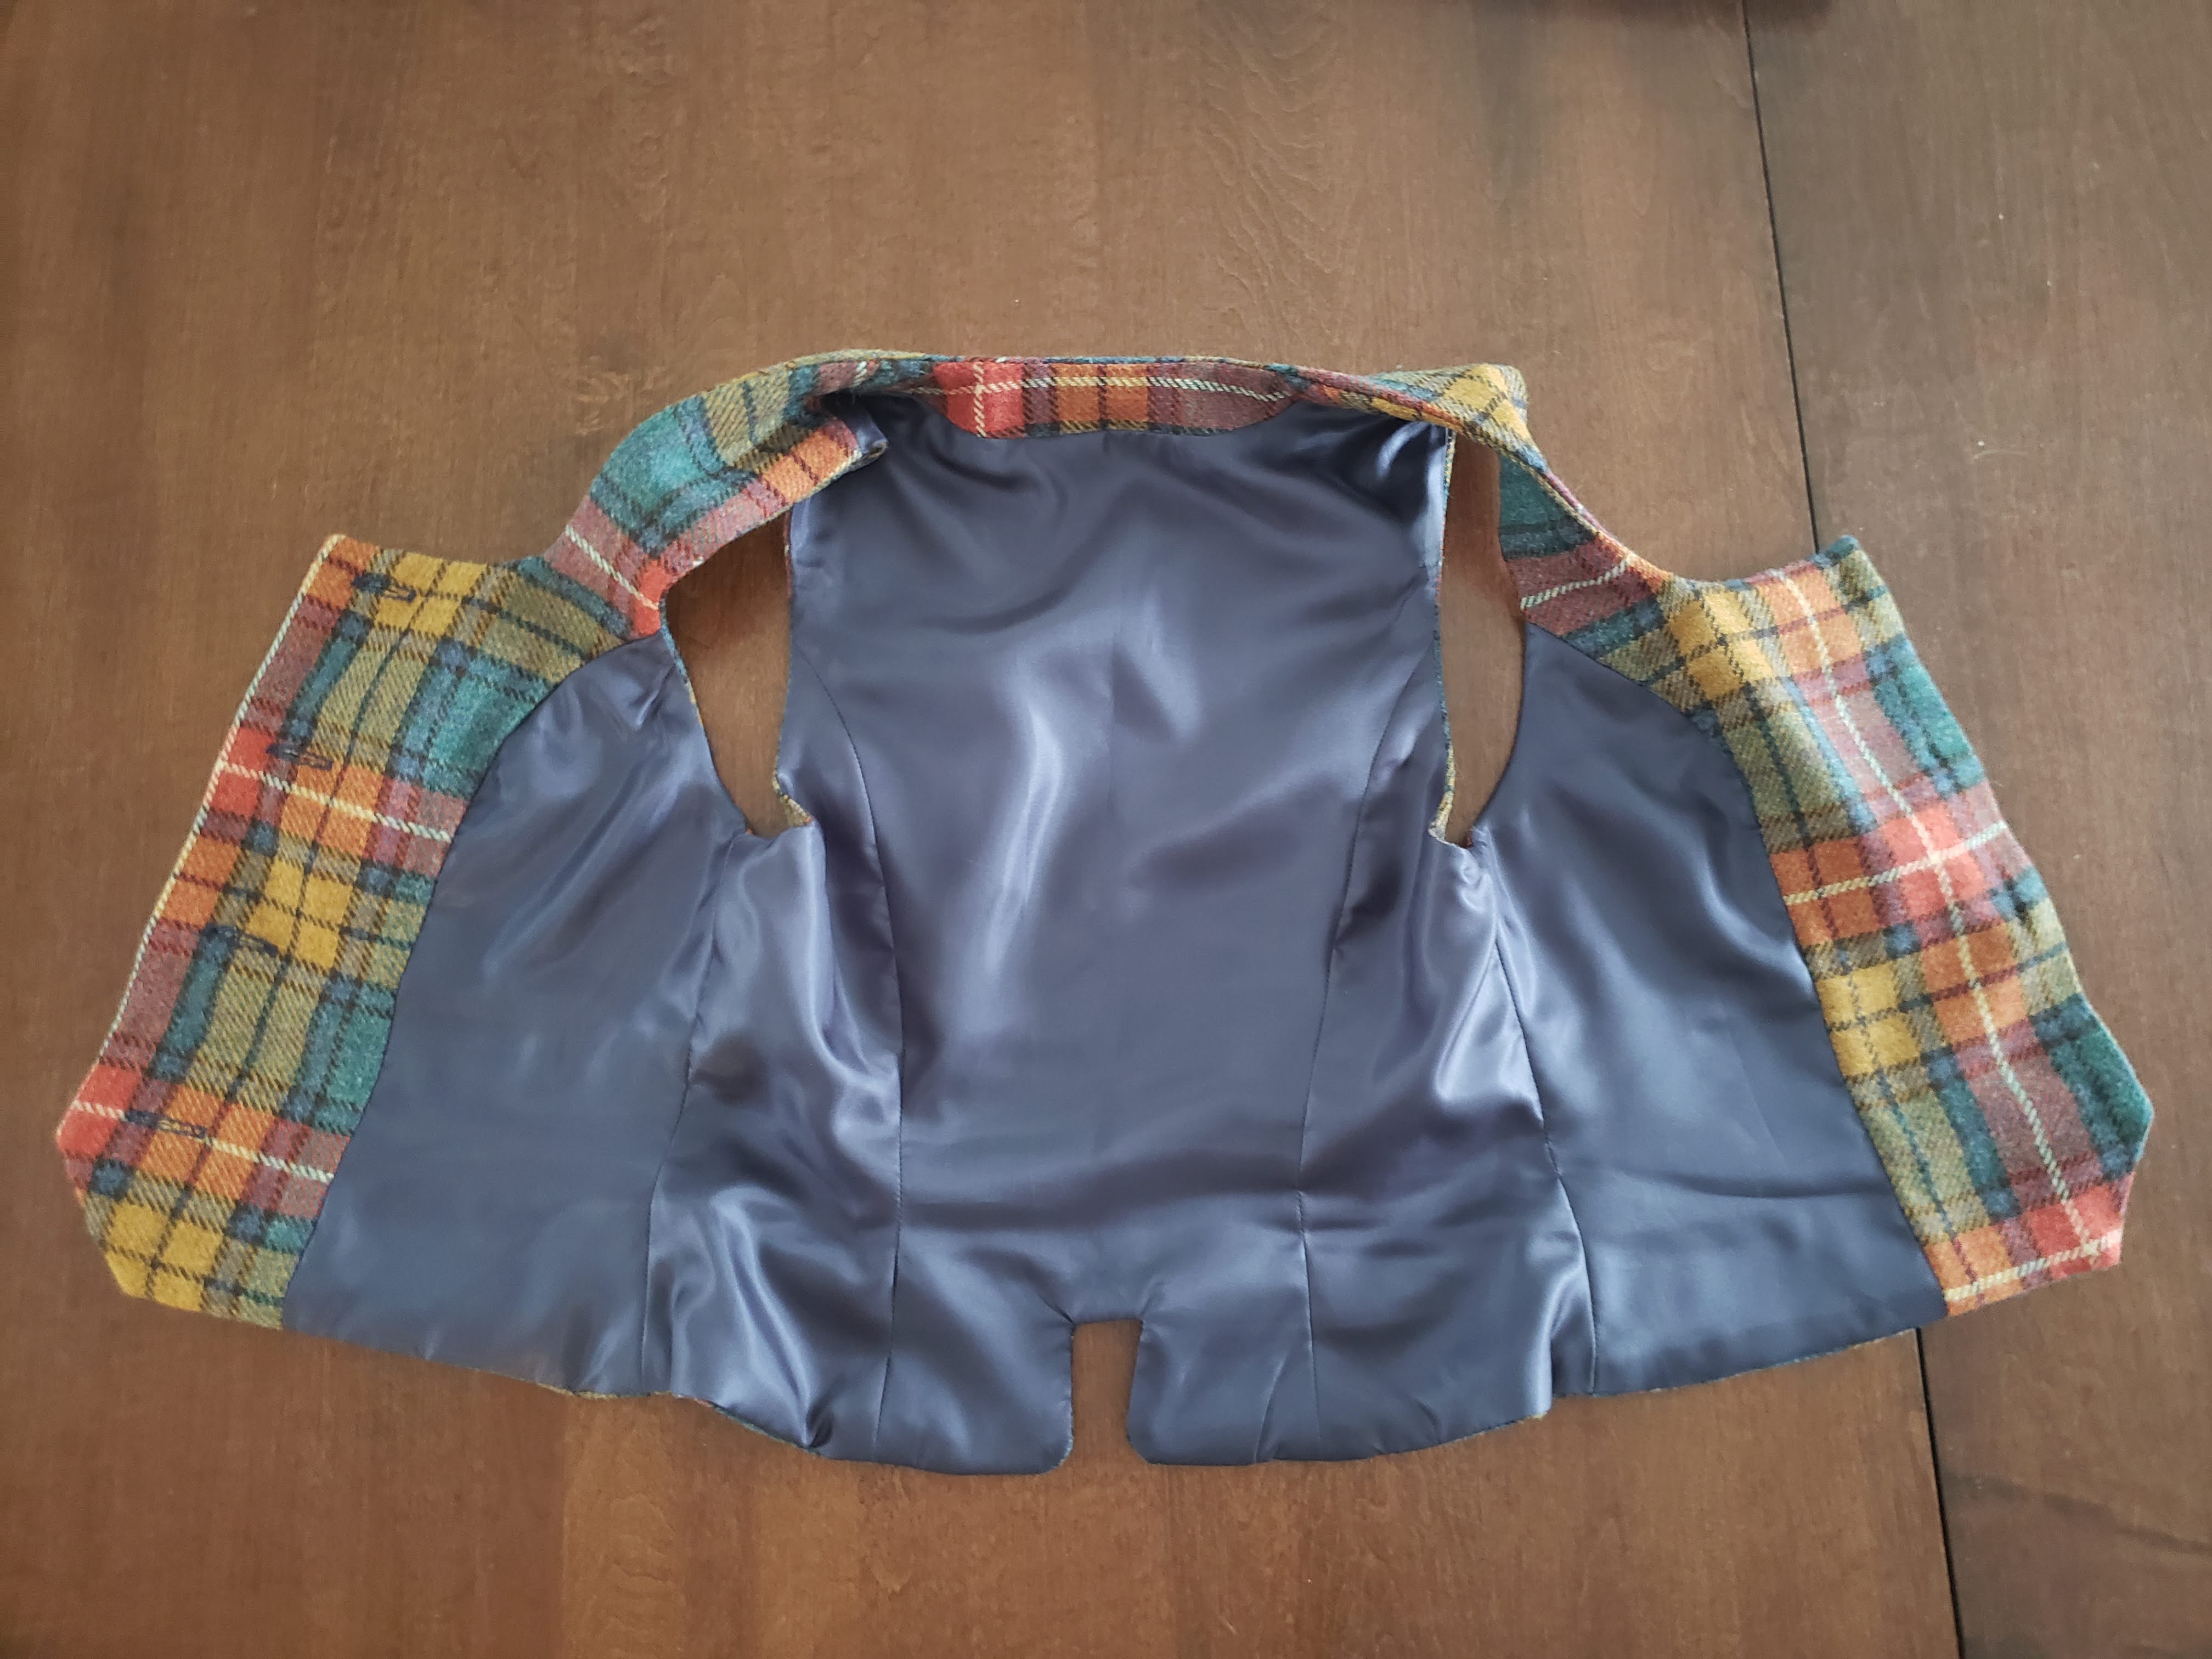
My lining fabric was a blue acetate from Mood Fabrics. All the lining pieces were pretty much the same, except I 'subtracted' the back neck facing from the back piece to get my back lining piece. The vest fronts I decided to line with the wool. If I were to do this again, I think I'd make a different choice—two layers of wool plus cotton interfacing at the fronts made everything a bit too bulky, especially at the shoulder seams. It was okay after trimming some seam allowance and pressing with plenty of steam, but not worth the headache.
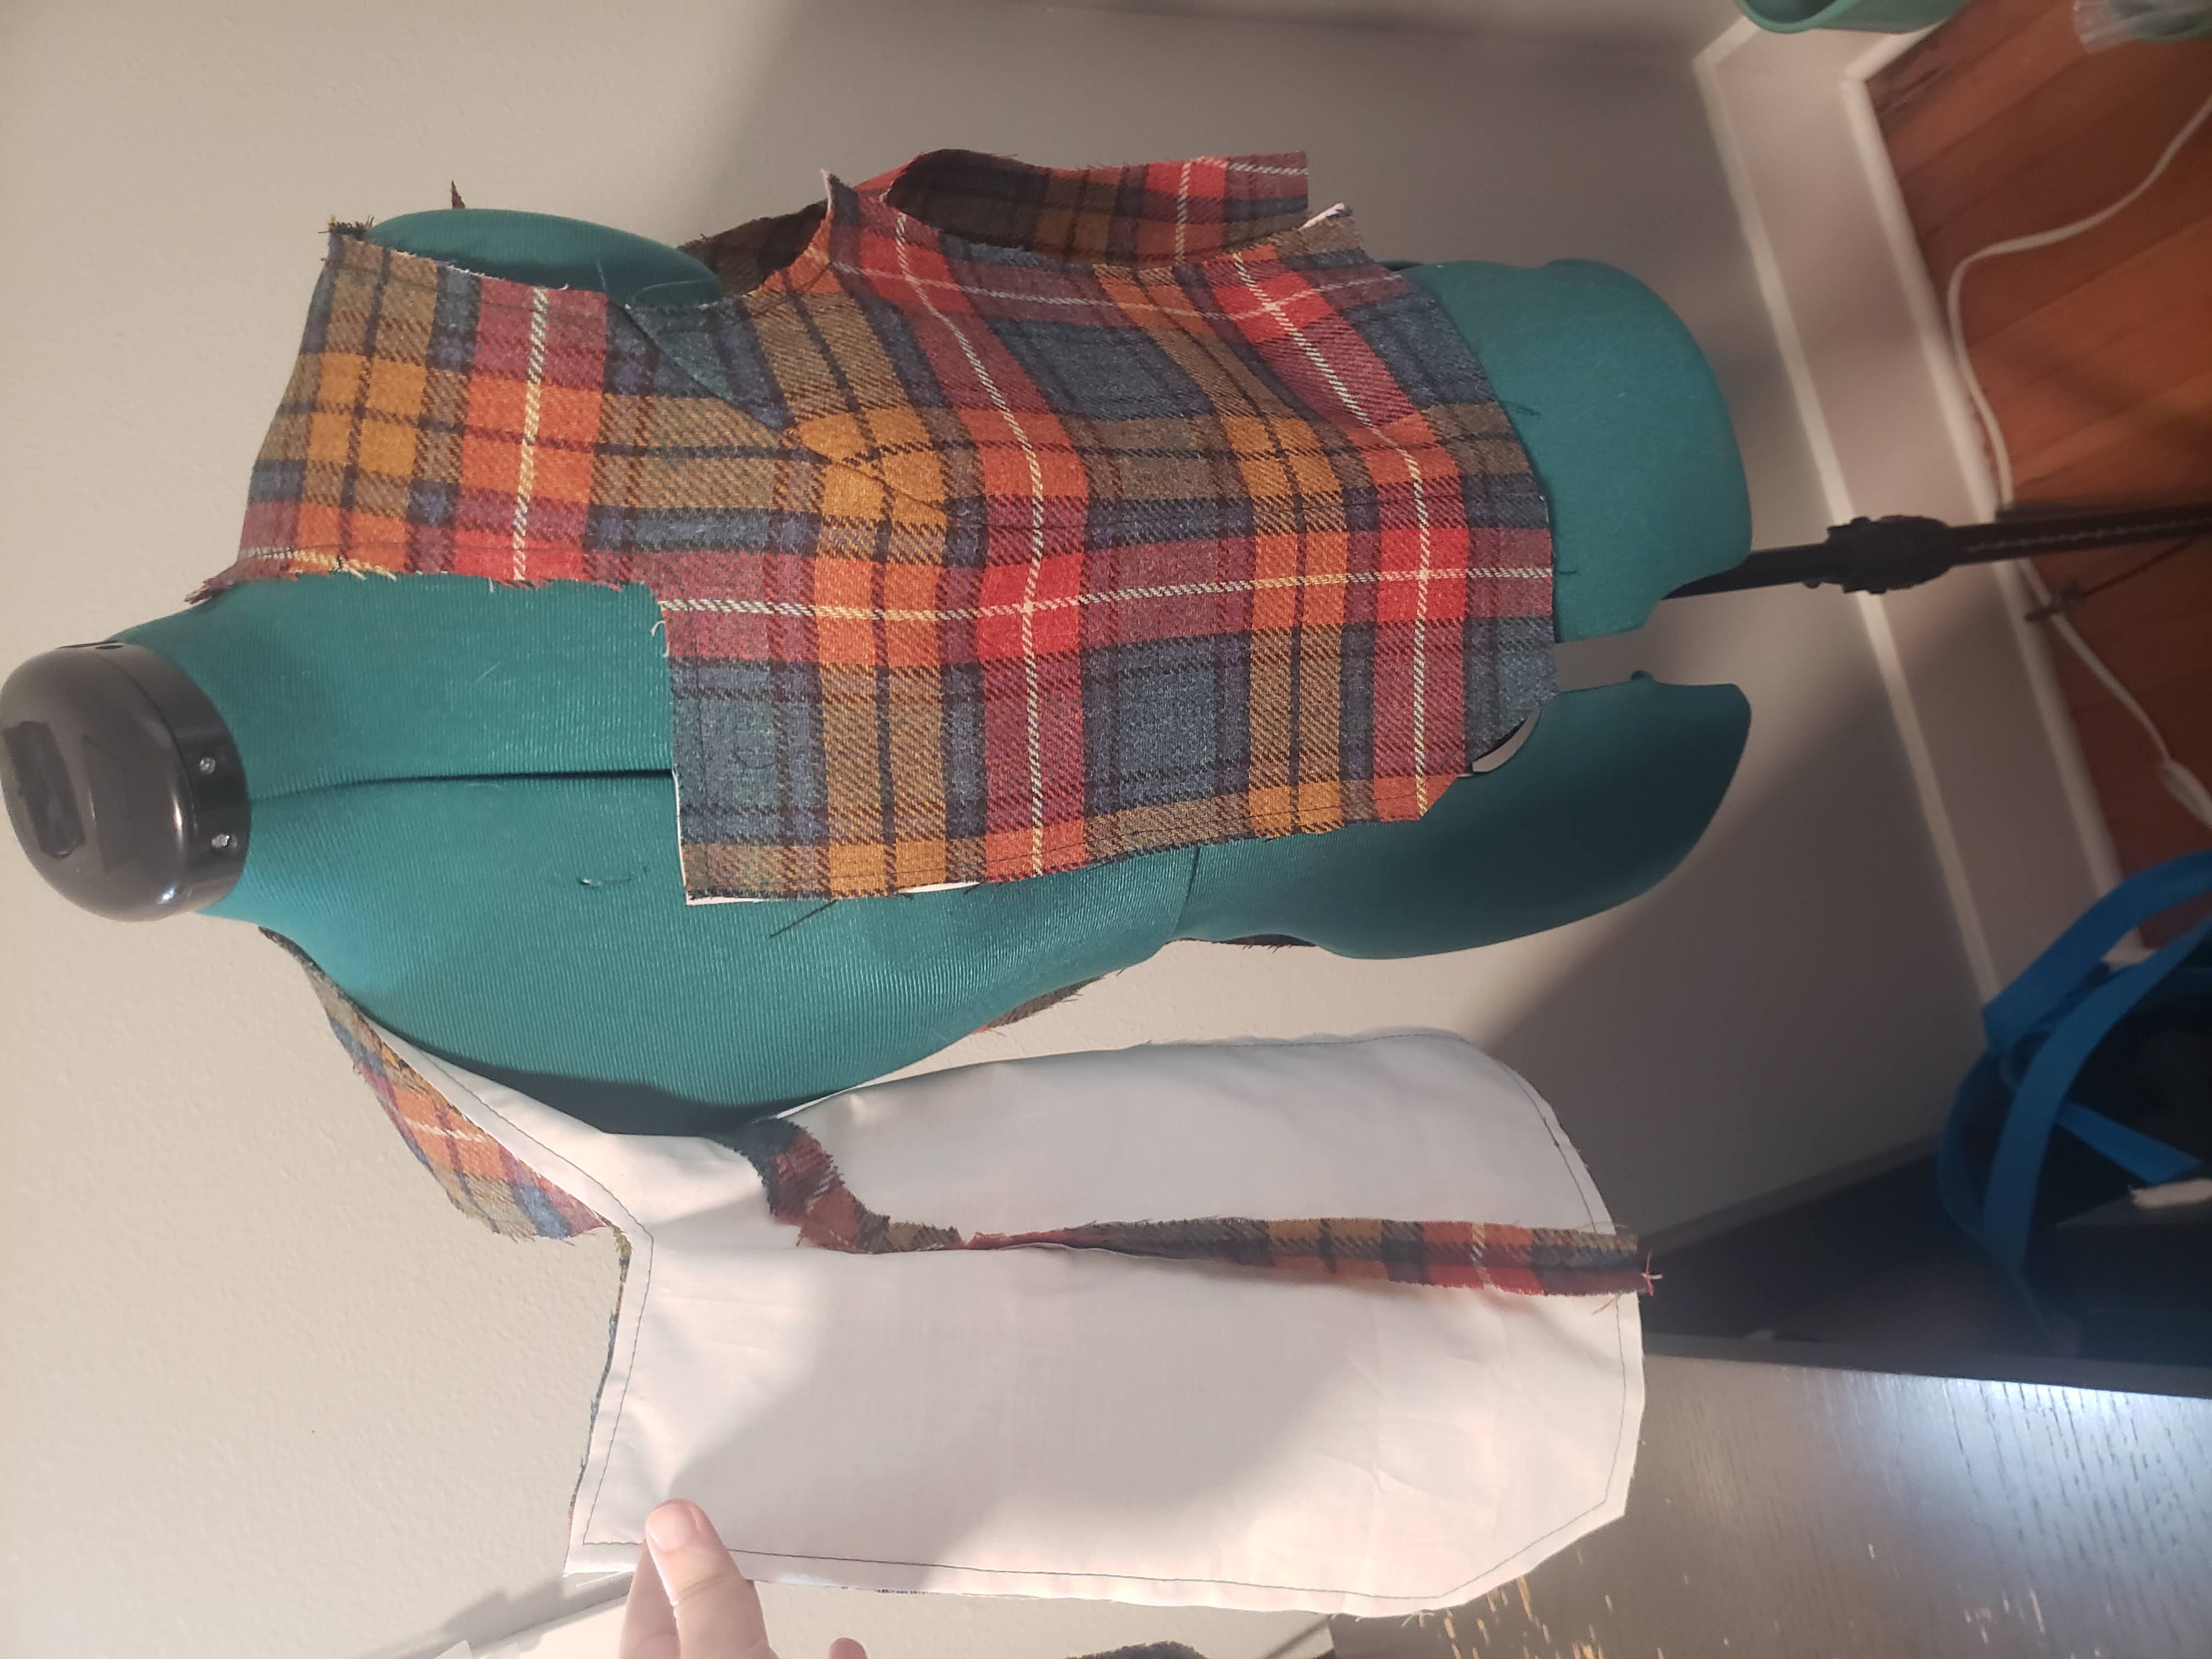
To attach the lining, I sewed from the center front, around the neckline, and down to the other side, then around the arm holes, leaving the bottom and side seams open. After turning right sides out, I pinned the sides (right sides together), and machine sewed them. Similarly, I sewed the bottom edge, leaving a large enough hole to turn it right side out. I then slip-stitched the hole closed. After stitching the button holes and attaching the wool-covered buttons, I was done with the vest! (I'll just show the inside for now)
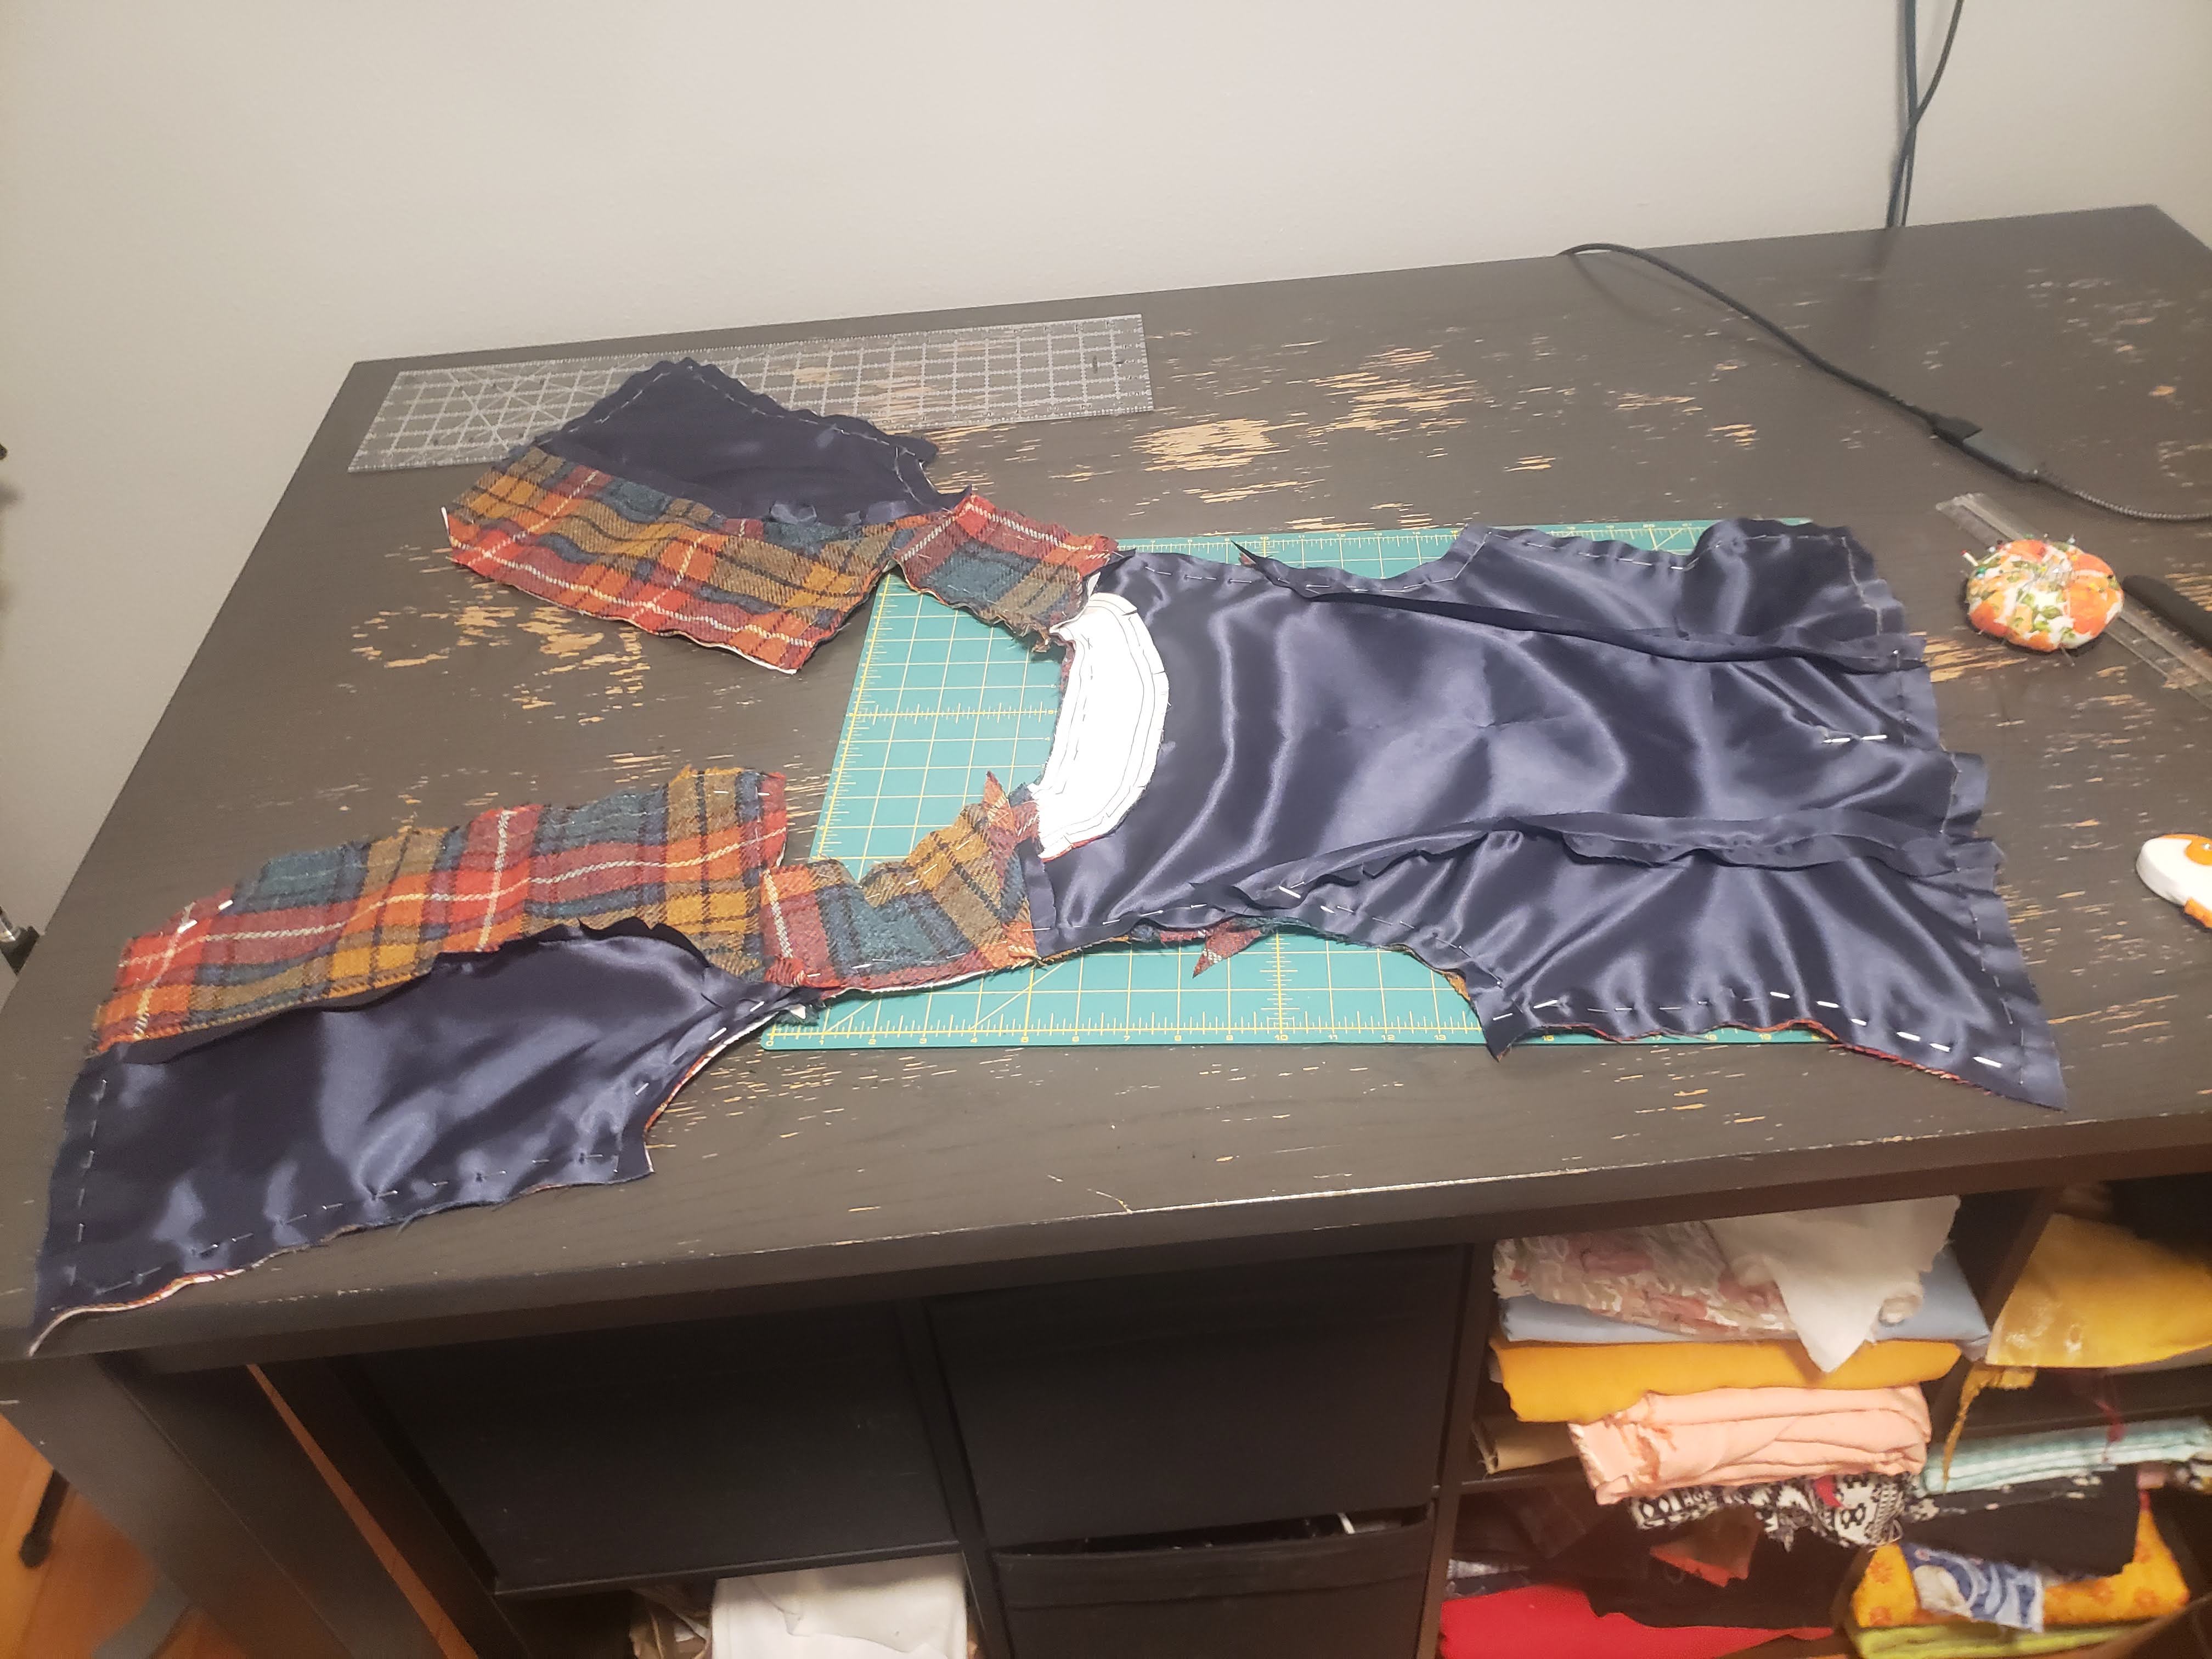
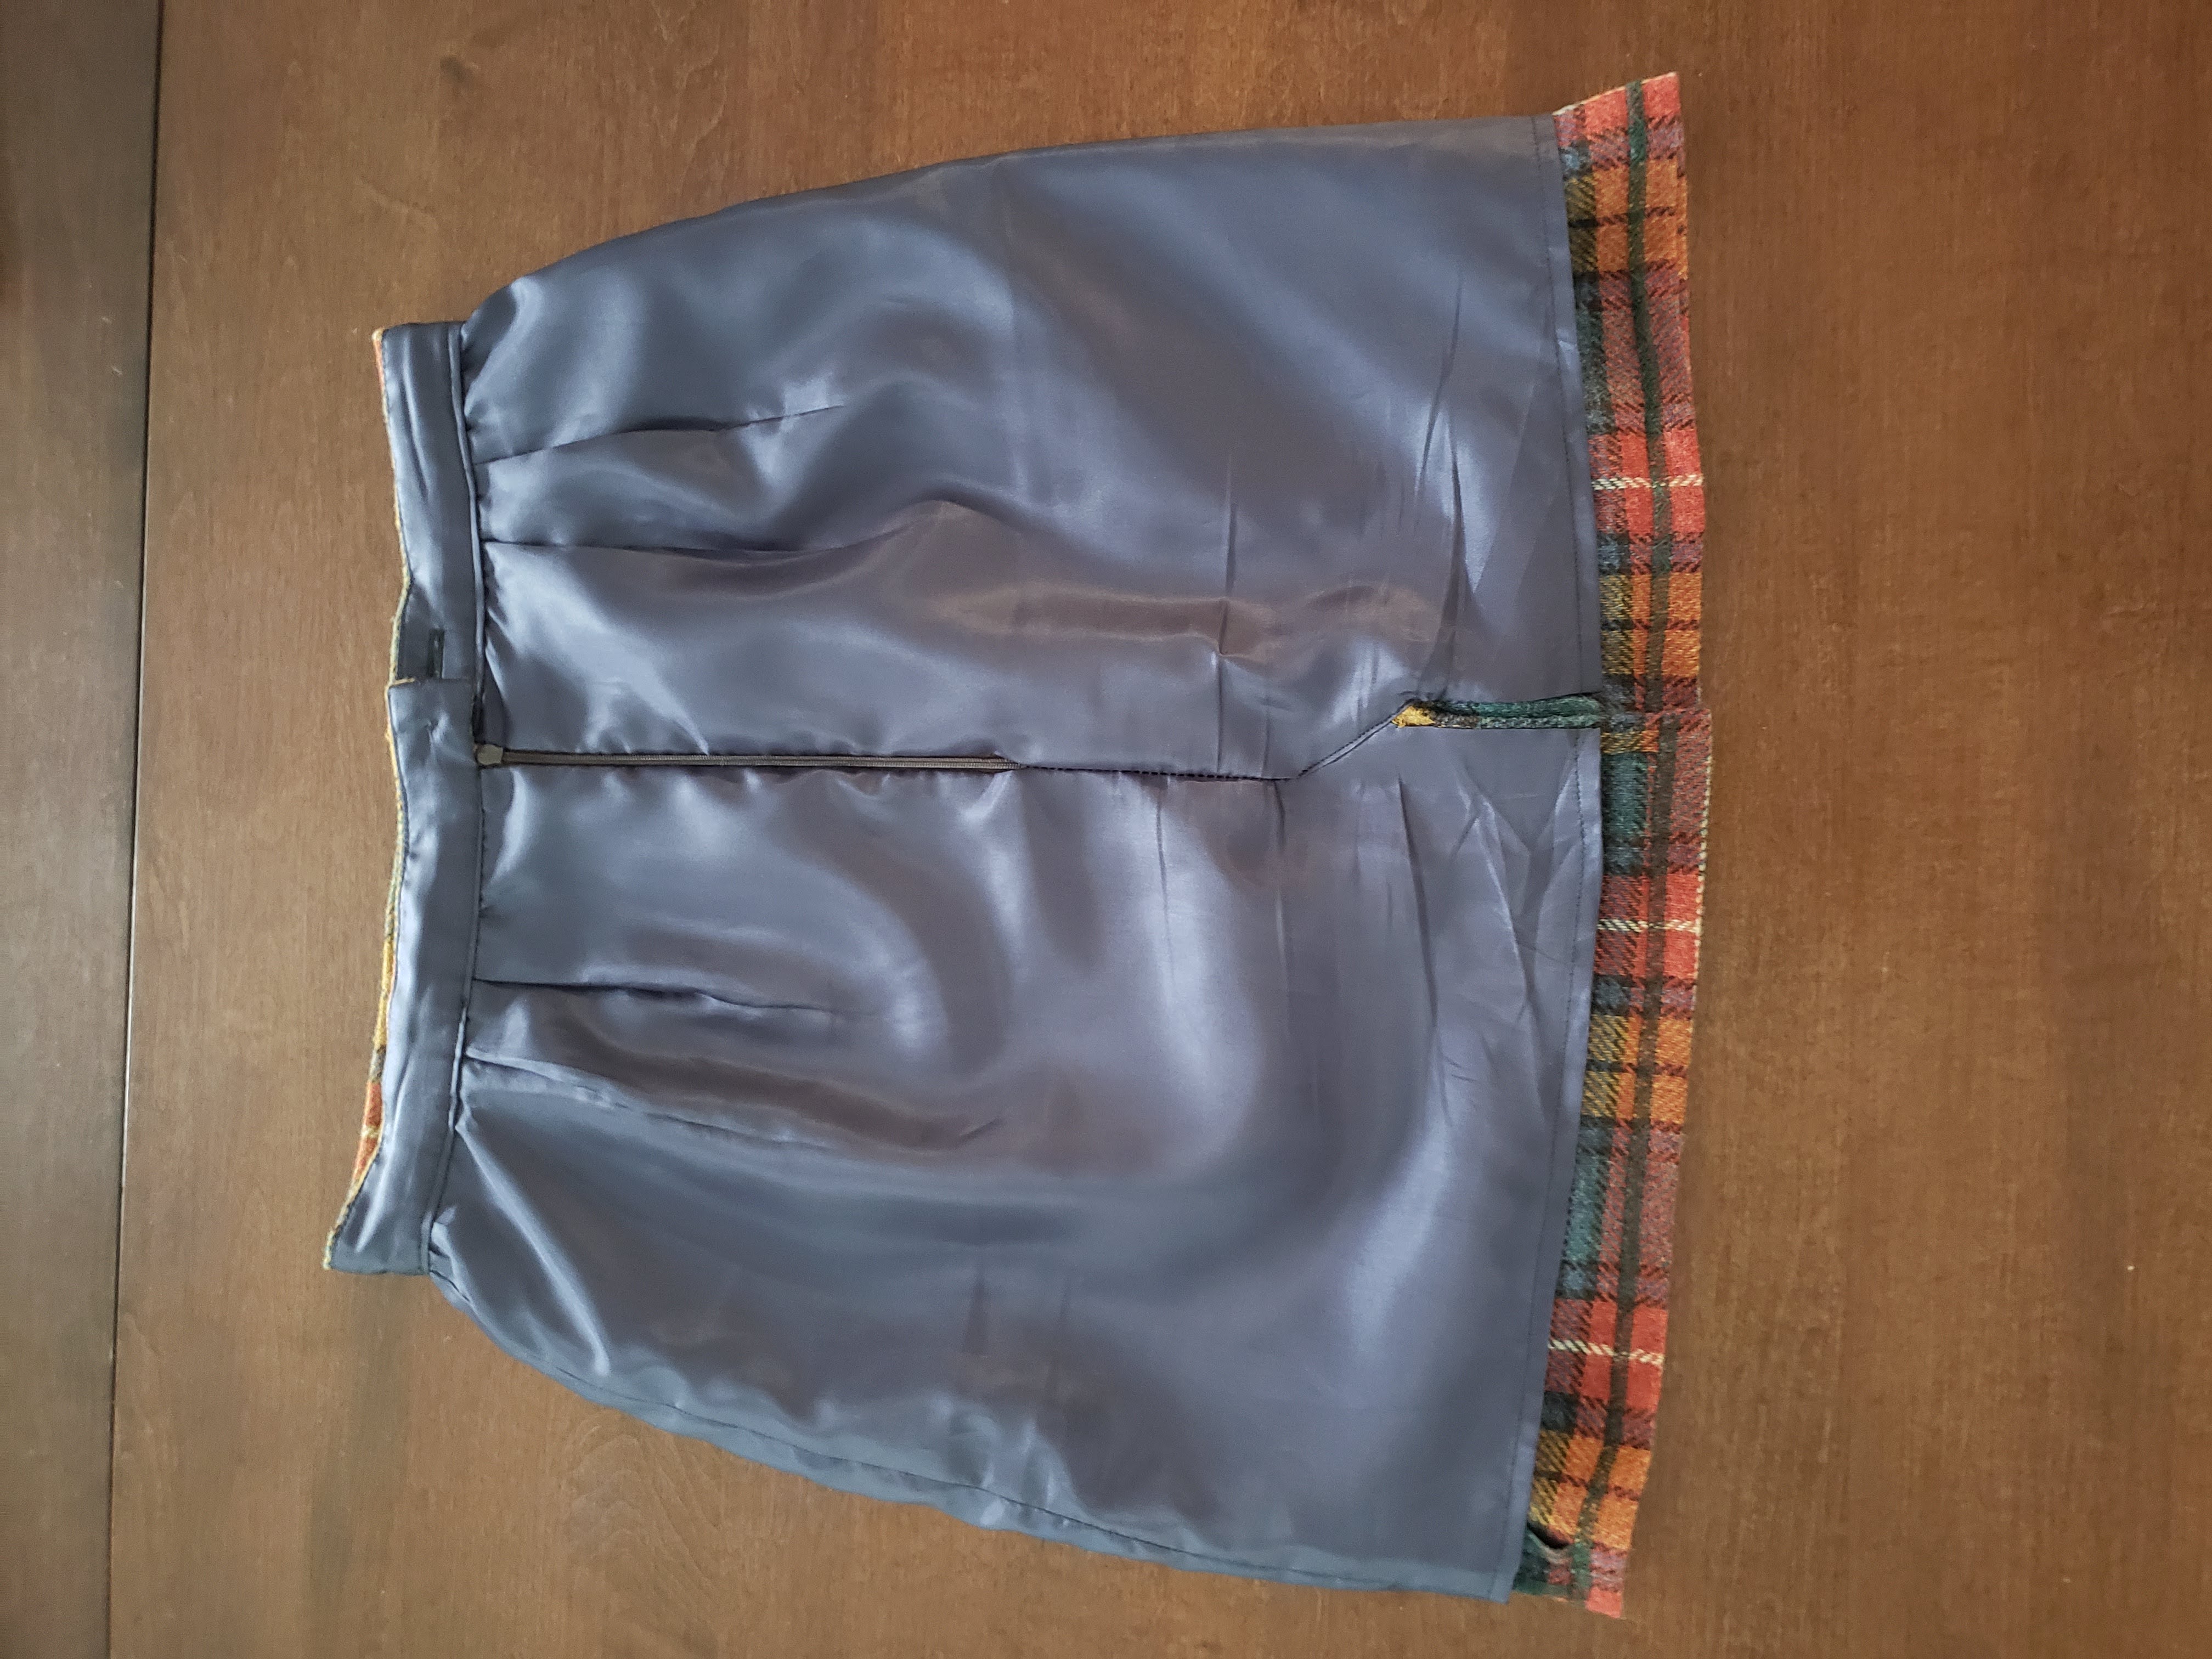
The skirt seemed simple on the surface, but a couple mistakes on my part made it take longer than expected. First, remember how I said I didn't pattern out my waistband? Well...winging it didn't go well. I accidentally cut the rectangle with a height equal to the desired waistband height + (seam allowance x 2). Yup. I didn't account for it being folded over and was short 1.5 inches. Whoops. I remedied this by sewing a strip of lining fabric along the long edge. Problem solved!
My next mistake? Not cutting the lining properly to account for the vent. I couldn't wrap my head around how everything was supposed to lay around the opening, but tried my best. I think the right back lining piece is slightly too narrow? I don't notice it when I'm wearing it, though, so I guess it's okay. I also didn't realize I wasn't supposed to sew the darts in the lining, just do tucks instead, so I had to unpick those as well. The result is a little messy, but it's the inside so 🤷
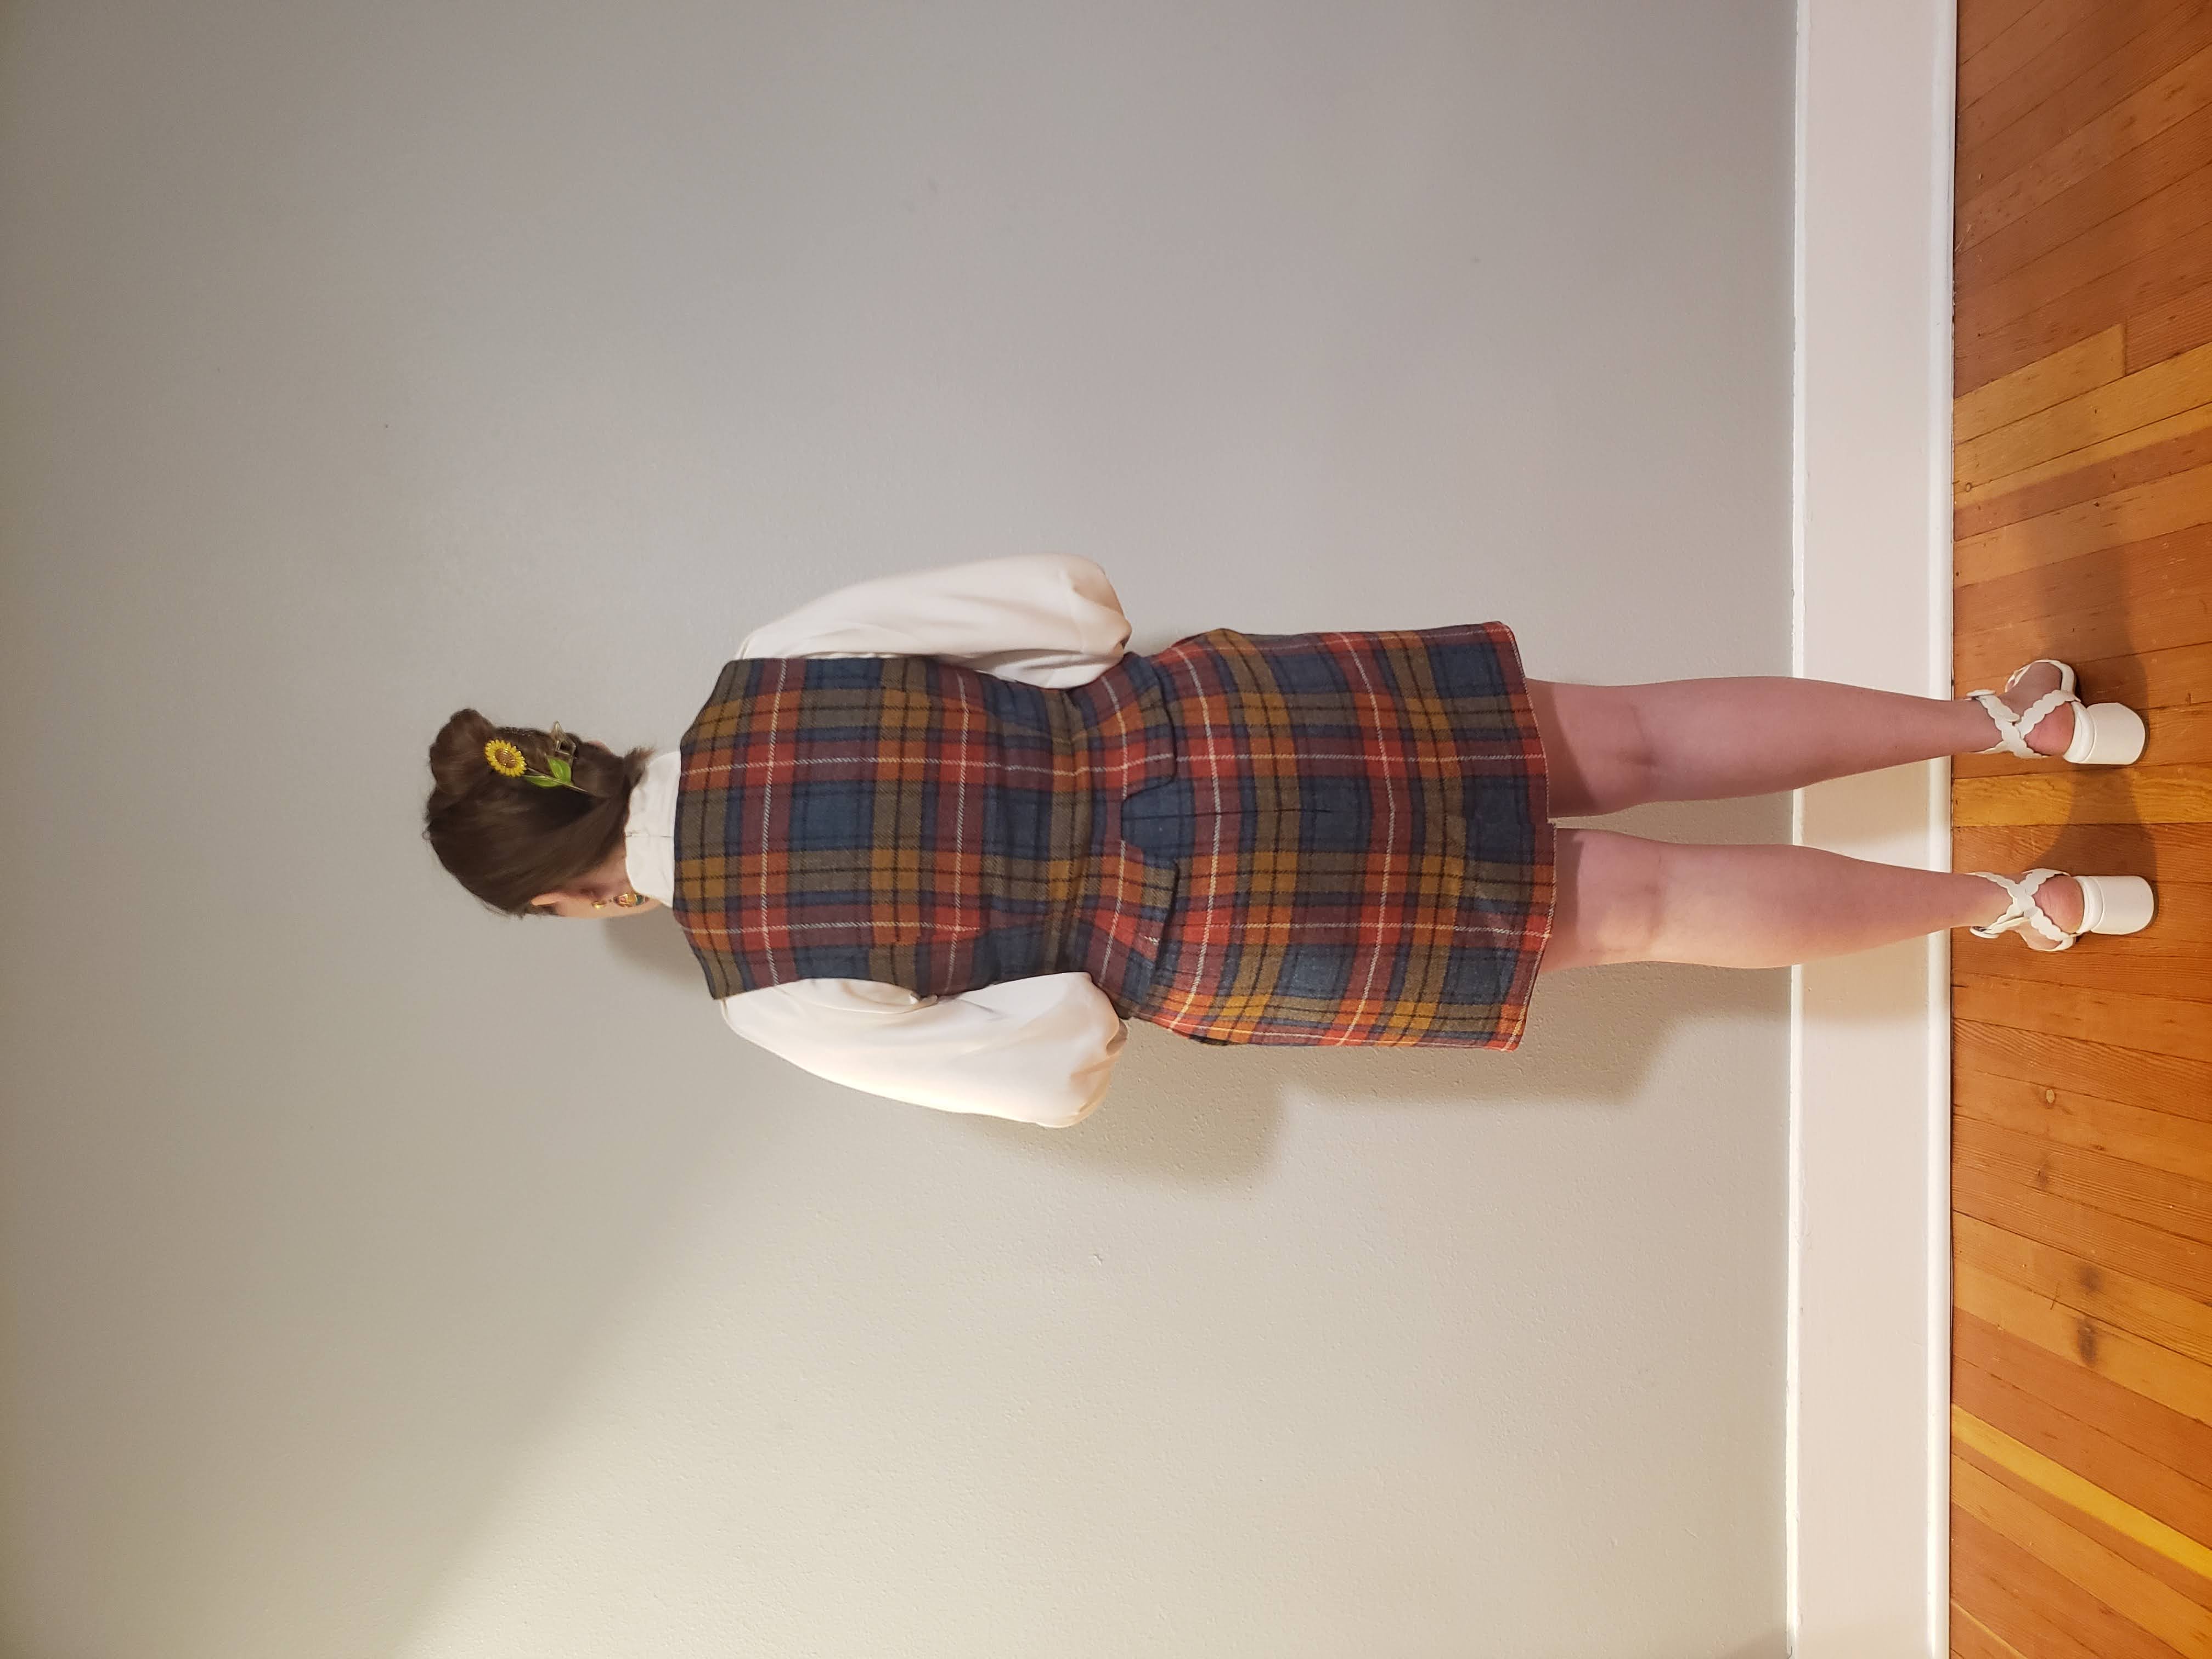
In the end, I'm pretty happy with the overall look. Although, instead of clueless, it's giving me...gingerbread man? Not sure why. Maybe it's the buttons.


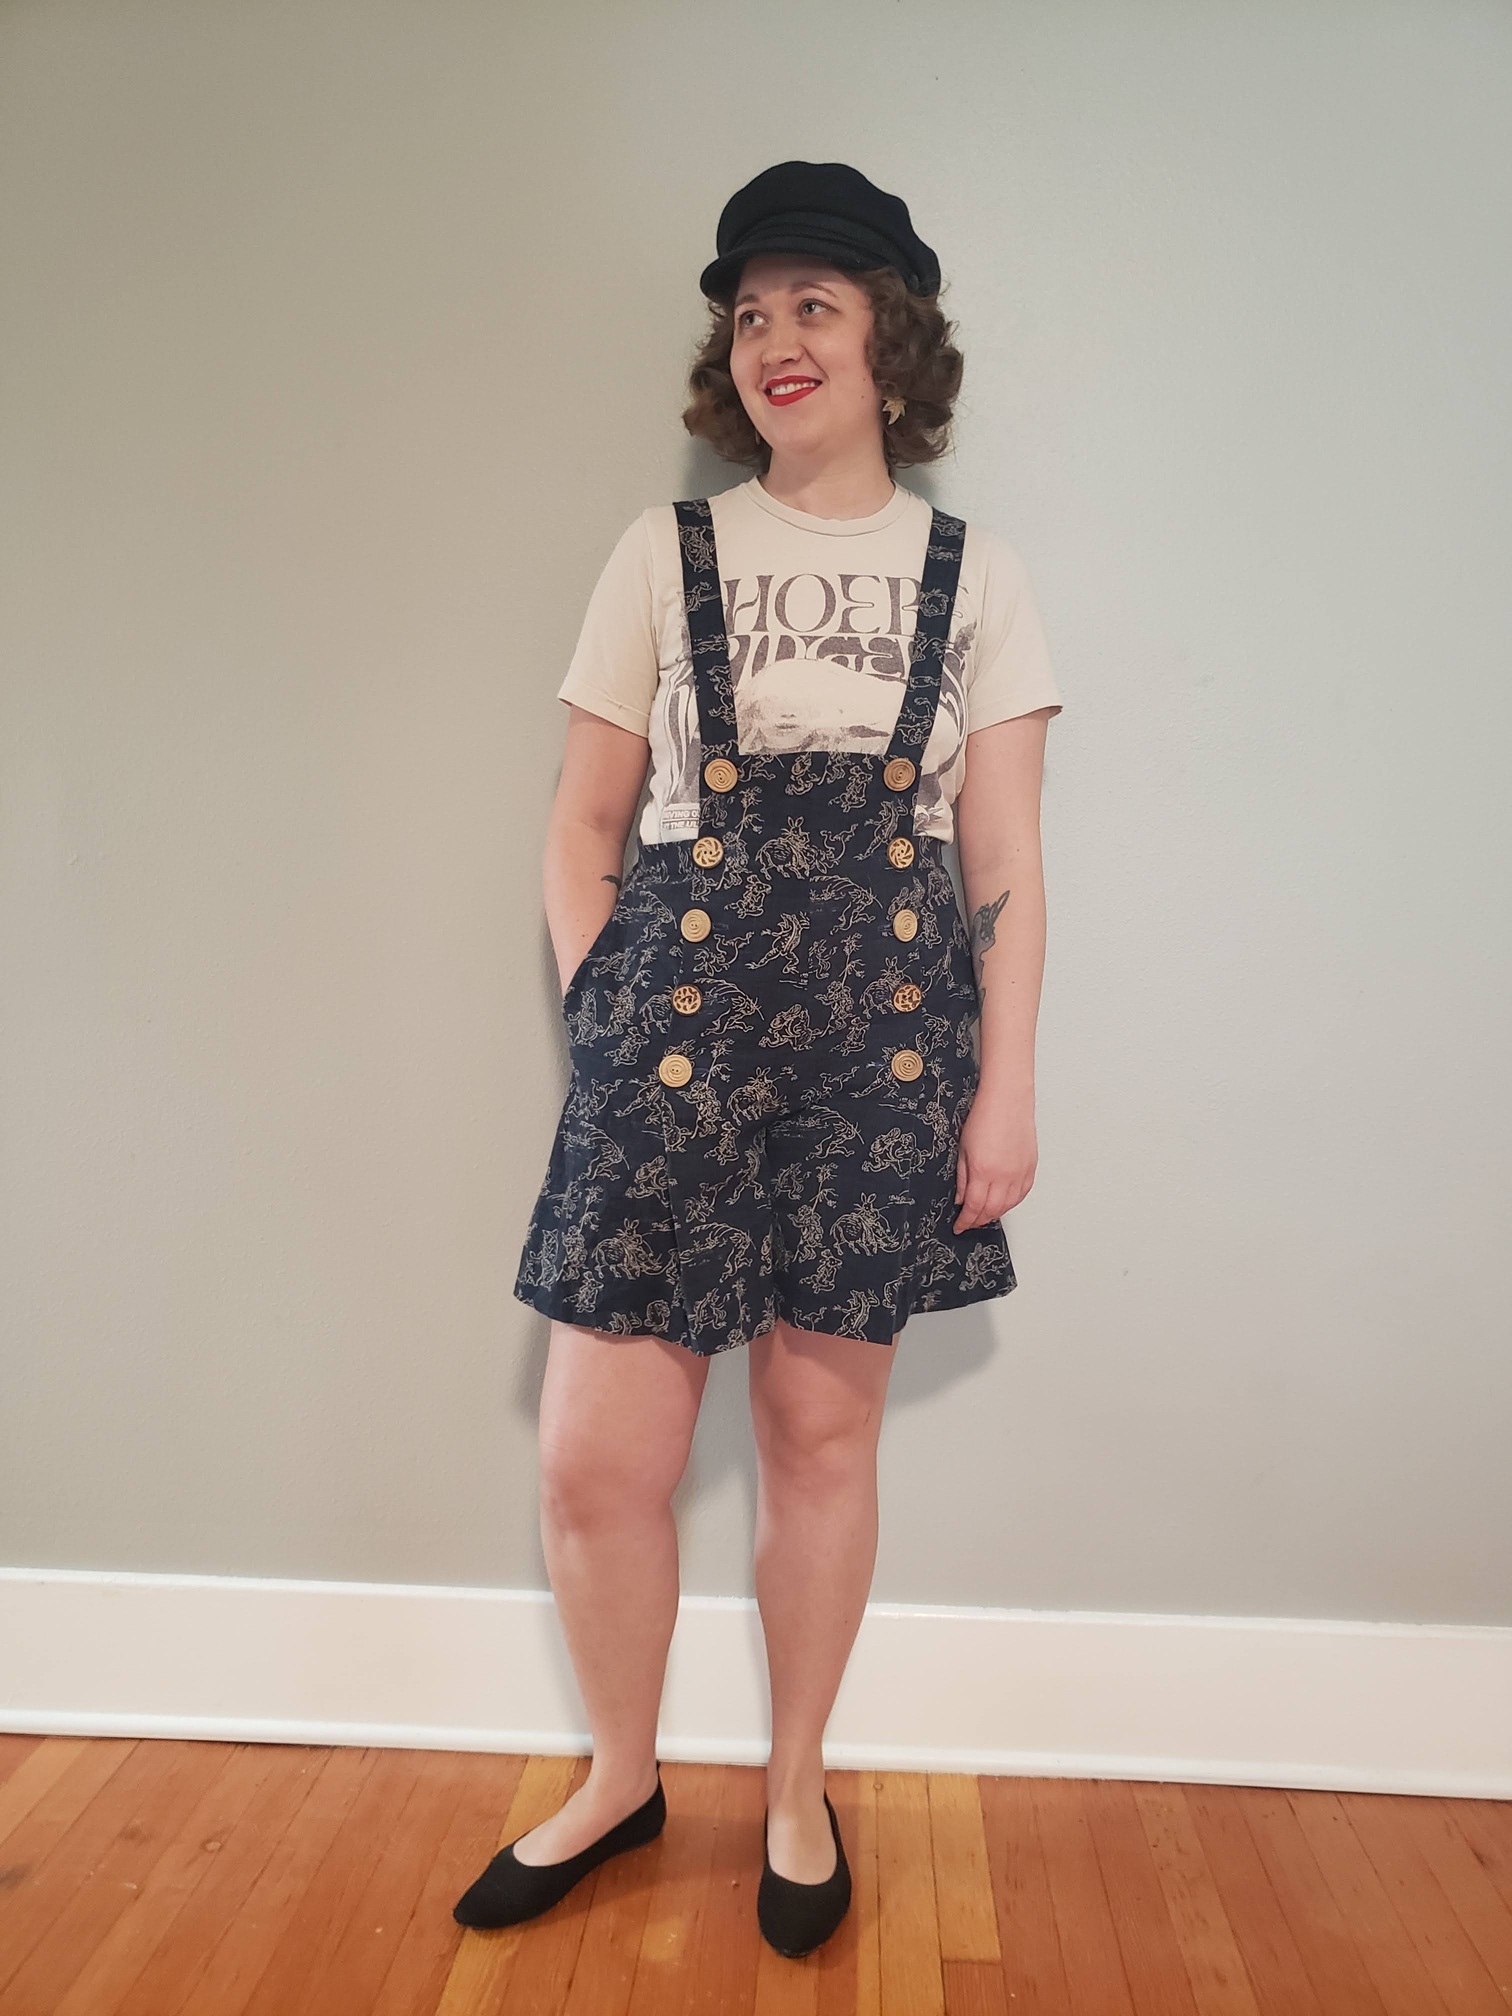
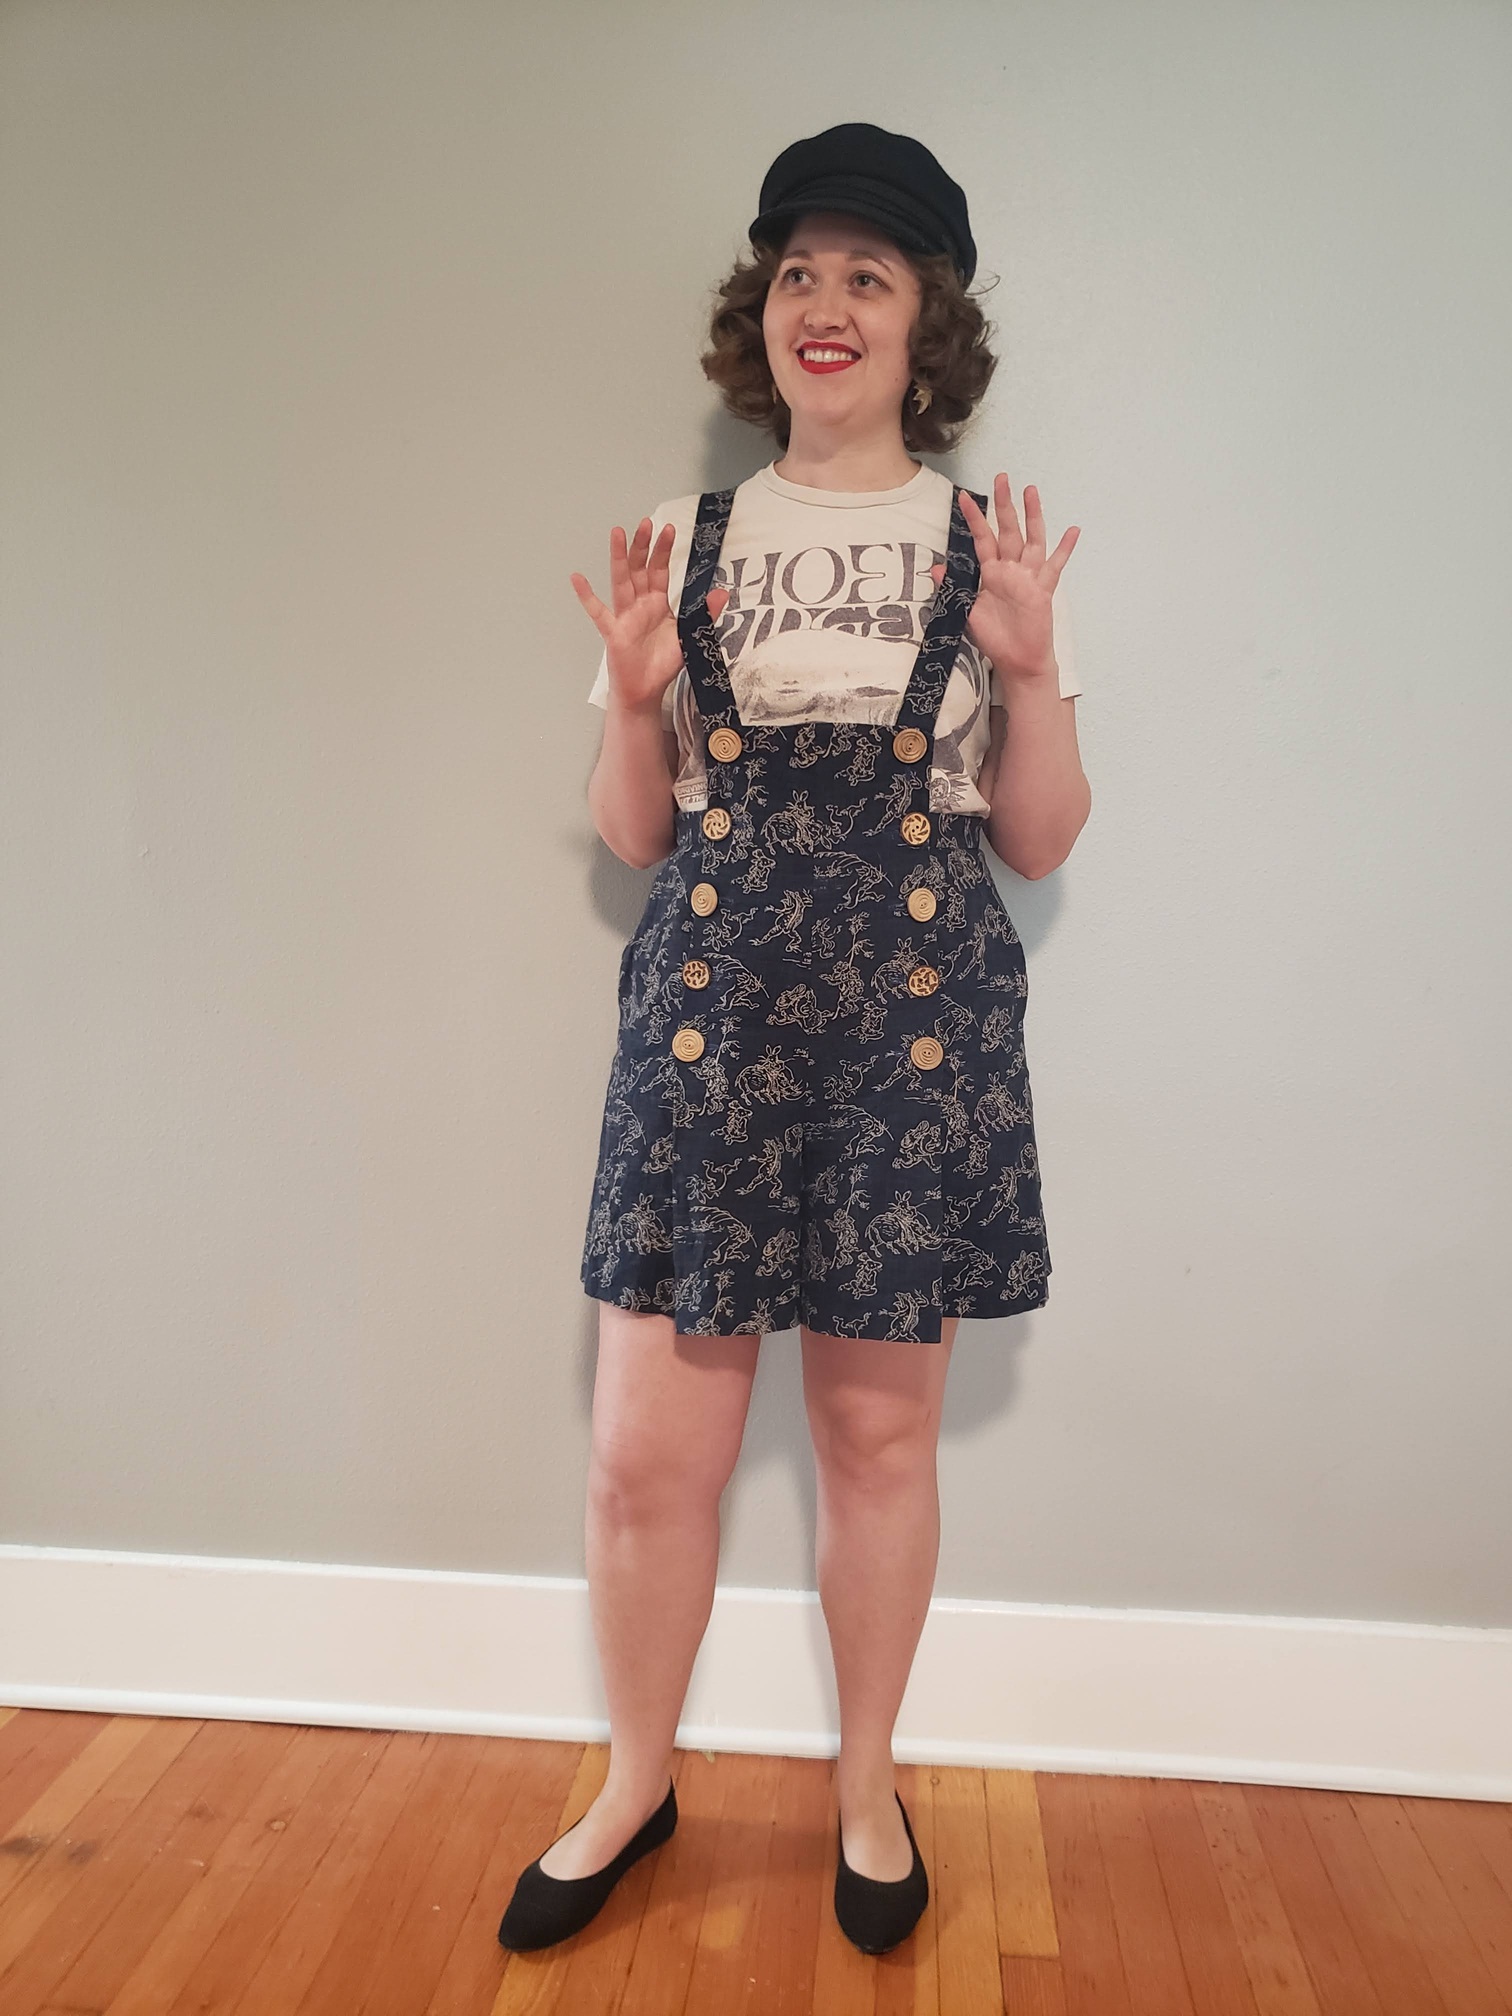
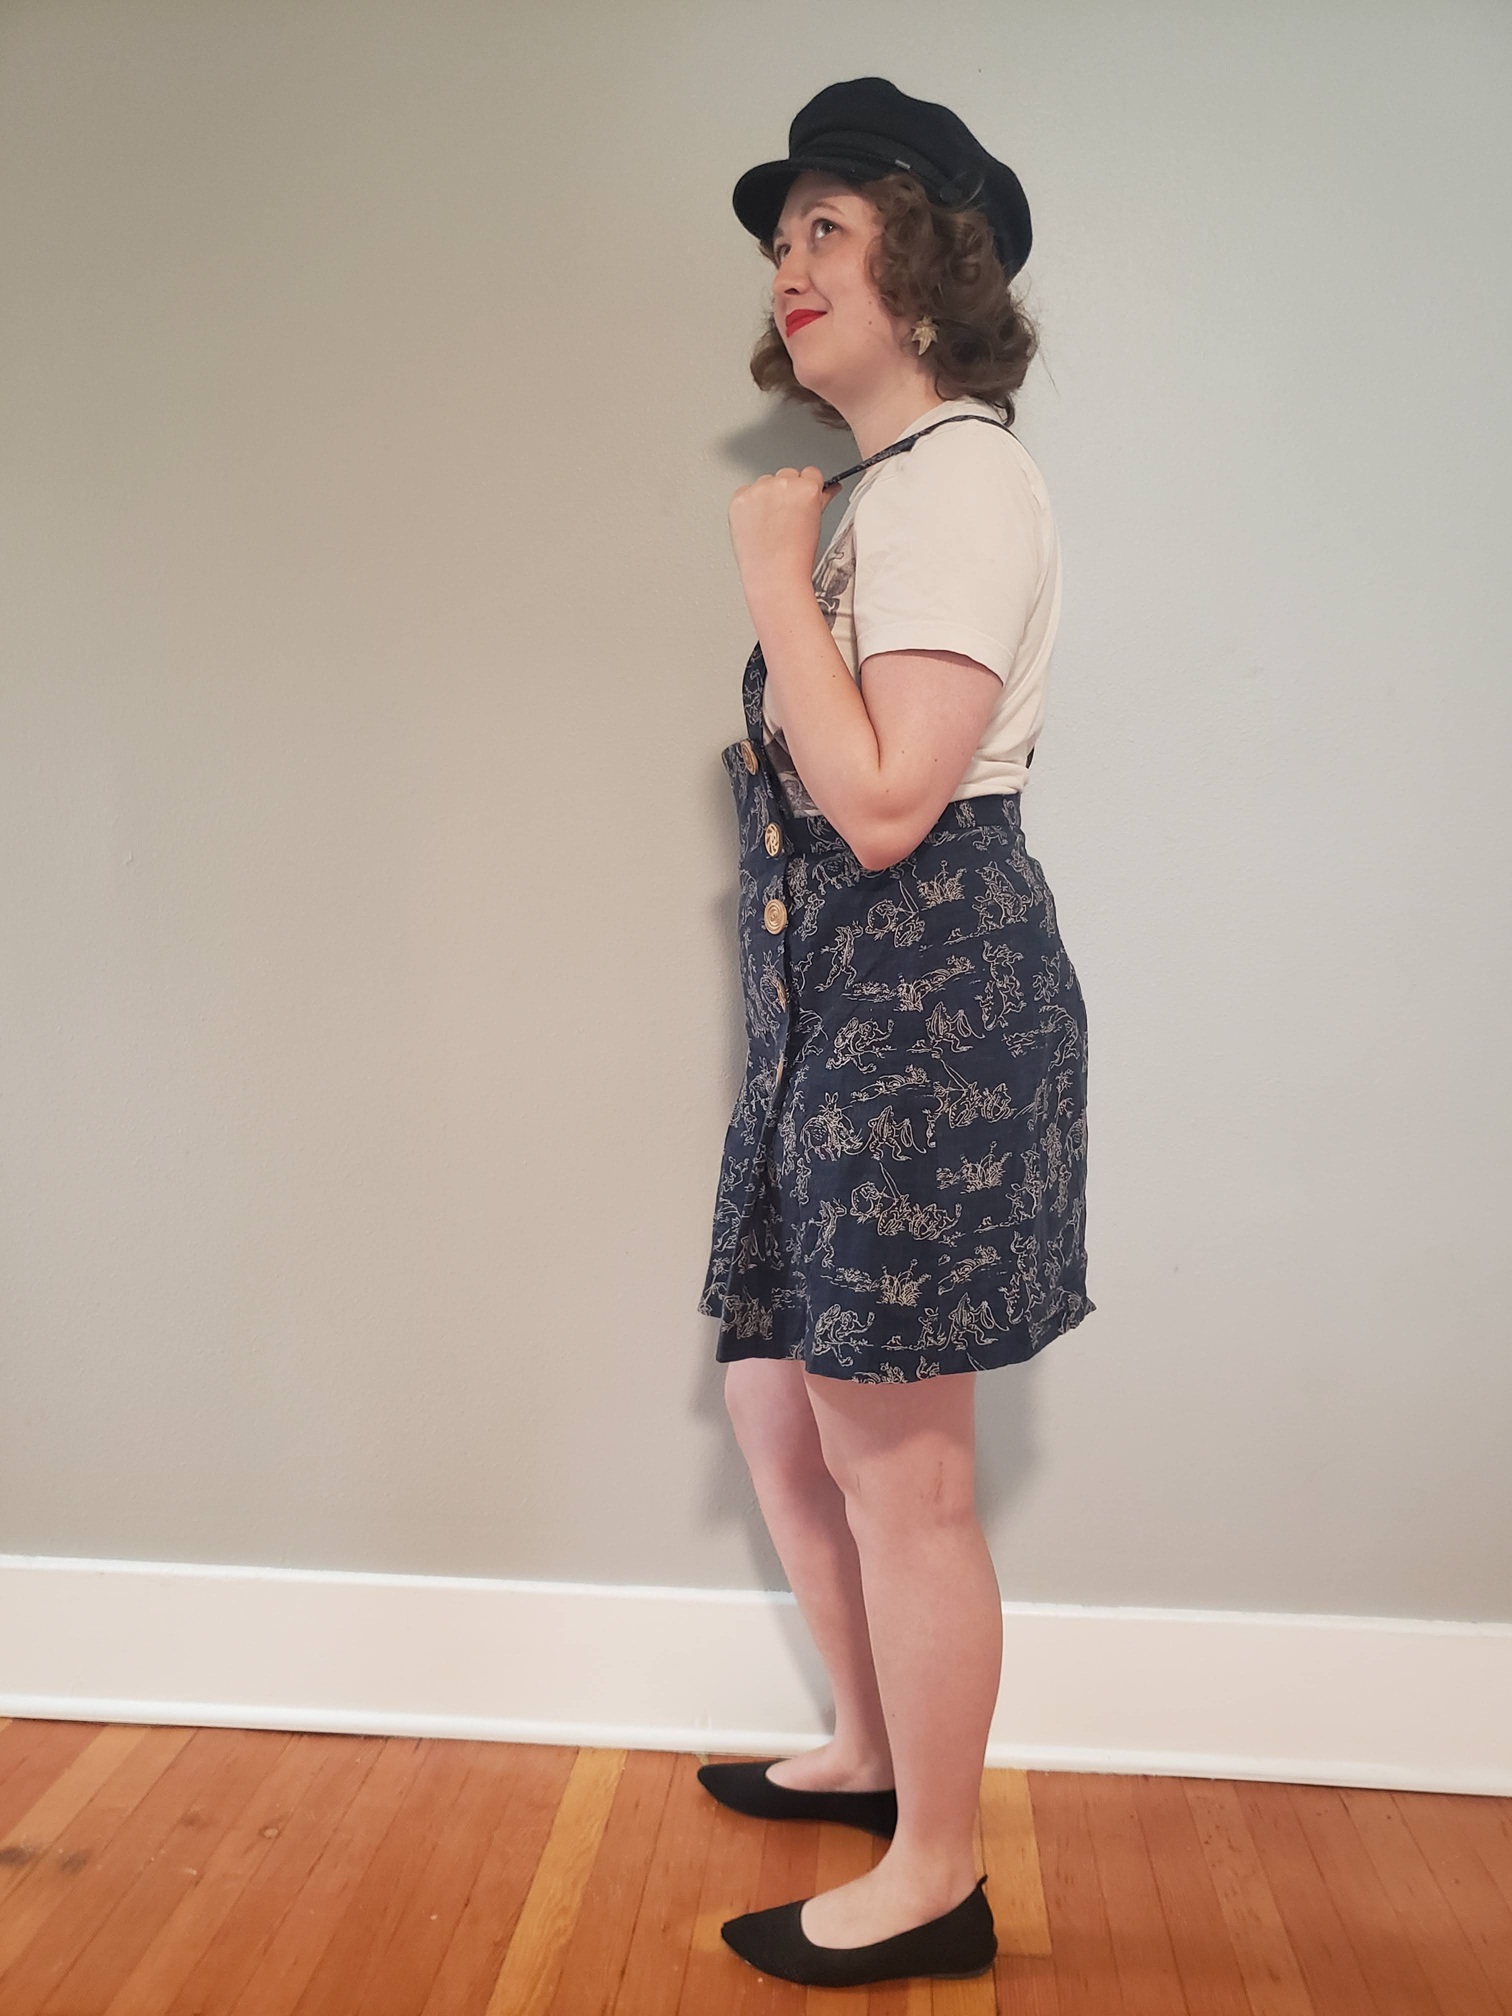
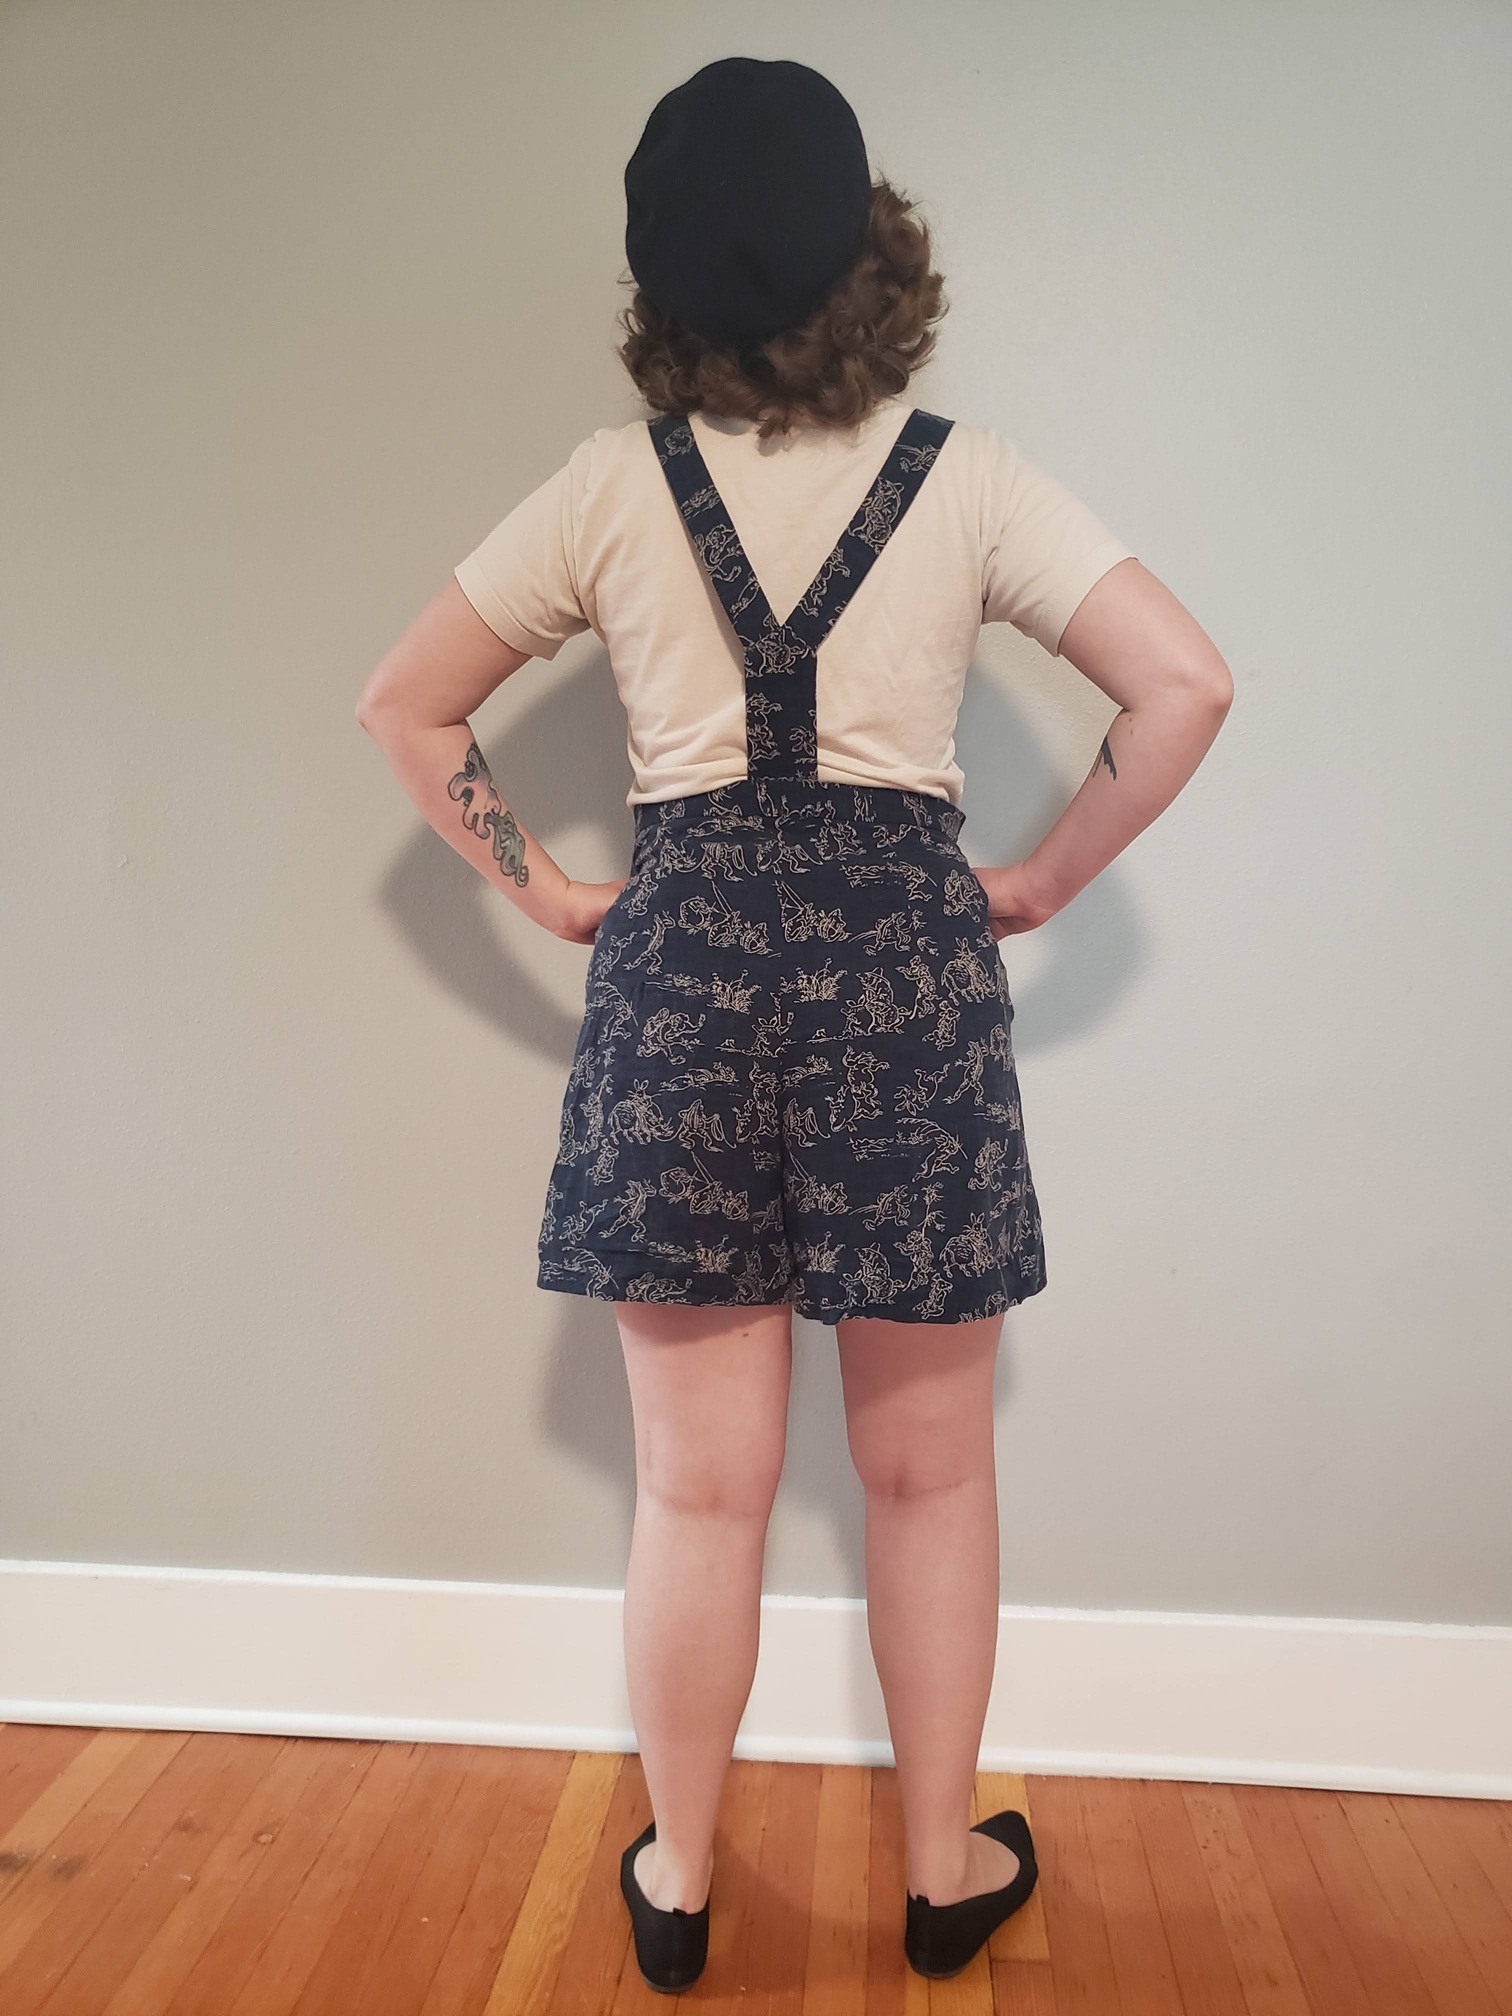
Palazzo Shorts
Similar to my cherry blossom pants, I bought the pattern (SewChic Palazzo Pant and Overall) for these shorts first, and got the fabric/buttons later while on my trip to Japan. The fabric depicts small vignettes of toads, hares, boars, and monkies (?) dancing, practicing archery, whacking each other with branches, and using lassos. I was drawn to the folky art style, and wondered if the characters depicted were from a specific Japanese fairy tale.
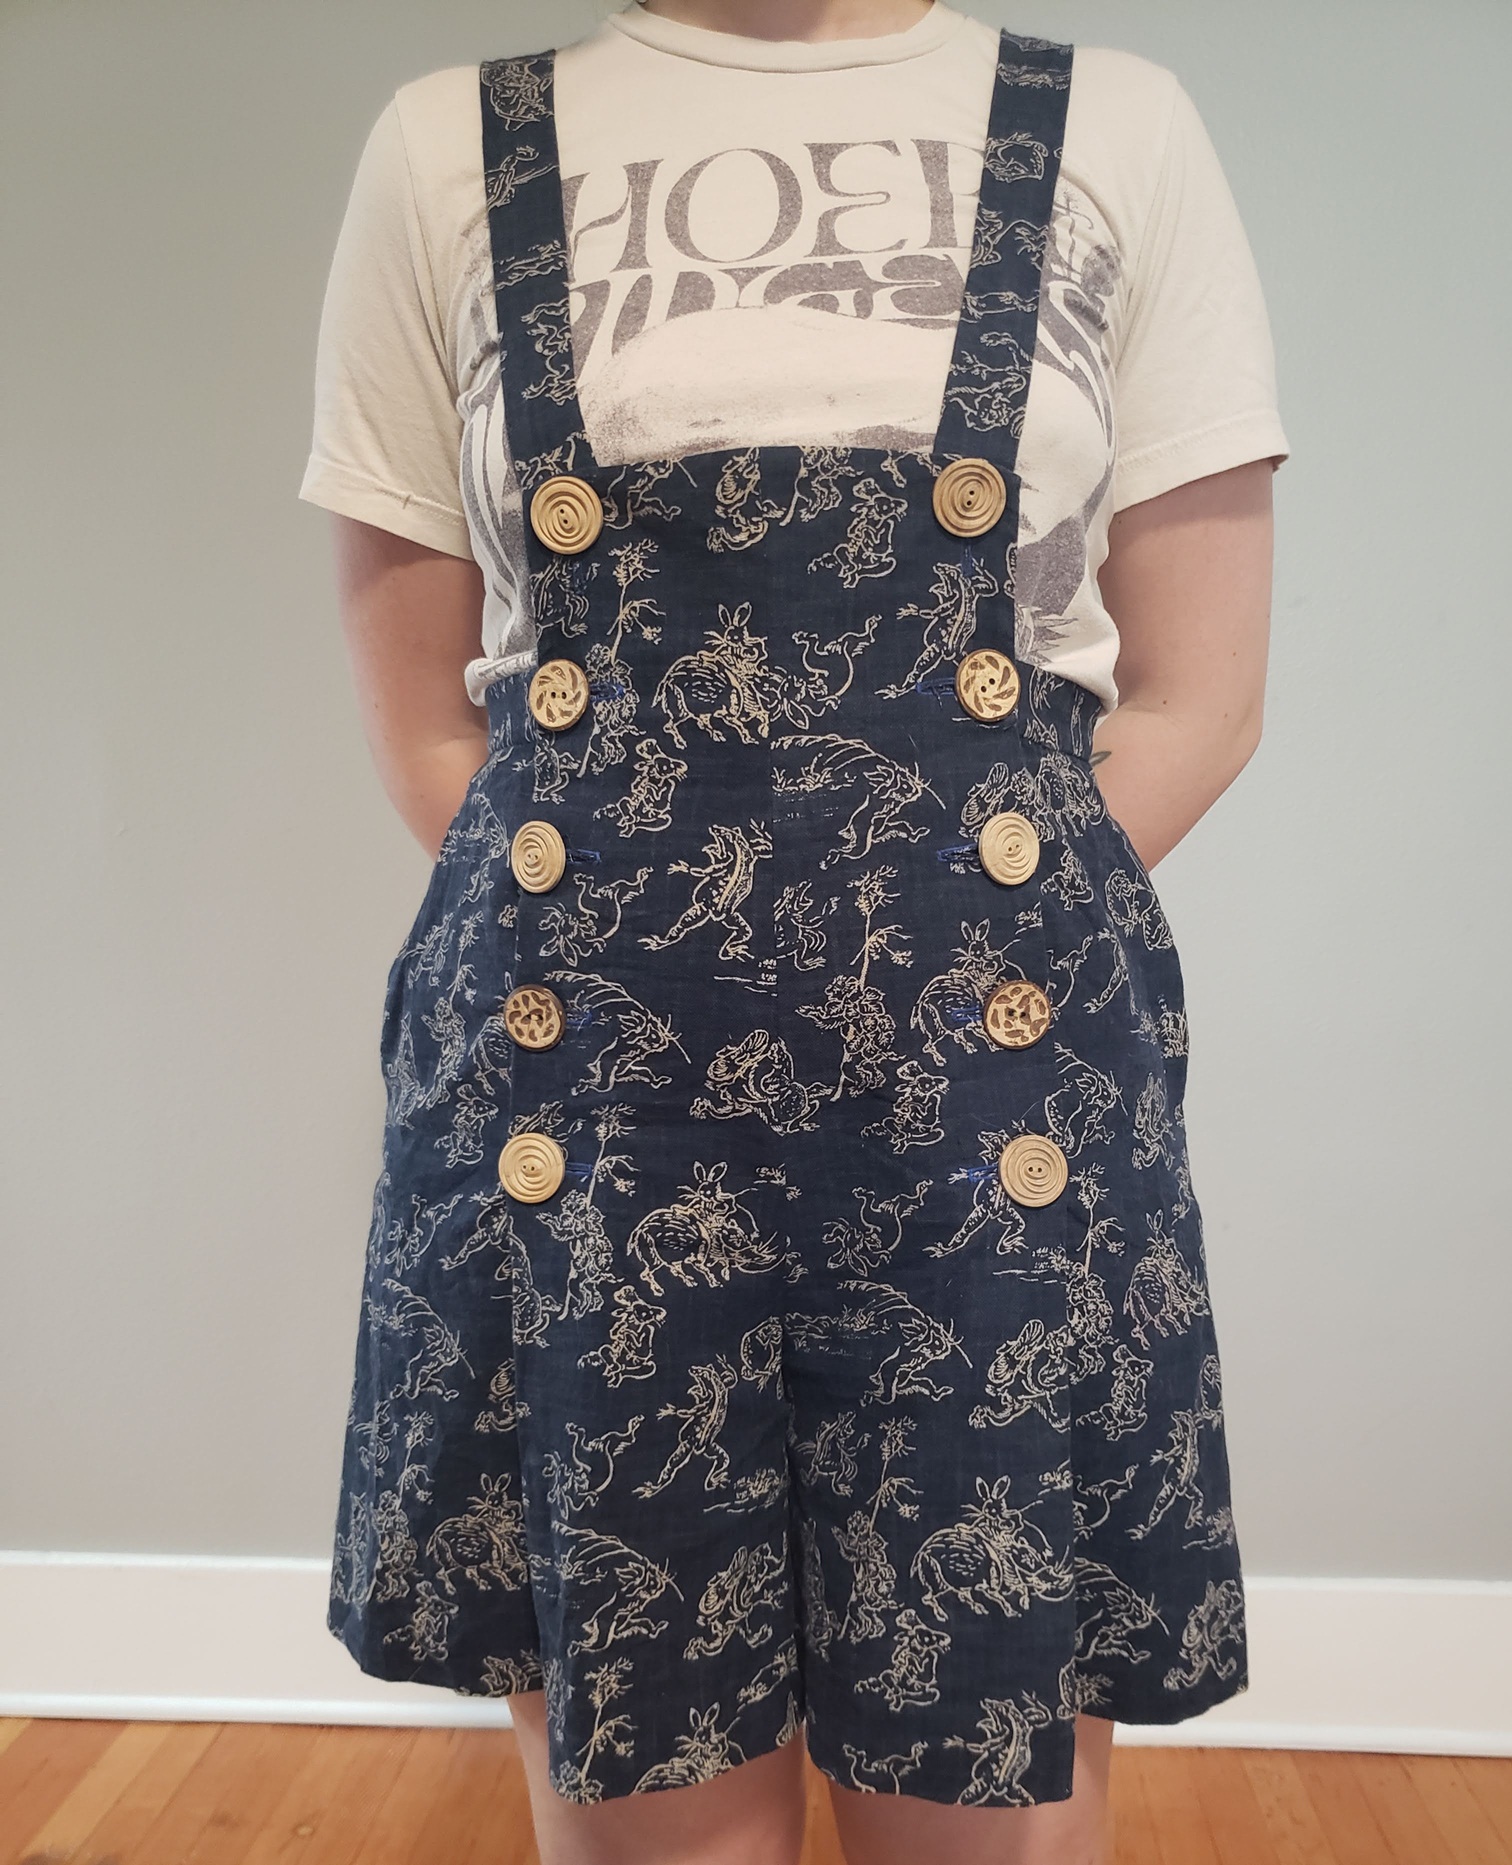
After a cursory search, I found no such concrete stories, but there were plenty of examples of similar motifs in Japanese art. One such example was the yokai, Ōgama: enormous toads with rainbow breath which hunt snakes, birds, and bugs; Once large enough, they may even begin o feast on humans!
I attempted to actually film my sewing process, but quickly became annoyed with my phone camera--when in video mode it zooms in quite a bit to the point where it was hard to find positions that captured what I was doing clearly. Plus, my camera app would randomly close or stop recording. After several instances of this, I gave up and decided to try again on my next project.
I first made a mock up out of bedsheets and ended up making the same adjustment that I did to the cherry blossom pants, which was scooping the back crotch curve. Figures, since this pattern was made by the same pattern company! If I were to make these again, I think I would finish the inside a bit differently than instructed. There were a lot of raw edges left unfinished, such as the pocket bags and side seams...One thing I did appreciate, though, was that it taught me about he existence of the blind hem stitch on my sewing machine! I will definitely be using that again in the future--it saved me a lot of time that I would have otherwise spent hand-sewing :)
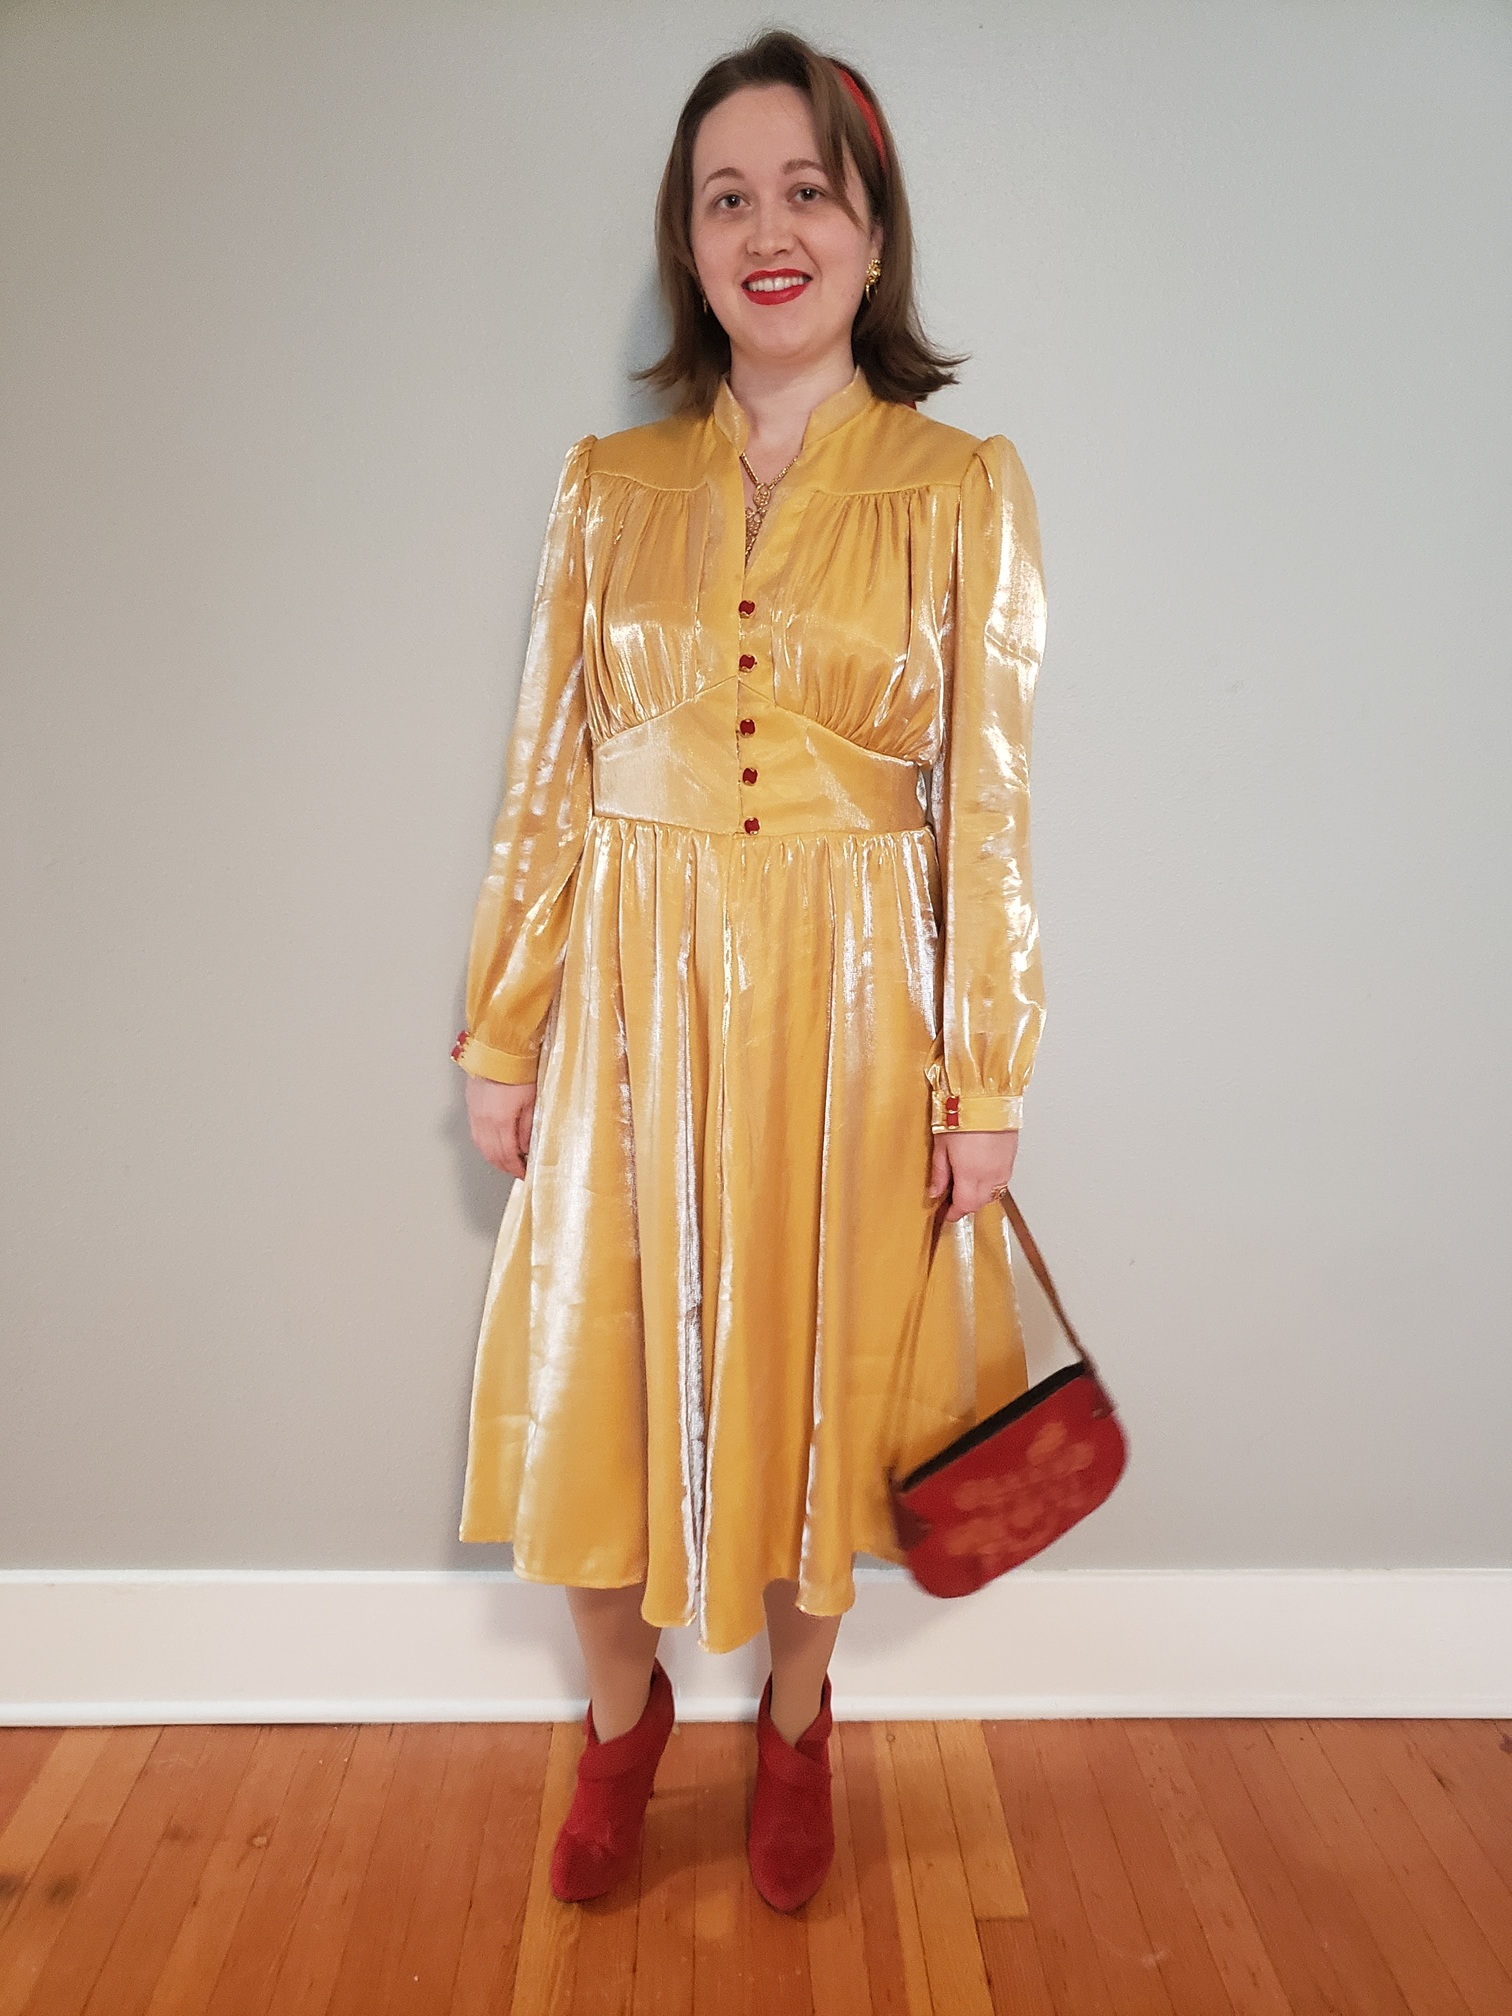
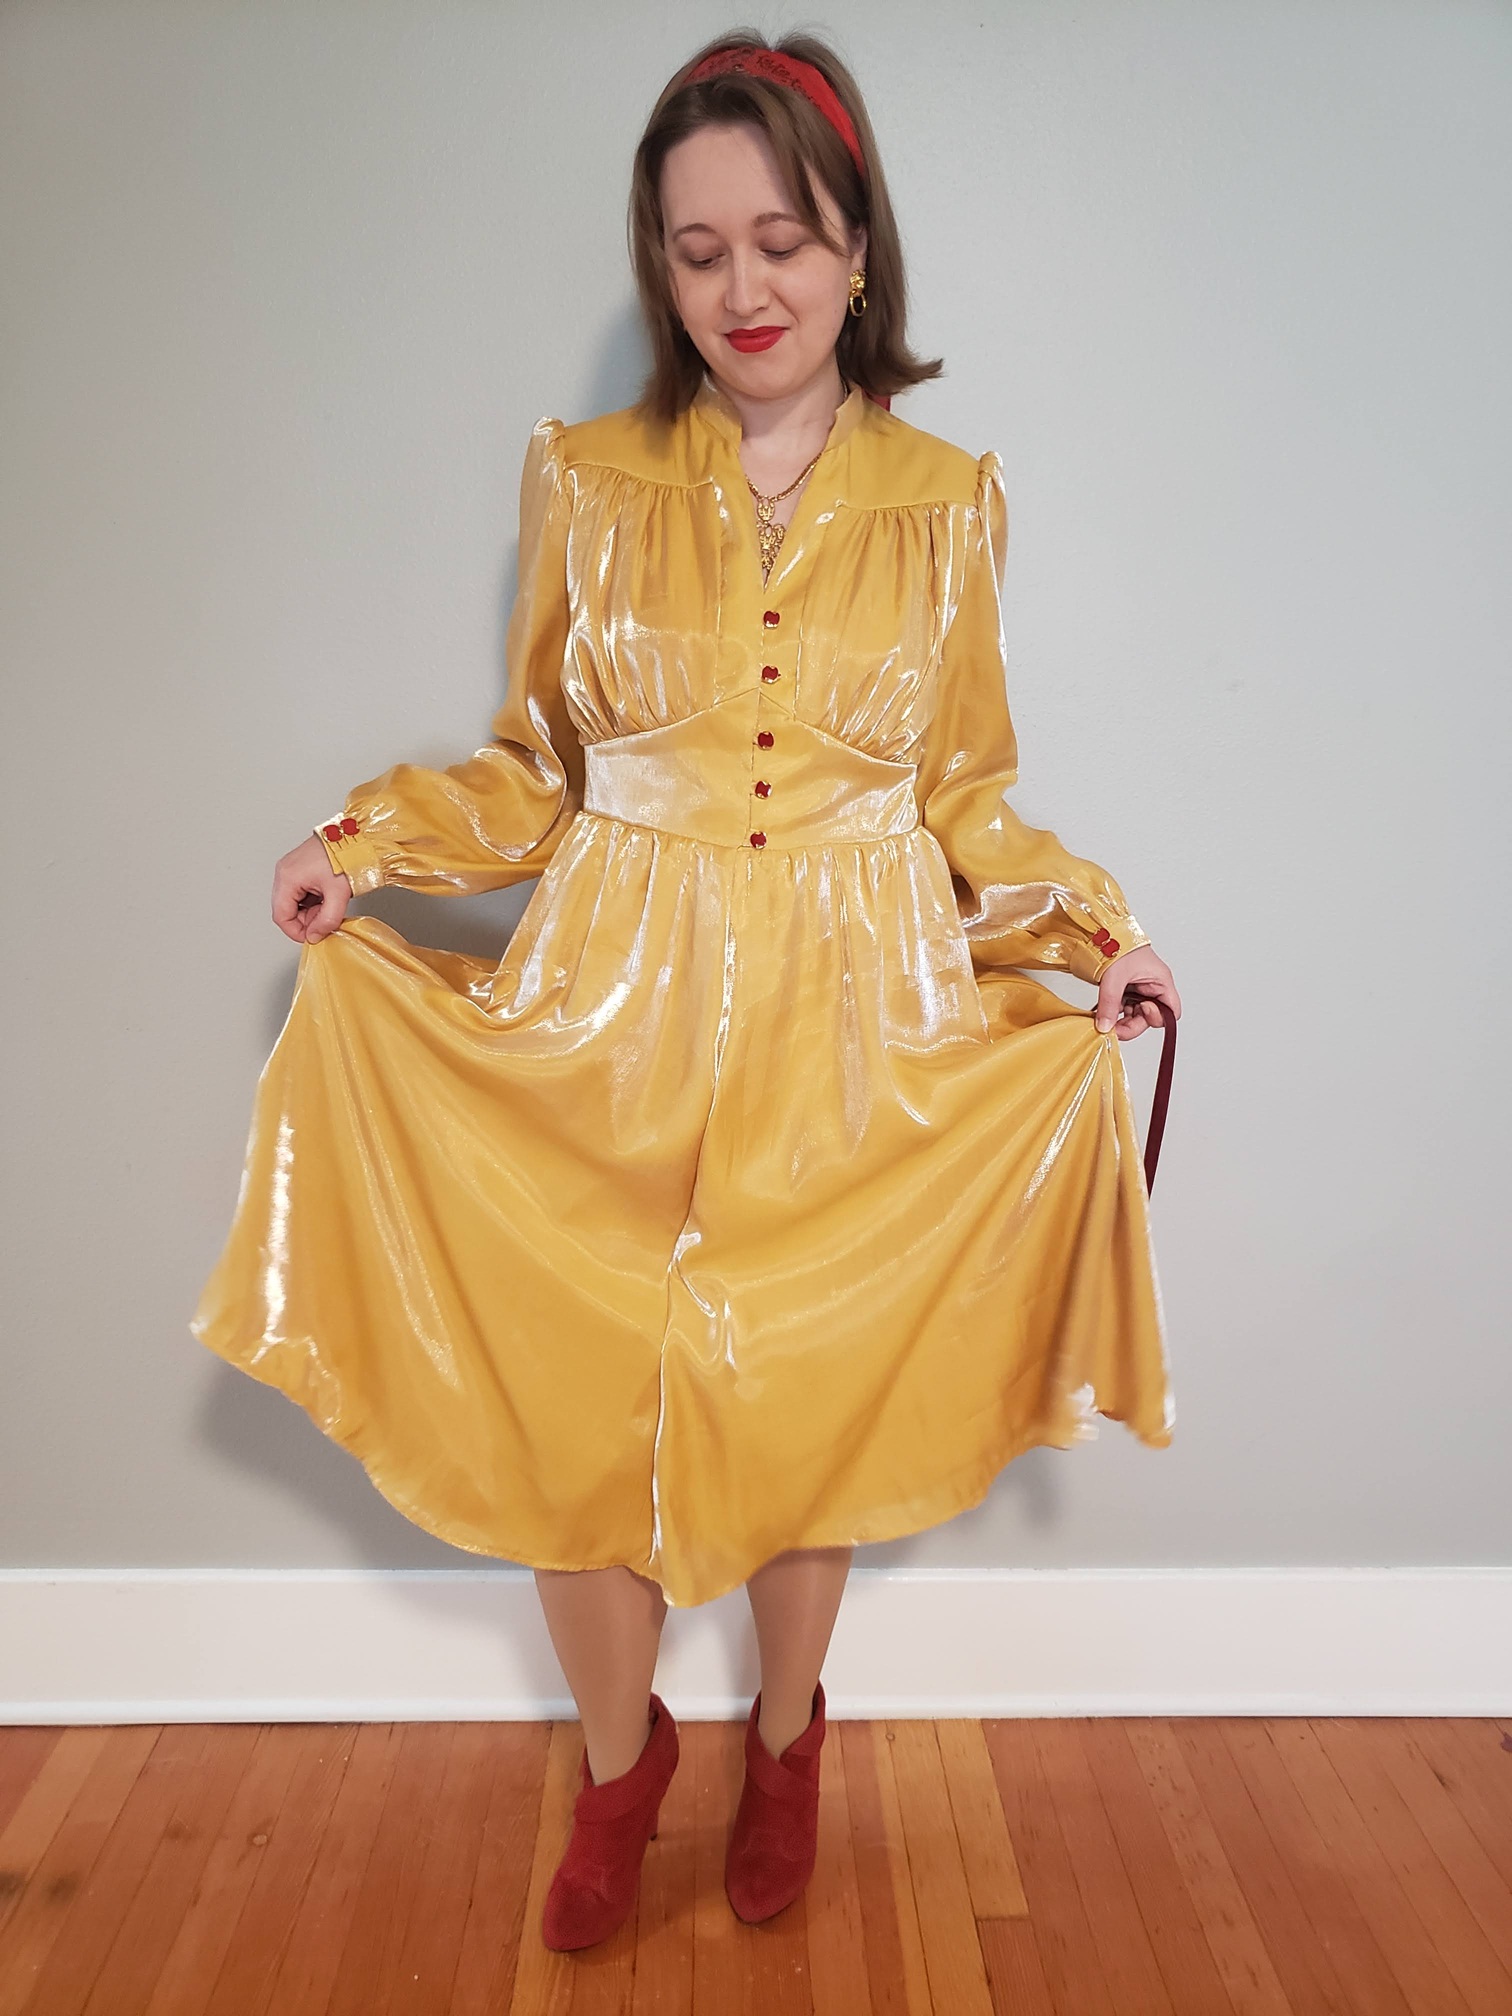
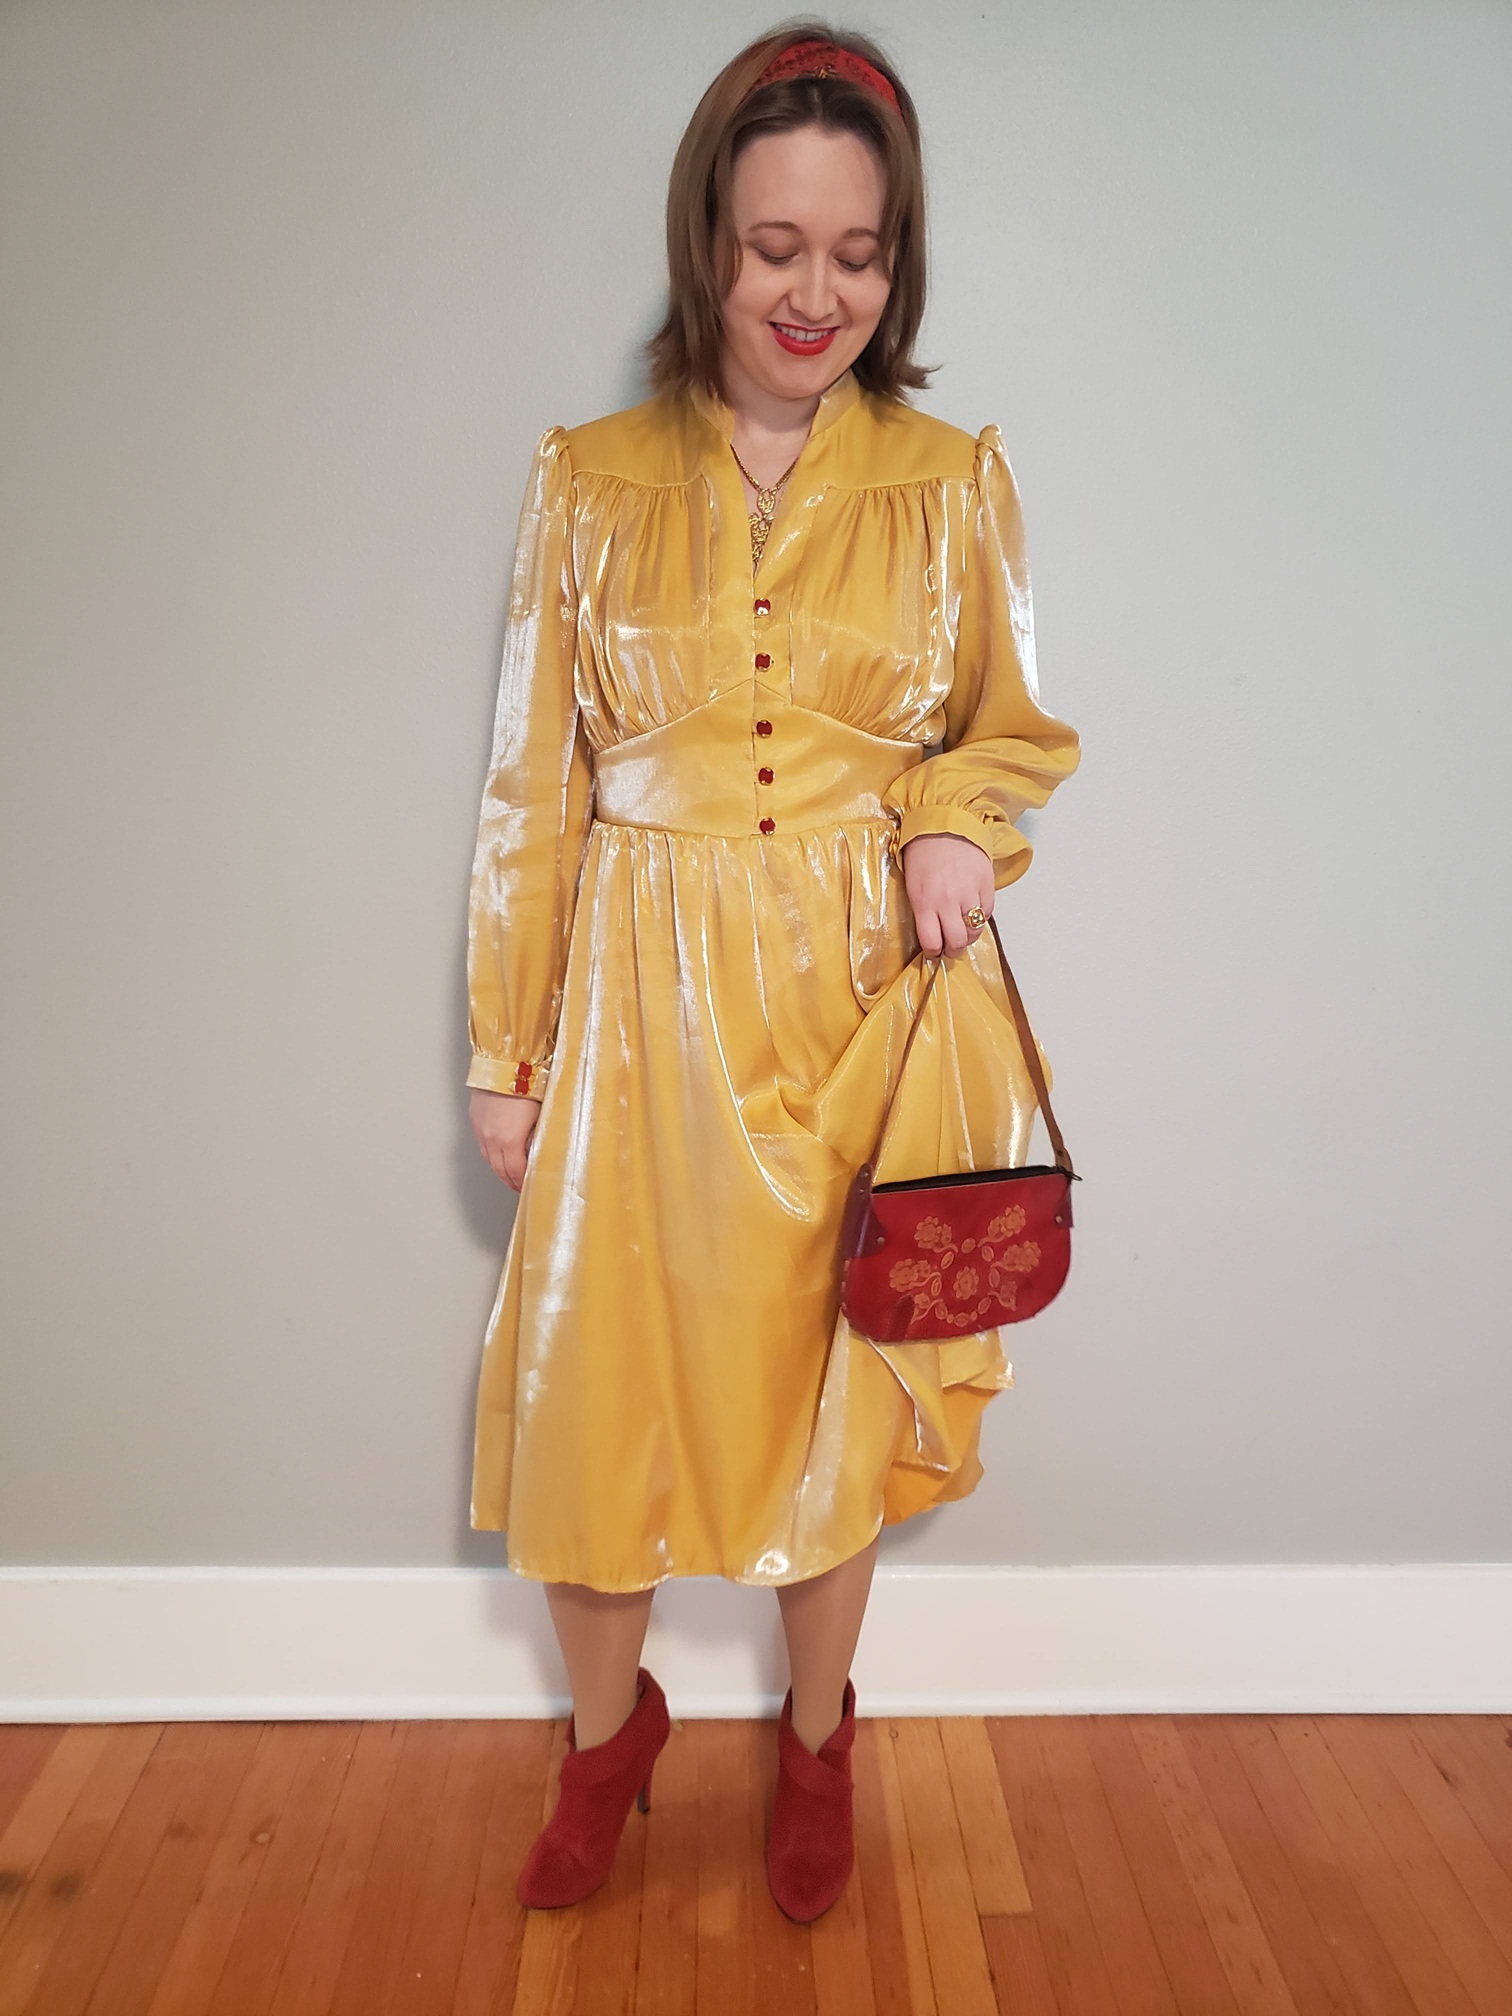
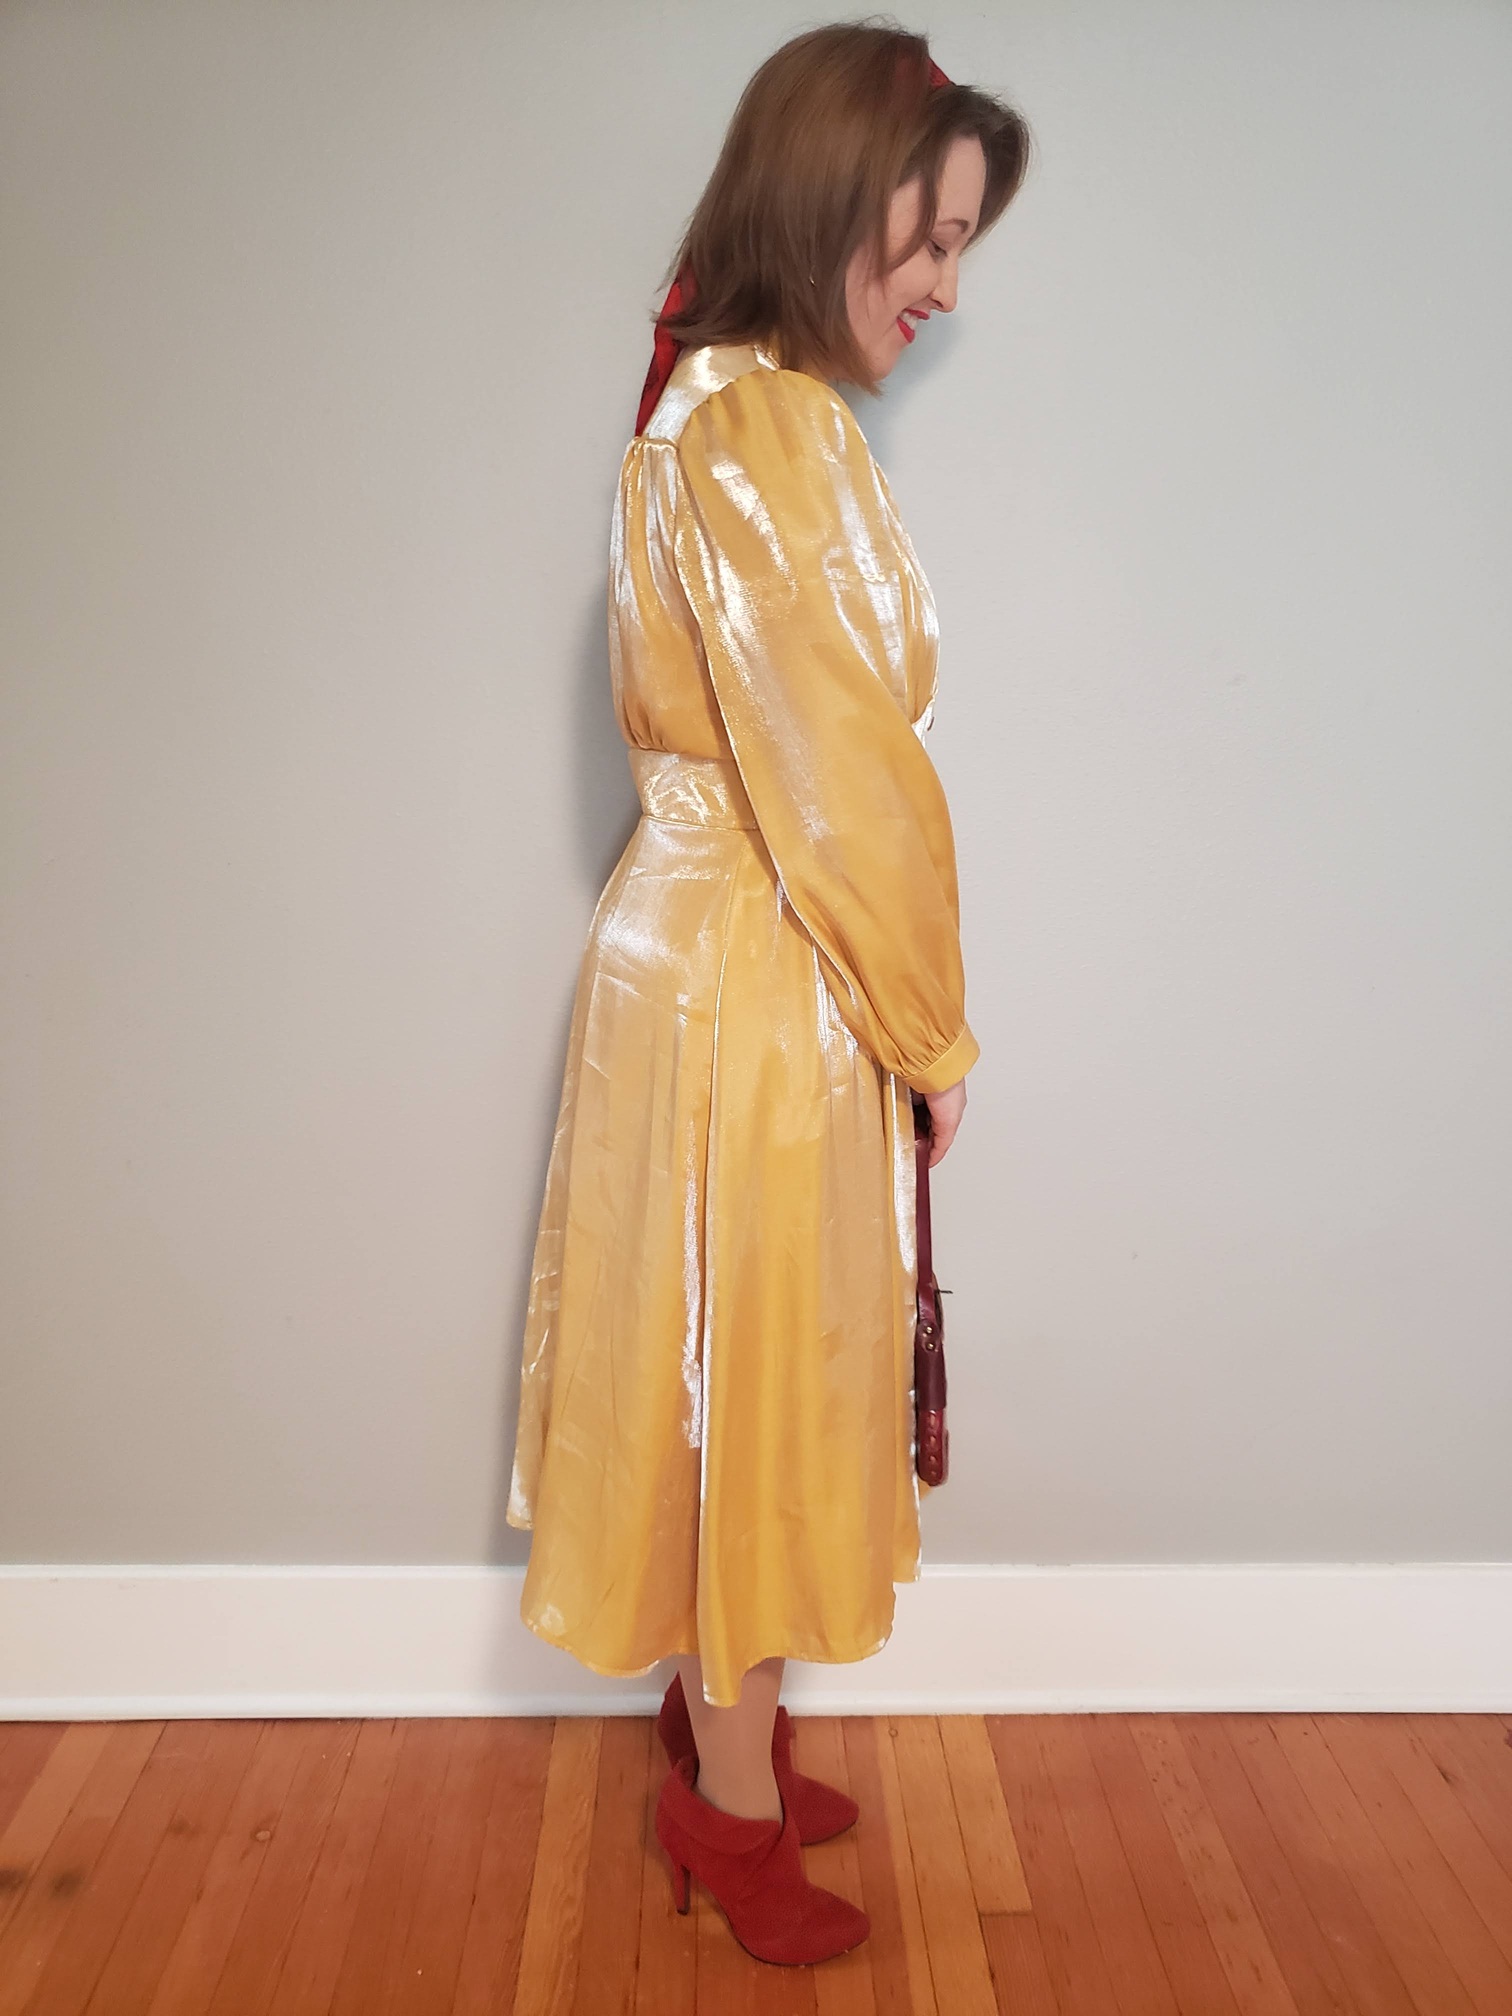
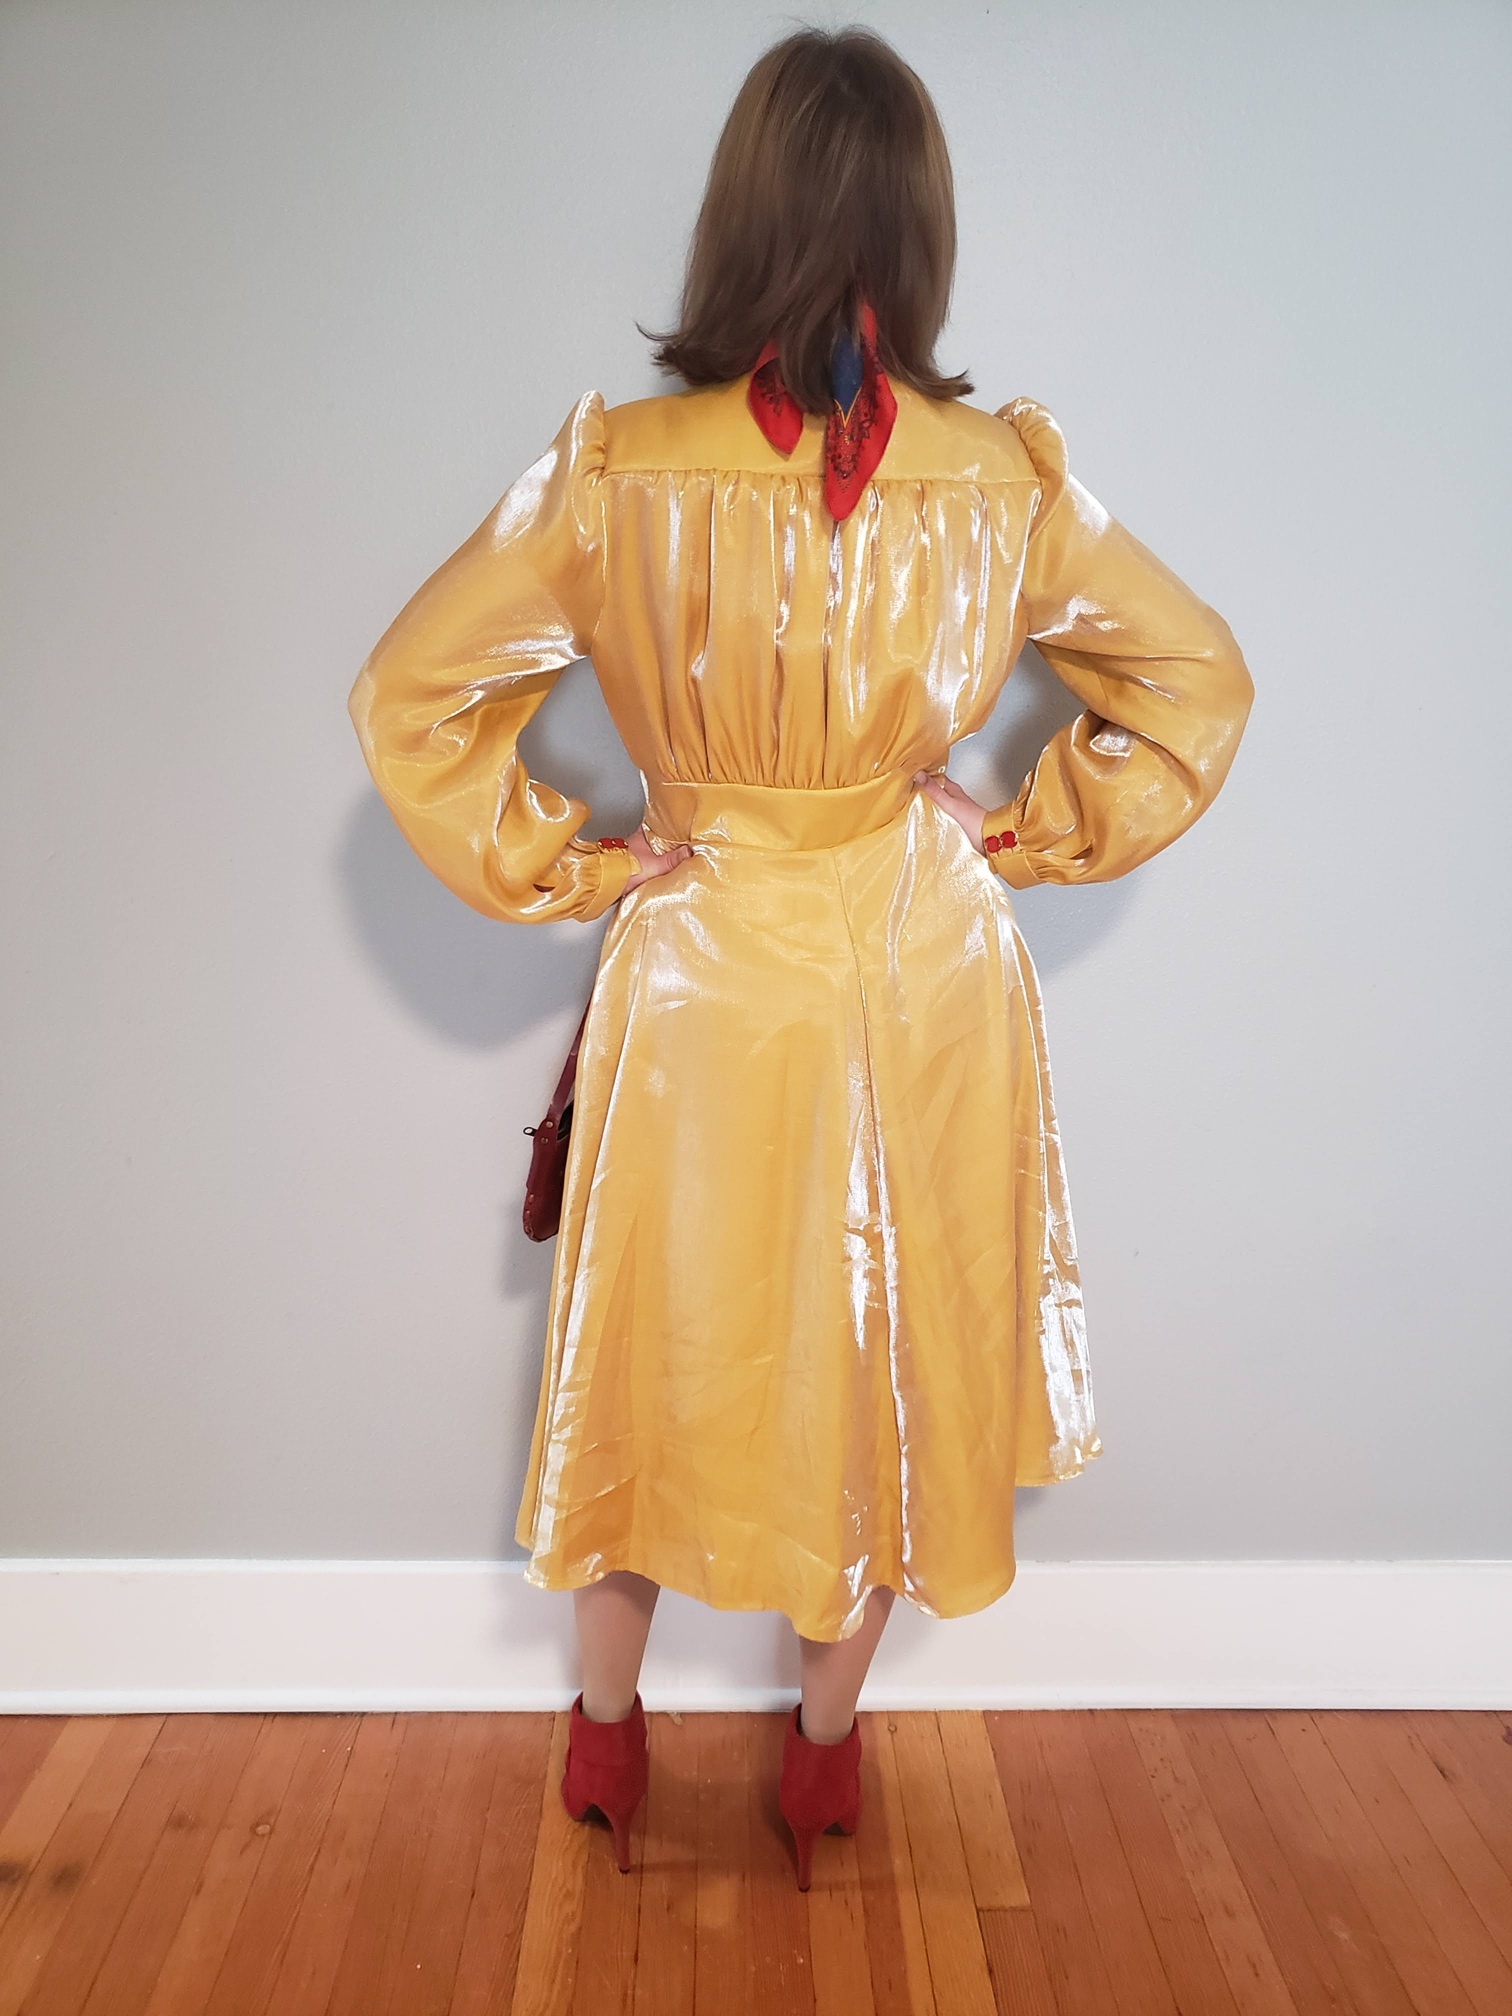
Yellow Bishop Sleeve Dress
You will notice that this dress is quite a bit different from the original dress design I had in mind:
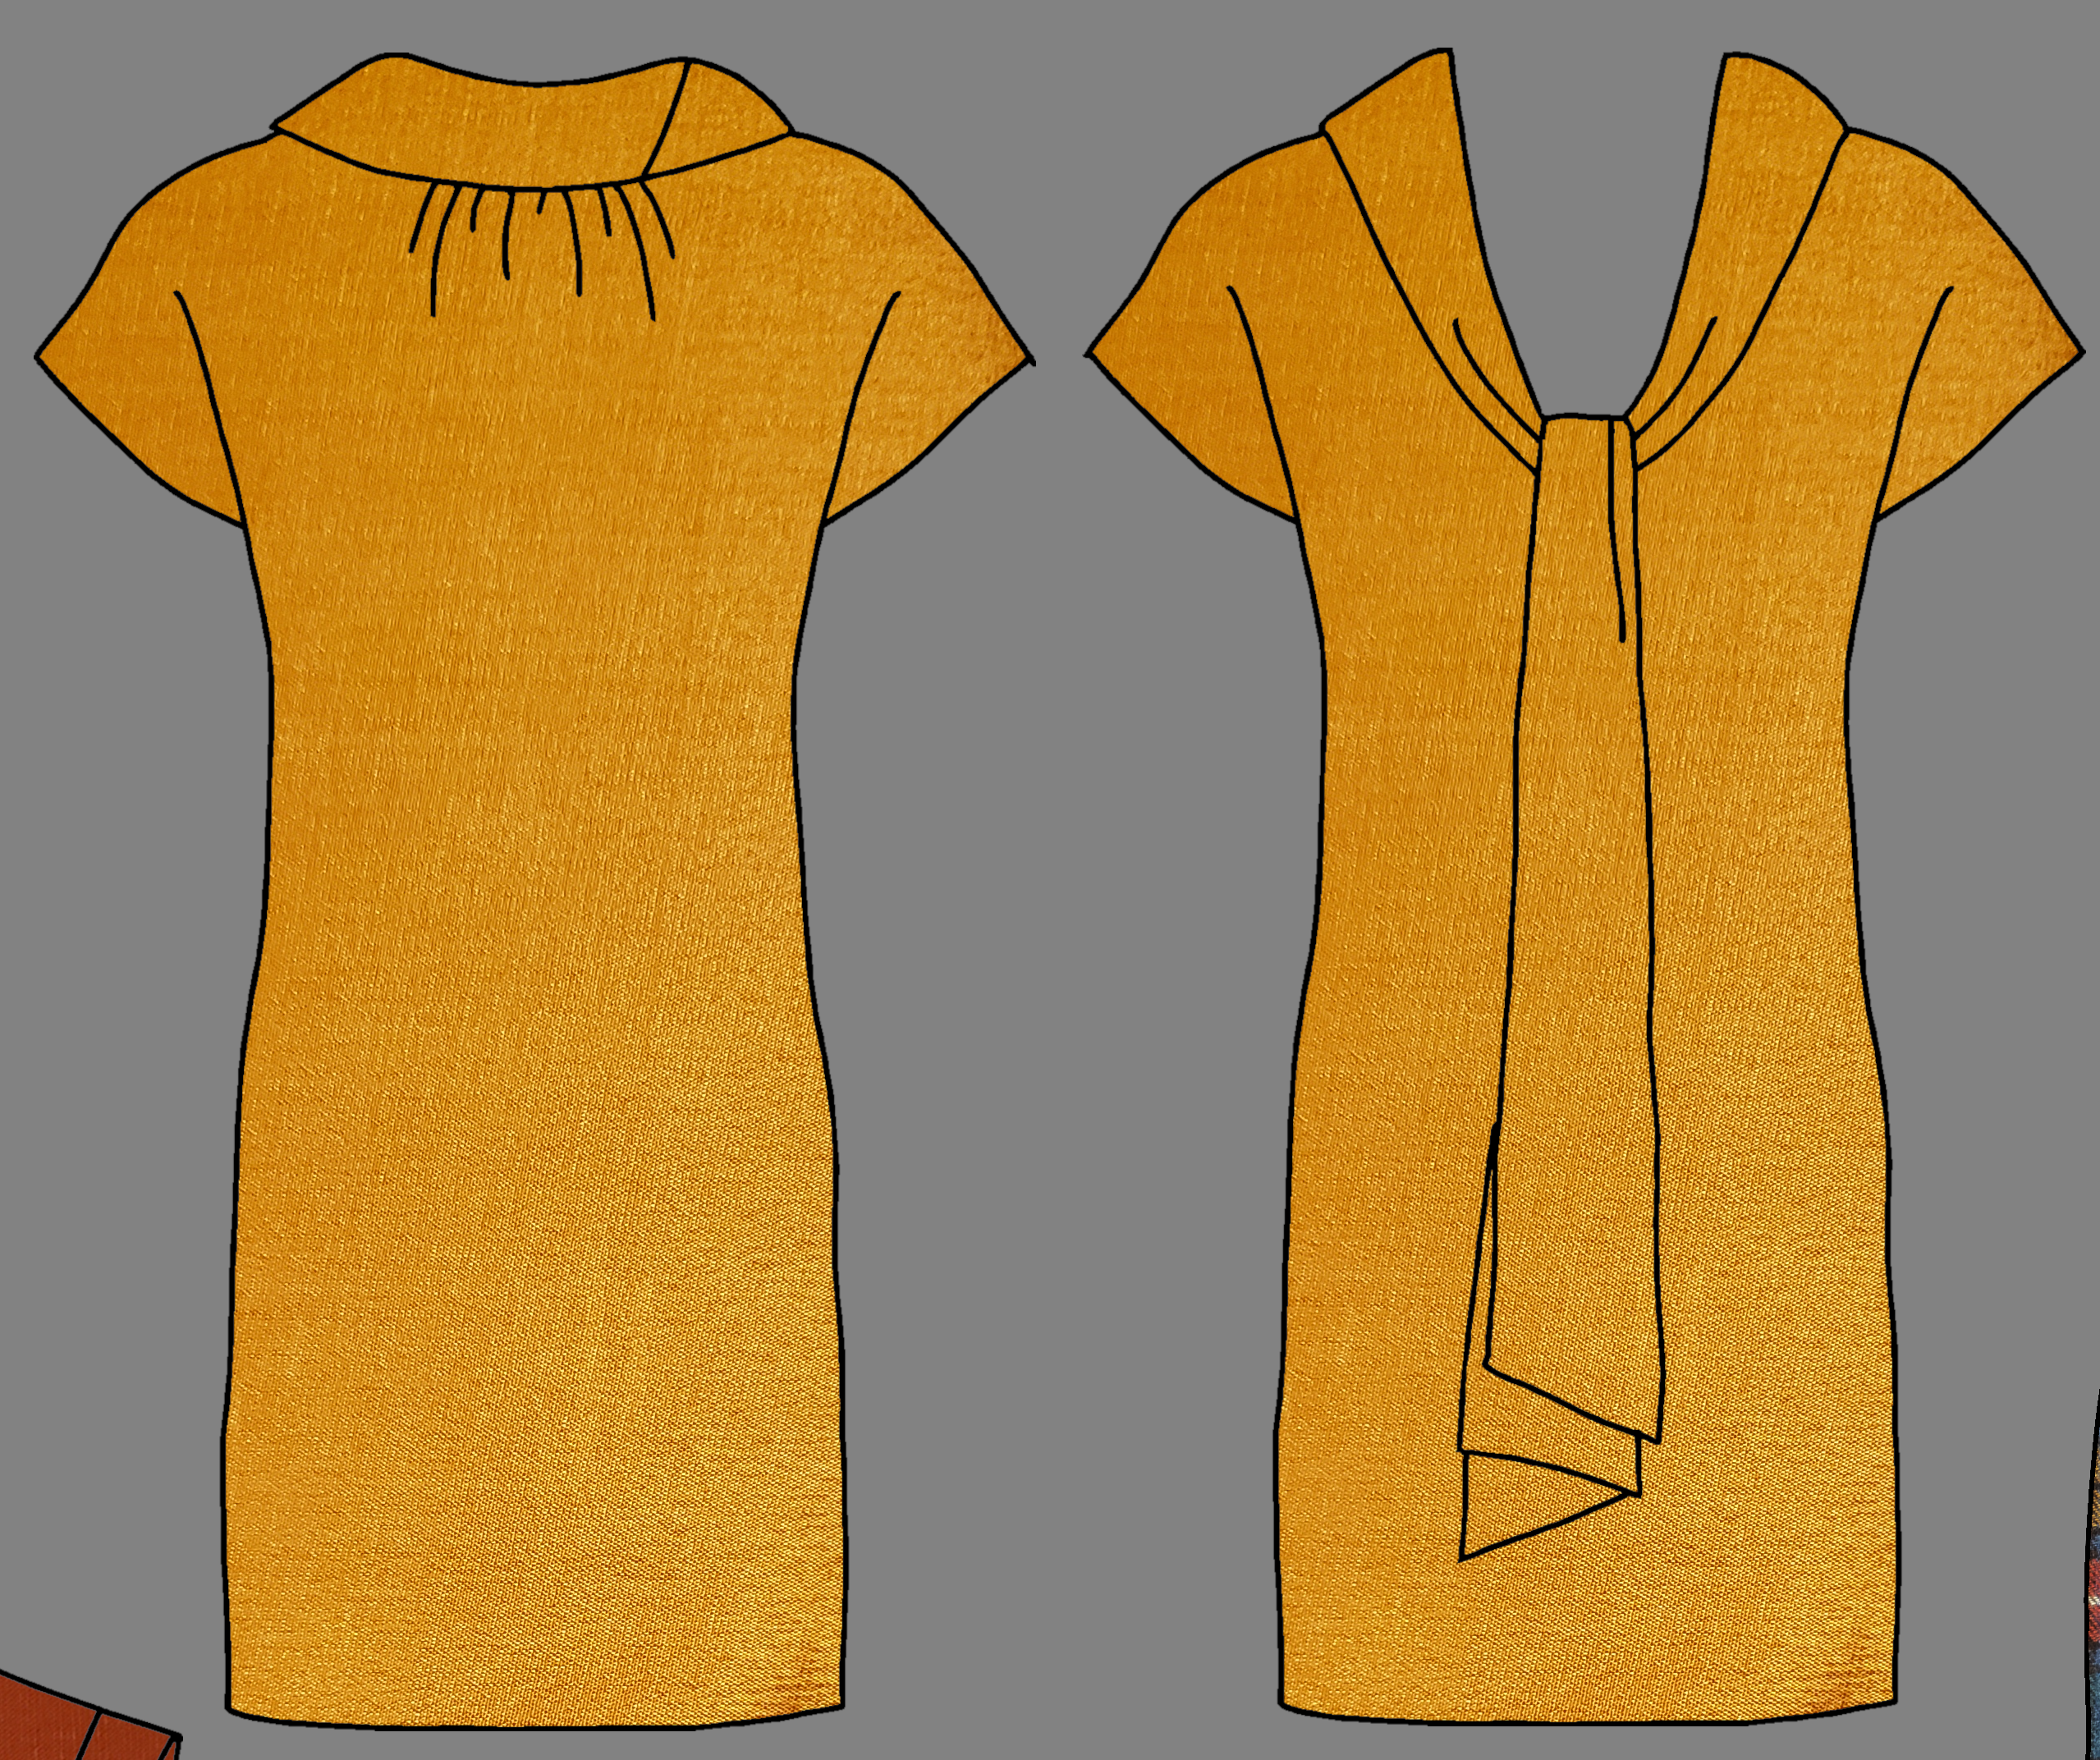
Yup. Neither the pattern nor the fabric are the same. Originally I was planning to make Vogue Patterns V1544, but when considering the recommended fabric types listed on the pattern: Four-ply Crepe, Crepe Back Satin, Silk Jacquard, I came to the conclusion that the fabric I had--a very lightweight mulberry silk from Bengaluru--would not have the structure/drape such a dress called for. Later, I happened to be in Joann's during its closing sale--they were selling the rest of a bolt of this very shiny, yellow Rayon/Polyester blend. It was very different from the more natural-fibre fabrics I tend to gravitate towards, but it seemed so unique and the price was right, so I bought it!
A friend's wedding happened to be approaching so I resolved to finally make this dress! However...the dress code specifically asked for dresses that fell below the knee. I could have lengthened the original dress, but I didn't think that suited the chic silhouette. And so, I pulled out a different pattern from my stash: Vogue Patterns V9076! It featured lots of gathers that I thought might show off the glossiness of my fabric.
The pattern was okay, but yet again I took issue with how the inside was finished with serged edges. Normally this wouldn't bother me, but the polyester threads of this fabric are like little needles which poke out and itch to high heaven. I intend to go back and bind the edges for comfort. I also added three inches to my waistband for a much looser fit (perfect for dancing and potential meal bloat!)
I ended up working until the last minute to finish this dress in time for the wedding, but to no avail! I only had to finish the bottom hem and sew on the buttons, but with an hour until the start of the ceremony, I knew I wouldn't make it in time. I cut my losses and wore a different dress :(
Oh well! I finished it a couple days later, and got to wear it on a nice date-night. I really like that I chose red buttons, which allowed me to be a bit more creative with my accessories.
Comments